
Content
Page Table of Contents
About the Author
Hot Topics
Is your PC running unusually slow, crashing frequently, or stuck in a repair loop? Are you planning to reinstall Windows, replace an SSD, or completely erase your system before selling the computer? For many users, formatting the C drive seems like the quickest way to start fresh. However, formatting the system partition also raises important questions:
- Will Windows still boot afterward?
- Will formatting delete everything permanently?
- Can files still be recovered later?
- Should you format, reset, or securely wipe the drive instead?
Before you erase the C drive, it is important to understand what each method actually does, the risks involved, and which option makes the most sense for your situation.
Before Formatting C Drive
Formatting the C drive is very different from formatting a regular data partition. Since the C drive contains Windows system files, boot information, installed programs, drivers, and user profiles, removing it incorrectly can leave the PC unbootable. Before you begin, make sure you understand these key points:
| Important Item | Why It Matters |
|---|---|
| Formatting removes Windows | The PC can't boot until Windows is reinstalled |
| Installed apps will be deleted | Programs on the system partition will be erased |
| Personal files may be lost | Desktop, Downloads, Documents, and AppData folders are usually stored on C drive |
| Quick format does not fully erase data | Recovery software may still restore deleted files |
| Windows can't format itself while running | You usually need bootable media or recovery tools |
What You Should Prepare First
Before formatting the system drive, it is recommended to:
- Back up important files to an external drive or cloud storage
- Save software license keys and activation information
- Create a Windows installation USB
- Check whether BitLocker encryption is enabled
- Confirm which partition is the actual system partition
- Make sure the laptop is connected to power during the process
If you only want to improve performance or remove temporary system issues, formatting may not even be necessary. In many cases, using Reset This PC or performing a clean Windows reinstall is safer and faster.
Format vs Reset vs Wipe
Many users use these terms interchangeably, but they are completely different operations. Understanding the difference helps you avoid unnecessary data loss or incomplete cleanup.
| Feature | Format C Drive | Reset This PC | Secure Wipe |
|---|---|---|---|
| Removes Windows | Yes | No | Yes |
| Removes Windows | Yes | Yes | |
| Deletes installed apps | Yes | Yes | Yes |
| Keeps personal files | No | Optional | No |
| Reinstalls Windows automatically | No | Yes | No |
| Data recovery possible | Sometimes | Sometimes | Extremely difficult |
| Best for | Clean install | Fixing Windows issues | Selling or recycling PC |
How to Format C Drive on Windows 11/10/8/7
On a Windows PC, you can normally format almost any partition through File Explorer or Disk Management while the operating system is running. However, the system partition is an exception. If you open This PC, right-click the C drive, and select Format, Windows will display an error message similar to:
"You cannot format this volume. It contains the version of Windows that you are using. Formatting this volume could cause your computer to stop working."
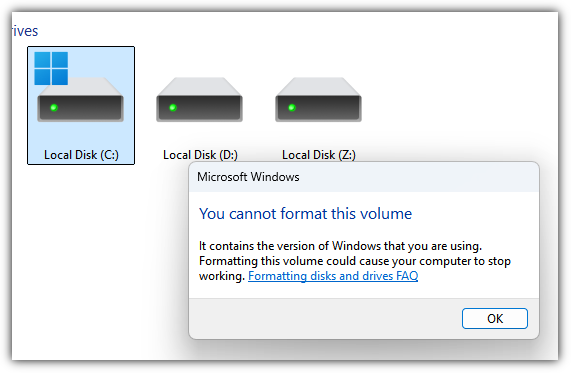
This restriction exists for security reasons. The C drive contains critical boot files and system data required to start Windows, including bootmgr, BCD, and other boot configuration components. Since the operating system is actively running from the C drive, Windows prevents the partition from being deleted or formatted while in use. In addition, the C drive is typically configured as the active system partition, meaning it controls the boot process for the entire computer. Removing or formatting it inside Windows would immediately make the system unbootable.
Although Windows does not allow you to directly format the system partition like a regular data drive, you can still format the C drive outside Windows. This may sound complicated, but the process is actually straightforward once you use the correct method.
The following sections will show several ways to format the C drive on Windows 11, 10, 8, and 7 safely and correctly.
| Workable Solutions | Step-by-step Troubleshooting |
|---|---|
| Fix 1. Format with Windows Setup | Boot with the Windows Setup Disc. Place the CD in the optical hard drive...Full steps |
|
Fix 2. Format with Partition Tool (Recommended by Techradar) |
Connect or insert the USB/CD/DVD to your computer and launch EaseUS Partition Master...Full steps |
| Fix 3. Use a System Repair Disc | Insert CD/DVD into DVD-ROM or connected external DVD drive...Full steps |
| Fix 4. Format C Drive with Command Prompt | In Command Prompt, type the following command and press Enter: diskpart...Full steps |
Fix 1. Format C Drive Windows 10 with Windows Setup or External Storage Media
It is a convenient way to format C drive with this method. You can format C drive this way - using Windows 11/10, Windows 8, Windows 7, or Windows Vista installation media. Here are the steps to format C drive:
Step 1. Boot with the Windows Setup Disc. Place the CD in the optical hard drive and follow the instructions.
Step 2. Select the language you want to use and select "Next."
Step 3. Click "Install Now" and wait until it finishes. This process doesn't really install the Windows OS.
Step 4. Accept the terms and conditions and select "Next."
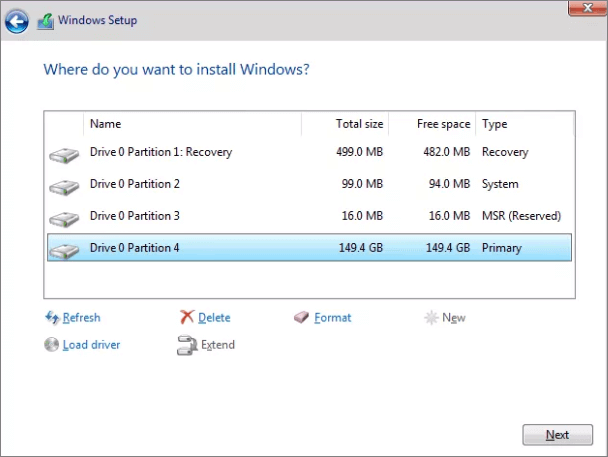
Step 5. Go to the Custom (advanced) option. You will see a list of all the existing drives. Click "Drive options (advanced)."
Step 6. Select "Format". Now, Windows will start the process of formatting your drive.
Video Guide - How to Format C Drive in Windows 10 and Reinstall Windows 10
This video shows how to format the local C drive and reinstall the Windows 10 system.
- 0:43 Make a backup folder.
- 2:26 Plug a Windows 10 bootable USB.
- 2:37 Change the boot menu.
Fix 2. How to Format C Drive in Windows 10/11 with Third-party Tool
Among the four available choices, let's choose the most straightforward method to start: use the partition tool - EaseUS Partition Master. With this software, you can format the hard drive without using the Windows installation disc or tools.
Reliable Partition Management Tool
- Transfer free disk space from one drive to another directly.
- Resize/move, merge, clone partition, and check file system error.
- Clone disk, convert to MBR/GPT, convert to dynamic/basic.
- Migrate OS to SSD/HDD, increase partition space, wipe data, etc.
Procedure 1. Create a Bootable Disk
Download EaseUS Partition Master to create a bootable disk. The WinPE bootable disk allows you to access your hard drive outside the current OS.
Step 1. To create a bootable disk of EaseUS Partition Master, you should prepare a storage media, like a USB drive, flash drive or a CD/DVD disc. Then, correctly connect the drive to your computer.
Step 2. Launch EaseUS Partition Master, and find the "Bootable Media" feature on the left. Click on it.
Step 3. You can choose the USB or CD/DVD when the drive is available. However, if you do not have a storage device at hand, you can also save the ISO file to a local drive, and later burn it to a storage media. Once made the option, click the "Create" button to begin.
- Check the Warning message and click "Yes".
Step 4. When the process finishes, you'll see a pop up window, asking if you want to restart computer from the bootable USB.
- Reboot Now: it means you want to restart the current PC and enter EaseUS Bootable Media to manage your disk partitions without OS.
- Done: it means you don't want to restart the current PC but to use the bootable USB on a new PC.
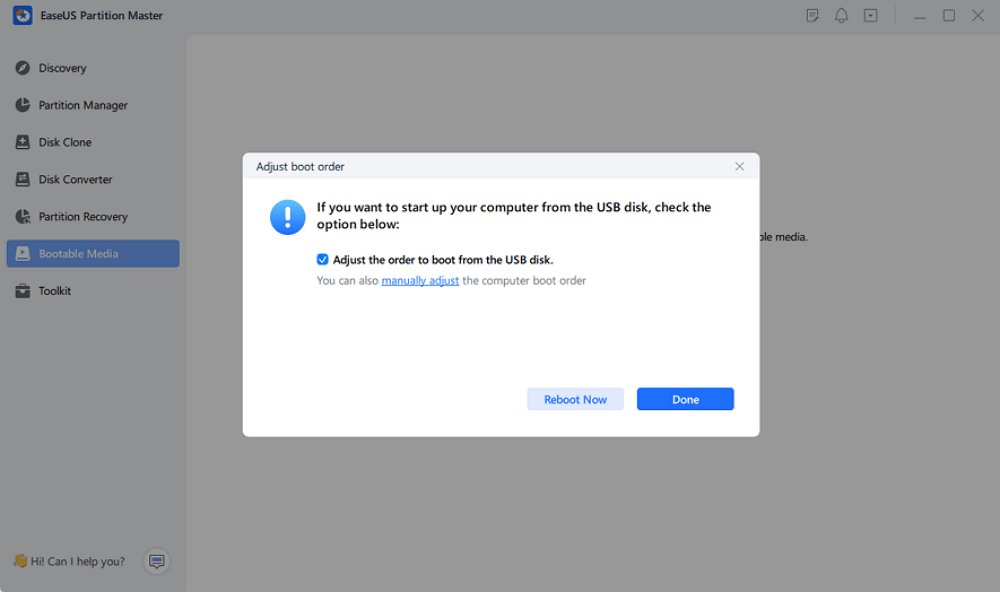
Note: To use the bootable disk on a new PC, you need to resart the target computer and press F2/F8/Del key to enter BIOS, and set the USB bootable disk as the first boot disk.
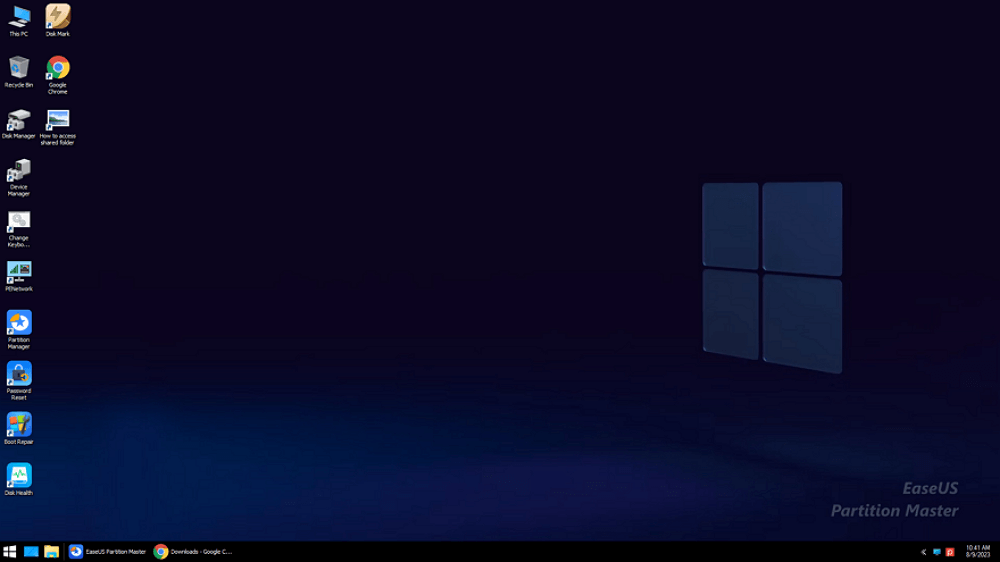
Wait patitiently and your computer will automatically boot up from the USB bootable media and enter EaseUS WinPE desktop.
Procedure 2. Boot the Computer from the Bootable Media
Step 1. Restart your computer and press the BIOS key (depending on the computer you use, it could be F2, F8, or the Delete key...) to enter BIOS.
Step 2. In BIOS, set to boot the computer from the bootable USB/CD/DVD.
Procedure 3. Format the C Drive Using EaseUS Partition Master
After the startup, your computer will boot into a system with EaseUS Partition Master installed. Now, your computer is using another operating system with formatting abilities. You can format the C drive with ease.
Step 1. Right-click the hard drive partition and choose the "Format" option.
Step 2. In the new window, you can set a new name for your selected hard drive partition. Then click the "OK" button.
Step 3. Click the "Execute 1 Task(s)" button, then click "Apply" to start formatting the hard drive partition.
If you are using other devices, like a USB flash drive or SD card, read on:
Fix 3. How to Format C Drive with System Repair Disc in Windows 11/10/8/7
You can also format a C drive by making a System Repair Disc. If you don't have a copy of Windows 7, 8, 10, or 11, you can create your own disc and use it to boot, then format drive C. Steps to format C drive with a System Repair Disc.
Step 1. Create a System Repair Disc.
- 1. Insert CD/DVD into DVD-ROM or connected external DVD drive.
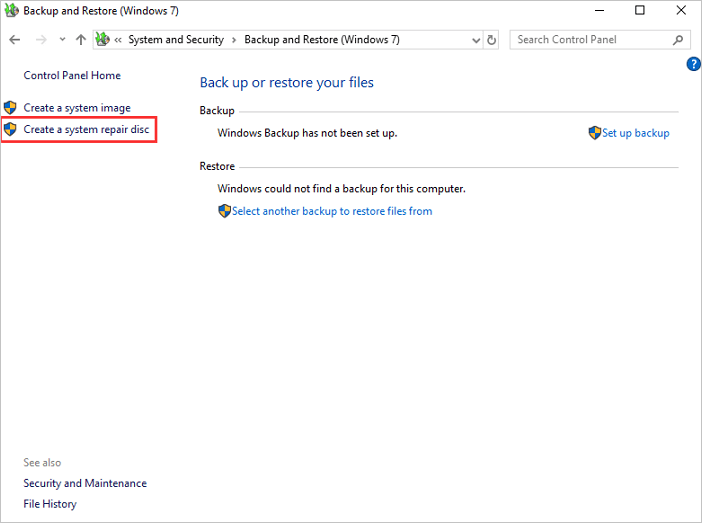
- 2. Click "Control Panel" on the computer screen, then click "Backup and Restore (Windows 7)".
- 3. Click "Create a system repair disc" from the left column to open the repair disc creation window. Follow the on-screen instructions to create a system repair disc.
Step 2. Format C Drive with the System Repair Disc.
- 1. Insert the disc in the optical drive and restart your PC. You will be shown a prompt telling you to press any key to boot from the CD. Wait for the installation to complete. Choose your preferred language and continue.
- 2. You will be redirected to System Recovery. Select the "Use recovery tools..." option and proceed.
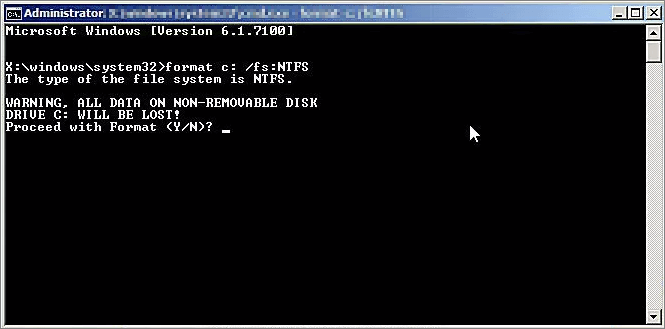
- 3. Go to Command Prompt. Enter the following command: format c: /fs:NTFS
- 4. You will be asked to provide the volume level. Enter the label. Proceed to the format by typing in Y and hitting Enter. Once the format is finished, enter the Volume Label.
Fix 4. Format C Drive Using Command Prompt
Formatting the C drive through Command Prompt is an advanced operation that permanently removes the Windows operating system, installed applications, system files, and personal data stored on the system partition.
Before continuing, make sure you have:
- Backed up important files
- Created a Windows installation USB or recovery drive
- Saved activation keys and software licenses
- Confirmed the correct partition before formatting
Because Windows is actively running from the C drive, you cannot format the system partition from inside the operating system. To perform the format successfully, you must boot into Windows PE or another external recovery environment first.
Step 1. Boot into Windows PE or Recovery Environment
- Insert the bootable USB drive created earlier and restart your computer.
- Boot the PC from the USB device instead of the internal system drive. Once the recovery environment loads, open Command Prompt from the advanced recovery options or Windows setup screen.
Step 2. Launch DiskPart
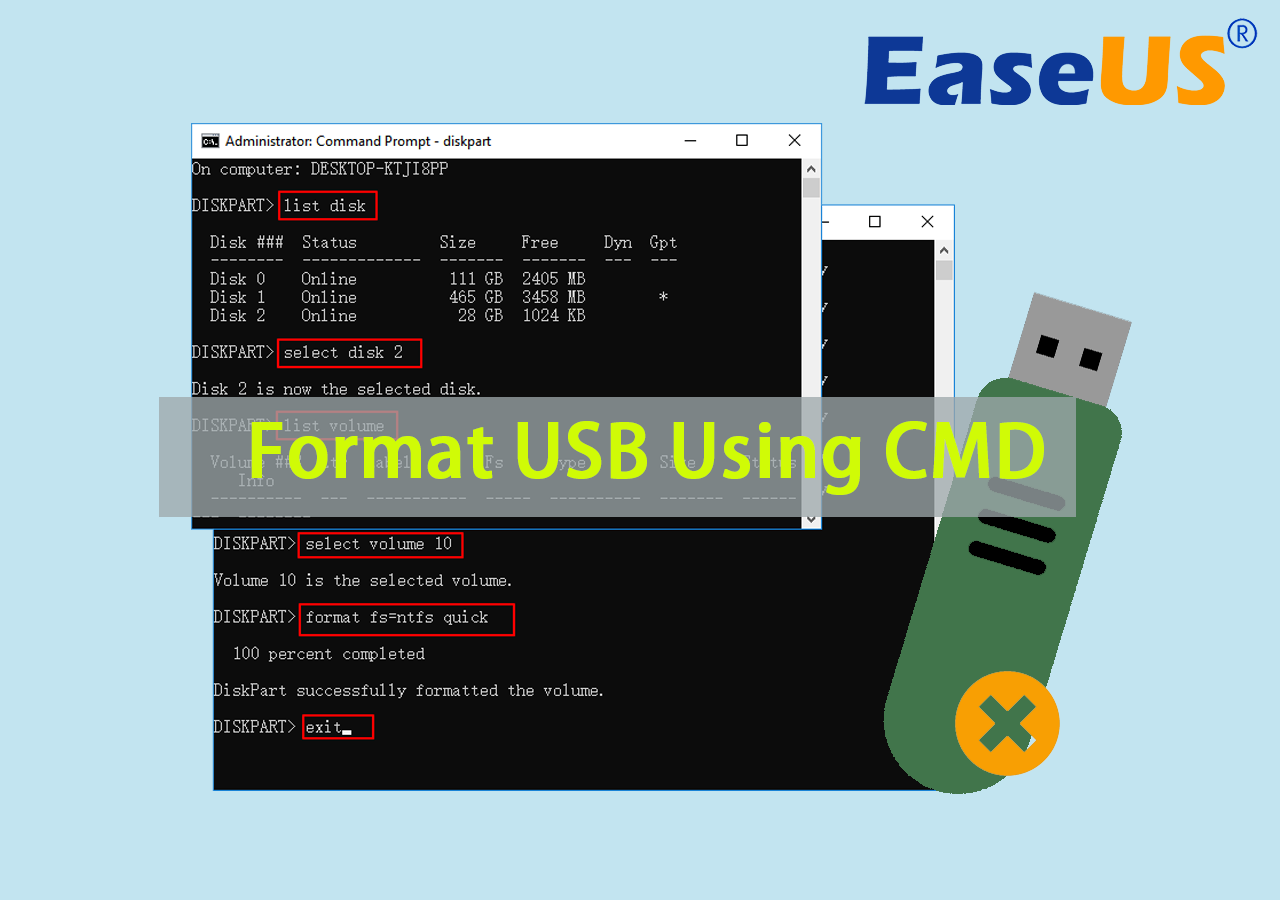
In Command Prompt, type the following command and press Enter: diskpart
(DiskPart is a built-in Windows disk management utility used to manage partitions, volumes, and storage devices from the command line.)
Step 3. Identify the C Drive Partition
Type the following command:
list volume (This will display all available partitions and volumes on the computer. Carefully locate the volume associated with the C drive by checking: drive letter, partition size, file system type, and volume label.)
Step 4. Select the System Partition
- Type the command and press Enter: select volume 2 (Replace 2 with the correct volume number for the C drive)
- After selecting the partition, DiskPart will confirm that the volume is now selected.
Step 5. Format the C Drive
To perform a quick NTFS format, type: format fs=ntfs quick
This command quickly formats the selected partition using the NTFS file system.
If you want Windows to scan the drive for bad sectors and perform a more thorough format, remove the quick parameter: format fs=ntfs
A full format takes longer but may help detect disk errors on older HDDs or corrupted drives.
Step 6. Exit DiskPart
After formatting finishes, type: exit
Now, based on your needs, you can reinstall Windows, create new partitions, replace or upgrade the SSD.
Are these solutions to format C drive Windows 11/10 helpful to you? Don't hesitate to share them with your friends who are facing the same problem.
Bonus Tip: What Happens After Formatting C Drive
Formatting the C drive removes the operating system, installed applications, and most user data stored on the partition. After the process finishes:
- Windows will no longer boot normally
- Installed programs become unusable
- Desktop and user folders are deleted
- System settings and drivers are erased
- The partition becomes empty or ready for a new OS installation
1. Will Other Drives Be Affected?
In most cases:
- D drive and other partitions remain untouched
- External drives are not affected
- BIOS and firmware settings stay the same
However, accidentally selecting the wrong partition during setup can erase additional drives, which is why partition identification is critical before formatting.
2. Can Files Be Recovered After Formatting?
That depends on the formatting method.
- Quick Format: usually recoverable with data recovery software because the file table is removed, not the actual files.
- Full Format: Harder to recover because Windows scans sectors and overwrites some structures.
- Secure Erase or Wipe: Recovery becomes extremely difficult because the data is intentionally overwritten.
Extended Reading: Quick Format VS Full Format
A quick format and a full format may look similar, but they work very differently behind the scenes.
Quick Format
- A quick format removes the file system index and marks the drive space as available for new data, but it does not completely erase existing files. Because Windows only rebuilds the file structure instead of scanning the entire disk, the process usually finishes within minutes. This option is commonly used during Windows reinstallations or SSD upgrades when the drive is still healthy.
Full Format
- A full format not only rebuilds the file system but also scans the drive for bad sectors and disk errors. Since Windows checks the entire partition, the process takes much longer to complete. It also makes data recovery more difficult compared to a quick format. Full formatting is often recommended for older HDDs, corrupted drives, malware infections, or unstable storage devices.
| Type | What It Does | Speed | Recoverable |
|---|---|---|---|
| Quick Format | Removes file system index only | Fast | Often Yes |
| Full Format | Scans sectors and rewrites structures | Slower | Much harder |
On SSDs, repeated full formatting is usually unnecessary because modern SSD controllers and TRIM technology already manage storage optimization differently from traditional hard drives.
Don't forget to share this tutorial with others if you think it's helpful.
The Bottom Line
In conclusion, formatting a C drive is unnecessary if you want to do it to install Windows because the OS installation requires you to format the disk during the process. If you have to format the C drive on your computer, there are several options for you. The easiest is creating a bootable media with software like EaseUS Partition Master (Fix 2). A bootable USB/CD/DVD enables you to format the target OS from another OS effortlessly. Hope the guide is helpful to you.
Format C Drive FAQs
how to format local disk c? How do you format only the c drive in Windows 10/11? See short answers.
How do I format my C drive only?
To format your C drive only, you'll need to create a bootable USB drive or CD/DVD.
Once you have your bootable media, boot from it and select the option to format your C drive. This will erase all the data on your C drive, so back up any important files before proceeding. Once the format is complete, you must install an operating system on your C drive. You can do this by booting from your bootable media and selecting the option to install an operating system. Follow the prompts to complete the installation process. Once your new operating system is up and running, you can format your C drive as needed without affecting any other drives on your computer.
How do I format C drive quickly?
The answer is actually quite simple, and there are a few different ways to do it. One method is the built-in Windows tool called "Disk Cleanup." This tool will scan your hard drive and remove any unnecessary files, which can help to free up space and improve performance. Another option is a third-party disk cleanup program, which can be even more effective at deleting old files and improving performance. Finally, you can format the C drive using the Command Prompt. This method is slightly more technical but can be useful if you want complete control over the process.
How do I format a C drive partition?
Before you format a C drive partition, it is recommended that you back up any important files that you don't want to lose. Once you have done this, you can format the partition using the following steps:
1. Open the Disk Management tool by going to Start > Run and typing in 'diskmgmt.msc'.
2. Right-click on the C drive partition you want to format and select 'Format.'
3. Choose the format type (NTFS, FAT32, etc.) and the Allocation Unit Size you want to use.
4. Click 'OK' to format the partition.
How Can We Help You
About the Author

Sherly joined EaseUS in 2022 and she has always loved writing articles and enjoys the fun they bring. She receives professional training here, focusing on product performance and other relative knowledge. She has written over 200 articles to help people overcome computing issues.

Jean is recognized as one of the most professional writers in EaseUS. She has kept improving her writing skills over the past 10 years and helped millions of her readers solve their tech problems on PC, Mac, and iOS devices.
Product Reviews
-
I love that the changes you make with EaseUS Partition Master Free aren't immediately applied to the disks. It makes it way easier to play out what will happen after you've made all the changes. I also think the overall look and feel of EaseUS Partition Master Free makes whatever you're doing with your computer's partitions easy.
Read More -
Partition Master Free can Resize, Move, Merge, Migrate, and Copy disks or partitions; convert to local, change label, defragment, check and explore partition; and much more. A premium upgrade adds free tech support and the ability to resize dynamic volumes.
Read More -
It won't hot image your drives or align them, but since it's coupled with a partition manager, it allows you do perform many tasks at once, instead of just cloning drives. You can move partitions around, resize them, defragment, and more, along with the other tools you'd expect from a cloning tool.
Read More
Related Articles
-
How to Clean C Drive Without Losing Data in Windows 11 (Safe & Easy Guide)
![author icon]() Sherly/2026/08/17
Sherly/2026/08/17 -
Why Can't shrink C Drive with All of the Space Free and How to Fix
![author icon]() Cici/2026/08/13
Cici/2026/08/13 -
Computer Says Fixing (C:) Stage 1 | Reasons and Fixes
![author icon]() Cici/2026/08/04
Cici/2026/08/04 -
How to Move Unallocated Space to Next to C Drive | Full Guide
![author icon]() Brithny/2026/09/29
Brithny/2026/09/29
 Cici/2026/08/13
  Brithny/2026/09/29