-
![]() BitLocker Drive Encryption, How to Unlock BitLocker Drive
BitLocker Drive Encryption, How to Unlock BitLocker Drive July 23,2026
 6 min read
 -
![]() The Disk Structure Is Corrupted and Unreadable? Here to Fix!July 23,20266 min read
The Disk Structure Is Corrupted and Unreadable? Here to Fix!July 23,20266 min read -
![]()
-
![]() How to Fix Corrupted HTML File Recovery Solutions (Online & Offline)July 23,20266 min read
How to Fix Corrupted HTML File Recovery Solutions (Online & Offline)July 23,20266 min read -
![]()
-
![]()
-
![]() Excel Keeps Crashing Windows 10 - All Too Easy to HandleJuly 23,20266 min read
Excel Keeps Crashing Windows 10 - All Too Easy to HandleJuly 23,20266 min read -
![]()
-
![]()
-
![]()
Page Table of Contents
System Restore is one of the best Windows 11 features, which has been around for several years. Its robust feature generates snapshots of the current working conditions of your system. Therefore, it helps protect them as the significant restoration points that you can degenerate upon occurring any unanticipated events.
Undoubtedly, it's the best Windows feature, needing to be enabled before anyone tries to exploit it. If you're fretting about why there are no system restore points for Windows 11, you have come to the right place! Follow the fixes below to Enable system restore points on Windows 11. Let's get started!
| Workable Solutions | Step-by-step Troubleshooting |
|---|---|
| Fix 1. Enable System Restore Points | Follow the steps below to Enable system restore points on Windows 11...Full steps |
| Fix 2. Run SFC | Windows system folders can be destroyed or impaired, which may trigger...Full steps |
| Fix 3. Check Disk Space Usage | You might change the maximum permitted disc storage for the system...Full steps |
| Fix 4. Enable Volume Shadow Copy Service | App information and data are backed up by Volume shadow copy and clients...Full steps |
| More Fixes | Learn how to retrieve Windows 11 restore points once they vanish by starting...Full steps |
Why Do Windows 11 Restore Points Disappear
Windows 11 "system restore points disappear" error will occur when their total storage capacity has been taken, the System Restore files are damaged, and the available storage time has expired. It might also disappear if you've improved your operating system, USB turbo accelerators are present, or system restore is deactivated. These are the 3 significant reasons explained below, which led to system restore points disappearing on Windows 11:
Reason 1. System Restore Files Are Corrupted
Any flaws that may appear in data while it is being designed, edited, stored, or sent from one location to another are computer data instability. When the operating system or any apps that require it open a file with corrupted data, undesirable results may result.
Among the outcomes include giving a warning message and not opening fully, opening but only displaying a portion of distorted and nonsensical data, losing information from the document, and in very extreme circumstances, a system breakdown.
Reason 2. Storage Space Is Exhausted
If your operating system malfunctions or stops performing at its best, system restore is a group of files that can return you to its earlier version. When your HDD or SDD is at capacity, your points can vanish.
The system will be forced to terminate if there is less than 200 MB of free space on your hard drive. In that case, until you manually remove older files, you won't receive any new backup downloads.
Reason 3. System Restore on Default Disable
Due to the feature being deactivated, you might be losing restore points. System Restore might occasionally become inoperable, notably if you recently upgraded your computer's operating system. For example, you may encounter System Restore becoming greyed out. Alternatively, you can have deliberately disabled System Restoring.
Recover System Restore Points Windows 11
Sadly, System Restore is turned off by default in Windows 11. To safeguard your computer from unforeseen problems, please follow the 8 fixes below if you've just learned about System Restore and would like to enable it.
Fix 1. Enable System Restore Points on Windows 11
Follow the steps below to enable system restore points on Windows 11:
Step 1. Hit the Start icon and select the "Settings" application on your Windows 11 PC. By holding down the Windows + I keys, you may also access "Settings".
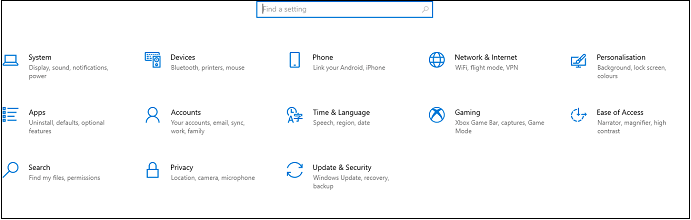
Step 2. Choose "System" from the left side menu if it isn't already selected. Then select the "About" link at the bottom of the page.
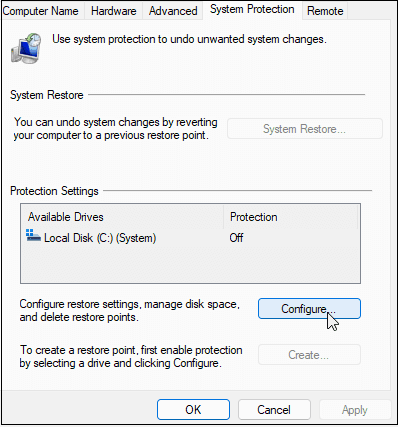
Step 3. Tap "System Protection" in the relevant links area to display the System Properties box. Find the "Security Settings" option, then choose your primary drive. After that, press the "Customize" button.
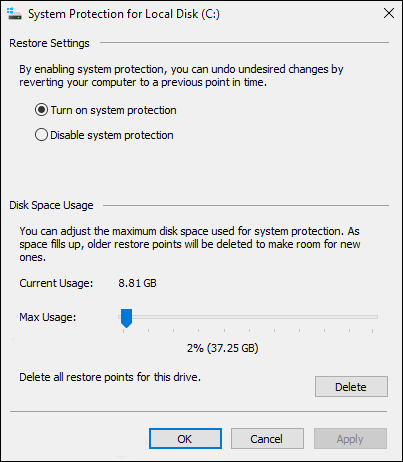
Step 4. Switch on protection for the system by selecting the option located in the Recover Configuration section.
Step 5. The Max Usage parameter can control how much storage your Windows 11 system must set aside for restoration points. Once you're finished configuring something, hit "Apply", followed by "OK".
Step 6. Your System Restore is now operational after the setup is finished. This implies that your system will swiftly create a restore point whenever certain system modifications or software upgrades are made.
Fix 2. Run SFC to Fix No System Restore Points Windows 11
Windows system folders can be destroyed or impaired, which may trigger the System Restore tool and other operating system components to stop functioning. In such circumstances, you may utilize System File Checker to recover corrupted or lost files:
Step 1. Open CMD or the Terminal app with administrator rights in Windows 11 (or earlier versions of Windows). Using the built-in search feature, you can locate both Terminal and CMD.
Step 2. Enter the command: sfc /scannow and then press Enter key on the keyboard.
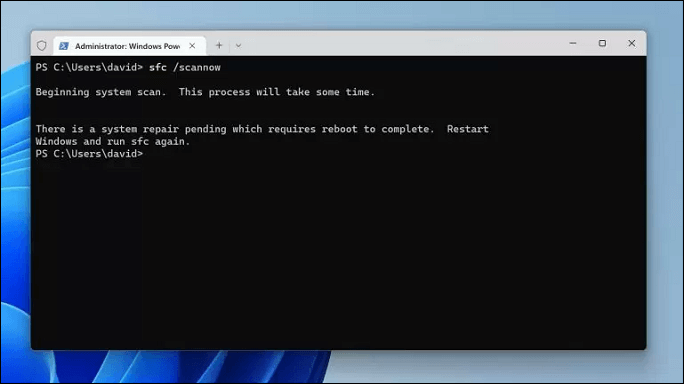
Step 3. To finish the scanning procedure, reboot your computer.
Fix 3. Check the Windows 11 Disk Space Usage
You might change the maximum permitted disc storage for system restoration and see if the performance improves to confirm that the disc capacity is the issue. Consider the following steps to deter system restore points from disappearing and boost the maximum disk space usage in Windows 11:
Step 1. Open the Run window by pressing the Windows key + R.
Step 2. Type system.cpl and hit Enter once the Run window opens.
Step 3. Hit the "System Protection" tab.
Step 4. Opt for the "Local Disk (C:) (System)" drive.
Step 5. Choose to "Configure".
Step 6. Move the Max Usage slider to the appropriate position under Disc Space Usage to increase the percentage. Adjusting it to at least 500MB is advised.
Step 7. Hit the "OK" button.
Fix 4. Enable Volume Shadow Copy Service
App information and data are backed up by Volume shadow copy, and clients can back up data safely using the Volume Shadow Copy. Follow this advice to recover a lost restore point in Windows 11:
Step 1. Press Windows + R to open the run box, type services.msc, and click "OK" to continue.
Step 2. Under the Services window that appears, find "Volume Shadow Copy". To continue, right-click it and select "Start."
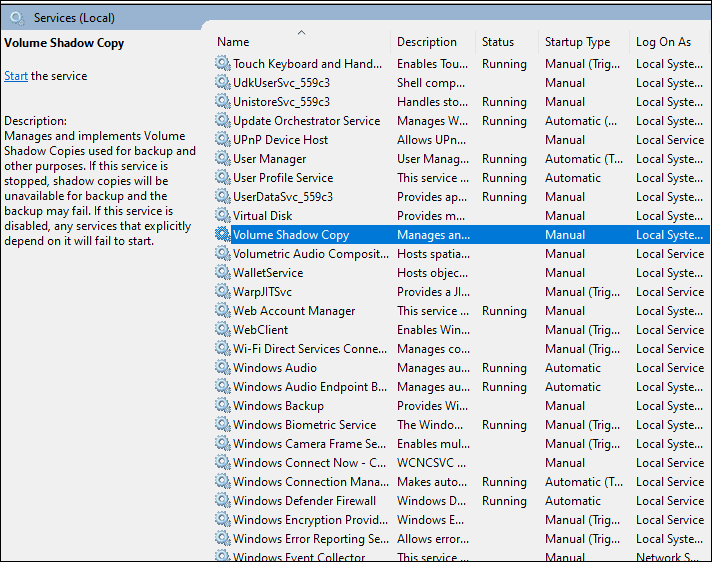
Step 3. It will begin to operate and allow you to create a restore point.
Fix 5. Recover System Points in Windows Safe Mode
Learn how to retrieve Windows 11 restore points once they vanish by starting in Safe Mode:
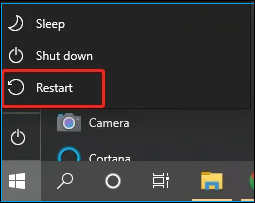
Step 1. Shut down all open programs and reboot your computer again. Before your computer loads the Windows login page, press the "Shift" key.
Step 2. Next, click "Troubleshoot" before choosing "Advanced options."
Step 3. Navigate the "Restart" feature under "Startup Setting" now. Select "Enable Safe Mode with Command Prompt" from the menu that appears.
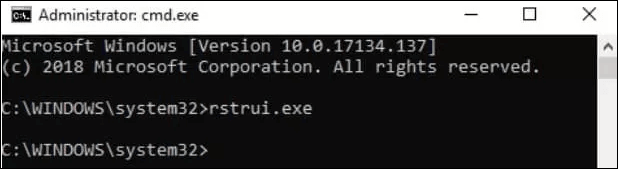
Step 4. Type rstrui.exe into the Windows command prompt window that appears and hit "Enter."
Step 5. As you hit the "Next" button, you will be presented with the available restoration points. To update the system to any selected Restored point, pick it and then hit the "Next" button at the bottom.
Step 6. Verify the restoration procedure when the following window appears. To reactivate System Restore points, press the "Finish" button.
Fix 6. Change Triggering Properties of System Restore
Step 1. In the search box, enter "Task Scheduler." Search the Task Scheduler Library for "Microsoft". Select "Windows" > "System Restore" from the dropdown menu.
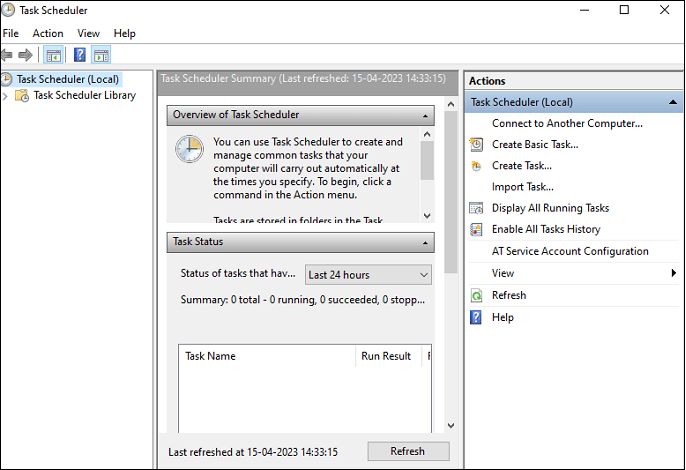
Step 2. After choosing "SR", click the "Trigger" tab. You can change the settings here.
Step 3. Select the "Conditions" option from the user interface window after creating another job. Uncheck the box next to "Begin the task only if the system is on AC power" on the Power tab.
Step 4. In addition, uncheck the box next to "begin the task only if the computer is idle."
If you read here and the above fixes do help you with your current problem, please share this article with your friends or colleagues who are in the same situation and have the same problem. Also, it is welcome to share it on social media platforms.
Fix 7. Delete Corrupted System Files
You can repair Windows 11 PC and delete corrupted system files using an administrator account. Follow the steps below:
Change users
Step 1. Hold the Ctrl + Alt + Delete buttons.
Step 2. Hit "switch user" to change the login details.
Step 3. Press Enter after choosing the admin user account and inputting the password.
Restart your computer
Step 1. After restarting the Windows 11, navigate to the Homepage.
Step 2. On the following screen, type your administrator account and username.
Step 3. Log in with the admin user credentials.
Fix 8. Create a System Restore Point for Windows 11
Follow the steps below to create a System Restore Point for Windows 11:
Step 1. Hit the Start button or the Windows key.
Step 2. Type: restore point, and tap Enter.

Step 3. The "System Properties" window will be opened. Hit the "Configure" button now.
Step 4. The following dialogue box has a slider that you may drag up or down to change how much disc space has been allocated for the restoration points. For instance, you might wish to incorporate additional space if your disc has much of it.
On the other hand, if you have only a little bit of storage, you may decrease it. Usually, the space allotted by Windows is sufficient. Click "OK" when you're done.

Step 5. It's time to establish a restore point once System Restore has been enabled. Then, adhere to the on-screen directions after clicking the Create icon.
![]()
Step 6. A progress bar will be seen while creating the restore point on Windows 11.
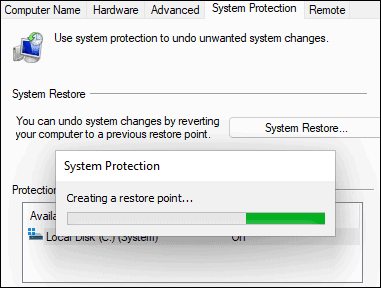
Step 7. Hit the close button.
Recover Deleted Files When System Restore Points Are Lost
When the system recovers lost points and no other backups, Windows users risk losing data. A professional data recovery tool can help you recover deleted files on Windows 11 when the system restore points are lost.
To help retrieve information lost due to file system errors, system failures, and unintentional file deletions, EaseUS Data Recovery Wizard was designed. The program's intuitive design allows even inexperienced users to retrieve deleted files rapidly.
- This program can recover deleted photos and documents and rescue files from hard drives, USB flash drives, and other storage devices.
- It can conduct raw drive recovery, deleted file recovery, corrupted hard drive recovery, partition recovery, and more.
- Support data recovery from Recycle Bin, formatting, hard drive corruption, virus attack, and system crash under different situations.
EaseUS software has a simple interface and is easy to operate:
Note: To guarantee a high data recovery chance, install EaseUS data recovery software on another disk instead of the original disk where you lost files.
Step 1. Launch EaseUS Data Recovery Wizard on your Windows 11, Windows 10, Windows 8, or Windows 7 computer. Select the disk partition or storage location where you lost data and click "Search for Lost Data".

Step 2. This recovery software will start scanning the disk to find all lost and deleted files. When the scan process completes, click "Filter" > "Type" to specify lost file types. If you remember the file name, you can also search in the search box, which is the fastest way to find the target file.

Step 3. Preview and restore lost Windows files. You can double-click to preview the scanned files. Then, select the target data and click the "Recover" button to save them to another safe spot in the PC or Cloud drive.

The Bottom Line
It's natural to feel hopeless when the tool that ought to solve the most severe system problems doesn't. Thankfully, if you follow the fixes in this article, System Restore issues are frequently not too challenging to resolve. Additionally, you can always employ a third-party backup and restoration program like EaseUS Data Recovery Wizard Pro to recover and safeguard your files even though System Restore keeps malfunctioning.
Download EaseUS Data Recovery Wizard Pro today!
No System Restore Points Windows 11 FAQs
Consider the below-mentioned FAQs to understand the topic better:
1. Why don't I have any system restore points?
It can be because your Local Drive C: is too small, which prevents Windows 11 from allowing you to create a restore point.
2. How to find older restore points in Windows 11?
Type restoration into the search bar in the Control Panel. Choose "Recovery" > "Start a System Restore". Choose "Next" in the box labeled Recover system files and settings. Pick the desired restore point from the results list, then click "Screen for Damaged Programmes".
3. Where are system restore points stored in Windows 11?
On each drive, the System Volume Information folder contains restoration points.
4. How often does the system create restore points automatically?
An automated restore point is created before installing a Windows update, an application that is not signed, or a program from an MSI. A restore point is also made if no other automatically generated restore point has been developed within the previous seven days.
Was this page helpful?


20+
Years of experience

160+
Countries and regions

72 Million+
Downloads

4.9 +
Trustpilot Score


