Page Table of Contents
Updated on May 10, 2024
Replacing an HDD with an SSD is a popular way to improve your laptop's performance because SSDs have better performance than HDDs. That is why many users want to upgrade their laptops to SSD. But how to replace laptop HDD with SSD? This article from EaseUS will tell you how to upgrade a laptop's hard drive to SSD without reinstalling Windows and losing data. Let's begin!
Here is what you will need:
| 🧰Tool You Will Use | EaseUS Disk Copy |
|
📃Preparations |
|
Download this useful disk cloning software here
Preparations Before Replacing the Laptop HDD with SSD
How to replace a hard drive with an SSD? Generally speaking, it is easy to upgrade your laptop hard drive to SSD. Now, let's see what you need to prepare before you start to replace your laptop HDD.
♦ Suitable Tools.
It would be easy if you had easy access to your hard drive via a removable panel on the bottom of the laptop. If your laptop doesn't have this kind of easy access, you'll need to use specialized toolkits such as specialized screwdrivers, suction cups, pry tools, and tweezers.
♦ An SSD.
First, figure out what type of interface the drive in your laptop is compatible with (usually SATA or PCIe), and determine which form factor will fit (often 2.5-inch or the slim M.2). From there, it's up to you to balance price, performance, and size. If the SSD is not new, remember to create a full backup of the SSD.
♦ A Super Fast Disk Cloning Software.
You may wonder why you need disk cloning software. This is because Windows has no built-in cloning settings. If you want to clone an HDD/SSD, you must use third-party cloning tools. EaseUS Disk Copy is the right one to suit your needs.
♦ Backup your HDD before cloning.
You'd better backup your system or clone your disk before you replace the old disk with a new one because data loss happens every second. EaseUS Todo Backup, a free backup tool, comes to help in this regard.
Best HDD to SSD Cloning Software Free Download
To replace a laptop hard drive with an SSD, the best way is to use professional cloning software to help you clone a hard drive to an SSD. This is because Windows does not provide such a tool, allowing you to clone a hard drive. Fortunately, you can use third-party cloning software to help you. EaseUS Disk Copy is the right one to help you change HDD to SSD.
EaseUS Disk Copy is a versatile cloning utility for Windows 11, 10, 8, and 7. It can help you clone your system, partitions, and clone hard drives of different sizes. In addition, it can help you resize disk partitions during cloning, migrate only Windows OS to another drive, create a WinPE bootable disk, and upgrade SSD on a laptop without trouble.
EaseUS Disk Copy
- Upgrade HDD to SSD without reinstalling Windows
- A simple and intuitive interface with faster cloning speed
- Clone hard drive with bad sectors without hassle
- Migrate data from one computer to another
- Replace a laptop hard drive without losing data
If you like this post, you can share it on your social platforms to help more people.
If you want to replace your laptop HDD with SSD, EaseUS Disk Copy can suit you well. You can feel free and safe to download and use it.
How to Upgrade Laptop HDD to SSD Without Reinstalling OS
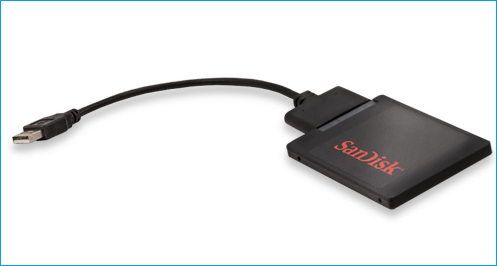
1. Connect the SSD to Your Laptop
Physically connect the SSD. Place the SSD in the enclosure or connect it to the USB-to-SATA adapter, and then connect it to your laptop with the USB cable.
2. Clone Your Hard Drive
To simplify the process of cloning your laptop hard drive, you can save your time and energy. Download this 100% secure disk cloning software - EaseUS Disk Copy here now:
PS: This software is fully compatible with all Windows Operating Systems, which means that you can install it on any Windows computer or laptop to create a disk image. Now follow the details below:
Prior Notice:
- The "Sector by sector copy" asks the size of your destination disk to be at least equal to or larger than that of the source disk. Leave this feature unchecked if you wish to clone a larger hard disk to a smaller hard disk.
- All data on the destination disk will be completely erased, so take care.
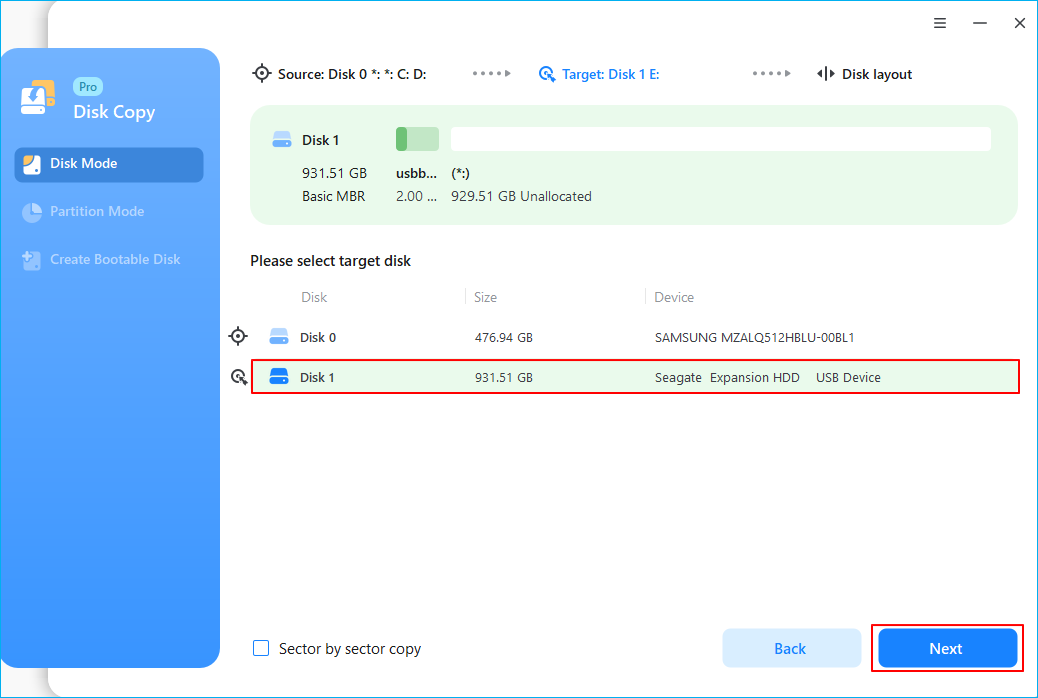
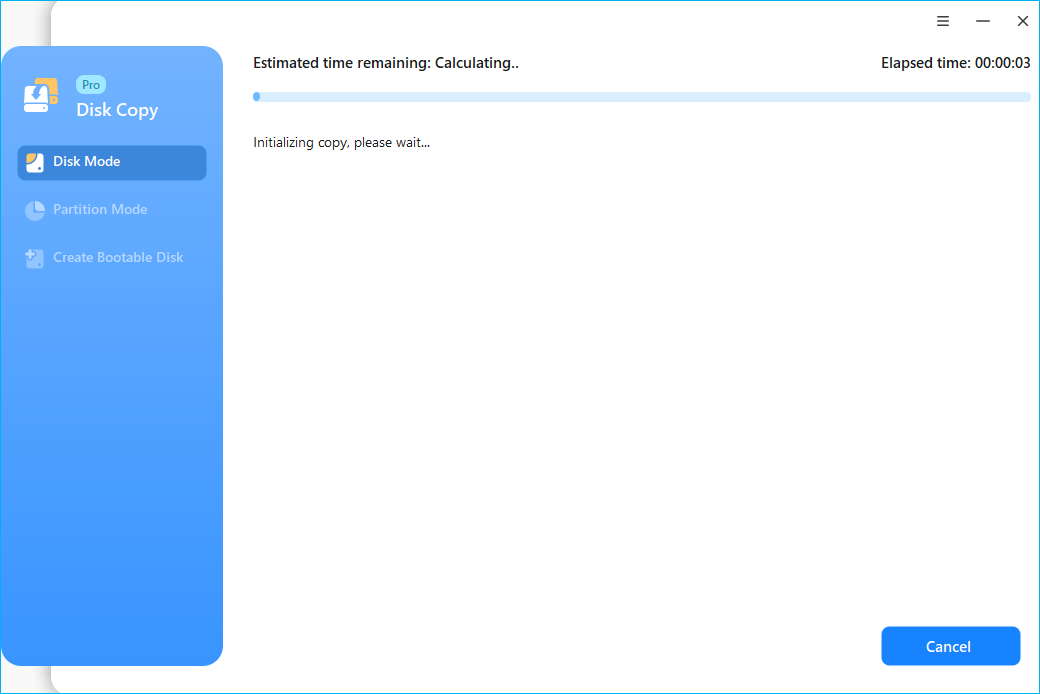
Step 1. To start copying/cloning an entire disk to another, choose this disk as the source disk under "Disk Mode" and click "Next".

Step 2. Choose the other disk as the destination disk.
Step 3. Check the disk layout of the two disks. You can manage the disk layout of the destination disk by selecting "Autofit the disk", "Copy as the source" or "Edit disk layout".
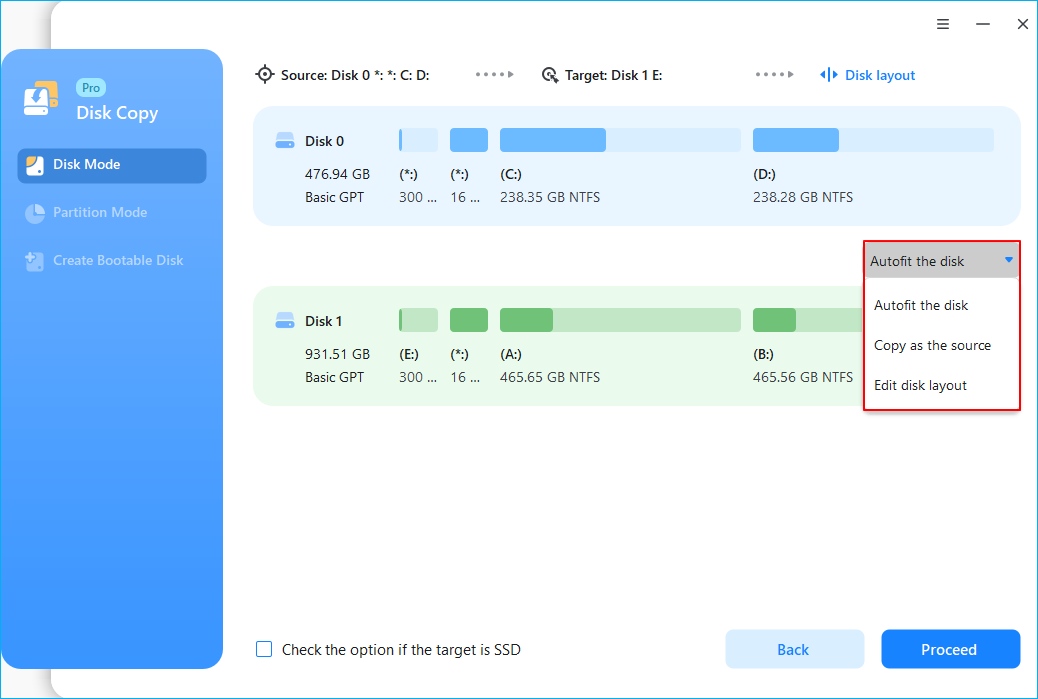
- "Autofit the disk" makes some changes by default on the destination disk layout so that it can work at its best status.
- "Copy as the source"does not change anything on destination disk and the layout is the same as source disk.
- "Edit disk layout" allows you to manually resize/move partition layout on this destination disk.
Tick the "Check the option if the target is SSD" option to put your SSD in its best performance.
A message now appears, warning you that data will be lost. Please confirm this message by clicking "OK" and then click "Next".
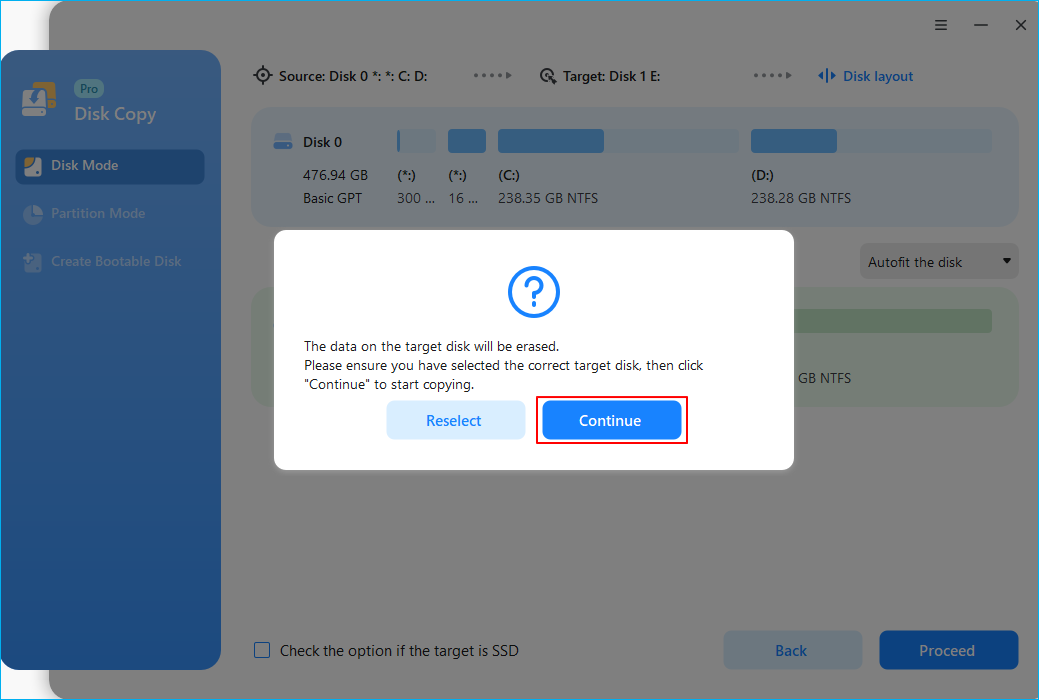
Step 4. Click "Proceed" to officially execute the task.
Video Tutorial - HDD to SSD Clone
3. Physically Replace Your Laptop HDD with the SSD
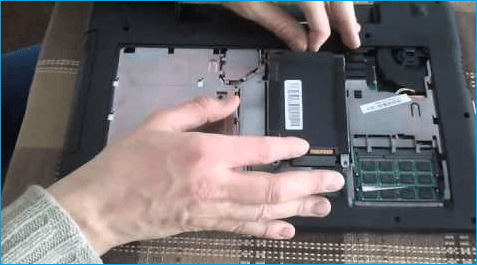
► Turn the computer off and remove the back panel.
Turn your laptop off and then disconnect both the power cable and any other connected cables -- including the SSD. Then unscrew the back panel and remove it to get access to your hard drive.
► Use your tools to secure your drive to the laptop. You'll need to unscrew those before you can remove the drive.
► Lift the old drive up about 30 or 45 degrees and pull it out. In its place, install the SSD and put the back panel on.
4. Boot Up with the SSD
The moment of truth: Turn your laptop on to boot it from the cloned SSD. If your laptop boots as normal and you see all of your programs and settings just the way they were before (except much faster), all went well.
If you meet the cloned SSD won't boot error, you can turn to the following article for help.
Is It Worth Replacing HDD with SSD in Laptop
In most circumstances, changing a laptop from an HDD to an SSD would significantly reduce the time it takes to boot Windows, load programs, edit videos, play games, transfer big amounts of files, etc. Therefore, it is worth upgrading a laptop's HDD to SSD:
- Faster speed: Compared to conventional HDDs, SSD disks offer substantially quicker rates. For instance, a basic HDD read speed ranges from 80 to 160 MB/S to 200 to 500 MB/S. Additionally, the top read speed of an NVMe SSD is 3500MB.
- Data protection: Since SSDs don't have any moving parts, they are far better suited to safeguard your data from damage brought on by dropping or knocking the drive.
SSDs are also more durable, quieter, lighter, emit less heat, and use less power.
To Wrap Things Up
That is all about how to replace laptop HDD with SSD. Using professional cloning software like EaseUS Disk Copy is the best way to help you upgrade an HDD to an SSD on your laptop or replace hard drive in laptop without any boot issues. In addition, EaseUS Disk Copy can also help you to perform the SSD replacement for laptop and other tasks. Just download and try it.
FAQs on How to Replace/Upgrade Laptop HDD with an SSD
1. Is it safe to replace HDD with SSD Windows 10?
Is it safe to replace an HDD with an SSD? The answer is in the affirmative. SSDs have many advantages over HDDs, and replacing an HDD with an SSD can boost your computer's performance.
2. Can I just replace my HDD with SSD in laptop?
No, you cannot just replace your HDD with an SSD because you will lose your data and Windows if you do this directly. To replace your HDD with an SSD, you'd better clone your HDD to an SSD with professional cloning software like EaseUS Disk Copy, which can help you replace a laptop hard drive without losing data and reinstalling Windows.
3. Do I need to reinstall Windows after SSD upgrade?
It depends. If you clone your SSD to another drive when upgrading an SSD on your laptop, you do not have to reinstall Windows again. While if you replace an SSD without cloning, you will lose Windows and data on your old SSD. The best way to replace an SSD with another is cloning, which can help you replace a hard drive without losing Windows and data.
Was this page helpful? Your support is truly important to us!
EaseUS Disk Copy
EaseUS Disk Copy is a well designed and very easy-to-use HDD/SSD cloning and migration tool, a tool which should be ideal for anyone wanting to quickly and easily migrate an existing system disk to a new disk (or newly installed SSD drive) with the minimal of configuration required.
-
Updated by
![]()
Jerry
"I hope my articles can help solve your technical problems. If you are interested in other articles, you can check the articles at the bottom of this page, and you can also check my Facebook to get additional help."…Read full bio -
Written by
![]()
Brithny
Brithny is a technology enthusiast, aiming to make readers' tech lives easy and enjoyable. She loves exploring new technologies and writing technical how-to tips. In her spare time, she loves sharing things about her game experience on Facebook or Twitter.…Read full bio
Related Articles
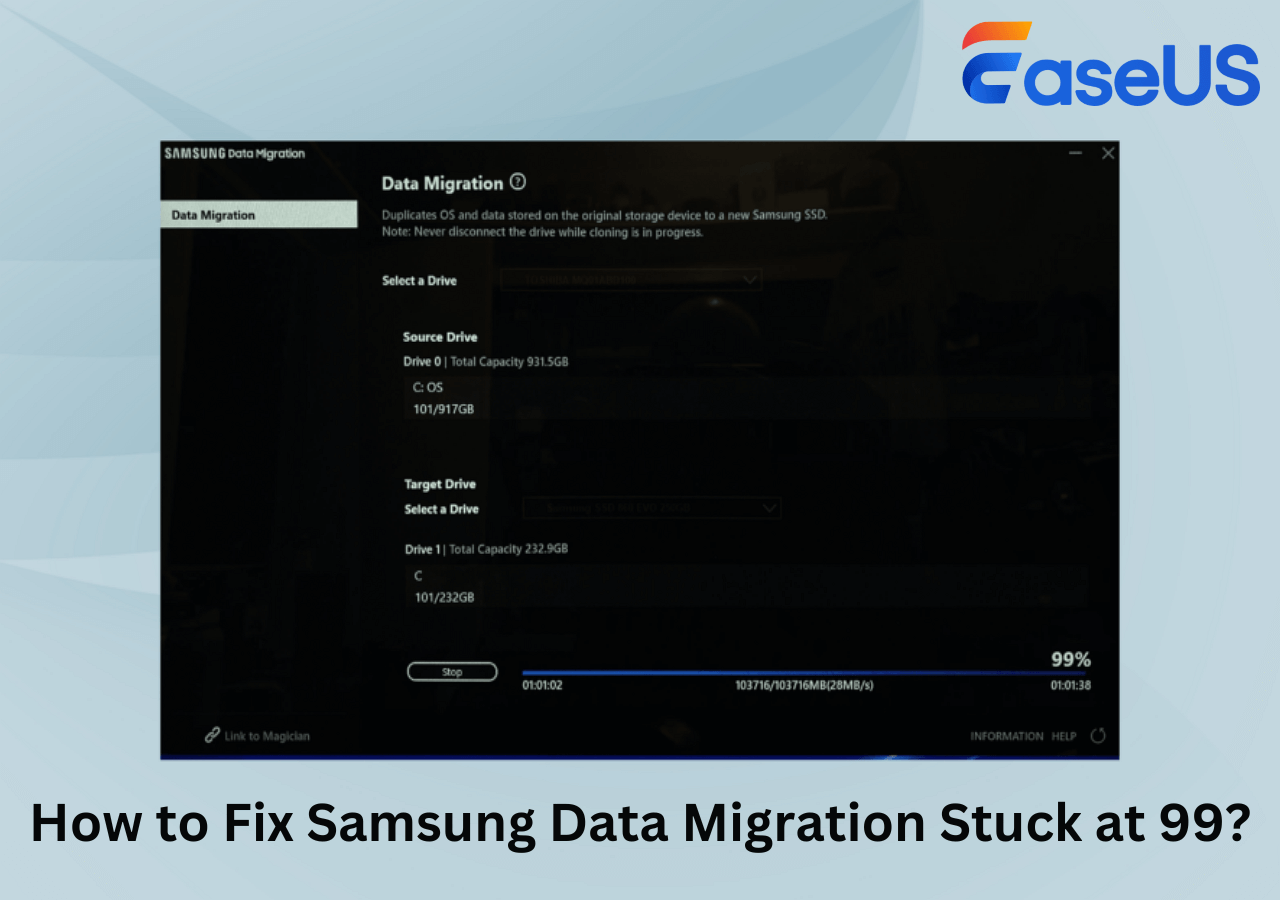
![]() Samsung Data Migration Stuck at 99%, 0%, or 100%? 5 Fixes Here!
Samsung Data Migration Stuck at 99%, 0%, or 100%? 5 Fixes Here!![]() How to Clone SSD to New SSD Without Losing (OS Included)
How to Clone SSD to New SSD Without Losing (OS Included)![]() How to Transfer Data from One Internal Hard Drive to Another with 3 Ways
How to Transfer Data from One Internal Hard Drive to Another with 3 Ways![]() How to Upgrade HP Pavilion SSD Without Reinstalling [Full Guide]
How to Upgrade HP Pavilion SSD Without Reinstalling [Full Guide]![]() FIX Error: Acronis True Image For Crucial Not Working
FIX Error: Acronis True Image For Crucial Not Working![]() How to Migrate Windows 11 to Larger SSD Without Losing Anything
How to Migrate Windows 11 to Larger SSD Without Losing Anything


EaseUS Disk Copy

Dedicated cloning tool to meet all your system, disk, and partition clone needs.
Popular Posts


Interesting Topics