Page Table of Contents

Want to upgrade to a new SSD but keep your current Windows installation, apps, files, and settings? You can transfer C drive to new SSD without reinstalling Windows.
The easiest way is to clone the disk that contains your C: drive to the new SSD. After cloning, you can boot your PC from the new SSD and continue using Windows as before.
This guide explains how to transfer the C drive to a new SSD, including how to prepare the new drive, clone your Windows installation, boot from the SSD, and fix common problems after the transfer.
Can You Transfer C Drive to a New SSD?
How can I safely move entire C drive to a new SSD?
by u/Willing_Professor_13 in datastorage
Yes. You can move your Windows installation to a new SSD without performing a clean installation of Windows.
C: is a partition, not the entire physical disk. A typical Windows installation may also have EFI, System Reserved, MSR, or Recovery partitions that are used to boot Windows and support system recovery.
For this reason, if you are replacing your current system drive with a new SSD, cloning the entire source disk is generally more reliable than copying only the C: partition. This transfers the relevant system and boot partitions along with Windows, helping the new SSD remain bootable.
Fortunately, some dedicated cloning software like EaseUS Disk Copy lets you clone your C drive and boot partitions to another drive without cloning the entire disk.
What to Do Before You Move C Drive to New SSD
Make the following preparations first to help you copy your Windows installation to an SSD:
➡️Get the right SSD
Make sure to buy the right form factor for your computer (such as M.2 or 2.5''). You also need to get an SSD large enough to fit your data on drive C. If you have a 500GB drive now, you probably need a similarly sized (or bigger) SSD.
➡️Back up your data
Generally, cloning will not cause data loss, but it is always good practice to back up your data before any major operation on your PC. Additionally, if the target SSD has data, back it up because cloning will erase everything on the target drive.
➡️Clean up C drive
Before cloning, you can clean up C drive by deleting unnecessary files, temporary data, and used applications. This reduces the data you need to transfer and helps optimize the new SSD's space. If you're upgrading to an SSD smaller than your current hard drive, you will pay extra attention to this.
➡️Connect SSD
If you use a laptop with only one slot, you'll need a USB-to-SATA adapter, dock, or external disk enclosure to connect your new SSD over USB. If you're using a desktop PC or laptop with multiple drive slots, you can install it internally alongside your existing hard drive.
➡️Download a cloning tool
If your SSD manufacturer offers a migration program, such as Samsung Magician for Samsung SSDs, that might be your best bet. If your SSD manufacturer doesn't provide a migration tool, EaseUS Disk Copy is your next best bet.
As mentioned above, if you do not want to clone the entire drive, it offers a system mode feature that lets you clone C drive to another drive.
 Free Download
Windows 11/10/8/7
Download this disk cloning software to transfer C drive to another. The following part will show you how to clone C drive to new SSD using this reliable disk cloning tool.
How to Clone C Drive to New SSD in Windows
To move C drive to new SSD, first install or connect the SSD to your PC and make sure it can be detected by your PC in Windows File Explorer. EaseUS cloning software allows you to clone to a drive without initializing it and directly migrate Windows to SSD if it is a brand-new one. Here is the SSD upgrade guide:
Before cloning:
- Install or connect the destination disk that you want to move OS to your computer, and make sure it can be appropriately recognized.
- Ensure the target HDD or SSD has enough capacity to accommodate your system files.
Step 1. Launch EaseUS Disk Copy and choose System Mode.
Install EaseUS Disk Copy system migration software on your computer, launch it, and choose System Mode. EaseUS Disk Copy will select the current system you use by default, including all system-related files and boot sectors.
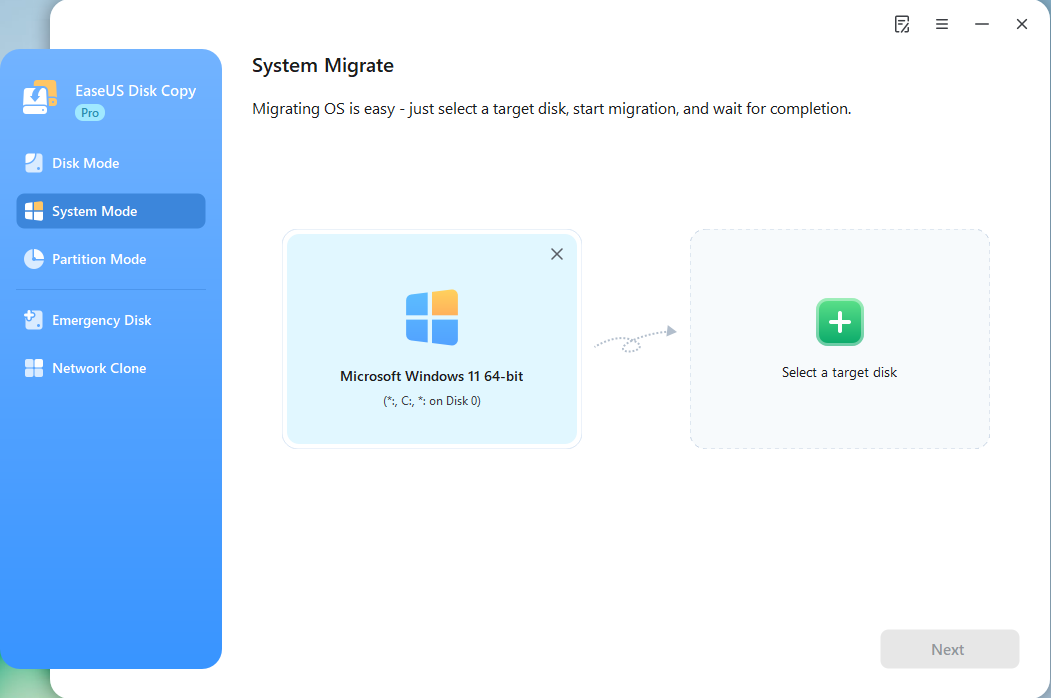
*If you apply dual-boot system, you can select another system by yourself.
Step 2. Select the target HDD/SSD.
Choose the destination HDD/SSD that you want to move OS to.
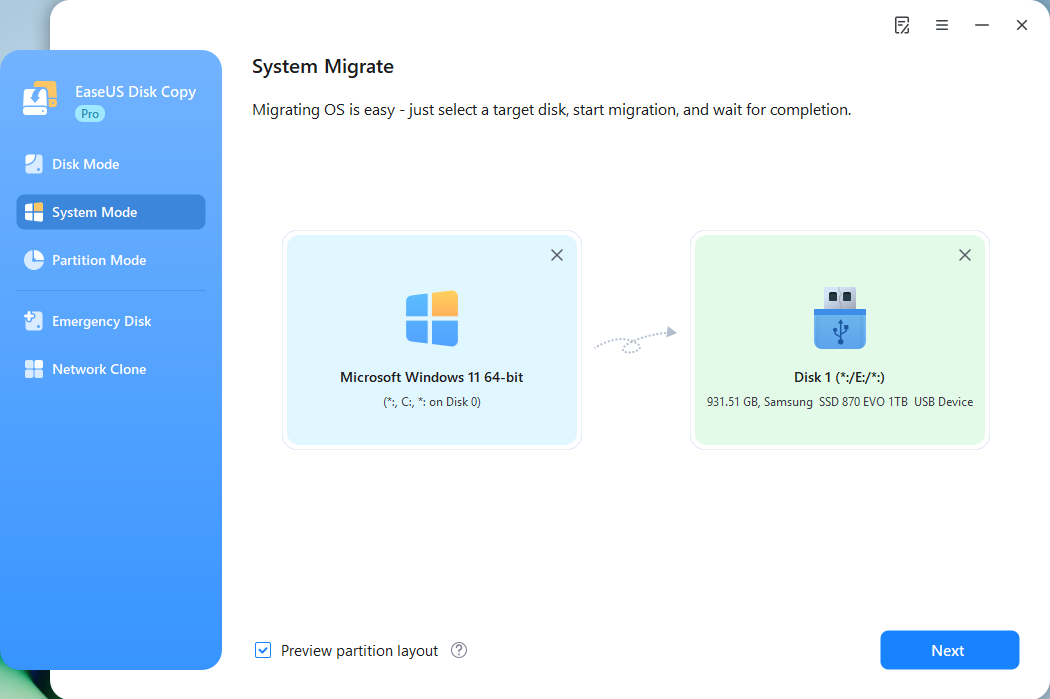
Step 3. Adjust target disk layout.
Specify the target layout as your preference. You can choose among:
- Autofit the disk: makes some changes by default on the destination disk layout so that it can work at its best.
- Copy as the source: create a 1-to-1 copy of your source disk, the layout is the same as the source disk.
- Edit disk layout: allows you to manually resize/move the partition layout on this destination disk.
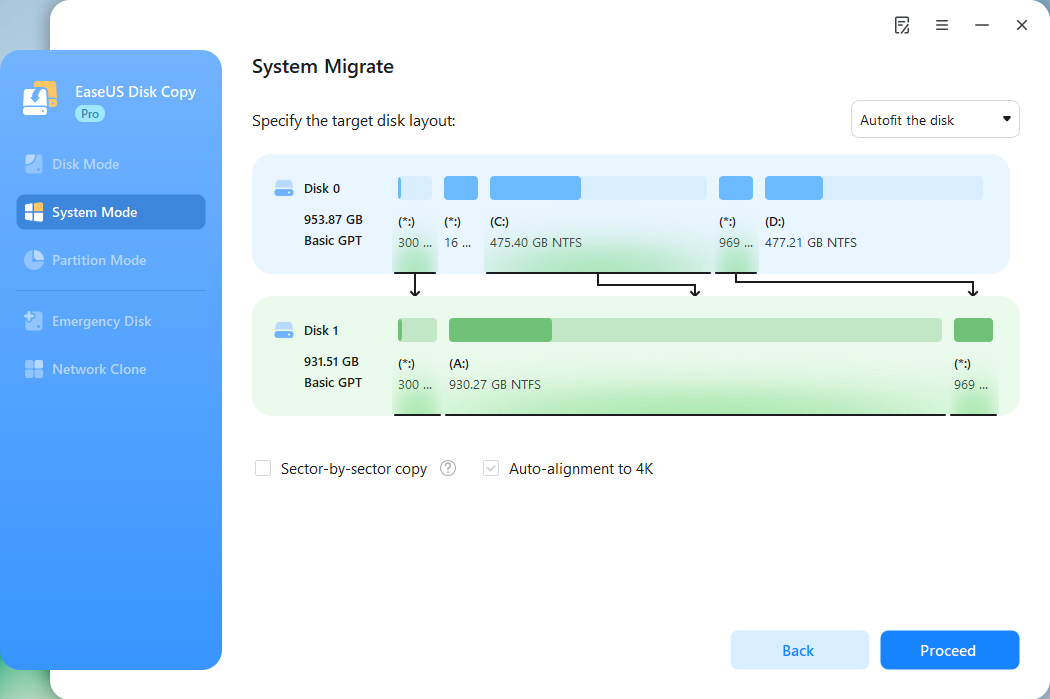
*The option Auto-alignment to 4K will be checked automatically to optimize the performance of your SSD.
Step 4. Start cloning OS.
Click Proceed, and a message will appear, warning you that data will be lost. Confirm the message by clicking Continue. Now, it will start cloning OS to the new disk.
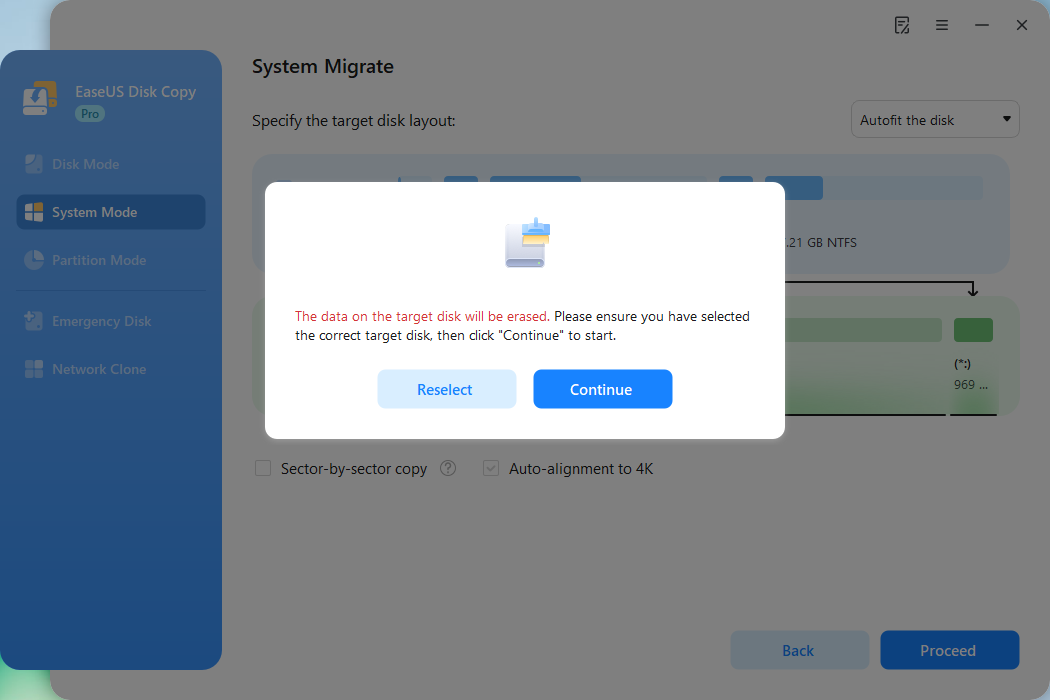
Now, it will start cloning OS to the new disk.
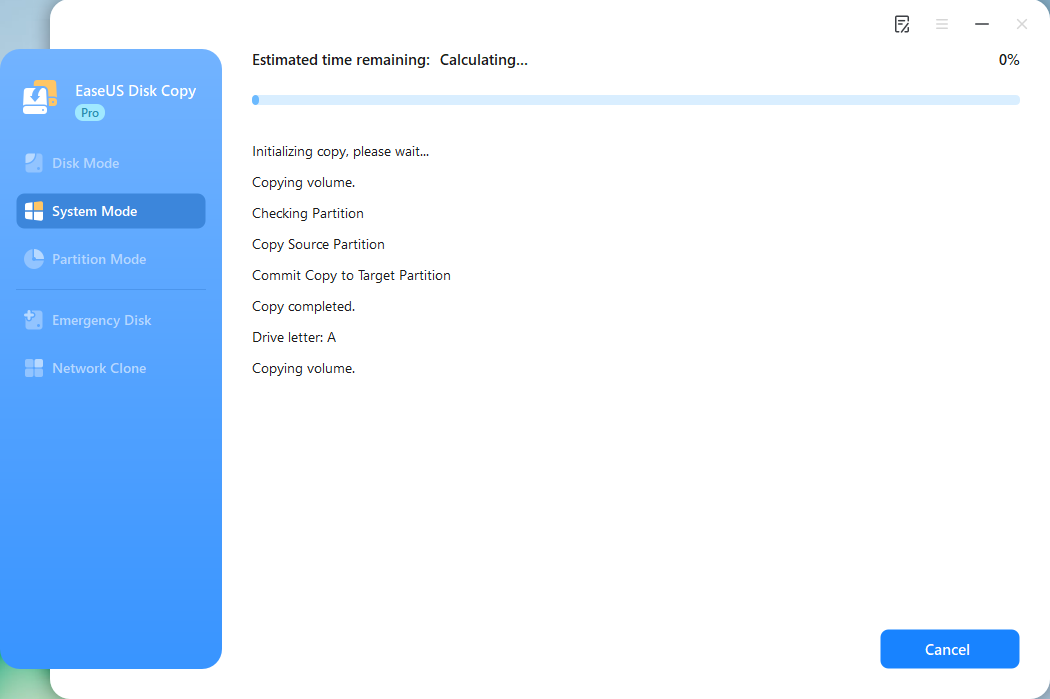
This video demonstrates how to transfer your C drive to a new SSD using disk cloning software - EaseUS Disk Copy:
Share this post on your social media to help others clone C drive to new SSD drives!
What to Do After Cloning Your C Drive
After cloning is complete, you have transferred your Windows or data to the new SSD. Here is what you need to do after cloning your SSD.
#1. Install Your SSD
You can directly install your SSD alongside the old disk if you have a desktop PC with more than one disk slot. If your PC has only one disk slot, remove the old drive and replace it with the SSD. Here is how to replace the hard drive with new SSD on your laptop:
Step 1. Shut down your laptop and unplug the power supply. (If your laptop has a removable battery, you can remove it to avoid accidental power-on.)
Step 2. Open the back panel of the laptop by removing the screws with a screwdriver.
Step 3. Find the existing drive, which is typically installed in a small bracket or cage.
Step 4. Remove the screws or clips that hold the drive in place.
Step 5. Disconnect the SATA cable and the power connector from the drive.
Step 6. Insert the new SSD and connect it to the SATA and power connectors. Secure it with screws in the same slot where the old drive is installed.
Step 7. Place the panel and screws back.
#2. Boot from the new SSD
Now, you need to boot your computer from the installed SSD. (This may be unnecessary on laptops with one drive, but if you encounter problems in booting, it can also help.)
Step 1. Power on your PC and press a key on your keyboard to enter the BIOS/UEFI settings during the startup. (F2, F10, F12, Esc, or Delete. Check your device or motherboard manual.)
Step 2. Go to the Boot menu.
Step 3. Set the cloned SSD as the boot drive.
Step 4. Save the changes and exit the BIOS.
Step 5. Restart your computer, and your computer should now boot from the cloned SSD.
- Tips
- If your PC does not detect the SSD, check whether the connections are secure.
- If the system boots to an error, ensure the Windows OS on the SSD is intact and cloned correctly.
Troubleshooting Tips:
Open Windows File Explorer and check that the new SSD is the C: drive. If everything looks good, you're done. If your old drive is still installed on your PC, you can either erase it to store extra files or disconnect it entirely.
Share this post on your social media to help others clone C drive to new SSD drives!
C Drive Transferred to New SSD Not Working?
A few common issues may occur when moving Windows to a new SSD.
1. New SSD Is Not Detected
- Check the SSD connection.
- Try another USB port if you're using an adapter.
- Check Disk Management.
- Check BIOS/UEFI to see if the SSD is detected.
- Make sure the SSD or adapter is compatible with your PC.
2. Windows Won't Boot From the New SSD
Check the boot order in BIOS/UEFI and select the new SSD or Windows Boot Manager as the first boot option. If the old drive is still connected, disconnect it temporarily and try booting again.
3. PC Still Boots From the Old Drive
The old drive may still have higher boot priority. Change the boot order in BIOS/UEFI, or temporarily disconnect the old drive to test the new SSD.
4. The New SSD Is Smaller
A smaller SSD can work if the data and partitions on the old drive can fit on it. Remove unnecessary files and resize the partitions during cloning if needed.
5. The New SSD Has Unallocated Space
If the new SSD is larger, some space may remain unallocated after cloning. You can expand the Windows partition during or after the cloning process if your cloning tool and disk layout support it.
To Wrap Things Up
That is all about how to transfer C drive to new SSD or how to migrate C drive to new drive. In short, you can use professional cloning software, such as EaseUS Disk Copy, to help you move the C drive to a new SSD. By following the step-by-step guide presented in this guide and using EaseUS Disk Copy, you can successfully clone C drive and migrate Windows OS to an SSD or hard drive without reinstalling Windows or losing data. Download and try it!
Free Download
Windows 11/10/8/7
FAQs on How to Migrate C Drive to SSD
1. Do I need to format the new SSD before cloning?
Not necessarily. Most cloning tools can prepare the destination SSD during the cloning process. If the new SSD already contains files, back them up first because cloning may overwrite the destination drive.
2. What should I do if it says there's not enough disk space?
If your cloning tool reports insufficient disk space, free up space on your source drive or ensure the destination drive is large enough. Also, check that the destination disk is properly allocated, as unallocated space can make the cloning tool think there isn't enough room.
3. Can I transfer only the C drive to an SSD?
You can clone the C: partition, but that may not be enough to make the new SSD bootable. Windows may also need system partitions such as EFI and Recovery. You can use the system mode in EaseUS Disk Copy to migrate OS to another drive.
4. Can I transfer C drive to a smaller SSD?
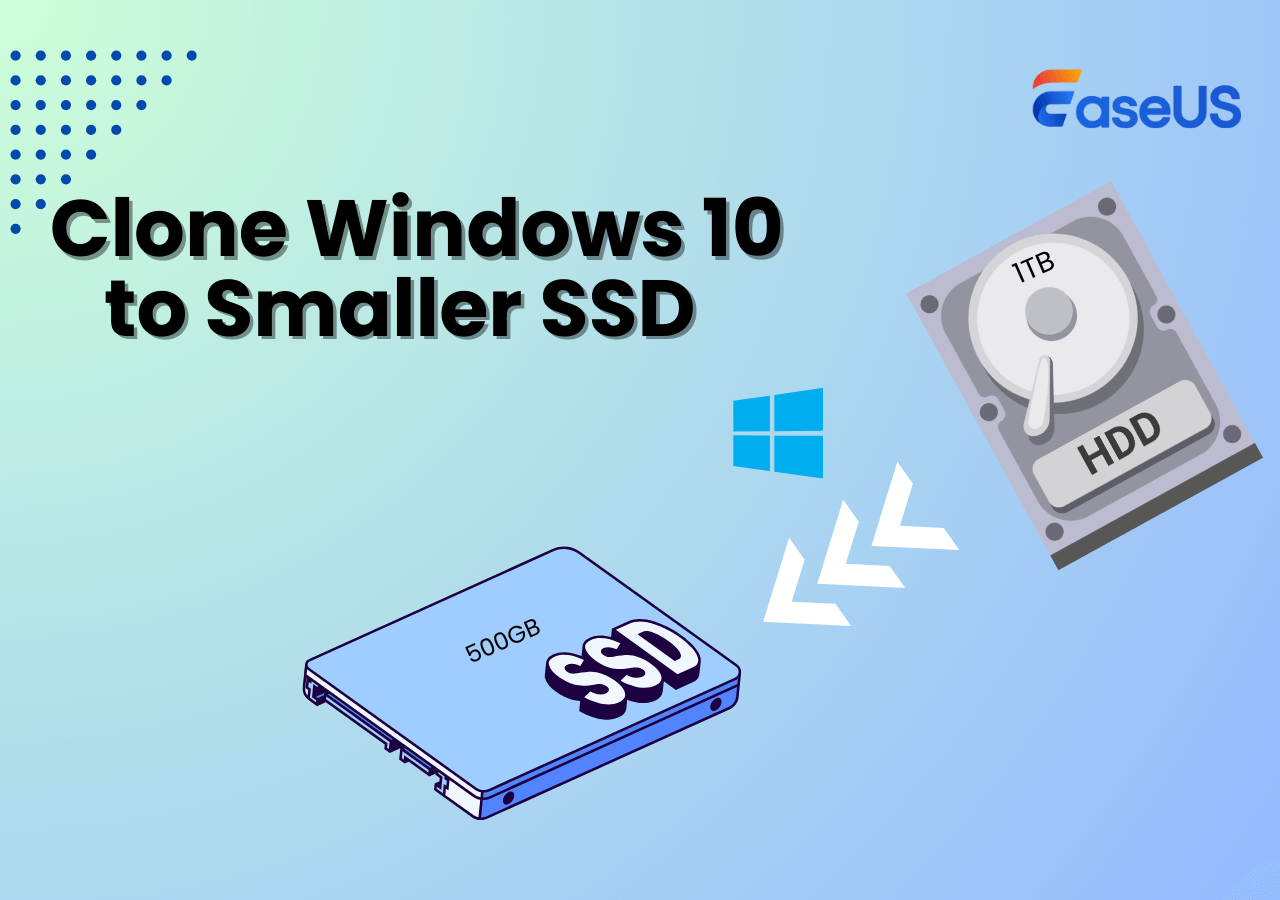
Yes, you can clone to a smaller SSD as long as the target SSD is larger than the space used on the source disk. You can manage the disk before cloning, such as cleaning it up to free up space.
5. What should I do if it won't boot after cloning?
If your system doesn't boot after cloning, first change the boot order in your BIOS/UEFI to make the new drive the primary boot device. If that fails, use a Windows recovery disk or Windows RE to access Startup Repair or the Command Prompt to run the Bootrec.exe commands (/fixmbr, /fixboot, /rebuildbcd) to repair boot files. Finally, verify the correct boot mode (UEFI/Legacy) for your disk type (GPT/MBR) and ensure the cloned disk's partition is active or set to the correct boot mode.
-
Updated by
![]()
Jerry
"I hope my articles can help solve your technical problems. If you are interested in other articles, you can check the articles at the bottom of this page, and you can also check my Facebook to get additional help."…Read full bio