Page Table of Contents
Quick Navigation:
| Workable Solutions | Step-by-step Troubleshooting |
|---|---|
| 1. Preparations for Cloning | Check if the computer motherboard support...Full steps |
|
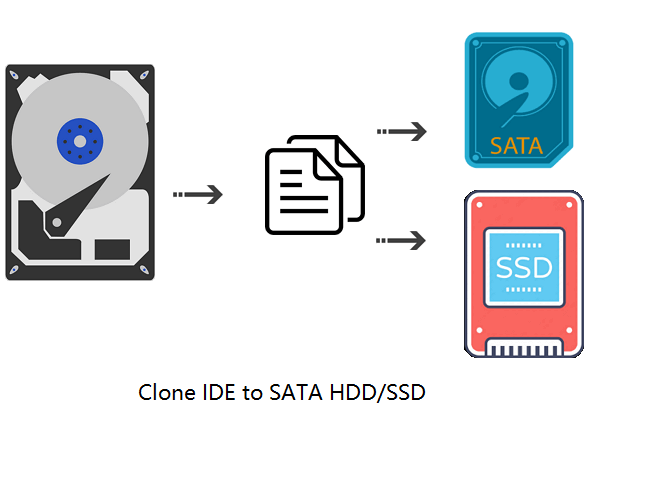
2. Clone IDE to SATA HDD/SSD |
1. Clone IDE Disk to SATA HDD/SSD Without...Full steps 2. Migrate OS from IDE to SATA HDD/SSD...Full steps |
"Hi there, do you know how to clone IDE to a SATA as a boot drive? My computer is running slower and slower recently and I'm thinking to migrate OS from the IDE to a SATA SSD without reinstalling Windows, is that possible?"
Why Need to Clone IDE to SATA
With the fast spread of SSD, more and more users are upgrading their system disk from HDD to SSD by disk cloning. Most of these disks are SATA drives now.
However, there are some users still using IDE hard drives as their boot drive, which makes it quite inconvenient for them to complete some advanced tests or do some jobs on their PCs. Therefore, IDE users are trying to migrate their system disk, replacing IDE hard drives with SATA HDD or SSD.
SATA vs. IDE
Besides, there are some other reasons which make IDE users want to upgrade IDE disk to SATA HDD/SSD. Here below is a comparison table of SATA and IED, which explains why it's necessary to clone IDE to SATA HDD or SSD:
| SATA | IDE |
|---|---|
|
|
- After cloning IDE to SATA HDD/SSD, you don't need to reinstall the Windows system. Everything on the old IDE disk will be cloned to the new SATA SSD or HDD.
So how to clone IDE to SATA? How to clone IDE hard drive data with Windows system to SATA HDD or SSD without a booting issue? Some preparation jobs are needed to be done before cloning the IDE disk to the SATA drive. Let's see now.
Part 1. Preparations for Cloning IDE Disk to SATA HDD/SSD
In order to clone IDE to SATA without reinstalling the system and booting issues, there are some preparation jobs needed to be done in advance.
#1. Check if the computer motherboard support SATA
- If the computer motherboard supports SATA, use a SATA cable and a power cable to connect SATA HDD/SSD to your PC.
- If the computer motherboard doesn't support SATA, buy an IDE-to-SATA adapter to connect the SATA HDD/SSD to your PC.
#2. Prepare a new SATA hard drive or SSD
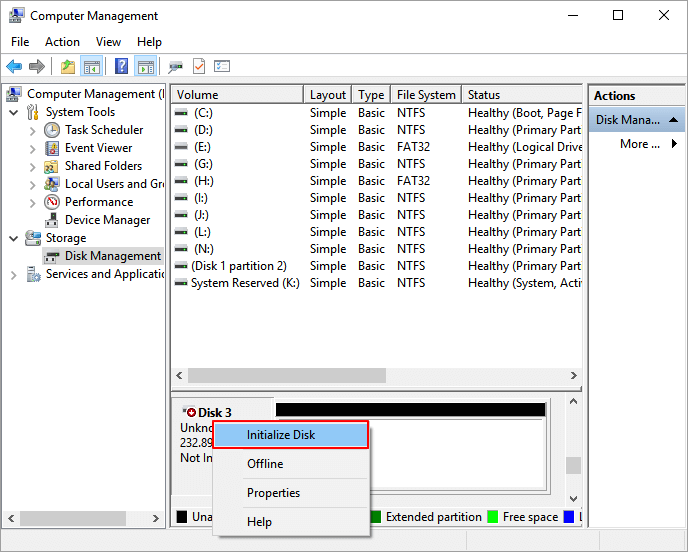
If it's a brand new SATA hard drive or SSD, connect it to your computer and initialize it first. See how to initialize a new HDD/SSD:
Connect SATA SSD/HDD to Windows PC via a USB to STAT cable > Open Disk Management and right-click the SATA disk > Select "Initialize Disk" > Set the disk as GPT or MBR.
If it's a used SATA HDD/SSD and you have some data saved on the disk, back up and save the data to another secure location or disk in advance.
#3. Download reliable IDE to SATA cloning software
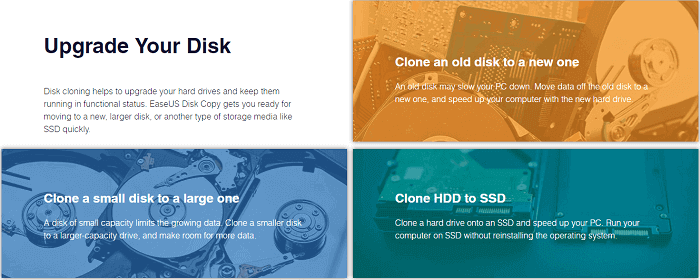
The last key point that decides the success of IDE to SATA disk upgrading is to choose reliable disk cloning software. Here we would like to recommend you try EaseUS Disk Copy, which enables you effectively upgrade the disk by cloning without losing any data or boot issues.
EaseUS Disk Copy
- Clone a hard drive for backup and recovery use
- Migrate OS from HDD to SSD or SSD to SSD
- Upgrade a hard drive with SSD without reinstalling Windows or losing data
- Create a WinPE bootable disk and resize partitions during cloning
- Clone a hard drive with bad sectors
Windows 11/10/8/7
Video Tutorial - Clone IDE HDD to SSD on Windows 11/10/8/7
The video contains everything you may want to know about cloning, including preparations, clone steps, and the boot issue.
Once all these preparation jobs are done, you can now start to clone IDE to SATA hard drive or SSD now.
If you like this post, you can share it on your social platforms to help more people.
Part 2. Clone IDE Disk to SATA HDD/SSD Without Booting Issue
To clone the IDE disk to SATA HDD/SSD without a booting issue, you just need to follow the below steps to clone IDE disk data to SATA HDD/SSD without reinstalling the system now:
First. Set the SATA drive to IDE mode in BIOS
Step 1. Connect the SATA HDD/SSD to the PC via the SATA cable and power cable or IDE-to-SATA adapter.
Step 2. Restart PC and press F2, F12, Del, etc., keys and release the key to enter BIOS.
Step 3. Go to the Advance menu, locate and change SATA Controller Mode to IDE Mode.
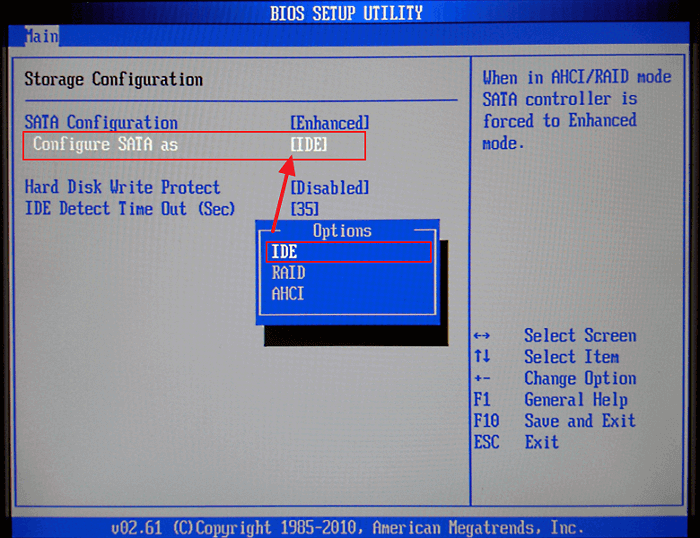
The exact menu option in BIOS may differ but look for "SATA Configuration", "SATA Mode", "SATA Controller Mode", "SATA Operation", etc. And remember to change the mode from AHCI / RAID to IDE mode.
Step 4. Save the changes, exit BIOS, and start up the PC to continue the disk cloning process.
Next. Clone IDE disk to SATA HDD/SSD, upgrade IDE to SATA HDD or SSD
Now you can start the process to clone IDE disk data to SATA HDD/SSD using EaseUS Disk Copy with the below tutorial steps:
PLUS: Before you start, remember to activate this software for a smoothy cloning process from IDE to SATA without any data loss or problems:
Let's see how to upgrade and clone the IDE disk to SATA HDD/SSD without data loss on your own:
Windows 11/10/8/7
Step 1. Run Disk Cloning Software
- Download and install EaseUS Disk Copy.
- Launch EaseUS HDD to SSD cloning software and select Disk Mode.

Step 2. Select Source and Target Drives
- Select the HDD as the source disk.
- Select the SSD as the destination disk.
Step 3. Adjust Disk Layout (Optional)
- Choose "Autofit the disk" to make full use of the larger capacity on the target disk.
- Choose "Copy as the source" to use the "Sector-by-sector copy" feature.
- Choose "Edit disk layout" to manually resize the layout on destination drive.
Step 4. Start Cloning
- Confirm the warning message (all data on the destination disk will be wiped) and start cloning.
- Wait for the cloning process to be done.
- After cloning, all your data will be transferred to the new disk, including data, Windows, settings, and programs.
Last. Set PC to boot from the SATA HDD/SSD
After the cloning process, don't rush to restart the PC. Another step is needed to be done - setting the PC to boot from SATA HDD/SSD via BIOS:
Step 1. Restart PC and press F2, F12, Del, etc., keys and release the key to enter BIOS.
Step 2. Go to the Boot section, and set the newly cloned SATA HDD or SSD as the boot drive in BIOS.
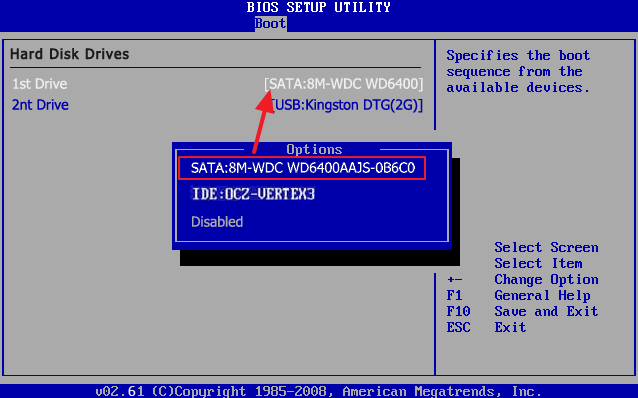
Step 3. Save the changes and restart the PC.
After this, your Windows computer will boot from the new disk, and everything is now visible on the SATA disk. If you want to use the IDE disk as a data drive, you can delete the OS partition, clear the whole disk data, and save new data on it.
Further Readings: How to Migrate OS from IDE to SATA HDD/SSD
Some of you may don't want to clone the whole disk data from IDE to SATA but just want to migrate OS from IDE drive to SATA HDD or SSD. If you have the same needs, you are at the right place.
Here we'll guide you to migrate OS or transfer Windows system only from IDE disk to SATA HDD or SSD with the help of reliable universal restore software. Universal restore can help you migrate OS to dissimilar hardware without boot issues. You just need to create a Windows system image on an external hard drive and then restore it to another computer or HDD/SSD.
EaseUS Todo Backup Home is a professional backup and recovery utility that can help you do a universal restore. Also, remember to make sure that your computer motherboard supports SATA and prepare a SATA cable and power cable to connect it to your IDE PC.
Then, you've successfully cloned OS from IDE disk to SATA HDD or SSD. No data loss issue or error would happen. And you can continue using the old IDE disk as a storage device on your computer.
Conclusion
That is all about how to clone IDE to SATA HDD/SSD. This page offers two reliable ways to help old Windows users upgrade their system disk - IDE drives to a new SATA hard drive or SSD by cloning the whole disk or migrating OS.
If you prefer to change the whole disk without an OS boot issue, EaseUS Disk Copy, with its disk cloning feature, as recommended in Part 2, can help.
Windows 11/10/8/7
If you only need to move the operating system to SATA HDD/SSD, the system migration tutorial in Further Readings will help you out.
FAQs on Clone IDE to SATA HDD/SSD
1. Can I replace an IDE drive with SSD?
Yes, you can replace an IDE hard drive with an SSD. But you have to use professional disk cloning software like EaseUS Disk Copy to help you clone data, including the OS, on the IDE drive to an SSD.
2. How do I clone an IDE hard drive?
You need to use third-party cloning software like EaseUS Disk Copy to clone an IDE hard drive since Windows doesn't offer a cloning tool that allows you to perform such as job.
3. What is a disadvantage of using an IDE?
The IDE hard drive is hard to keep up with frequent changes, which include new templates, samples, and functionality. To produce clean code, you still need knowledge because IDEs cannot automatically fix problems. Some IDES are too complicated for newcomers to comprehend.
-
Updated by
Tracy became a member of the EaseUS content team in 2013. Being a technical writer for over 10 years, she is enthusiastic about sharing tips to assist readers in resolving complex issues in disk management, file transfer, PC & Mac performance optimization, etc., like an expert.…Read full bio