Page Table of Contents
Updated on Jul 19, 2024
Backup and Restore feature is one of the easiest ways to restore all your Windows 7 or Vista backups on your Windows 10 system. However, many Windows 10 users are currently facing difficulties while restoring previous Windows 7 backups with the help of the Backup and Restore (Windows 7) feature. At the same time, some users are also getting errors while using the File History function to save a copy of all the files stored on the system. They are getting different errors when using these features. Fortunately, these issues can be solved with the help of some workarounds. This article shares some tried and tested solutions to resolve the Windows 7 backup on Windows 10 not working issue. Thus, thoroughly check the below-mentioned solutions and eliminate this issue.
Why My Windows 7 Backup Can't Work on Windows 10
There could be several reasons for the improper functioning of the Backup & Restore feature. Here are some common culprits expected to cause the Windows 7 backup on Windows 11 not working issue.
- File History Service Not Working
- Issues With the Hard Drive
- Corrupted System Files
- Disk Errors
- Potential Virus or Malware Attack
- Issues With Old Backups
- Improper Functioning Of Volume Shadow Copy
How to Fix Windows 7 Backup on Windows 10 Not Working (14 Fixes)
Here in this section, we have mentioned over twelve workarounds to resolve the Windows 7 backup on Windows 10 not working issue.
- 1. Enable File History Service and Windows Search
- 2. Disable and Enable System Protection
- 3. Enable Volume Shadow Copy
- 4. Manually Remove Old Backups
- 5. Use Chkdsk Command
- 6. Enable Windows Backup Service
- 7. Make Sure 'Automatically back up my files' is Turned On
- 8. Run Virus Scan1
- 9. Keep Saved Versions to Forever
- 10. Adjust the Disk Space Usage
- 11. Turn Off & Reset File History
- 12. Format the Drive
- 13. Change the Drive
- 14. Use Third-Party Backup Software
1. Enable File History Service and Windows Search
Some of the most common reasons for this issue is the improper functioning of the File History Service and Windows Search service. These two services hold an essential role in the proper functioning of the Backup and Restore feature. It could be possible these Windows services aren't working correctly, which led to this error. You need to enable the File History Service and Windows Search from Service Manager by following the below-mentioned steps.
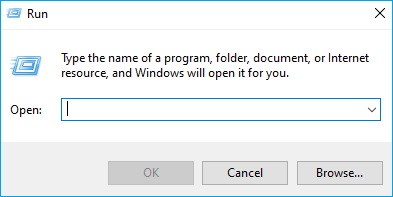
Step 1. Press Windows + R on your keyboard to open the Run program.
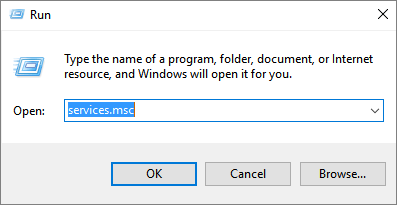
Step 2. Type Services.msc in the Search Bar.
Step 3. Search for File History Service and Windows Search in the Service section.

Step 4. Right-click on the File History Service and select Properties.
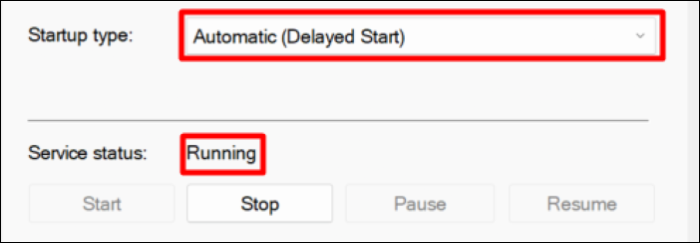
Step 5. Ensure that Service status is set to Running and Startup type is selected to Automatic (Delayed Start).
Step 6. You need to follow the same process (Steps 1 to 5) with Windows Search.
Step 7. Reboot your Windows 10 PC and use the Restore & Backup feature again to see whether it's working.
2. Disable and Enable System Protection
System Protection is a Windows feature that ensures all the data and files stored on your Windows system are safe. Sometimes the System Protection feature stops functioning and indirectly disrupts the function of the Backup and Restore feature. We suggest disabling the System Protection feature once and then re-enabling it to ensure it's working properly this time. Follow along to do the same.
Step 1. Launch the Control Panel.
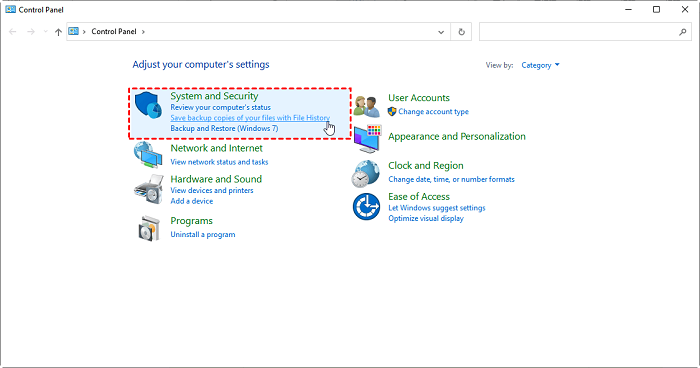
Step 2. Open the Control Panel and head to the System and Security tab.
Step 3. Move to the System tab and then the System Protection section.

Step 4. Click on Configure button to change the settings.
Step 5. Set Restore Settings to Disable system protection.
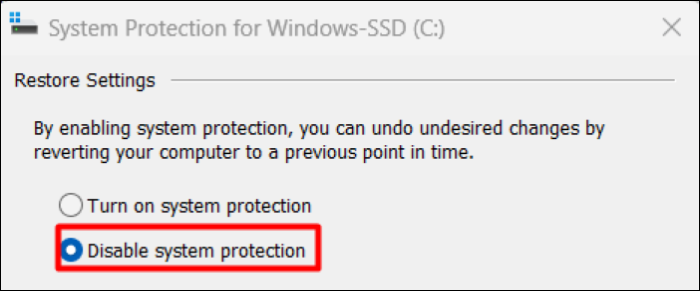
Step 6. Click on Apply.
Step 7. Open the System Protection settings again and set Restore Settings to Turn on system protection.
Step 8. In the end, click on Apply and close the window.
Step 9. Restart the PC.
3. Enable Volume Shadow Copy
Volume Shadow Copy is an essential Windows service that helps the Backup and Restore feature work properly. It is found that sometimes this service stops working due to some reason. Hence, you must follow the steps mentioned to enable the Volume Shadow Copy service.
Step 1. Open the Services app.
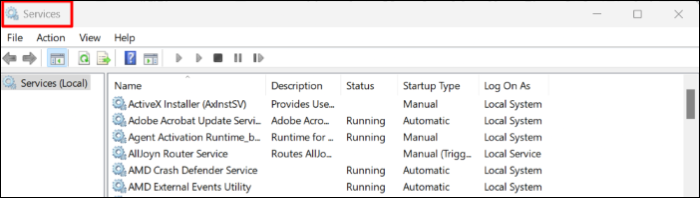
Step 2. Search for the Volume Shadow Copy service in the Services tab.

Step 3. Right-click on the Volume Shadow Copy service and click on Properties.
Step 4. Head to the Dependencies tab in the Properties section.

Step 5. Once landed in the Dependencies section, ensure that this service is running.
4. Manually Remove Old Backups
Your old backups and restore points may be preventing you from importing the Windows 7 data backup. In that case, we suggest removing all the old backups to ensure this will not cause any error. You can manually remove all the old backups from the System Protection settings. Follow the below-mentioned steps to remove the old backups.
Step 1. Open the Control Panel app from the Windows Search Bar.
Step 2. Move to the System and Security in the Control Panel.
Step 3. Open the System settings and then the System Protection tab.
Step 4. Click on Configure to delete the old backups and restore points.
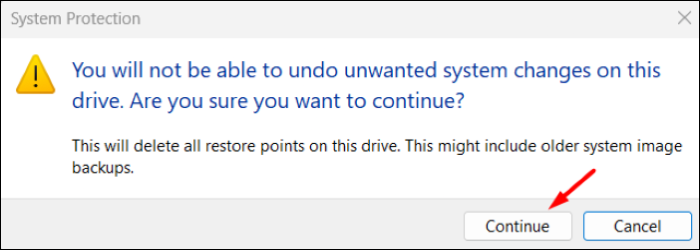
Step 5. Click on Delete to remove all the stored backups.

Step 6. On the next window, click on Continue to completely delete all the backups.
Step 7. Click on Apply and then OK to close the window.
5. Use Chkdsk Command
Sometimes the Backup and Restore function stops operating due to some disk errors. You can scan and repair your disk errors by executing the Chkdsk disk error command in Command Prompt. Follow the below-mentioned steps to know the exact steps.
Step 1. Open Command Prompt as Administrator.
Step 2. Type chkdsk /r X: in the Command Prompt and hit the Enter key.
Note: Here, X represents the letter assigned to your hard disk. Replace the X with the hard disk letter you want to scan for errors.
Step 3. Once done, enter the Y in the Command Prompt to schedule the scan for the next time you start the PC.
Step 4. Reboot the PC, and don't press any key. Your system will automatically enter the scanning mode and scan and fix disk errors.
Step 5. That's it. Try restoring the Windows 7 backup on your Windows 10 PC using the same feature.
6. Enable Windows Backup Service
Windows Backup service is a crucial service that enables us to generate and import Windows 7 and Windows Vista backups. You need to enable the Windows Backup service from the Services app, and the below-mentioned steps demonstrate the same.
Step 1. Open the Services app.
Step 2. Look for the Windows Backup service in the Services tab.

Step 3. Right-click on the Windows Backup service and choose Properties.
Step 4. Set Service status to Start, and ensure Startup type is selected to Manual.
Step 5. Click on Apply and then OK.
Step 6. Once done, restart the PC and try generating a backup again.
7. Make Sure 'Automatically back up my files' is Turned On
If you are wondering why your Windows 10 system isn't generating backup automatically, there is a possibility you might haven't enabled the automatic backup generation feature. You can enable the Automatically back up my files option following the below-mentioned steps.
Step 1. Open the Settings app.
Step 2. Head to the Update and security settings from the left-navigation menu.
Step 3. Select Backup and enable the Automatically back up my files option.
8. Run Virus Scan
One of the common reasons for this issue is infected files and viruses. We suggest running a quick virus scan using the Virus & threat protection tool. Follow the below-mentioned steps to check the same.
Step 1. Open the Virus & threat protection through Windows Search Bar.
Step 2. Click on Quick Scan to let the scan for the virus and malware threats.

Step 3. Wait for the results and see if the scan finds any virus. If it finds any virus, clear or quarantine all the infected files and attempt the backup generation again.
What is a Computer Virus and How to Protect Your Computer from Viruses
If your Windows PC or computer acting weird or slowing down, do you see a lot of pops or programs you did not install? Then follow this easy guide. Here we have explained what a computer virus is, its types, the risk, and what protections you can take to keep the viruses away from the computer.

9. Keep Saved Versions to Forever
Changing Keep saved versions settings can also possibly resolve the issue. Follow the below-mentioned steps to modify the Keep saved versions setting.
Step 1. Head to Control panel > System and Security > File history.
Step 2. Click on Advanced settings.
Step 3. Set Keep saved versions option to Forever (Default).
10. Adjust the Disk Space Usage
It could be possible that you have allotted all your disk space to programs and applications, and nothing remains for the backups to store. It is likely the reason for the Windows 7 backup on Windows 11 not working issue. You need to make sure that some disk space is available to store and import your Windows 7 backups and other essential tasks. Follow the mentioned steps to adjust the disk space usage in Windows 10.
Step 1. Open the Control Panel and open the System and Security settings.
Step 2. Click on System Protection in the System settings.
Step 3. Click on the Change settings button.
Step 4. Select Configure to modify the disk space usage.
Step 5. Use the slider in the Disk Space Usage section to adjust the maximum usage per your needs.
Step 6. Set the Disk Space Usage to 15% to ensure that system gets enough space to create and store backups.
Step 7. Click on the Apply button and close the window.
11. Turn Off & Reset File History
Some users said that disabling and re-enabling File History can also fix the same problem. Follow the mentioned steps to disable the File History option.
Step 1. Open the Control Panel and then open the System and Security settings.
Step 2. Open File History and click on Turn off to disable the File History.
12. Format the Drive
In some cases, repairing the disk errors using the Chkdsk command resolves the Windows 7 backup on Windows 10 not working issue. In case it isn't the same in your case, we suggest formatting your hard disk and bringing it back to the new state. Follow the below-mentioned to know how to format the hard disk on Windows 10.
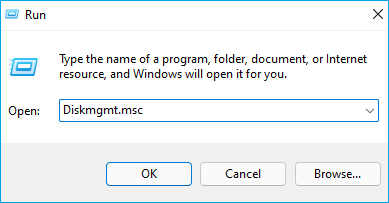
Step 1. Press Windows + R key combination to open the Run program.
Step 2. Type diskmgmt.msc in the Search Bar.
Step 3. You will now see all the drives connected to your PC.
Step 4. Right-click on an internal and external hard drive you want to format.
Step 5. Select Format from the contextual menu.
Step 6. Enter the drive name in the Volume label text box.
Step 7. Select the preferred file type in the File system option.
Step 8. Lastly, click on the OK button.
13. Change the Drive
Even after trying all the mentioned resolutions, the Windows 7 Backup on Windows 10 Not Working issue doesn't go. We will suggest using another drive to save the Windows 7 to another drive and then using it to transfer it to your Windows 10 PC. This will most probably resolve the issue.
14. Use Third-Party Backup Software
As a last resort, you can use third-party backup software to take regular backups and transfer them with ease. Besides this, using third-party backup software is always a safer option as you don't know when your Windows system will stop taking automated backups. But, in the case of third-party backup tools, you won't face any issues while generating system backups. There are different third-party backup software available for Windows 10.
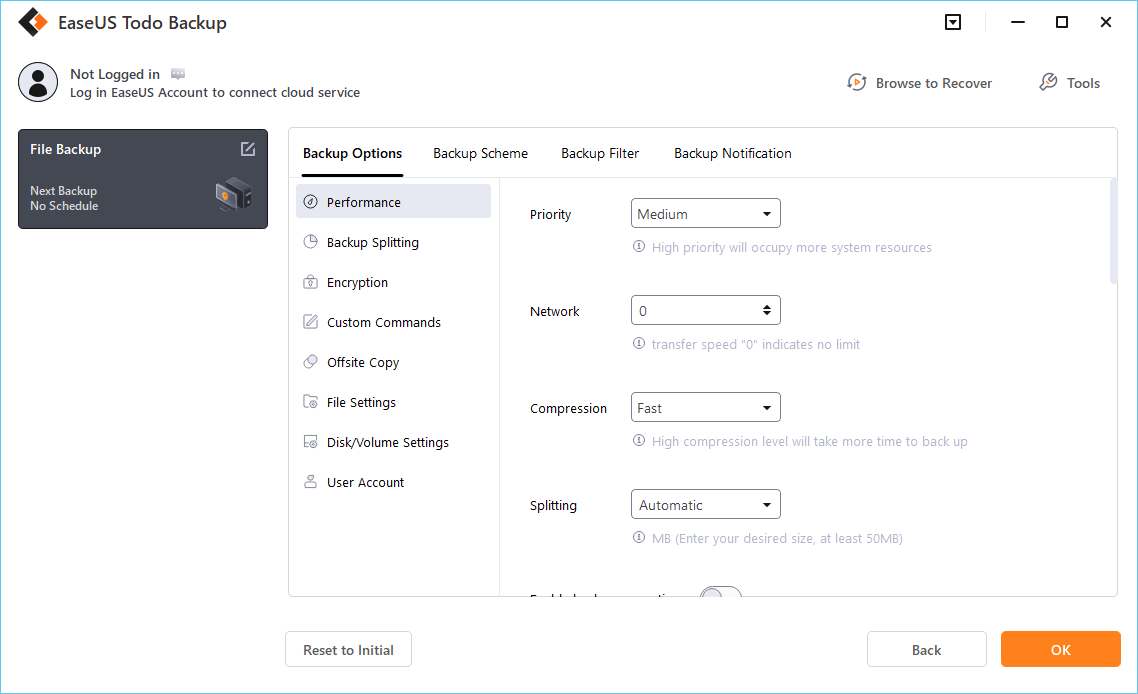
We recommend using the EaseUS Todo Backup due to its exclusive features, such as 250GB of free cloud storage. This tool is freely available and lets you easily perform all basic to advanced backup generation tasks. You can use EaseUS Todo to take unlimited backups and store them in 250GB worth of free cloud storage. Fortunately, it also supports automatic backups, so you never need to worry about system backups.
Secure Download
Step 1. Launch EaseUS Todo Backup and choose "Create Backup" on the home page, click "Select backup contents".

Step 2. Among the four available categories, click "OS" to start back up.

Step 3. The system partition will be automatically selected, you only need to select the location.

Step 4. Local Drive, Cloud, and NAS are available for you to save the backup file. You can also connect an external hard drive to preserve the system backup files.

Step 5. You can customize the settings in "Options" at the left bottom. After that, click "Backup Now", and the process will begin.
*After finishing the backup process, you can check the backup status, recover, open, or delete the backup by right-clicking the backup task on the left.
Frequently Asked Questions
1. Does Windows 7 Backup Still Work With Windows 10?
You can still use your Windows 7 and Windows Vista backup on your Windows 10 system using the Windows 10's Backup & Restore feature.
2. Why Does My Windows 7 Backup Keep Failing?
It could be possible that there are some issues with your internal and external hard disk. You can try executing the disk error command. Another thing you can do is try formatting your internal and external hard disk.
Final Words
We can understand how frustrating it could be when you are trying to restore your Windows 7 data on your Windows 10 system, continuously facing failures. There could be several reasons for this issue. We shared some of the best working solutions with you to resolve this issue. You can try implementing the above-mentioned solutions to overcome the Windows 7 backup on Windows 10 not working issue.
Was this page helpful? Your support is truly important to us!

EaseUS Todo Backup
EaseUS Todo Backup is a dependable and professional data backup solution capable of backing up files, folders, drives, APP data and creating a system image. It also makes it easy to clone HDD/SSD, transfer the system to different hardware, and create bootable WinPE bootable disks.
Secure Download
-
Updated by
![]()
Jerry
"I hope my articles can help solve your technical problems. If you are interested in other articles, you can check the articles at the bottom of this page, and you can also check my Facebook to get additional help."…Read full bio -
Written by
![]()
Jean
Jean is recognized as one of the most professional writers in EaseUS. She has kept improving her writing skills over the past 10 years and helped millions of her readers solve their tech problems on PC, Mac, and iOS devices. …Read full bio
Related Articles
![]() What Size External Hard Drive Do I Need to Backup My Laptop | Quick Guide
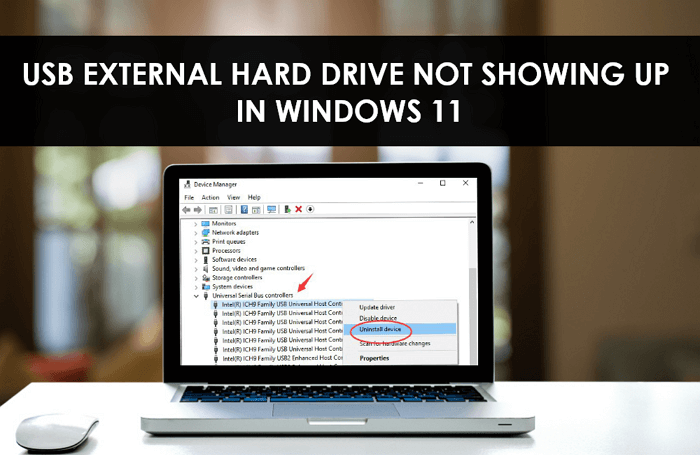
What Size External Hard Drive Do I Need to Backup My Laptop | Quick Guide![]() USB External Hard Drive Not Showing Up in Windows 11 (99% Users Rated Useful)
USB External Hard Drive Not Showing Up in Windows 11 (99% Users Rated Useful)![]() How Long Does It Take Google Drive to Process a Video
How Long Does It Take Google Drive to Process a Video![]() How to Choose Suitable Digital Photo Storage Devices?
How to Choose Suitable Digital Photo Storage Devices?![]() Acer Windows 10 Recovery USB Download (2 Tips & 1 Alternative)🥇
Acer Windows 10 Recovery USB Download (2 Tips & 1 Alternative)🥇![]() How to Update BIOS Windows 10
How to Update BIOS Windows 10


EaseUS Todo Backup

Smart backup tool for your files, disks, APPs and entire computer.
Topic Clusters


Interesting Topics