Page Table of Contents
Updated on Jul 01, 2026
Windows Defender, which was first released as free anti-spyware software for Windows XP, is an anti-virus component of Windows OS. Prior to Windows 10, Windows Defender was a graphical desktop app. Since Windows 10, it is merged to Windows Security app and Powershell, enabling users to visit Windows Defender directly from Settings. In Windows 11, Windows Defender received a small security upgrade that blocks vulnerable drivers from being able to run on your device.
The Cons of Windows Defender
However, even though Windows Defender is getting more aggressive and more determined in defending viruses and malware, it still failed to gain the favor of users. Every day a number of users are searching "how to disable Windows Defender", and here are the reasons why they do it.
1. Conflict with Another Antivirus Software
Windows Defender is good antivirus software, but only on the premise that you don't have other choices. Most users would choose another third-party antivirus software to protect their computers, if they do not disable Windows Defender, it might identify the new virus protection program as a malicious file and vice versa.
2. Taking Too Much CPU Usage
This is actually not only the disadvantage of Windows Defender but also a problem of almost all antivirus software. When running the antivirus software, it uses up your computer's resources from CPU to disk space and RAM. What's worse, if you're using Windows Defender, it never stops monitoring and scanning your device for viruses and malware. So if you have other computer protection methods, you can disable Windows Defender to save your device's CPU and RAM usage.
The above two points are the main disadvantages of Windows Defender. There are other minor cons such as Windows Defender might prevent you from installing certain software, or cause some error codes. In the next part, we will tell you how to turn off Windows Defender permanently.
How to Disable Windows Defender on Windows 11
Here we will introduce two methods for you to disable Windows Defender on Windows 11. The first method can only temporarily suspend the Windows Defender, but it is an easier way. The second method might be a little complicated, but once applied, you can cease Windows Defender on your computer forever.
1. Temporarily Stop Windows Defender on Windows 11
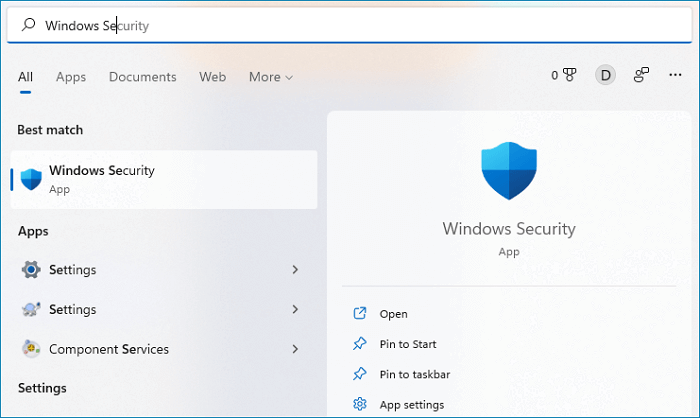
Step 1. Search Windows Security on Start and open the best match.
Step 2. In the Windows Security app, click the Virus & Threat protection tab.
Step 3. Under Virus & threat protection settings, click Manage settings.

Step 4. Switch the Real-time protection button to turn off the Windows Defender.
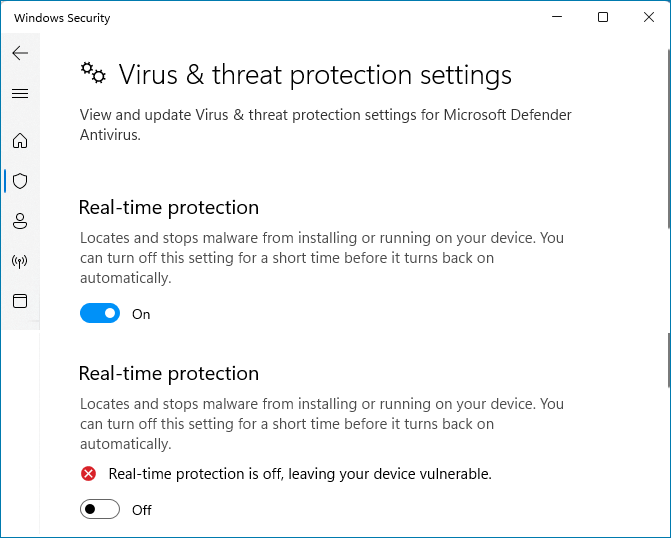
*In Windows 11, if you turn off Windows Defender, it will automatically turn on the next time you start the computer.
2. Permanently Disable Windows Defender on Windows 11
With this method, you could turn off Windows Defender once and for all. The core of this method is to take ownership of the Windows Defender so that we can completely disable it.
1. Boot into Safe Mode
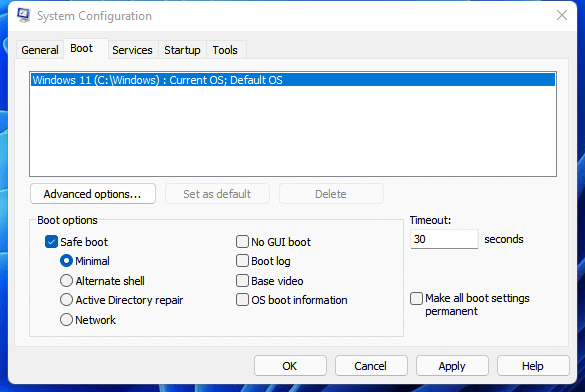
Step 1. Press Windows + R key to open the run box, enter msconfig, and press enter.
Step 2. Select the boot tab, and tick the Safe boot under Boot options.
Step 3. Click OK and restart your computer, then your computer will boot into safe mode.
2. Run Windows Defender as Administrator
Step 1. Open File Explorer and navigate to this folder: C:\ProgramData\Microsoft\Windows Defender.
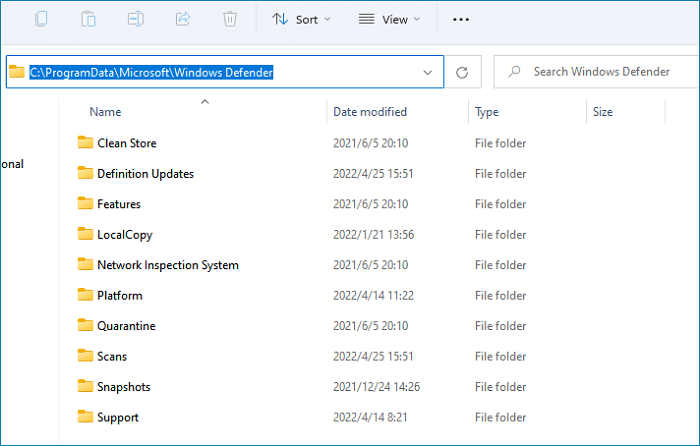
Step 2. Right-click the Platform folder, click Properties, switch to the Security tab, then click Advanced.
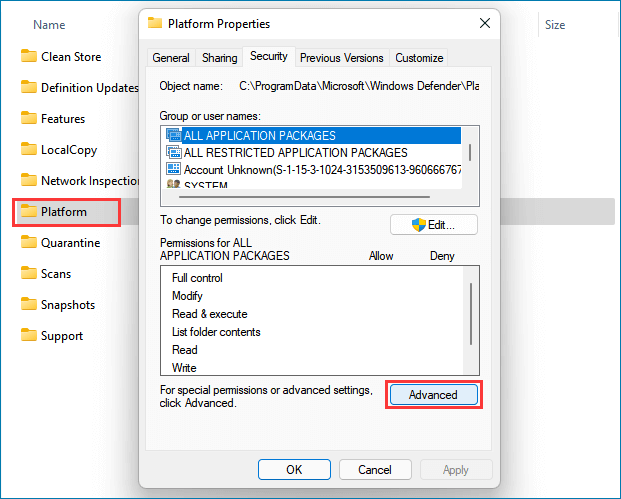
Step 3. You can see that now the owner of Windows Defender is the SYSTEM.
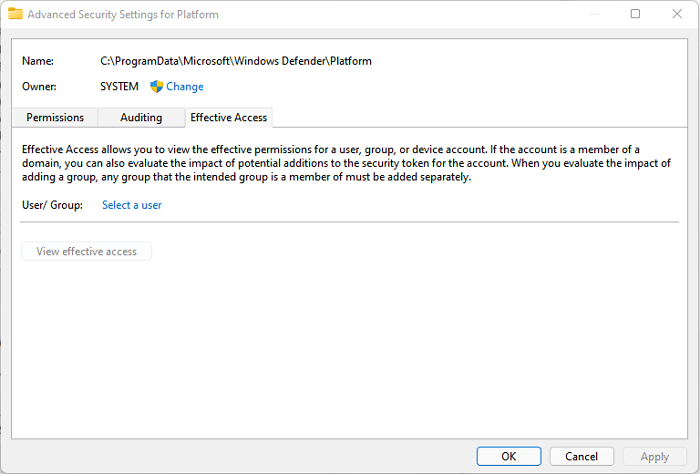
Step 4. Click the Effective Access tab, and click Select a user.
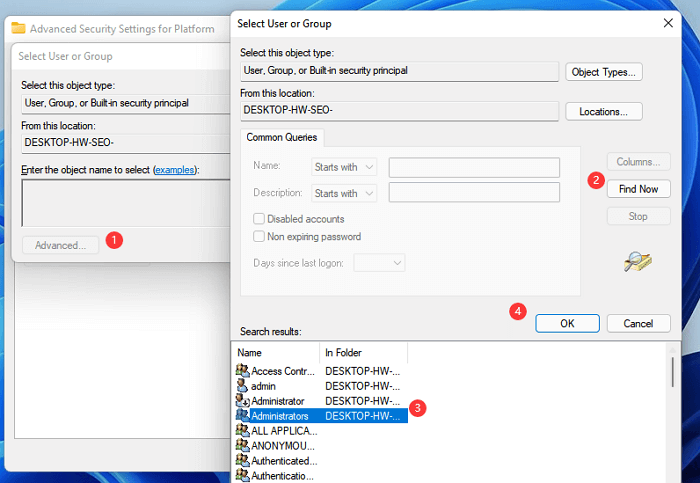
Step 5. Go to Advanced > Find Now > Administrators, and click OK twice to confirm the change.
3. Remove Windows Defender Permissions
Now you can see that the owner of Windows Defender has changed to Administrators and you can remove the permissions to disable Windows Defender.
On the Advanced Security Settings for Platform window, select every one of the permission entries, click Remove, tick the Replace owner on subcontainers and objects option at the top, then tick the Replace all child object permission... option at the bottom, click Apply.
4. Disable Safe Boot and Restart
Follow the steps in the very first step to enter msconfig, unselect the Safe boot option and restart your computer. This is the last step of permanently disabling Windows Defender in Windows 11. After restarting your computer, you can reopen the Windows Security app, now you could see that there is no Virus & Threat Protection.
How to Protect Your Computer from Virus
After knowing how to disable Windows Defender on Windows 11, you may wonder if there are better ways to protect computers from viruses. There are two options for users, one is to find third-party virus protection for PC, and the other is to make a backup for important files regularly.
If you don't know which antivirus software is suitable for your needs, read this article to see if you can find a good one.
Expert Picks: Best Virus Protection for PC 2022
Nearly everybody knows the importance of protecting computer data, but how? Make a backup? Use the antivirus software? Actually, you need both. This article will focus on how to choose antivirus software for your PC. Keep reading and choose the best virus protection for your PC.

There is a lot of backup software on the market that enables users to make regular backup plans. We recommend you try EaseUS Todo Backup, it can not only provide various backup options for users but also allow users to create a security zone to store the backup files to prevent the backup files from malware attacks. Besides powerful backup features, EaseUS Todo Backup performs well in the cloning field. It supports users to clone a single disk, partitions, and system without data loss.
If you value your backup security, you can download EaseUS Todo Backup and have a try on it.
Secure Download
Step 1. Select Backup Contents
On the main window, click the big question mark button to select backup contents. You can choose to back up individual files, entire disk or partition, operating system and mails.

Step 2. Select Security Zone as Backup Destination
While selecting backup destination, you can see the Security Zone option. Click Security Zone and use it as a backup destination.
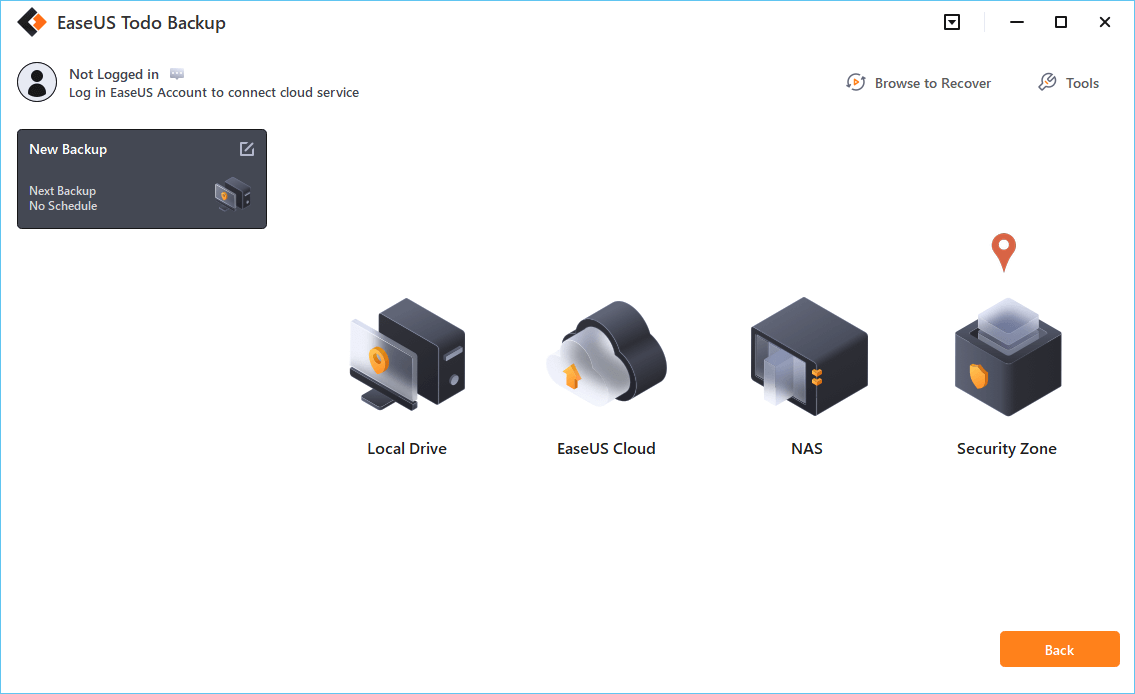
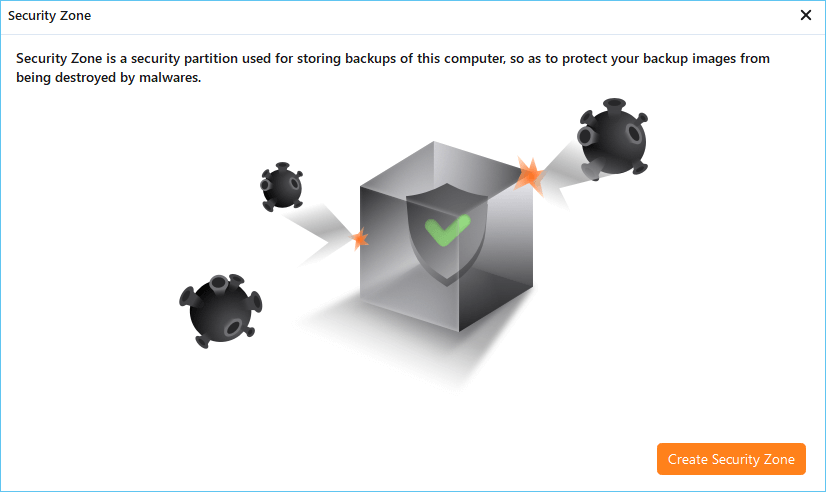
However, if you're first to use the Security Zone function, EaseUS Todo Backup will guide you to create one. Click "Create Security Zone".
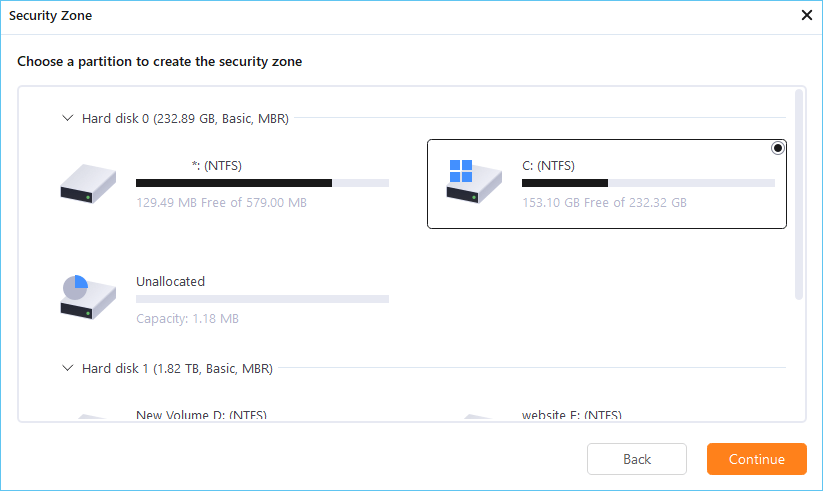
Choose a partition with enough free space for your backups and then click "Continue".
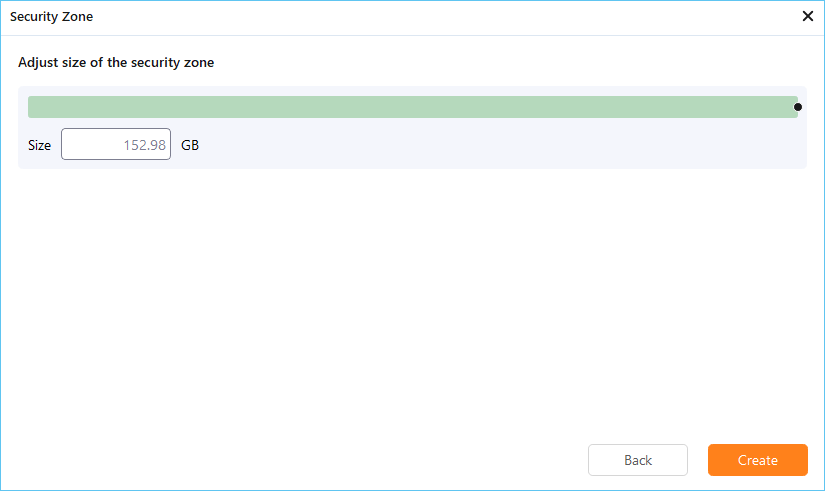
You can adjust the partition size for the security zone. Click "Create" to get it done.
Step 3. Execute the backup task
Click "Backup Now" to start the backup process. Your backups of OS, files, drives and mails in the security zone will be fully protected from being seen or destroyed by virus, ransomeware and trojan.
The Bottom Line
In this article, we have told you the detailed steps of how to disable Windows Defender on Windows 11. You can both temporarily and permanently stop Windows Defender. Also, if you want to protect your data with creating backup files, EaseUS Todo Backup is a good choice and it has the winning feature of creating a security zone.
Was this page helpful? Your support is truly important to us!

EaseUS Todo Backup
EaseUS Todo Backup is a dependable and professional data backup solution capable of backing up files, folders, drives, APP data and creating a system image. It also makes it easy to clone HDD/SSD, transfer the system to different hardware, and create bootable WinPE bootable disks.
Secure Download
-
Updated by
![]()
Daisy
Daisy is the Senior editor of the writing team for EaseUS. She has been working at EaseUS for over ten years, starting as a technical writer and moving on to being a team leader of the content group. As a professional author for over ten years, she writes a lot to help people overcome their tech troubles.…Read full bio -
Written by
![]()
Jean
Jean is recognized as one of the most professional writers in EaseUS. She has kept improving her writing skills over the past 10 years and helped millions of her readers solve their tech problems on PC, Mac, and iOS devices. …Read full bio
Related Articles
![]() How to Perform System Restore from Command Prompt Windows 11
How to Perform System Restore from Command Prompt Windows 11![]() Lenovo OneKey Recovery Free Download for Windows 10 64 Bit/32 Bit
Lenovo OneKey Recovery Free Download for Windows 10 64 Bit/32 Bit![]() How to Backup GTA V Files on Steam (2026 New Guide)
How to Backup GTA V Files on Steam (2026 New Guide)![]() Step-by-Step Guide: How to Turn Off Windows Backup
Step-by-Step Guide: How to Turn Off Windows Backup![]() Free Download PXE Boot Server to Boot Multiple Computers on Network
Free Download PXE Boot Server to Boot Multiple Computers on Network![]() How to Update Acer BIOS with No Data Loss
How to Update Acer BIOS with No Data Loss


Topic Clusters


Interesting Topics