
Content
Page Table of Contents
About the Author
Hot Topics
Everything You Should Know about Windows 7 to SSD Migration:
| 🎯Goal: | Safely migrate Windows 7 to SSD. No data loss, no boot issue. |
| 🧰Tools: | SSD with connection cable, screwdriver, Windows 7, OS migration tool |
| ⏱️Duration: | 30-45 minutes |
| 🔢Procedure: |
|
Installing an SSD and setting it as the system disk is a quick way to upgrade your Windows 7 computer and improve performance. But most users don't want to reinstall because this process needs to set up Windows, all the apps, and get all the critical files and folders back on the new hard drive.
Here, we will show you two ways to transfer OS from HDD to SSD on Windows 7: moving Windows 7 only to a new SSD, and cloning the entire Windows 7 OS disk to SSD. Continue reading to learn the details.
The following methods also apply to help you upgrade the OS disk in higher operating systems, such as to:
Preparation: Install SSD and Initialize It for Windows 7 Migration
- ⏱️Duration: 5-15 minutes
- 🧰Tools: SSD (and its connection cable), Screwdriver, Windows 7 computer, Disk Management
The most direct way to get the SSD into your system is to install it physically, connect the right cables, and reinstall Windows from scratch. The ways to install SSD in desktop and laptop computers are a bit different, and here is how to do so:
#1. How to Install a New SSD
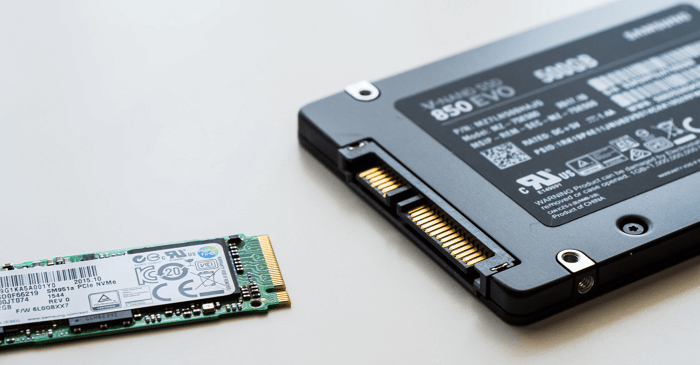
To ensure a smooth Windows 7 migration process, get a larger SSD than the used space of the Windows 7 OS drive. Follow these steps to install a new SSD on your computer:
Install an SSD on the laptop:
- Shut down your laptop, unplug the power, remove the battery, and uninstall the old hard drive
- Connect the SSD to the motherboard using a SATA cable
- Reinstall the battery, plug-in power, and restart the laptop
Install an SSD on a desktop computer:
- Open your desktop computer case
- Connect the SSD to the motherboard using a SATA cable
- Connect the power cord to the SSD
- Install the new SSD into the computer's drive bay
- Close the computer case, plug in all cables
- Power on the computer
Extended Reading: How to Install a Second SSD
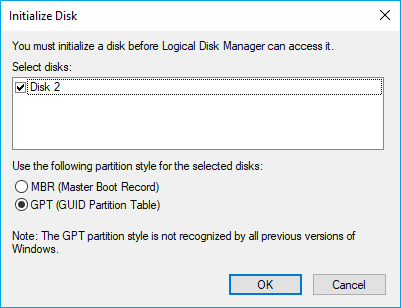
#2. Initialize SSD
Initializing SSD to the same disk partition style as the Windows 7 OS disk also affects system migration. Here is how to do so:
- Right-click the Windows icon and select "Disk Management".
- Locate and right-click on the target SSD and select "Initialize Disk".
- Set MBR or GPT to the SSD.
Method 1. Migrate Windows 7 to SSD with System Migration Software
- ⏱️Duration: 20-25 minutes
- 🧰Tools: SSD (and its connection cable), Screwdriver, Windows 7 computer, OS migration software
To move Windows 7 from HDD to SSD, using a reliable OS migration tool such as EaseUS Partition Master can efficiently save your energy and time. This software provides you with "Migrate OS" function to migrate Windows 7 OS to SSD with installed applications and C drive data. You don't need to worry about the procedure being too complex or the system boot issue. Now, download this software and follow the step-by-step guide to finish moving Windows 7 to SSD.
Steps to migrate OS to HDD/SSD:
- Run EaseUS Partition Master, and select "Clone" from the left menu.
- Check "Migrate OS" and click "Next".
- Select the SSD or HDD as the destination disk and click "Next".
- Check Warning: the data and partitions on the target disk will be deleted. Make sure that you've backed up important data in advance. If not, do it now.
- Then click "Yes".
- Preview the layout of your target disk. Then click "Start" to start migrating your OS to a new disk.
- After this, click "Reboot Now" or "Done" to determine if you want to reboot the computer from the new disk immediately.
"Reboot Now" means to keep the changes instantly, while "Done" means you need to restart the computer later manually.

Note: The operation of migrating OS to SSD or HDD will delete and remove existing partitions and data on your target disk when there is not enough unallocated space on the target disk. If you saved important data there, back up them to an external hard drive in advance.
Let's check what else EaseUS Partition Master can do for you after moving Windows 7 to SSD.
- Extend system partition, or resize/move partition on SSD
- Create, format, copy, and delete partitions.
- Support converting GPT to MBR or from MBR to GPT.
Feel free to share this method to help more of your friends online to switch their system from old computers' disks to faster SSDs:
Method 2. Clone Windows 7 to SSD by System Clone
- ⏱️Duration: 20-25 minutes
- 🧰Tools: SSD (and its connection cable), Screwdriver, Windows 7 computer, EaseUS Partition Master
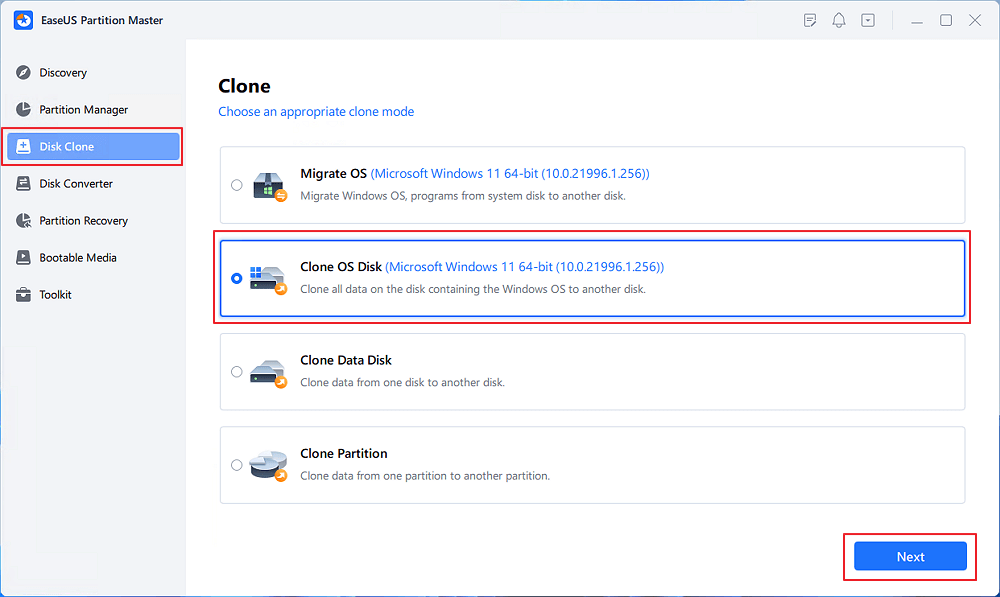
Another effective method to migrate OS to SSD is using the Clone Entire OS Disk feature in EaseUS Partition Master. This software enables you to clone the complete installation of Windows 7 to the SSD as long as the disk is large enough to hold the OS.
Now, let's see how to clone Windows 7 to SSD with detailed guides.
Step 1. Launch EaseUS Partition Master, go to the Disk Clone tab, select "Clone OS Disk" and click "Next".
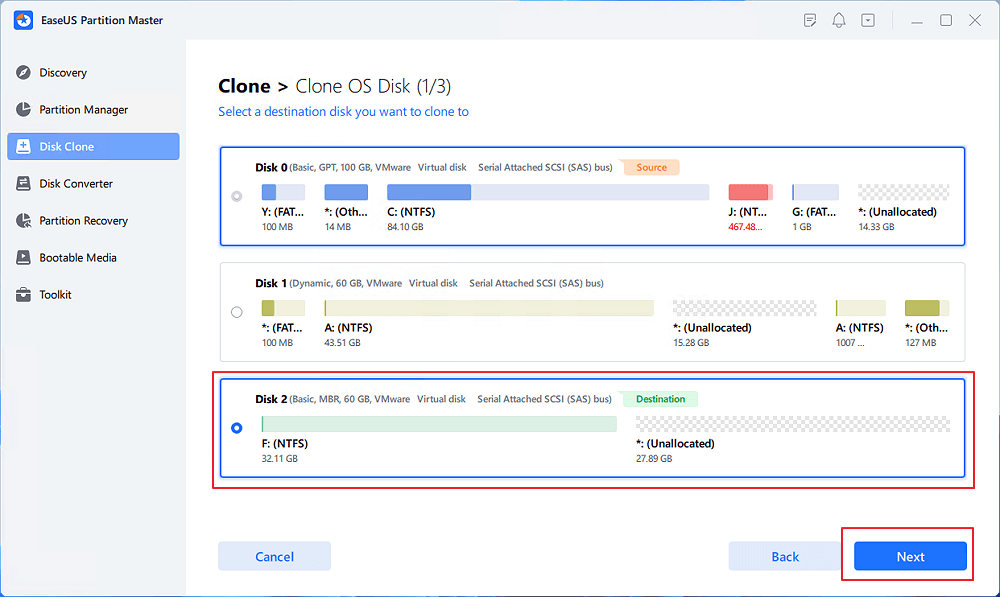
Step 2. Select the target new drive where you want to clone the OS to, and click "Next".
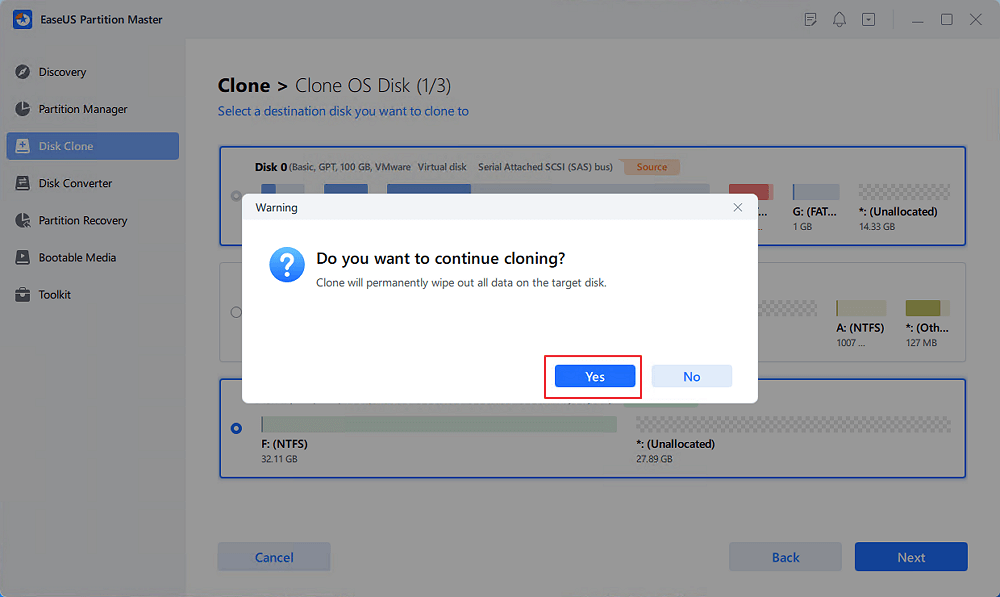
Click "Yes" to confirm that you want to continue the OS disk cloning process.
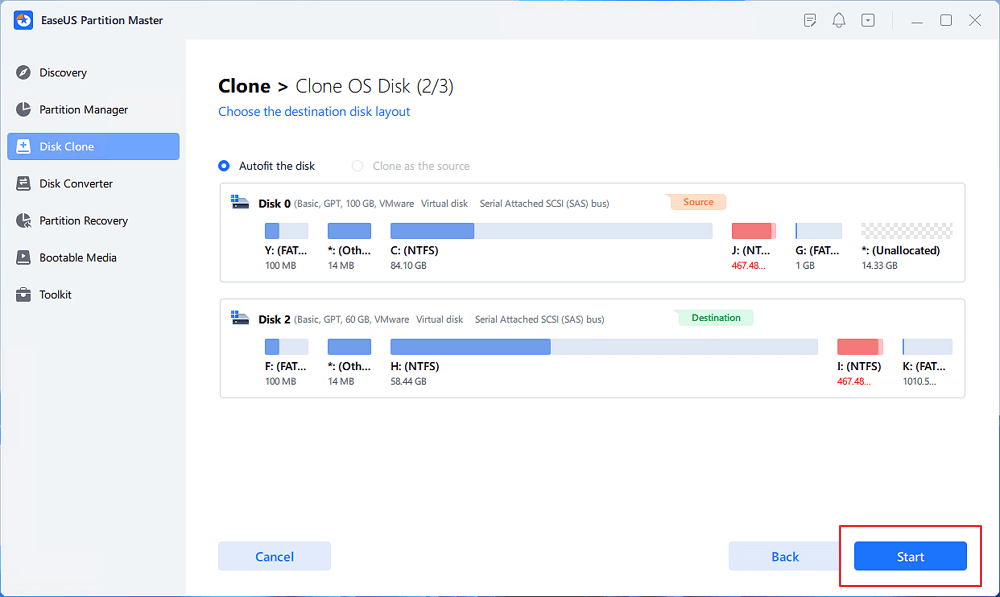
Step 3. View the disk layout, and click "Start" to begin the OS cloning process.
Step 4. When the process completes, you'll see a confirming message, asking "if you want to start up computer from the clone target disk".
- Reboot Now means to reboot your PC and configure the computer to boot OS from the new disk immediately.
- Done means you want to make the changes later.
Afterward: Make Windows 7 Bootable on SSD
- ⏱️Duration: 5-8 minutes
- 🧰Tools: Windows 7 computer, BIOS settings
After transferring Windows 7 to the new SSD, you can simply unplug the old hard drive and reboot the PC, and the computer will automatically boot from SSD. If you want to use the hard drive in Windows 7, you can switch the boot drive from the old OS drive to the new SSD in BIOS settings.
Here is how to do so:
Warning: Be careful when you enter Windows 7 BIOS settings to set the new SSD with OS as the boot drive.
- Restart the Windows 7 computer.
- Press the Del key to enter SETUP.
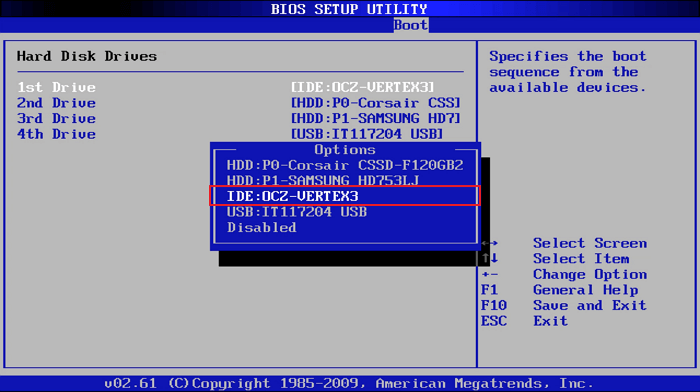
- When you enter the Setup utility, switch to the Boot menu.
- Then, use the down arrow to select the SSD as boot drive in the 1st Drive section.
So, this is the complete procedure of moving Windows 7 from HDD to SSD. You can not boot the Windows PC from the new SSD without any boot issues. If you like this tutorial, feel free to share it with more of your friends online:
Summary of Transferring Windows 7 to SSD
How do I transfer my Windows 7 over to an SSD?
My desktop computer is win7 how do I transfer the os only to ssd hard drive. from Microsoft
Don't worry if you are experiencing a similar issue or you are looking for an efficient way to switch Windows 7 with installed programs to a new SSD.
You can easily migrate Windows 7 from HDD to SSD using either of the above methods. The Migrate OS and Clone OS Disk features in EaseUS Partition Master can help you execute the operation more easily and flexibly.
You may also apply these two features to accomplish many complex migration tasks, especially when you need to upgrade hard disk from an old to a new one, from a smaller to a larger one, or from a hard disk drive to a solid-state drive without reinstalling OS.
FAQs about Clone Windows 7 to SSD
If you have further questions about migrating or cloning Windows 7 to SSD, follow the listed questions here and find answers below:
1. Can you clone a Windows 7 hard drive?
Yes, you can use the Clone feature in EaseUS Partition Master to clone the Windows 7 hard drive.
- Connect a new disk to Windows 7.
- Initialize the disk as the same disk type as the Windows 7 hard drive.
- Launch EaseUS Partition Master, go to Clone, select "Clone entire OS disk".
- Select the Windows 7 hard drive as the source disk and, select the new hard drive as the destination, click "Next".
- Click "Execute Task".
2. Can I just copy Windows to my SSD?
Yes, you can. You can apply the Copy Partition feature in EaseUS Partition Master to copy the OS and System partition separately to SSD. Then set the SSD as the boot drive so to make Windows bootable on the new SSD.
3. How do I duplicate Windows 7?
To duplicate Windows 7, you can use a reliable system clone software such as EaseUS Partition Master for help. It enables you to clone the entire Windows 7 disk to a new drive in simple clicks as the two methods showed you above.
4. Can you put Windows 7 to an SSD?
Yes, sure. You can simply put Windows 7 on an SSD disk by following the two methods provided in this tutorial article. Or you can also directly reinstall Windows 7 on SSD. If you prefer to reinstall the OS, go to check how to fresh install Windows on SSD.
How Can We Help You
About the Author
Updated by Tracy King
Tracy became a member of the EaseUS content team in 2013. Being a technical writer for over 10 years, she is enthusiastic about sharing tips to assist readers in resolving complex issues in disk management, file transfer, PC & Mac performance optimization, etc., like an expert.
Brithny is a technology enthusiast, aiming to make readers' tech lives easy and enjoyable. She loves exploring new technologies and writing technical how-to tips. In her spare time, she loves sharing things about her game experience on Facebook or Twitter.
Product Reviews
-
I love that the changes you make with EaseUS Partition Master Free aren't immediately applied to the disks. It makes it way easier to play out what will happen after you've made all the changes. I also think the overall look and feel of EaseUS Partition Master Free makes whatever you're doing with your computer's partitions easy.
Read More -
Partition Master Free can Resize, Move, Merge, Migrate, and Copy disks or partitions; convert to local, change label, defragment, check and explore partition; and much more. A premium upgrade adds free tech support and the ability to resize dynamic volumes.
Read More -
It won't hot image your drives or align them, but since it's coupled with a partition manager, it allows you do perform many tasks at once, instead of just cloning drives. You can move partitions around, resize them, defragment, and more, along with the other tools you'd expect from a cloning tool.
Read More
Related Articles
-
How to Format NVMe SSD in Windows 10/11 [Full Guide]
![author icon]() Tracy King/2026/06/17
Tracy King/2026/06/17 -
How to Move Recovery Partition Windows 10 (Easy & Safe)
![author icon]() Oliver/2026/07/01
Oliver/2026/07/01 -
Ender 3 SD Card Format: Fix Ender 3 Not Reading SD Card
![author icon]() Tracy King/2026/06/30
Tracy King/2026/06/30 -
Can't Change Letter or Unable to Assign Drive Letter to D/E/F/G
![author icon]() Daisy/2026/06/17
Daisy/2026/06/17


