Featured Articles
- 01 How to Install, Initialize and Partition SSD
- 02 How to Clone HDD to SSD
- 03 How to Migrate OS from HDD to SSD
- 04 How to Format SSD on Windows
- 05 How to Securely Erase SSD
- 06 How to Install Windows 10/11 on SSD
- 07 Use SSD and HDD Together on Windows 11/10
- 08 How to Free Up Space on SSD in Windows
- 09 SSD Fix 1: Repair Corrupted SSD
- 10 SSD Fix 2: SSD Not Initialized
- 11 Repair and Restore Not Working/Failed/Dead SSD
Compared with HDD, SSD enables you to enjoy faster reading and writing speed, better performance and reliability, and more robust durability. However, SSDs often have smaller storage than HDDs. In 2018, SSDs were available in sizes up to 100 TB but less costly, 120 to 512 GB models were more common.
[Top 6 Ways] How to Free Up SSD Space in Windows 10/8/7
That is to say, the commonly used SSD is 120 to 512 GB. Because of the small size, SSD gets full easily. Most people are looking for ways to free up SSD space.
- Fix 1. Clean Up Junk Files
- Fix 2. Disable System Restore
- Fix 3. Empty Recycle Bin
- Fix 4. Use Disk Cleanup
- Fix 5. Disable Hibernation
- Fix 6. Uninstall or Transfer Programs
Before you free up space on your SSD, find out what's taking up space on your SSD first.
Further Reading: Free Up Disk Space on Windows 8
What's Eating Up SSD Space
There's nothing worse than running out of space. The following steps can help you figure out what is taking up space on my SSD in Windows 10.
Note: If you want to know detailed information about SSD space, you can use a professional space analyzer to analyze disk space on Windows.
Step 1. Go to "Start > Settings > Storage".
Step 2. In the Storage window, you’ll get a view of the space usage situations on all your drives and partitions as shown in the image below:
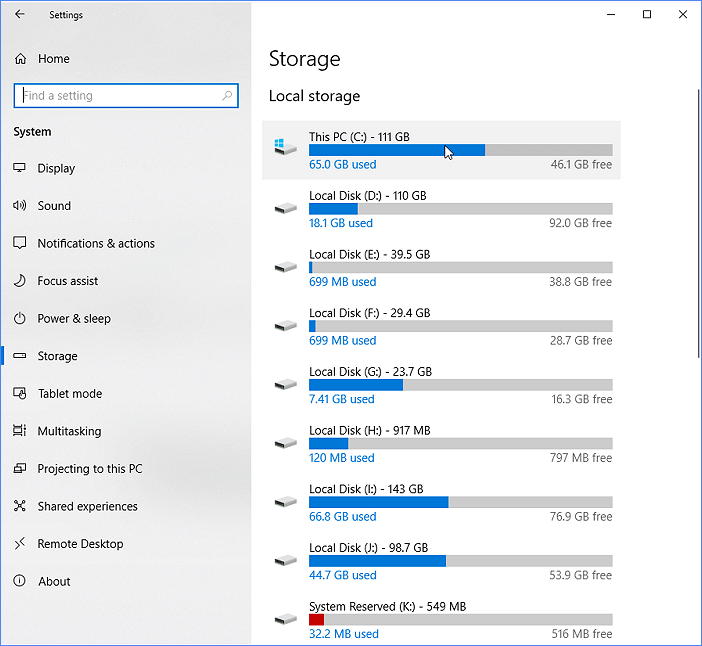
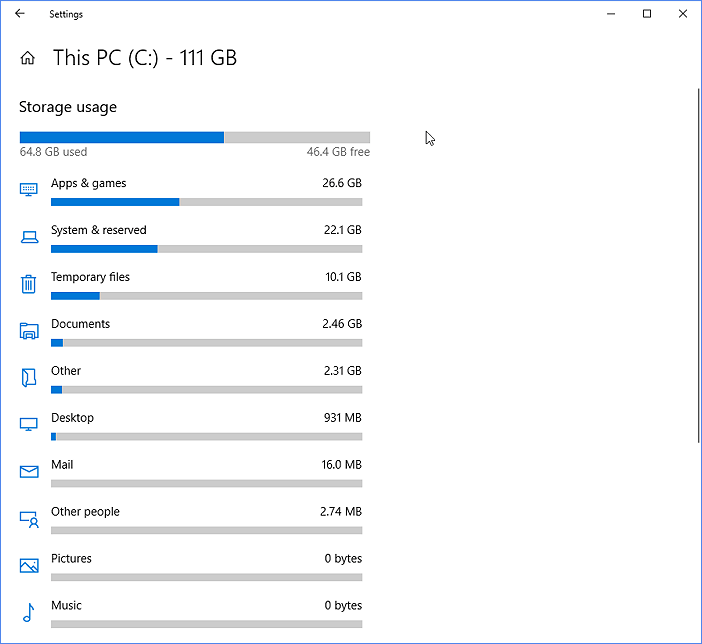
Step 3. Select the SSD, often it includes C drive. Click on it to see what’s taking up the most space on the partition.
🔥Further Reading: How to Find Large Files on Windows 10
You have figured out what's taking up space on your SSD, so follow the tried-and-true solutions to free up SSD space.
Solution 1. Clean Up SSD Junk Files in Windows 10/8/7
The easy and fast way to clean up junk files is to use third-party software. With reliable junk file cleanup software, you can easily remove files that are eating up your SSD space in Windows 10/8/7. EaseUS Tools is my recommendation. With this software, you can easily get rid of SSD junk files without any cost. In addition to system cleanup, this software also supports large file clean up, disk repair, and more.
Step 1. Download and install EaseUS Partition Master Suite.
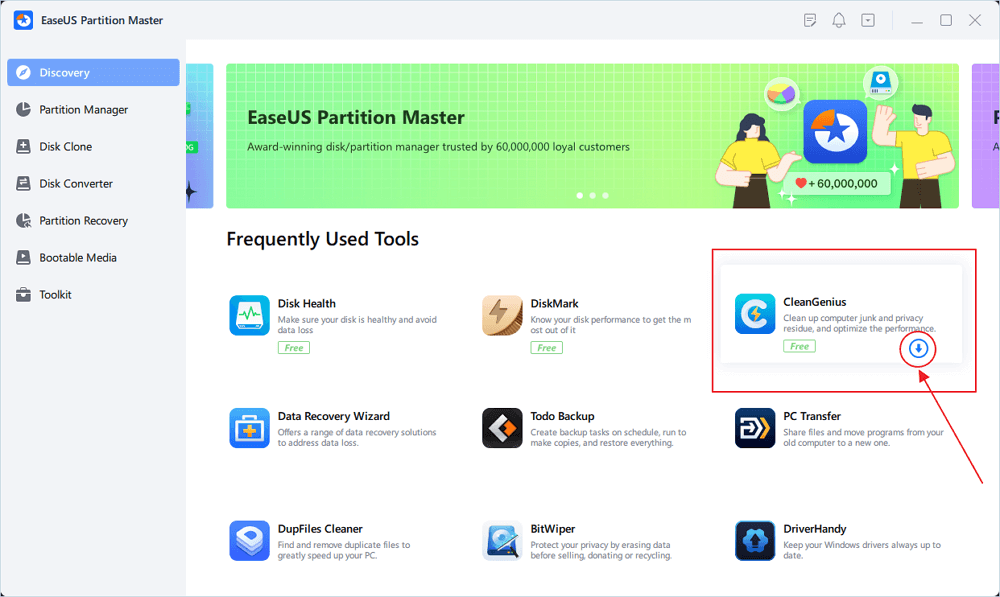
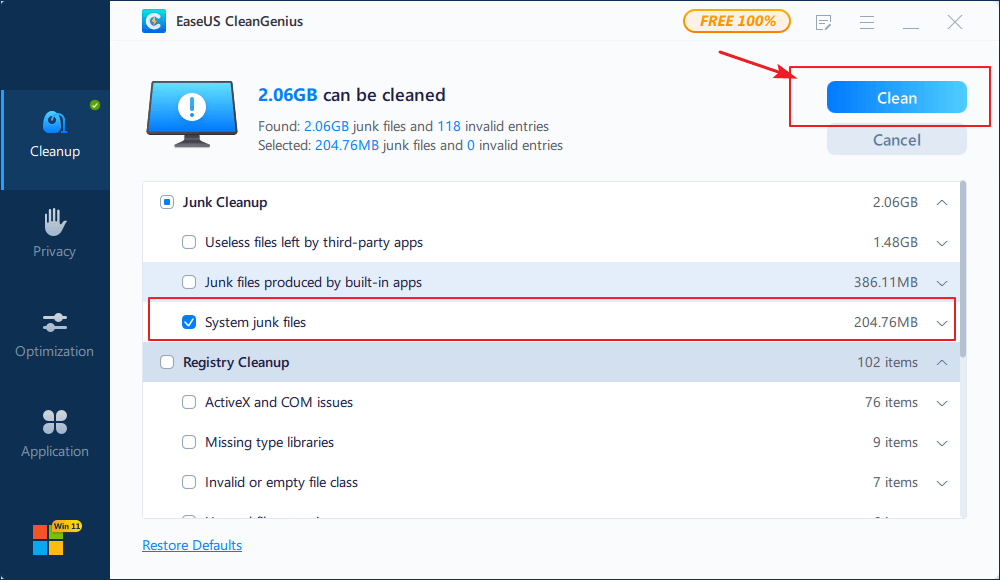
Step 2. Click PC Cleaner and install EaseUS CleanGinus. Then, click "Cleanup" and click "Scan" to start cleaning up the system and make your PC as good as new.
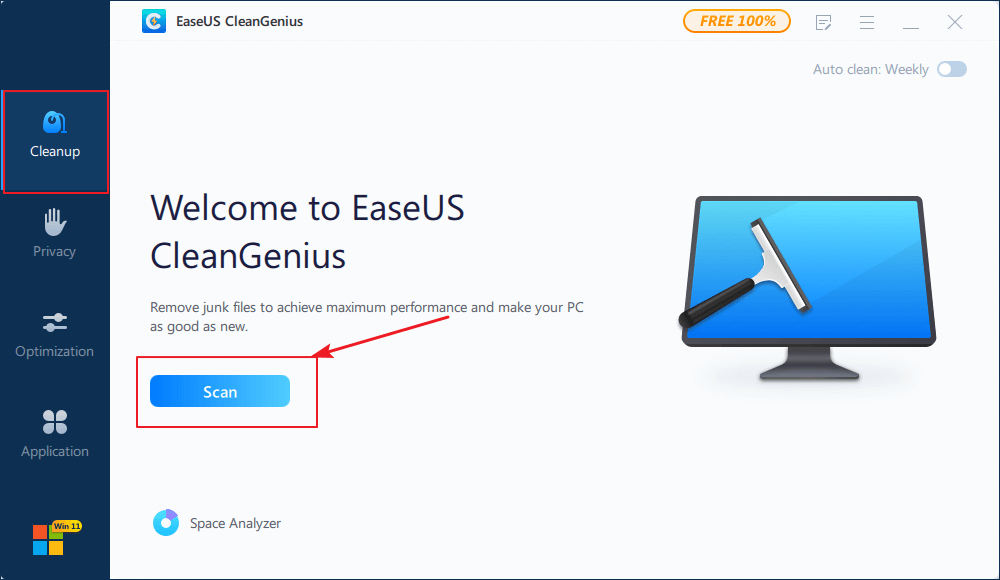
Step 3. The software will scanning all over your computer to find idle data files that take a huge amount of disk space, you can select useless large files, system junk files and Windows invalid entries and click "Clean" to start system cleanup process.
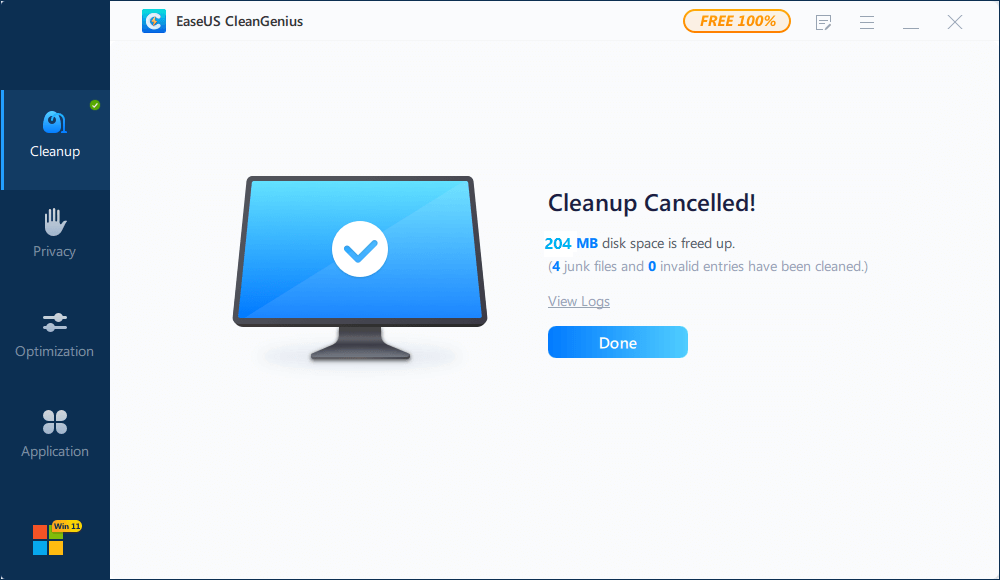
Step 4. When the scan is complete, click "Done" to finish cleaning system junk files.
Solution 2. Disable System Restore to Free Up Space
System Restore is a Windows feature that can help fix certain types of crashes and other computer problems. However, it could take up much space and this approach is not very effective. If there is something wrong with your system, a system clone utility is a better choice. Here, I advise you to disable System Restore.
Step 1. Right-click "This PC" and then click "Properties".
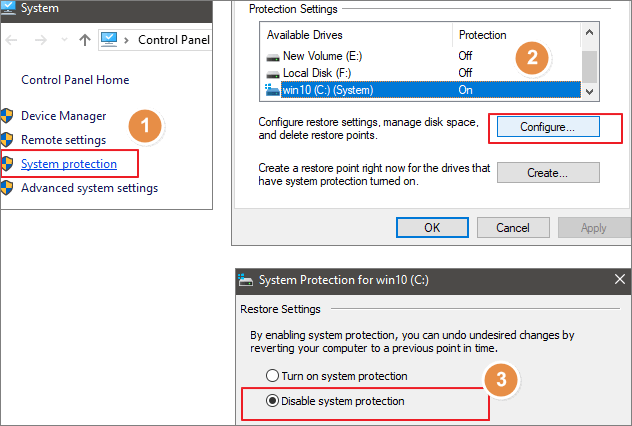
Step 2. Select "System Protection" on the left pane.
Step 3. Select the disk you want to turn off System Protection for and click "Configure"
Step 4. Select "Disable system protection", and click "OK".
Solution 3. Empty Recycle Bin to Get More Free Space
As a matter of fact, deleted files often go to Recycle Bin. It will remain there until you empty the Recycle Bin or restore the file from it. It's obvious that these files are taking up your SSD and HDD space. To empty a Recycle Bin:
Right-click on the Recycle Bin icon located on your desktop and select "Empty Recycle Bin". You can also create an auto-deletion to regularly empty Recycle Bin:
Step 1. Open Start, do a search for Task Scheduler, and press "Enter".
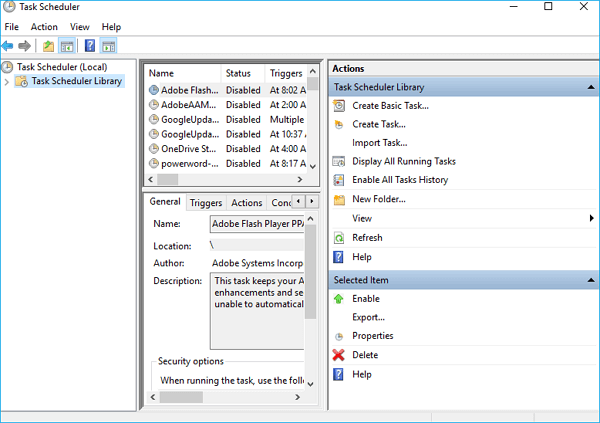
Step 2. Right-click "Task Scheduler Library" and click "New Folder". Name the folder My Tasks or anything descriptive. (You want to do this to keep your tasks organized and separated from the system tasks.) Right-click the newly created folder and select Create task.

Step 3. On the General tab, enter a name for the task, such as "Empty Windows Recycle Bin".

Step 4. On the Triggers tab, click New to create an action that will trigger the task.
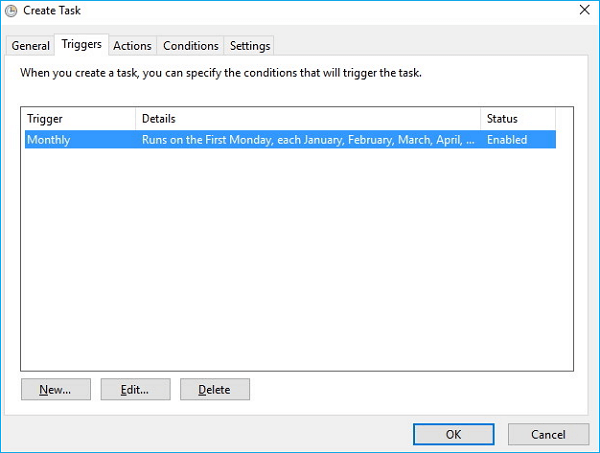
Step 5. For the purpose of this guide, I'll select and configure On a schedule, but you can pick from a number of trigger actions, including At log on, At startup, On an event, and more.
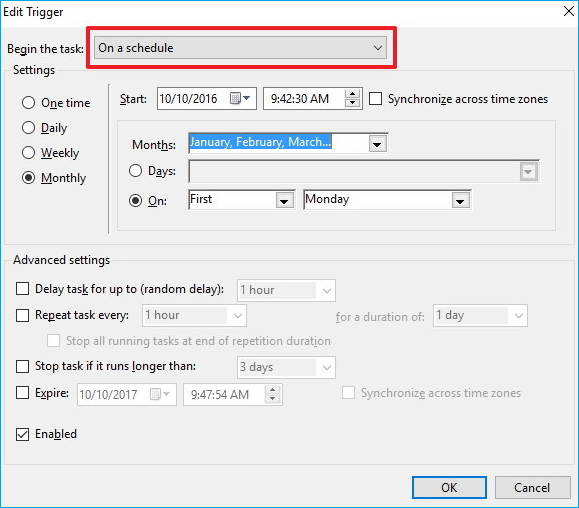
If you're using the schedule option as a trigger, consider using the Weekly or Monthly option, which will give you some time to recover deleted files.
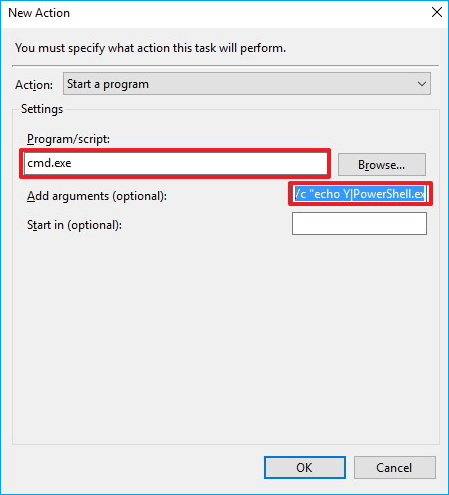
Step 6. On the Actions tab, click "New". Then, follow the steps below:
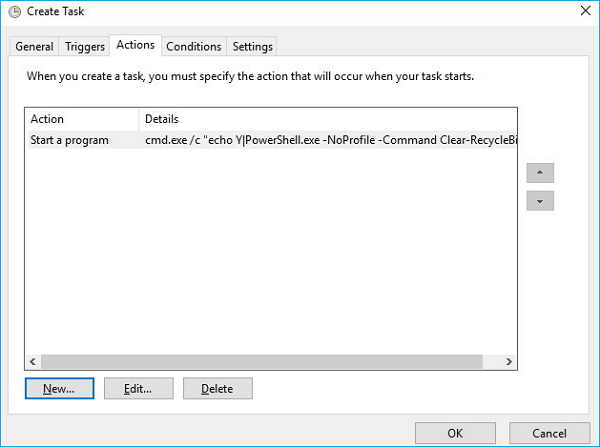
- Under Settings, on Programs/script enter cmd.exe.
- Under Settings, on Add arguments enter the following argument and click OK:
- /c "echo Y|PowerShell.exe -NoProfile -Command Clear-RecycleBin" Then click OK to complete the task.
Once you completed the steps, the task will run automatically at the trigger condition you have configured.
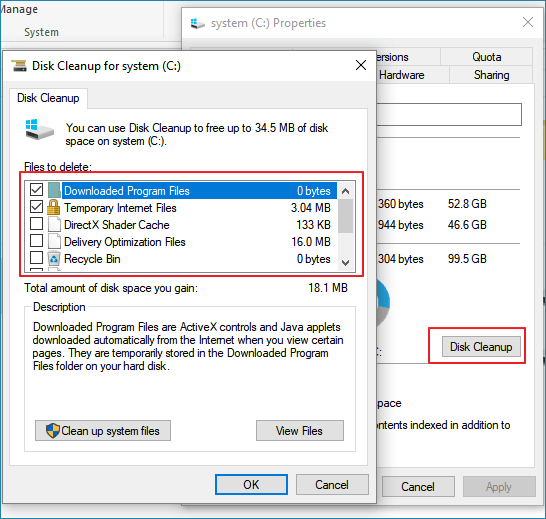
Solution 4. Use Disk Cleanup to Delete Temp Files
Temp files could also occupy lots of SSD space. Using Disk Cleanup to delete various temporary files, which are no longer needed is a good idea.
Step 1. Open "Start", search for "Disk Cleanup" and select the top result to open the experience.
Step 2. Select files that you want to delete from the C drive or other drives. Then, click the "OK" button.
Solution 5. Disable Hibernation in Windows 7
Windows 7 still had the Hiberfil.sys file. The Hiberfil.sys is a hidden system file located in the root folder of the drive where Windows is installed. The Windows Kernel Power Manager creates this file when you install Windows. But it still takes up lots of space. Having Windows 7 installed on an SSD means that it will boot in seconds, so you won't need hibernation anymore. To make hibernation unavailable, follow the steps below:
Step 1. At the start, search for cmd. Right-click "Command Prompt", and then click "Run as Administrator".
Step 2. At the command prompt, type powercfg.exe /hibernate off, and then press "Enter".
Step 3. Type exit, and then press "Enter" to close the Command Prompt window.
Solution 6. Uninstall or Transfer Programs to Another Drive
If some apps or games are taking up too much space, removing apps that you don't need is another way to reclaim additional space on your device. You can uninstall them by the following steps:
Open "Settings > Apps > Apps & features". Select the app or game that you want to remove and click the "Uninstall" button.
There's a better choice, move the apps or games to another drive. You can still keep the programs and free up SSD space at the same time. To easily transfer programs to another drive, download EaseUS Todo PCTrans and move all wanted apps to another hard drive or partitions to save space
Was This Page Helpful?
Daisy is the Senior editor of the writing team for EaseUS. She has been working at EaseUS for over ten years, starting as a technical writer and moving on to being a team leader of the content group. As a professional author for over ten years, she writes a lot to help people overcome their tech troubles.
Brithny is a technology enthusiast, aiming to make readers' tech lives easy and enjoyable. She loves exploring new technologies and writing technical how-to tips. In her spare time, she loves sharing things about her game experience on Facebook or Twitter.
Related Articles
-
Menu Bar Missing on Mac Monterey? Keep Menu Bar Visible on Mac
![author icon]() Jaden/Jan 24, 2025
Jaden/Jan 24, 2025 -
3 Ways to Fix USB Device_Descriptor_Failure Error in Windows
![author icon]() Tracy King/Jan 24, 2025
Tracy King/Jan 24, 2025 -
Laptop Turns Off When Unplugged - How to Fix?
![author icon]() Jerry/Jan 24, 2025
Jerry/Jan 24, 2025 -
How to Turn off System Restore Windows 10 [Three Ways]
![author icon]() Jerry/Jan 24, 2025
Jerry/Jan 24, 2025