-
![]()
-
![]() Genshin Impact Size on Laptop/PS4/Mobile [All You Need to Know]
Genshin Impact Size on Laptop/PS4/Mobile [All You Need to Know] June 16,2026
 6 min read
 -
![]() It Takes Two Lost Save File, How to Recover Lost Progress? [2026 Tips]June 30,20266 min read
It Takes Two Lost Save File, How to Recover Lost Progress? [2026 Tips]June 30,20266 min read -
![]() How to Recover Corrupted Macro Enabled Excel File with Top 5 WaysJune 17,20266 min read
How to Recover Corrupted Macro Enabled Excel File with Top 5 WaysJune 17,20266 min read -
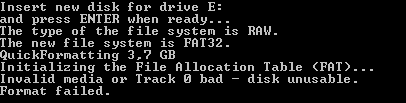
![]() How to Fix Invalid Media or Track 0 Bad - Disk Unusable Error in 8 WaysJune 30,20266 min read
How to Fix Invalid Media or Track 0 Bad - Disk Unusable Error in 8 WaysJune 30,20266 min read -
![]()
-
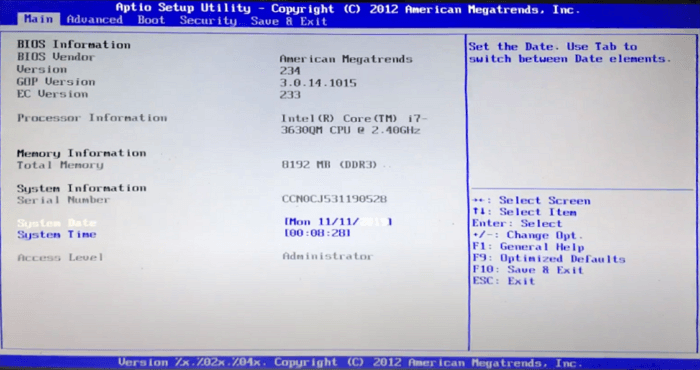
![]() Aptio Setup Utility Ultimate Guide | How to Access/Fix ItJune 29,20266 min read
Aptio Setup Utility Ultimate Guide | How to Access/Fix ItJune 29,20266 min read -
![]() BSOD After Installing SSD | Solved Without Losing DataJune 16,20266 min read
BSOD After Installing SSD | Solved Without Losing DataJune 16,20266 min read -
![]() Fix 'Windows Explorer has stopped working' in Windows 11/10/8/7June 16,20266 min read
Fix 'Windows Explorer has stopped working' in Windows 11/10/8/7June 16,20266 min read -
![]() [Solve Windows Defender Error] Fix Windows Error Code 0x80240022June 16,20266 min read
[Solve Windows Defender Error] Fix Windows Error Code 0x80240022June 16,20266 min read
Page Table of Contents
| Workable Solutions | Step-by-step Troubleshooting |
|---|---|
| Fix Error 0x80070490 in Windows Update |
Fix 1. Close Antivirus Software Temporarily...Full steps Fix 2. Run Windows Update Troubleshooter...Full steps Fix 3. Run SFC and DISM Scan...Full steps More fixes... |
|
Fix Error 0x80070490 in the Mail App |
Fix 1. Update Mail App...Full steps Fix 2. Check Email Privacy Settings...Full steps Fix 3. Reset Mail and Calendar...Full steps More fixes... |
| Fix Error 0x80070490 on Xbox |
Fix 1. Restart the Xbox/console...Full steps Fix 2. Factory Reset the Xbox...Full steps |
What Is the Error Code 0x80070490
Many of us use Windows OS, and we also prefer it due to its ease. But sometimes we might encounter an error 0x80070490. Numbers can get confusing, and you do not know what to do. But let us first understand what this error is.
You might have several accounts on different apps and want them to be on your Windows computer. So you try to add another account to your Windows but are greeted by a notification that says that your trial was unsuccessful and gives an error code 0x80070490.
So in simple words, when your Mail on Windows 10/11 fails to add another account of yours, error code 0x80070490 occurs. Also, it happens while updating via Windows Update or when updating an application downloaded from the Microsoft Store.
Reasons for Error Code 0x80070490
We told you how this error code 0x80070490 occurs; your Mail fails to add another account in simple words. Let us now look at this situation more technically, in computer terms, so that you understand it better and comprehend it.
Your Mail on Windows 10/11 fails to add another account because there has been a vitiated file or process in the System Component Store or Component-Based Servicing (CBS). So what are these System Component Store and Component-Based Servicing?
CBS or System Component Store or Component-Based Servicing is an added feature to Windows to make the installation process more manageable. It is more robust and secure than earlier systems. It is responsible for running and taking care of all Windows-related update operations.
Let us look at the various causes of this error in brief:
- An antivirus is trying to protect your system and working against the update or installation since it finds it a third-party object and harmful.
- Vitiated file or process in the System Component Store or Component-Based Servicing (CBS).
- You might have made some settings manually that are becoming an obstacle in the way of updates to be done by WU.
How to Fix Error Code 0x80070490 on Windows 10/11
Now that you know what this error code 0x80070490 signals and for what reasons it is caused, let us now look at how to fix it because you cannot stay with it. Can you? So let us get going with how to fix it on Windows 10/11, and we will see how to fix it on devices further in this article.
Even if you do not encounter this issue on your Windows 10/11, you can surely still follow it since it will help solve any other problems related to updates and installation. This method is strictly for Windows 10/11 and might not support other devices, so only follow it for Windows 10/11.
So now we will look at three ways to fix this error, so let us get going.
Fix 1. Close Antivirus Software Temporarily
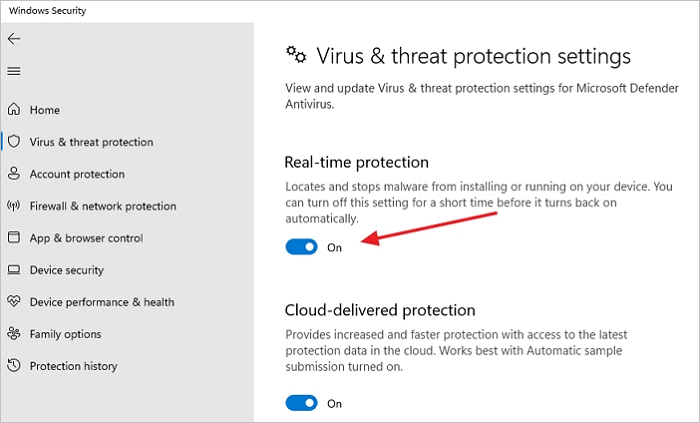
This error code 0x80070490 could be caused due to some antivirus. So we will have to disable it to let the update and installation process flow. Also, make sure that you have an antivirus installed on your system to follow this method, or you could skip to any other.
Disabling an antivirus for installation and updating isn't that difficult. You only have to disable its firewall and Real-time protection. Once you are done doing this, you can try installing or updating again.
If it runs, congratulations! You have completed the process, and you can reinstall your antivirus. If this did not work for you, let us move on to the following method.
Fix 2. Run Windows Update Troubleshooter
You can fix this issue with a feature that Windows provides in its recent versions. The built-in troubleshooter can resolve most Windows Update-related issues.
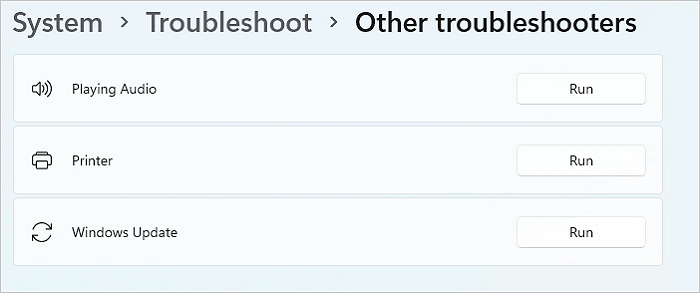
Step 1. Open Windows Settings using Win + I, and go to "System > Troubleshoot > Other troubleshooters".
Step 2. Locate the Windows update troubleshooter, and click on the Run button.
Step 3. Let the wizard complete the process, and once it's done, try to update Windows.
Fix 3. Run SFC and DISM Scan
Windows is well prepared for problems related to its files and provides solutions for them. The System File Checker will perform scanning of your windows, look for corrupted files like bugs, and try to repair them.
Let us see how you can use System File Checker.
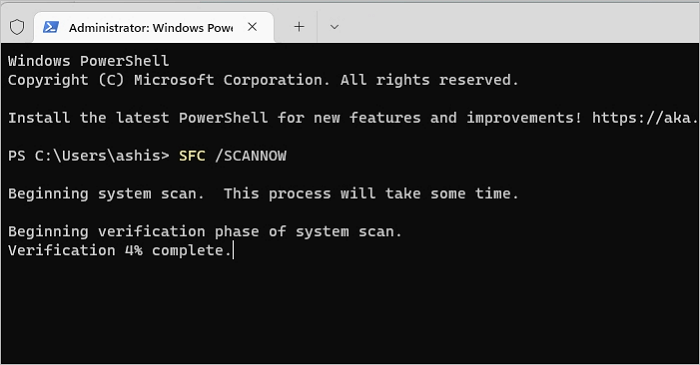
Step 1. On the start bar, type cmd and then right-click on Command Prompt and select Run as administrator.
Step 2. Next, on Command Prompt, type SFC /scannow and tap Enter.
Step 3. Once the System File Checker completes its job, it will tell you if the CBS store is corrupted or not.
If you get a message that says-Windows Resource Protection did not find any integrity violations, then there is no error.
Since there is no error, you can then run the DISM command to replace those old files.
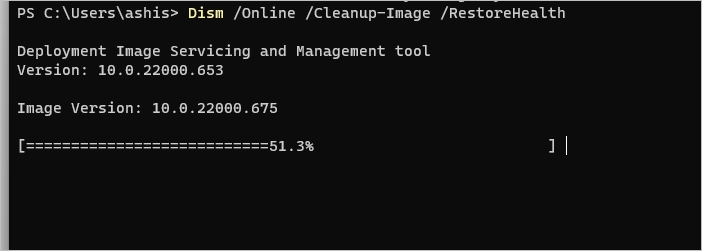
Step 1. In the admin command prompt, type and execute the following command:
Dism /Online /Cleanup-Image /RestoreHealth
Step 2. Once it's done scanning and replacing those files, you will need to restart the Window Update Service. Open Run prompt using Win + R, and then type services.msc and press the Return key.
Step 3. In the services list, look for Windows Update, right-click and select Restart. Once the system gets restarted, again do the procedure with Windows Module Installer. You can try updating now.
Fix 4. Reset Windows Update Components
Since you are now on the fourth method, the methods above did not work out well. No problem, this method could help you through, or else we also have a final solution to this error.
We will manually reset Windows update components and SoftwareDistribution and Catroot2 folders to create updates in this method.
Step 1. Click the start bar and search for cmd. Right-click on "Command Prompt" and select "Run as administrator".
Step 2. We will stop BITS, Cryptographic, MSI Installer, and Windows Update services. Paste the following on the Command prompt and press enter after each line:
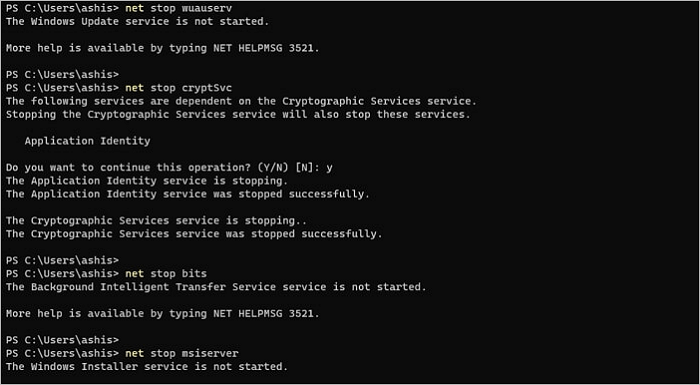
net stop wuauserv
net stop cryptic
net stop bits
net stop msiserver
Step 3. Now that the services are disabled, rename the Catroot2 and SoftwareDistribution folders. Pate the following on the command prompt and press enter after each line:
ren C:\Windows\SoftwareDistribution SoftwareDistribution.old
ren C:\Windows\System32\catroot2 Catroot2.old
Step 4. Restart the services. Do the same with the codes below that you did before, paste on the Command prompt, and press enter after each one.
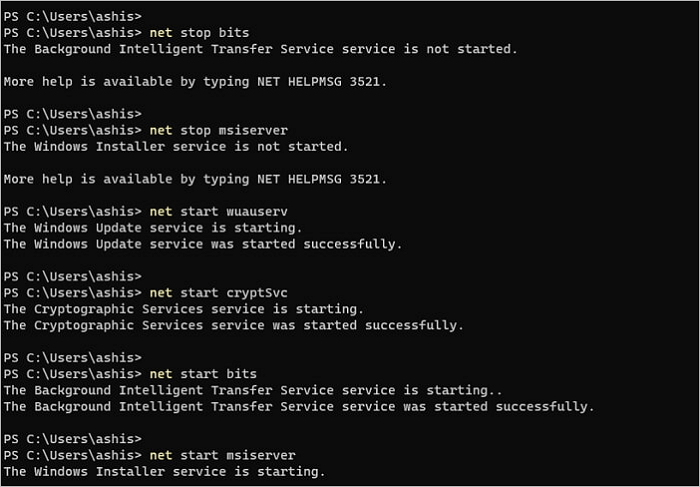
net start wuauserv
net start cryptSvc
net start bits
net start msiserver
Step 5. Lastly, all you have to do now is restart your system and try to perform the main task, updating. If this method doesn't work, move on to the final solution.
Fix 5. Perform a System Restore
Now we have reached the final solution for this issue. We kept this method at the end so that you get the work done more quickly, but nothing has worked yet; this will. In this method, we will try restoring Windows to a previous version. It will take your Windows back to when there were no issues.

Step 1. Tap Windows+R to open the Run command. Type rstrui and tap Enter; this will open System Restore.
Step 2. Click Next and find Show more restore points. Select a restore point before the application began malfunctioning and click the Next. To start the restoration process, select Finish and then Yes.
Step 3. Once the restoration is done, your system will restart by itself. Now you have the older version of the OS with no error code 0x80070490. And Voila!
Bonus Tip: How to Restore Lost Data for Windows Error Code
While these tips work, there is a chance that you may lose data. If that is the case, you can use EaseUS Data Recovery Wizard to restore lost files. The process works even when the computer doesn't boot.
Main features of EaseUS data recovery software:
- Recover data from formatted partition
- Compatible with any file system, such as FAT12, FAT16, FAT32, NTFS, NTFS5, HFS, HFS+, and exFAT
- Preview files before recovery
- Remote Support for novice users
- Recover and repair corrupted files, including videos, photos, and documents
The best part of using the EaseUS Data Recovery Wizard is that it is straightforward. You don't need to be an expert to use this software, but you can follow the wizard, set your requirement, and extract the lost files. You only need to make sure to extract the files on a separate drive instead of the same drive. The steps of how to use EaseUS Data Recovery Wizard are listed below:
Step 1. Select a drive and start scanning
Launch EaseUS Data Recovery Wizard and hover over the partition where you lost data. This could be an internal hard disk, external disk, USB, or SD card. Then, click "Search for Lost Data".

Step 2. Check and preview scanned files
Use the file format filter on the left or upper right corner to narrow the scan results until you find the files you need. Then, you can click the "Preview" button or double-click a file to preview its content, if you'd like.

Step 3. Recover lost data to a secure location
Click the checkbox next to the file and click "Recover" to restore the lost data to your local storage or Cloud drive. We recommend that you do not store the recovered data on the disk where you lost it earlier.

How to Fix Error Code 0x80070490 in the Mail App
The error code 0x80070490 is a common and harmless error on the Mail app of Windows 10/11. So let us look at the easy methods to fix it.
Fix 1. Update Mail App
App updates are available through the Microsoft Store App.
Step 1. Open the Microsoft Store app from the taskbar or by searching it through the Start Menu.
Step 2. Click on the Library icon at the bottom left to open the update and download section.
Step 3. Click on the Get Updates button, and let Microsoft check if there is an app update available. If yes, it will be listed among other apps.
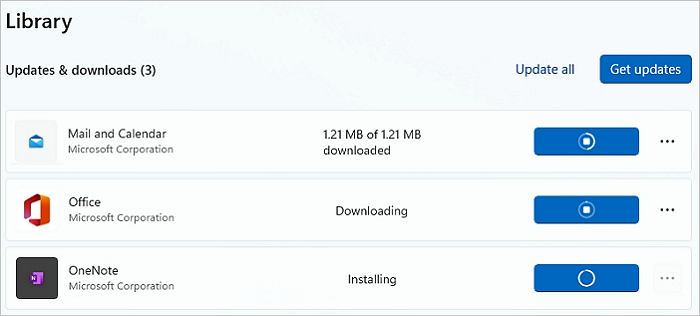
Step 4. Click on the update button next to the Mail app, and let the store download and update it.
Once the update is complete, launch the app and check if it's complete.
Fix 2. Check Email Privacy Settings
Error code 0x80070490 could also occur due to the wrongly made Email settings, so let us fix them.
Step 1. To do that, open Setting and select Privacy & Security, and open Email.
Step 2. Now turn on the switch next to Email Access. Let apps access your email, Mail, and Calendar.

Step 3. Check if you are still facing the issue.
Fix 3. Reset Mail and Calendar
Step 1. In this method, open "Settings", select "Apps", and then "App & Features".
Step 2. Locate the Mail and Calendar app listing and then click on the three-dot menu and the advanced options menu.
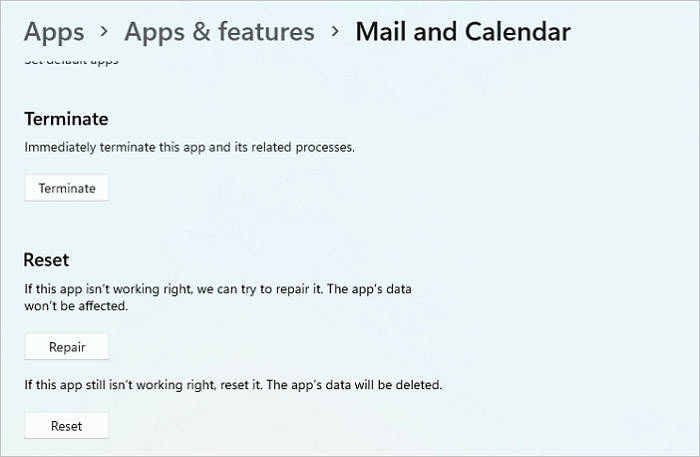
Step 3. Now select Terminate and then, Repair. If the problem gets fixed by just terminating, then all is good. If it does not, you choose further reset and let the process complete.
Fix 4. Reinstall the Mail and Calendar
Now you can move further and install Mail and Calendar, and hopefully, you will not experience error code 0x80070490 again.
Step 1. Right-click the Start button and click on Windows Terminal (Admin) or Windows PowerShell (Admin). This will open the elevated Windows Powershell console.
Step 2. To uninstall the Mail and Calendar apps, paste the following code and run it:
Get-AppxPackage Microsoft.windowscommunicationsapps | Remove-AppxPackage
Step 3. To finally install Mail and Calendar, open the Microsoft Store and install them. Now hopefully, you have got rid of the error code 0x80070490.
How to Fix Error Code 0x80070490 on Xbox
Xbox is a device that many people love, and they buy it to enjoy its services. So why put a break on it due to error code 0x80070490? So let us see how we can fix this situation.
Fix 1. Restart the Xbox/console
Step 1. We will start with the very basic restarting of the system. For this, firstly, shut down the console.
Step 2. Next, unplug everything for a few minutes. After a few minutes, put the plugs back, restart, and try again.
Fix 2. Factory Reset the Xbox
If the above fixes do not work, we will have to factory reset the console. It will remove all your data, so make sure you have a backup of all those before trying out this fix.
Step 1. You can start by turning off your console. Then unplug everything. Here, it is better to wait for a few minutes and replug the power cord.
Step 2. To factory reset, press and hold the BIND button and press the Xbox button on the console.
Step 3. After this, hold BIND and EJECT for 10-20 seconds and wait for it to start, after which you will be taken to the Troubleshooters. Now, select Reset and select Keep your games and apps, and you are done!
Conclusion
This article taught us what error code 0x80070490 is and what causes it. You might have often encountered it when adding another email id to your Mail app on Windows 10/11. But several other devices face this issue.
So we saw how you could fix this issue on Windows 10/11, Mail, and Xbox. You can follow some of the fixes even if you do not face this issue, as it will update the other apps and solve any problems if available.
Was this page helpful?
-
![]()
Approved by
Evan Galasso is a digital forensics and data recovery engineer with over 10 years of experience in the field. He presents opinions on the current state of storage media, reverse engineering of storage systems and firmware, and electro-mechanical systems of SSDs and HDDs.…


20+
Years of experience

160+
Countries and regions

72 Million+
Downloads

4.9 +
Trustpilot Score


