Page Table of Contents
Reviews and Awards
Can you transfer data from Windows to Mac? Of course! EaseUS offers you a comprehensive and optimal solution to transfer data across systems. With the help of different migration assistants and migration methods, you can easily transfer all your data, including contacts, calendars, email accounts, etc., from your Windows PC to the right place on your Mac. Read on for 5 proven methods provided by EaseUS.
Preparations Before Transferring Data from Windows to Mac
Before we start to migrate data, we need to make preparations on both MacBook and Windows PCs for smooth migration:
1️⃣Download the cross-platform migration tool - EaseUS Todo PCTrans, which provides a straightforward solution to save time and effort.
2️⃣Know the password and name of the administrator account on the PC and ensure the Windows system is up-to-date. The Migration Assistant for transferring data from PC to Mac only works with Windows 7 and higher.
3️⃣Connect your Mac and PC to the same network (such as home Wi-Fi). Or use an Ethernet cable to connect your Mac and PC ports and have an Ethernet adapter on hand.
4️⃣If you are using Microsoft OneDrive, uninstall it first. Also, uninstall antivirus, firewall, or VPN software if you have it installed.
5️⃣Check the hard drive health and ensure there are no problems with your Windows hard drive: open a run window and type cmd to open a command prompt; use chkdsk drive: /F to see any problems.
Once you have done the above preparations, read on. Whether you need to migrate files, documents, or media, these methods will ensure a smooth transfer to your new Mac system. Don't forget to share this article with others if you found it helpful in transferring your Windows data to Mac.
5 Ways to Transfer Data from Windows to Mac
Follow the five proven efficient ways to transfer data from Windows to Mac:
- Method 1. Use Cross-System Transfer Tool - EaseUS Todo PCTrans
- Method 2. Use Migration Assistant
- Method 3. Use File Sharing
- Method 4. Use Cloud Storage Service
- Method 5. Use an External Storage Device
Method 1. Use Cross-System Transfer Tool - EaseUS Todo PCTrans
Apply to: Users who don't want to use complicated programs and steps.
EaseUS Todo PCTrans, a professional third-party software for transferring files from PC to PC, provides advanced features and flexibility to transfer data between Windows and Mac. Simply install the tool on both systems, and you can easily solve the problem.
Without expertise or other tool requirements, you can transfer all your data and settings to Mac and enjoy a seamless transition to your new Mac system.
Step 1. Set Up the Old PC
- First, install and launch EaseUS Todo PCTrans and select Data Transfer on the left panel of the main interface.
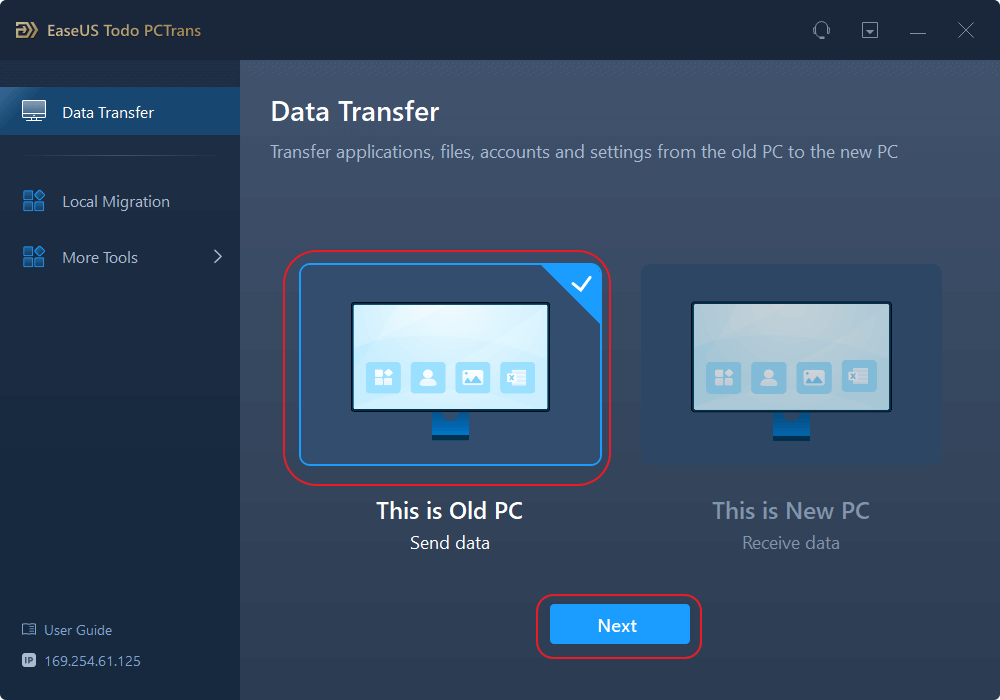
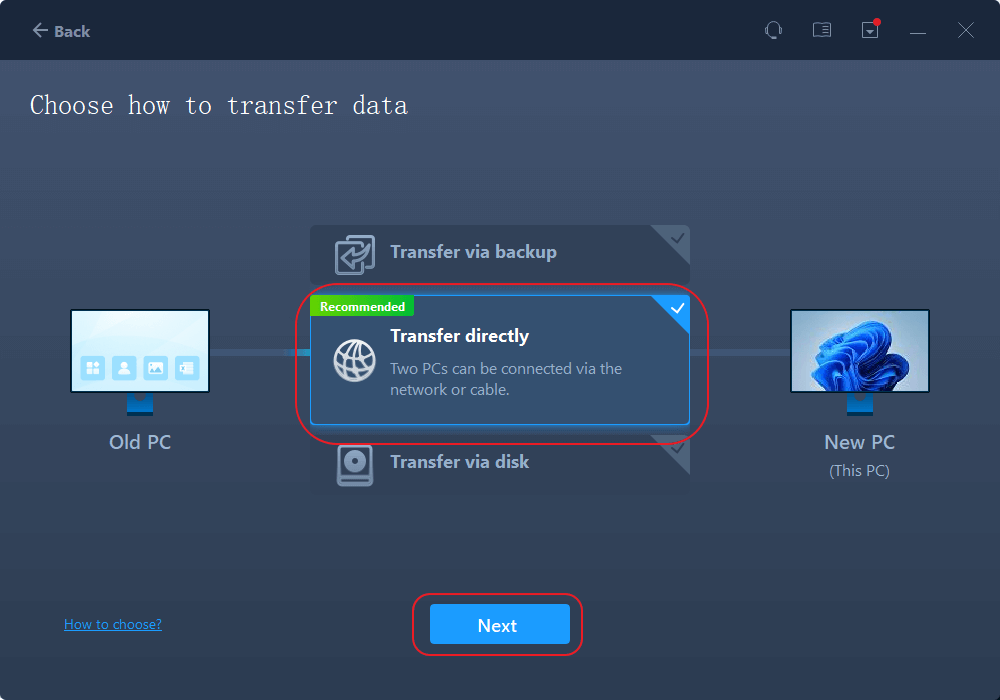
- Select "Transfer Directly" and click "Next" to continue.
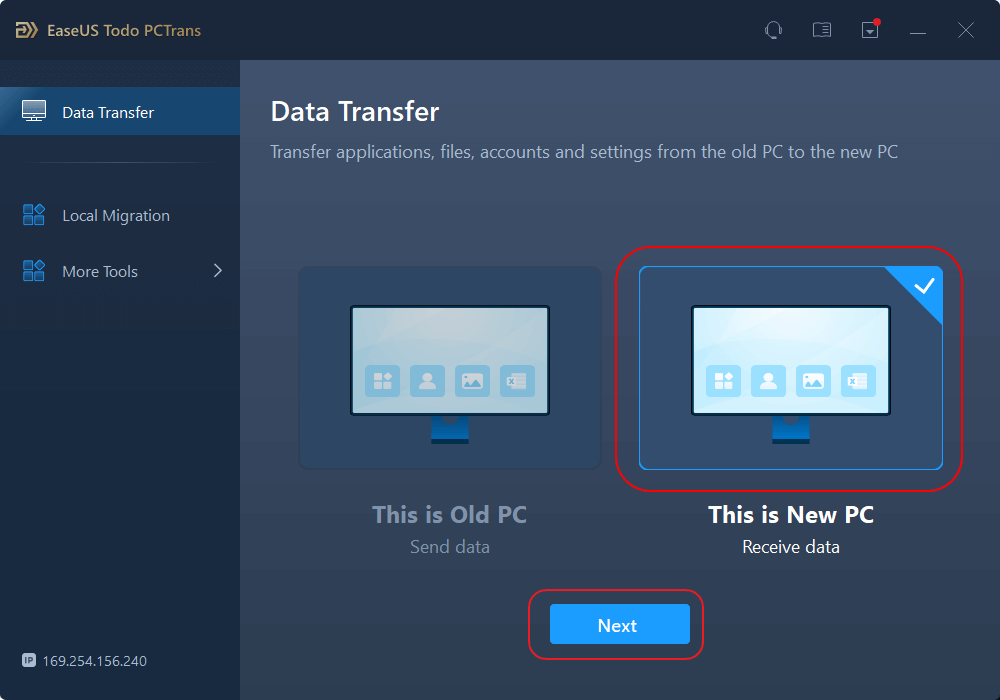
Step 2. Set Up the New PC
- Download and launch EaseUS Todo PCTrans on the new computer; select "This is New PC" and click "Next".
- Select "Transfer directly" and click "Next" to continue.
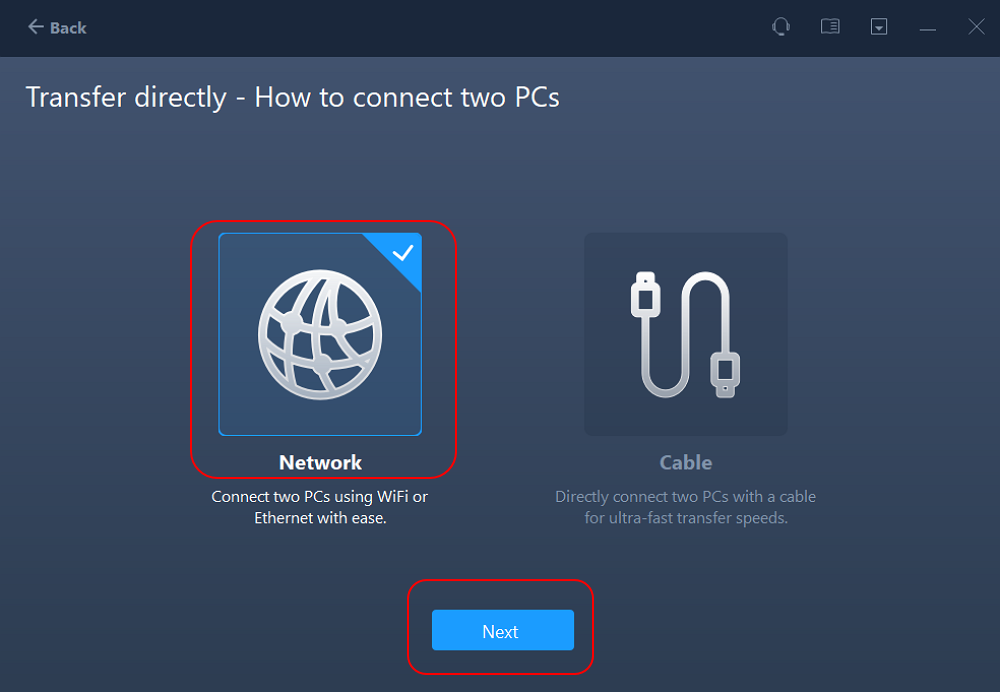
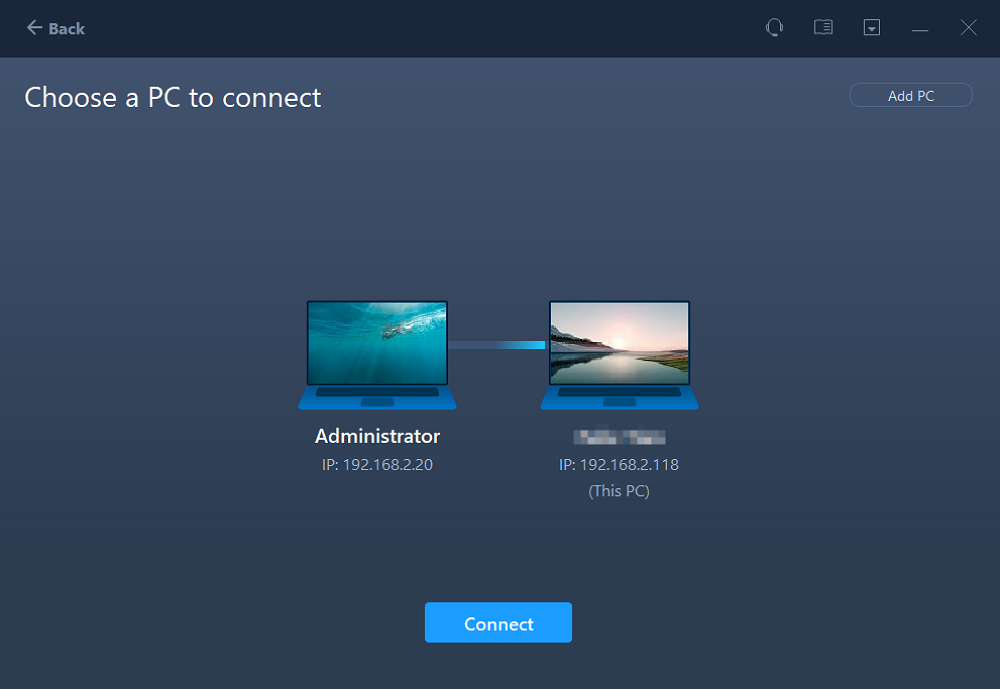
- Select "Network" and click Next to continue. This will automatically scan the old PC. (Make sure the two PCs are connected to the same LAN.)
- Select the target PC and click Connect. Then, it will take some time to scan and analyze the data in old PC.
Step 3. Select the Files to Transfer
- Finally, on the new PC, select the Files tab, select the files you need to transfer. Then, click "Transfer" to start.

Method 2. Use Migration Assistant
Apply to: Experienced users familiar with Mac's built-in tools and want to transfer files to Mac via Wi-Fi.
Migration Assistant is a built-in application provided by Mac. To know Migration Assistant Windows to Mac, refer to this section. Migration Assistant will copy but not delete files from your computer, so please feel free to use this tool:
Before you start, please get on your WindowsPC and install the appropriate Migration Assistant for Windows according to the macOS version on your Mac:
- For macOS Sonoma, macOS Ventura, or macOS Monterey: Windows Migration Assistant (current version)
- For macOS Big Sur: Windows Migration Assistant 2.3.1.0
- For macOS Catalina or macOS Mojave: Windows Migration Assistant 2.2.0.1
- For macOS High Sierra or macOS Sierra: Windows Migration Assistant 2.1.2.0
- For OS X El Capitan or earlier: Windows Migration Assistant 1.0.5.7
Steps to use Migration Assistant on Mac and PC:
On Mac:
Step 1. Open Finder and open Migration Assistant from Applications > Utilities folder.
Step 2. Click on the Transfer from Windows PC option and select Continue.

Step 3. Connect your Mac to your PC via Ethernet or local Wi-Fi network.
On Windows PC
Step 1. Execute the Migration Assistant download.
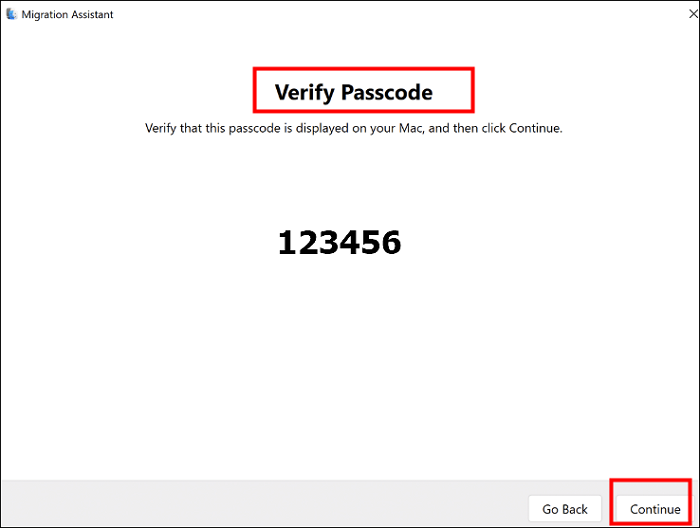
Step 2. Enter the security code displayed on your Mac into your Windows computer, and make sure your PC and Mac display the same password.
On a Mac
Step 1. The Migration Assistant catalogs the data on Windows. Then, select the data you want to transfer, such as user accounts, applications, files, and settings.
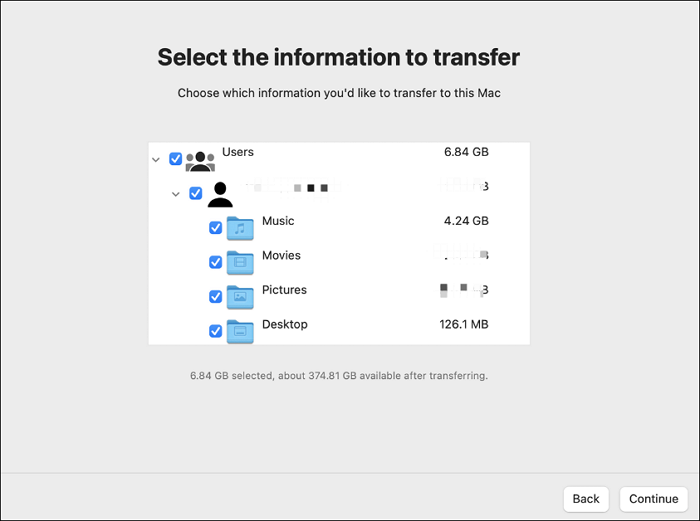
Step 2. Click Continue to start the data transfer process. Large transfers can take several hours to complete.
After the Migration Assistant has completed its work, log out of it on both machines and access the transferred account's data on your Mac by logging in. The password and account name is the same as those on your PC.
Method 3. Use File Sharing
Apply to: users who are familiar with Windows and Mac operations
Are you wondering how to move data from PC to Mac without using Migration Assistant? Windows also provides inbuilt methods for file sharing. You can connect Windows computers and Macs to the same local network and enable wireless data transfer.
Stage 1. Setting up File Sharing on Windows
Step 1. Open Windows Settings > Network and Internet > Status.
Step 2. Under Change Network Settings, select the Sharing option.
Step 3. After expanding the Private or Public Network menu, open Network Discovery and tick the checkbox next to File and Printer Sharing.
To share a folder, right-click the folder name and go to Properties > Sharing > Network File and Folder Sharing > " Sharing".
Stage 2. Accessing Windows files on a Mac
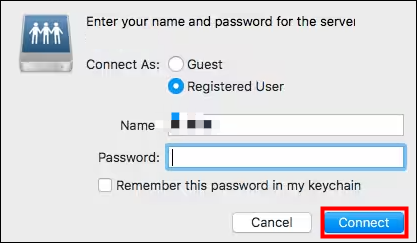
Step 1. Go to the Finder application, link to the server, type smb://[IP address], and press Enter.
Step 2. At the prompt, enter your Windows username and password and click Connect.
Step 3. All shared content or files will be visible on the system when the connection is complete. And drag and drop the required files and data.
Method 4. Use Cloud Storage Service
Apply to: Users transferring small amounts of data or files
Cloud storage services usually provide multiple platforms to be used together. For example, OneDrive, Google Drive, or Dropbox. Through these cloud storage, you can easily transfer data between different devices. However, there is a limit to the size of data that can be transferred through them, and this method is suitable for users who transfer less data or files.
Step 1. Sign up for an account that allows you to sign in on both Mac and PC, such as OneDrive or Google Drive.
Step 2. Sign in to the account within Windows and upload data to a folder in the cloud storage service.
Step 3. Sign in to the same cloud storage account on Mac and sync or download the data uploaded by Windows.
Method 5. Use an External Storage Device
Apply to: novice users, and those who have an external device.
USB flash drives or external hard drives provide the most traditional and simple data transfer method. You can easily transfer files from PC to Mac via USB.
Step 1. Copy the files you wish to move to the external storage device and connect it to your Windows PC.
Step 2. Eject the USB to a Windows PC.
Step 3. Connect the external device to the Mac and locate it.
Step 4. Copy files and folders from the external storage device to the desired location on your Mac.
Conclusion
Transferring data from Windows to Mac involves moving files, folders, and settings from one operating system to another. Fortunately, this article provides five different methods to help you transfer data from Windows to Mac. Depending on the size and complexity of the data, you should choose different methods:
- For small data - try cloud services and USB drives.
- For big data - choose EaseUS Todo PCTrans and Migration Assistant.
FAQs About Transfer Data from Windows to Mac
This section also provides additional questions about transferring data between Windows and Mac. Continue reading.
1. Can you transfer data from Windows to Mac after setup?
Of course, you can transfer data from Windows to Mac after setup, and Apple offers a tool called Migration Assistant. Apple offers a tool called Migration Assistant, which you can run the first time you set up your new Mac or after you've finished. Besides, we also provide additional methods in this article, such as external storage devices, local network transfer, cloud storage services, etc., which can help you migrate data from Windows to Mac.
2. How can I transfer files from PC to Mac on the same network?
To transfer files from PC to Mac on the same network, please open a file share on Windows first and then access the shared Windows files on Mac:
- Click Go > Connect to Server from the menu bar.
- Click Connect after entering your Windows computer's IP address in the Server Address area.
- After entering your password and Windows username, hit Return.
3. How do you transfer files from PC to Mac without Migration Assistant?
You can choose a migration assistant PC to Mac - EaseUS Todo PCTrans, for one-click migration. You can also use file sharing:
Stage 1: Open network share and set up a shared folder on Windows
Stage 2: Access Windows files on Mac and drag and drop them to the Mac drive.
This guide provides detailed solutions, so please read it carefully!
About the Author
Oliver is an EaseUS professional writer who dares explore new areas. With a passion for solving tech issues with straightforward guides for common users, Oliver keeps honing his writing craft by developing in-depth solutions for disk and partition management, computer boot-up issues, file transfer, etc.
Cici is the junior editor of the writing team of EaseUS. She accepted the systematic training on computers at EaseUS for over one year. Now, she wrote a lot of professional articles to help people resolve the issues of hard drive corruption, computer boot errors, and disk partition problems.
Reviews and Awards
-
EaseUS Todo PCTrans Free is a useful and and reliable software solution created to serve in computer migration operations, be it from one machine to another or from an earlier version of your OS to a newer one.
Read More -
EaseUS Todo PCTrans is by the folks at EaseUS who make incredible tools that let you manage your backups and recover your dead hard disks. While it is not an official tool, EaseUS has a reputation for being very good with their software and code.
![]() Read More
Read More
-
It offers the ability to move your entire user account from your old computer, meaning everything is quickly migrated. You still get to keep your Windows installation (and the relevant drivers for your new PC), but you also get all your apps, settings, preferences, images, documents and other important data.
Read More
Related Articles
-
Windows Installer Cleanup Utility Download (Free for Windows)
![author icon]() Cici/2024/11/29
Cici/2024/11/29 -
How to Move User Folder to Another Drive on Windows 11🔥
![author icon]() Tracy King/2024/11/29
Tracy King/2024/11/29 -
How to Transfer Files to a Flash Drive in Windows 10
![author icon]() Cedric/2024/12/04
Cedric/2024/12/04 -
How to Transfer Files from PC to PC in Windows 10 - Super Easy
![author icon]() Tracy King/2024/12/04
Tracy King/2024/12/04