-
![]() Microsoft Office Repair Tool | Repair Microsoft Word Online Free
Microsoft Office Repair Tool | Repair Microsoft Word Online Free July 23,2026
 6 min read
 -
![]()
-
![]()
-
![]()
-
![]()
-
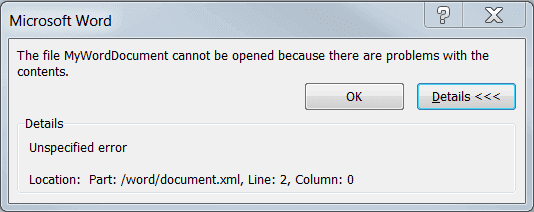
![]() 'The file cannot be opened because there are problems with the contents' FixesJuly 23,20266 min read
'The file cannot be opened because there are problems with the contents' FixesJuly 23,20266 min read -
![]()
-
![]()
-
![]() Free Download Hidden File Recovery Software to Recover Hidden FilesJuly 23,20266 min read
Free Download Hidden File Recovery Software to Recover Hidden FilesJuly 23,20266 min read -
![]()
Page Table of Contents
By using Windows Quick Access, you may quickly and easily access the essential files or folders on your computer. We know it's a minor detail, but Windows would not be the same without it.
Quick Access provides you with a selection of your recently accessed files and folders so that you can quickly return to your work. The Quick Access option is disabled by default in the Windows File Explorer. But, even if it is enabled, there are methods to get around it. Therefore, we will tell you how to remove folders or files from Quick Access in this guide. Let's get started!
What Is Quick Access
Quick Access is automatically shown on the far left of the File Explorer title bar, as seen in the screenshot below. Start by opening a File Explorer window and looking at the top of the window. The Quick Access Toolbar can be found in the upper-left corner of the screen.

Important: The Quick Access Toolbar should not be mistaken with the Quick access location from File Explorer's Navigation window, which can be seen in the screenshot below:
How to Remove Files or Folders from Quick Access in Windows 10/11
Disabling the recently used files and folders in Quick Access in Windows 10 is one customization option available in the operating system. Unless you have expressly pinned files or folders to Quick Access, Quick Access will be ineffective, so bear this in mind when disabling both options.
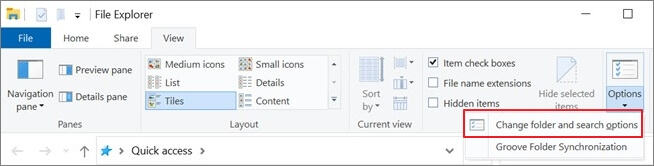
Step 1. Open the File Explorer Options in your Control Panel and choose the appropriate option.
Step 2. It may be accomplished by launching explorer, selecting the "View" tab, and selecting the "Options" drop-down menu from the View tab.
Step 3. Change the folder and search options by selecting them from the drop-down menu.
Step 4. The window that appears next will appear. Towards the bottom of the page, you'll find two checkboxes that enable you to change whether or not recent files and folders are shown to you.
(Note: Keep in mind that this does not behave the same way as the Recent Items feature in Windows 10. Only products that have been used repeatedly over some time will appear in the Quick Access section).
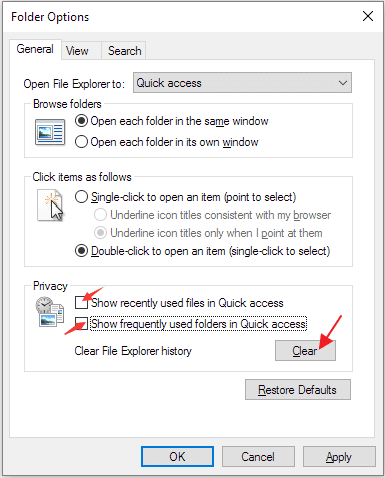
Step 5. Uncheck the box if you want to. The "Show recently used files in Quick access" and "Show commonly used folders in Quick access" are two options for showing recently used files. You also can delete the history of your File Explorer sessions.
(Note: This will wipe the slate clean in Quick Access, allowing for more current and relevant things to surface in the list of items).
How to Remove Quick Access from File Explorer Entirely
If you want to remove the Quick Access from the File explore entirely, here's a method to get rid of it.
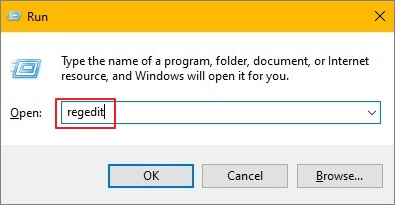
Step 1. Press Windows Key + R simultaneously, type regedit in the Run menu, and press OK.
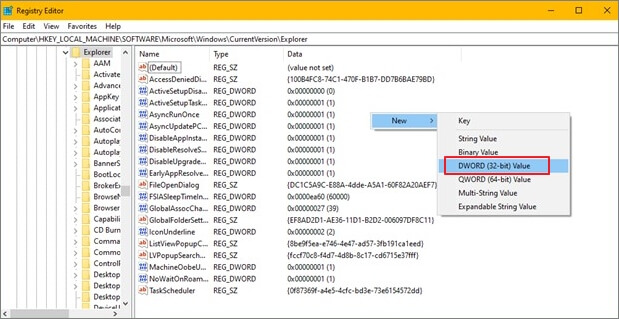
Step 2. Go to the "HKEY_LOCAL_MACHINE" option and then the "Software" tab. Then, go to "Microsoft > Windows > CurrentVersion > Explorer".
Step 3. Right-click anywhere and select the "DWORD (32-bit) Value" option. Change the value name to HubMode and allot the value as 1, and there'll be no Quick Access menu available.
Can't Remove Folder from Quick Access, How to Fix
If you can't remove folders or files from Quick Access with the above methods, take the following guides to troubleshoot.
Method 1. Reset the Quick Access Recent Items List
To reset the quick access recent items list, follow the steps below:
Step 1. Launch the File Explorer program.
Step 2. Right-click on the "Quick Access" star symbol to bring up the context menu.
Step 3. Select "Options" from the drop-down menu.
Step 4. To clear the screen, use the "Clear" button.
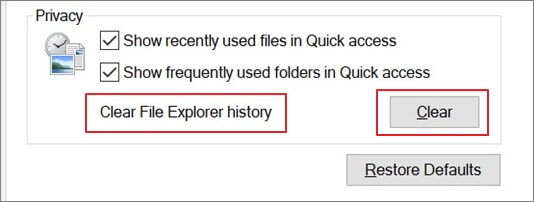
This feature will remove all recent folders from Quick Access, but it will not remove any folders that have been manually added.
Method 2. Delete Your Temporary Files
Here is how you can delete your temporary files in Windows 10/11:
Step 1. By going to the Windows "Temp folder" location listed above, you may open the Temp folder in File Explorer and access it.
Step 2. Select all of the files in the Temp folder that are no longer required and hit the "Delete" key to remove them.
Step 3. If a dialog titled "Folder" in Use appears, choose to "Skip" to remove the specified temporary files.
Step 4. Use the Recycle Bin to permanently erase any temporary files in Windows 10 created.
Method 3. Create a New Folder in the Old Location and Remove It from Quick Access
When you move a folder from the Quick Access bar to a different place, you may see that the folder has been stuck and that clicking on it will result in an error message.
If you face this problem, create a new folder in the exact location where the File you cannot unpin used to reside. It does not need to include anything if it has the same name as the original. Once the File has been made, you may unpin it from Quick Access and then permanently remove it.
How to Recover Permanently Deleted Folders/Files on Windows 10
A file recovery software might be needed to reverse the consequences of a data loss incident. We offer EaseUS Data Wizard Recovery for Windows as the best data recovery software of our choice for Windows users.
EaseUS Data Recovery Wizard is a comprehensive data recovery tool that uses complex algorithms to examine any storage medium for lost items that may be restored. Using its deep scanning mode, it will search your hard drive for bits of data that can be reassembled even after they have been erased from their original storage location.
Key Features
- Recover photos, documents, audio, music, and emails that have been lost or erased efficiently.
- It is possible to recover data from a formatted hard disk, an empty trash bin, a memory card, a flash drive, a digital camera, or a camcorder.
- Support for data recovery in various conditions, including accidental deletion, formatting, hard drive corruption, virus assault, and system crash.
- Repair corrupted files after data recovery like repair corrupted JPEG/JPG, fix broken videos, and repair damaged documents
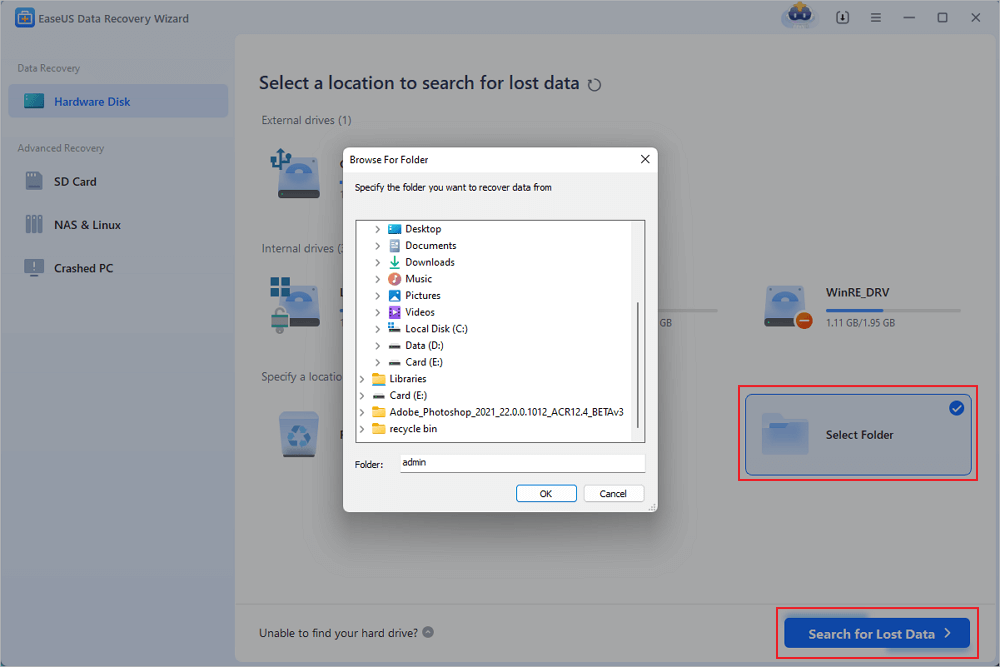
Step 1. Select a folder to scan for lost files
Launch EaseUS Data Recovery Wizard. Double click "Select Folder" to browse the the location where you lost the folder and click "OK" to scan the lost folder.
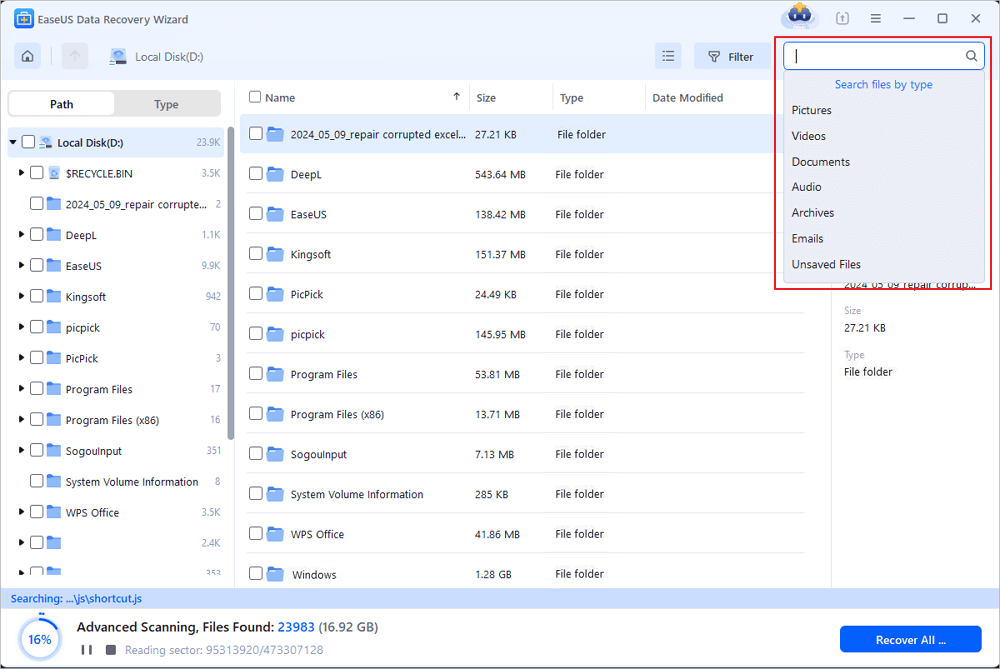
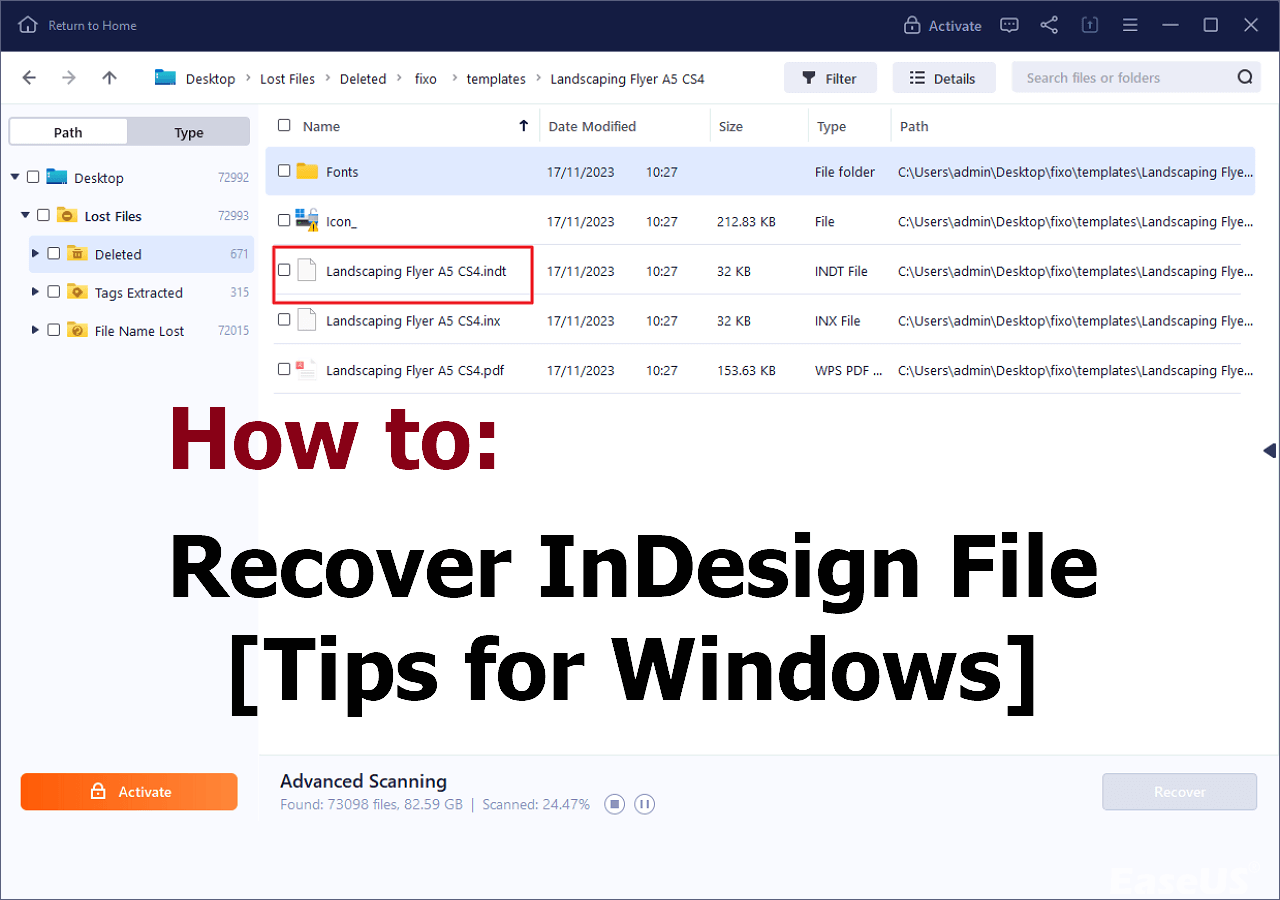
Step 2. Find and preview found files in the lost folder
If you remember the folder name, type the folder name in search box to quickly find the lost files. Then, open the found folder and double-click to preview scanned files. Or you can use the Filter feature to find a certain type of files.
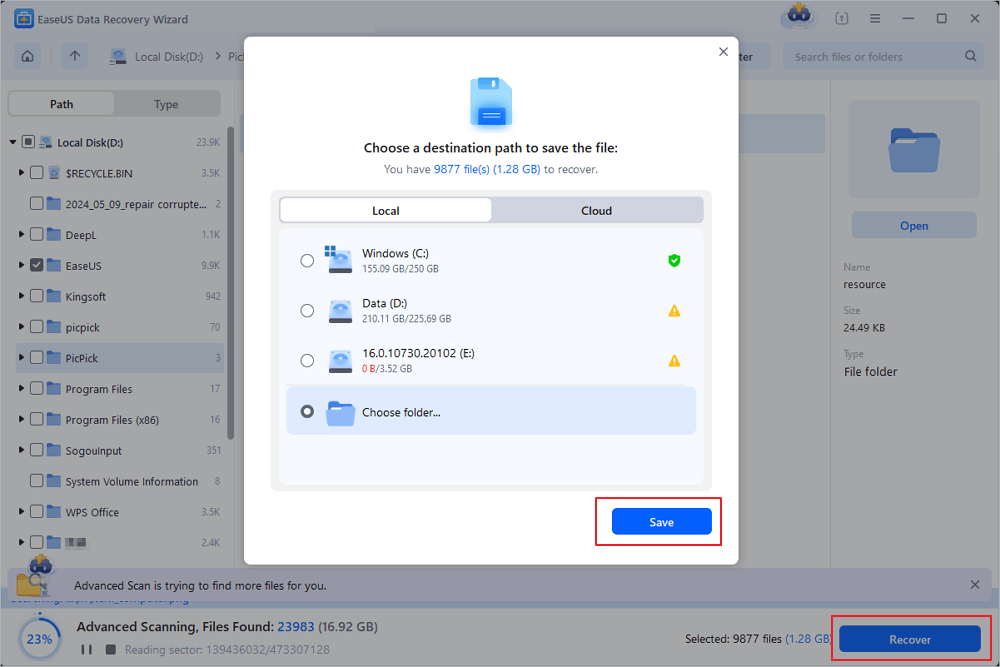
Step 3. Recover and save the lost folder
Last, select the folder and files you need, click "Recover" and choose a new & secure location on your PC or cloud storage like OneDrive, Google Drive, or Dropbox to keep the recovered data.
Concluding Words
Our comprehensive guide on how to remove folder from Quick Access has explained all the possible methods to troubleshoot. If you lose data due to an operation error or technical problem, EaseUS data recovery software can be your savior and restore all your lost files and folders. Therefore, do give it a try!
Was this page helpful?
-
Cedric Grantham is a senior editor and data recovery specialist of EaseUS. He mainly writes articles and how-to tips about data recovery on PC and Mac. He has handled 10,000+ data recovery cases and is good at data recovery of NTFS, FAT (FAT32 and ExFAT) file systems, and RAID structure reorganization. …


20+
Years of experience

160+
Countries and regions

72 Million+
Downloads

4.9 +
Trustpilot Score


