If you are a Mac user, you may face the situation when your Mac is updated to the lasted macOS version, including macOS Monterey update not found. Here are effective methods to fix this issue.
| Workable Solutions | Step-by-step Troubleshooting |
|---|---|
| 1. Check If Your Mac Is Available for macOS Monterey | Verify device compatibility, and then download macOS Monterey from the Apple Store...Full steps |
| 2. Shutdown and Restart Mac Device to Fix the Issue | Hit the Apple logo in the left-side upper corner, and click on the "Restart" button...Full steps |
| 3. Search and Download macOS Monterey in App Store | Open the Application folder, drag and drop the "Install macOS Monterey" application to Trash...Full steps |
| 4. Check macOS Date and Time Settings on Mac | Select the Apple menu, and click on System Preferences. Hit the "Sharing" button...Full steps |
| Other Methods | Hit the Wi-Fi from the menu bar, and toggle Wi-Fi off. Wait for another 10-15 seconds to reconnect...Full steps |
Why macOS Monterey Update Not Found
Apple keeps releasing macOS updates timely to boost Mac's security, stability, and performance. Therefore, a smooth macOS upgrade from Monterey to macOS Ventura offers Mac users extraordinary features. It's the reason that Mac users flock to update Monterey macOS after a new version is declared.
But you may not update the Macs to the latest version of macOS due to several issues. Users often deal with problems during updating, such as the macOS Monterey update not found. This pesky error holds you back every time you want a hassle-free update. If you're wondering why you can't find the macOS Monterey update, these are some of the best reasons:
- Unstable internet connection
- The macOS version is outdated in setting up
- Your MacBook requires more storage for the newest macOS Monterey update.
- Mac can't spot any updates.
The best first-aid is to back up all your data on your Mac, for it will stop further data loss. You can use the practical program Easeus Dara Recovery Wizard for Mac Pro to create a backup of your Mac. Simply click the green button below to obtain the free software download:
Back Up Your Mac and Never Lose Data
Back up and restore your MacBook/iMac without Time Machine, iCloud, or external hard drives.
Then, you can use the free macOS installation feature of EaseUS software to find the macOS Monterey. Here are the steps:
✨Step 1. Connect USB Flash Drive and Choose a macOS Version
Launch EaseUS recovery software, and choose "macOS Installer" from the Advanced Features. Insert a USB that has more than 16GB of free storage space.
- Option 1: Choose a macOS version you want to install, and a new windows will ask you to download macOS installer from App Store. After downloading the installer, click "Refresh".
- Option 2: If you have already downloaded macOS installer, choose "Add" and select the installer you have downloaded.
Finally, you can choose "Create macOS Installer" to start creating the bootable installer. You can select various macOS versions like macOS Sequoia, Sonoma, Ventura, Monterey, Big Sur, and older versions.

✨Step 2. Erase the USB and Create a macOS Installer
A notice window will appear to warn you this operation will remove everything on this USB. Make sure you have backed up data and nothing important is left on this USB, click the "Erase and create".

✨Step 3. Wait and Check How to Use macOS Installer
The software will automatically format the USB and download macOS installer files. After creating the bootable macOS installer, click the blue link on the interface to learn how to use the macOS Installer boot device to install macOS. Finally, click "Finish" to complete the whole process.

Are you wondering how to fix the 'macOS Monterey update not found' error? Before moving to the solutions, we will provide a video to help users. The primary timelines of the video are shown below:
- 00:21 Restart your MacBook and Wi-Fi router
- 01:20 Set date and time
- 02:11 Disable VPN
- 02:39 Reinstall macOS
How to Fix macOS Monterey Update Not Found Error
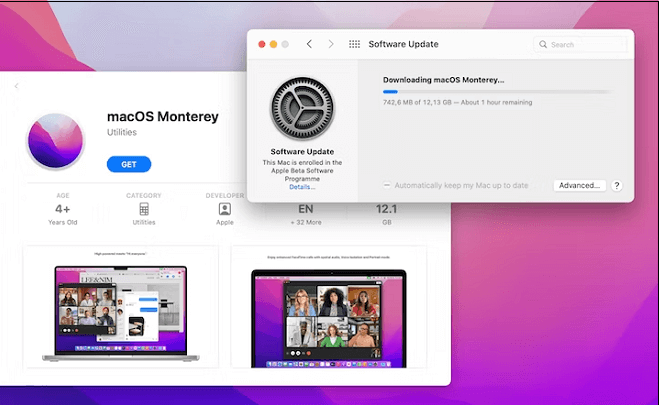
The biggest issue you might encounter is not being capable of updating your macOS. It was 25th October 2021 when macOS Monterey officially launched. Consequently, every Mac user has access to the updates as of the time it was released. If you see this message "macOS Monterey update not found," these are the fixes to try once:
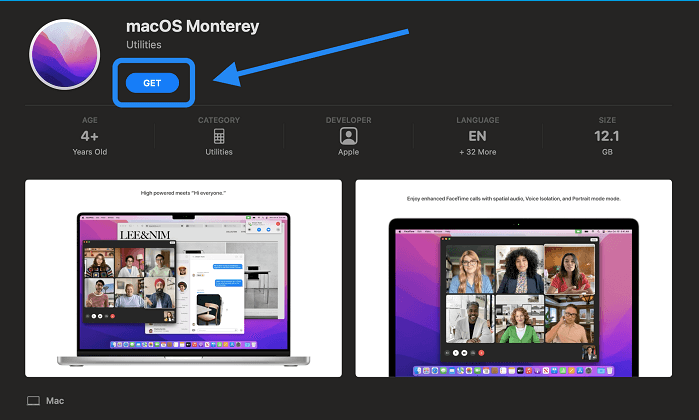
1. Check If Your Mac Is Available for macOS Monterey
In order to install macOS Monterey on your Mac, you need to head over to the Apple menu. After that, you're required to download it from "About This Mac > Software Update". After opening the Mac Software Update section, if you can't notice macOS Monterey, try these three steps below:
Step 1. Verify device compatibility. Several outdated Mac models macOS Monterey doesn't support, so there's a good possibility it won't run on your Mac.
Step 2. Download macOS Monterey from the Apple Store.
Step 3. To bring up the Software Update dialogue, press "Command + R". If there was a network fall, it ought to resolve the issue.
2. Shutdown and Restart Mac Device to Fix the Issue
Shutdown and restart your MacBook Pro/Air is one of the most hassle-free and straightforward solutions to fix the macOS Monterey update not found error. This is how your Mac will put an end to the software bugs preserved in the background. Consequently, your Mac will stamp out any errors linked to the OS. Go through the steps below to reboot your Mac:
Step 1. Hit the Apple logo in the left-side upper corner.
Step 2. Click on the "Restart" button.

Once you have restarted your Mac, let's start with the macOS update again.
3. Search and Download macOS Monterey in App Store
A quick solution to stamp out the checking "null" error on macOS Monterey is to search and install macOS Monterey from the App Store. Follow the steps below:
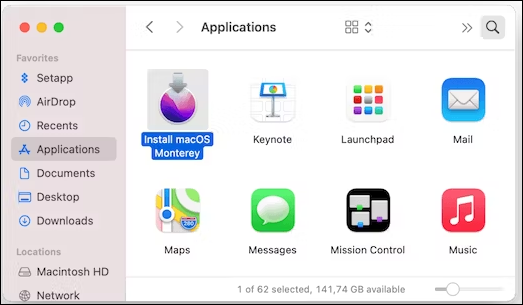
Step 1. Open the Application folder.
Step 2. Drag and drop the "Install macOS Monterey" application to Mac Trash.
Step 3. Download it again from the Apple Store, and install it in the usual manner.
Share this article on social media to read it anytime.
4. Check macOS Date and Time Settings on Mac
Once you have reinstalled the macOS Monterey installer, you may observe an error text showing, "can't verify macOS" or "macOS Monterey can't be cross-checked". It typically happens when your user account has cached information or when System Preferences' date and time settings are off.
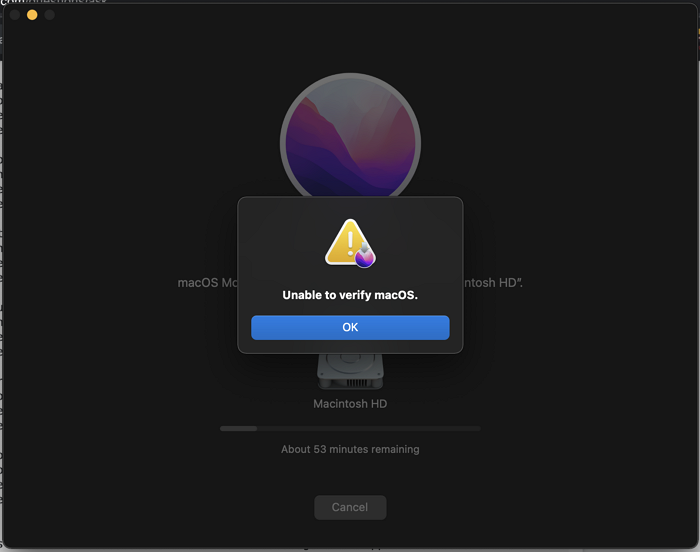
Consider the fixes below to solve the error "macOS Monterey couldn't be verified":
Step 1. Select the Apple menu, and click on System Preferences.
Step 2. Hit the "Sharing" button.
Step 3. To make modifications, click the lock in the bottom left corner.
Step 4. Opt for "Content Caching" to ensure it's toggled off.
Step 5. Select "All Content" under Cache.
Step 6. It's time to restart the Mac and download it once again.
You may try using the below-mentioned method in case you can't verify macOS Monterey:
Step 1. Hit the Apple logo, and hit the System Preferences.
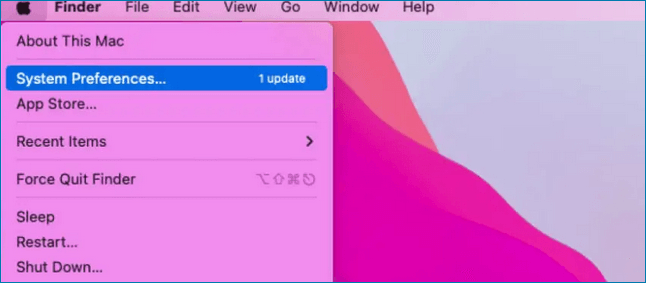
Step 2. Opt for the Date & Time to open it.
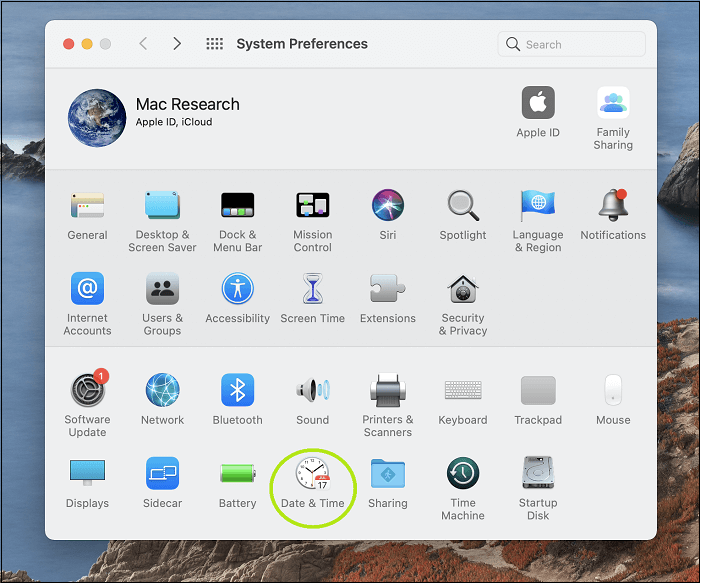
Step 3. Hit the lock at the lower left side to modify things.
Step 4. Untick, and after that, crosscheck the "Set date & time automatically" option. Save the changes you made by hitting the lock.
Once done, restart your MacBook, and download the update again via "Software Update."
5. Check the Internet Environment to Fix macOS Monterey Update Not Found
Are you unable to access the internet after installing macOS Monterey? If so, you must consider checking the internet environment to fix the macOS Monterey Update not found error. Follow the steps below to fix this:
Step 1. Hit the Wi-Fi from the menu bar, and toggle Wi-Fi off. Wait for another 10-15 seconds to reconnect to your Wi-Fi.

Step 2. Shut down your MacBook, and before it restarts, wait for a few seconds.
Step 3. Generate a brand-new Network Location:
- Hit the Apple symbol at the upper left side, and opt for "System Preferences".
- Establish an additional Network location by first finding Network, which typically displays as Automatic.
- Select "Edit Locations", add a new place by pressing the plus button, and then click "Done".
- Rejoin an established, functional Wi-Fi network.
6. How to Reinstall macOS in Mac Recovery Mode
In order to utilize a feature named Internet Recovery mode, the brand-new MacBooks can directly boot from a stable Internet connection even though no retrieval partition is available. These are the steps to consider reinstalling macOS in Recovery Mode:
Step 1. Your Mac needs to be shut down.
Step 2. Press the "Command + Option/Alt + R" and hold the Power button.
Step 3. Keep pressing those keys when a spinning globe and the phrase "Starting Internet Recovery" appear. This could take some time.
Step 4. There will be a progress indicator placed on top of the message. Let it fill, and it will take some time.
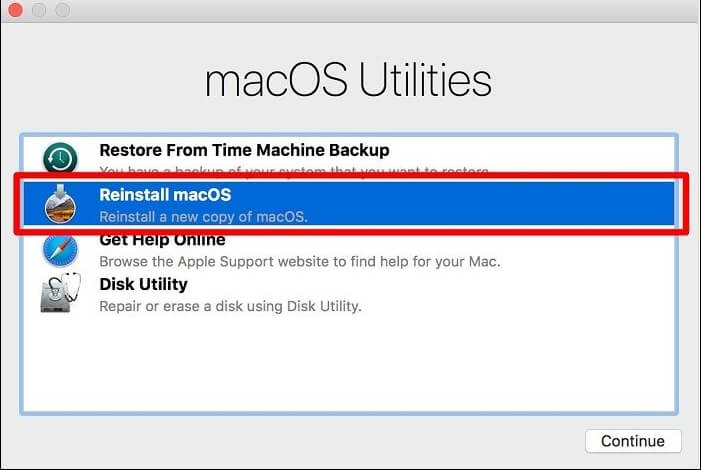
Step 5. Hold off until the macOS Utilities window appears.
Step 6. Continue the setup steps after selecting Reinstall macOS.
Your Mac needs to obtain the setup file for the current version of macOS that was preinstalled on it when you first opened the box after you selected to reinstall macOS in Internet Recovery Mode. Your Mac has to employ DHCP on an Ethernet or Wi-Fi network and WPA/WPA2 as an encryption protocol on Wi-Fi if OS X Restoration is selected for reinstallation.
LEARN MORE
Encounter issues while booting Mac into the Recovery Mode? This article will introduce six available methods to fix Mac won't boot into Recovery. Click the link to read more.
7. Clean Install macOS Monterey with Bootable Media
In order to clean install macOS Monterey with bootable media, for example, you can create Monterey USB installer on Mac, and you need to follow the steps below:
Step 1. The macOS Monterey ought to show up in Applications immediately after being installed.
Step 2. Please review your applications.
Step 3. Find the arrowed installer icon for macOS Monterey.
At this stage, you should take another portable USB device formatted with a minimum of 16 GB of space. You need to attach the drive to your macOS Monterey.
Step 4. The drive you currently have can be formatted using Mac Disk Utility. Put it in the macOS Advanced (Journaled) version. Now that your installer is on a bootable USB device using Mac Terminal, a control-line program, it is recommended to install Monterey.
Step 5. Essentially, we're instructing the Terminal to take the "macOS Monterey" file from Apps, copy it to the "Untitled" drive, and enable booting.
Step 6. Access Launchpad and enter "Terminal" in the search field.
Step 7. Copy the following command and paste it into the Terminal, and press enter:
sudo /Applications/Install\ macOS\ Monterey.app/Contents/Resources/createinstallmedia --volume /Volumes/Untitled
How to Recover Data After macOS Monterey Update
Losing data due to hardware malfunction, malware attack, format during a macOS update, system collapse, or deletion without having a backup is undesirable. Have you lost your data after updating macOS Monterey? If so, EaseUS Data Recovery Wizard for Mac is a powerful data recovery tool for services and business providers regardless of your data loss scenario's complexity.
Still, EaseUS data recovery software can assist your business in recovering your lost data from any macOS-based device thanks to its decades of data retrieval competence. Irrespective of the size of the files—from a single Office Word document to a large number of images you keep on Mac. EaseUS data recovery software can resolve various data loss circumstances, such as SD card recovery on Mac and restoring Trash data on Mac.
EaseUS macOS Recovery Program
- Recover lost lost files after macOS Monterey update, including documents, photos, audio, music, and emails.
- Recover formatted hard drive on Mac, emptied recycle bin, memory card, flash drive, digital camera, and camcorders.
- Support data recovery for sudden deletion, formatting, hard drive corruption, virus attack, and system crash.
To easily understand the operation to recover your lost data after the macOS Monterey update, you can refer to the following steps:
Step 1. Select the location
Select the disk where you lost data after updating to macOS Sonoma/Ventura/Monterey/Big Sur. Then, click "Search for lost files".

Step 2. Find lost data after the scan
EaseUS Data Recovery Wizard for Mac will immediately scan your selected disk volume and display the scanning results on the left pane. Use the file type and file path to find wanted data on Mac.

Step 3. Recover data after macOS update
Select the target files that were unknowingly lost during or after the update and click the "Recover" button to get them all back.

To Wrap Up
Overall, the macOS Monterey bugs so far have not shown anything serious. Incompatibility issues certainly cause Monterey's installation or download problems with your device, network, or space.
With beta revisions, slow Macs, overheating, and battery life issues are usual. In addition, there may be a few basic Bluetooth, Music, and AirPlay difficulties as well. Consider downloading EaseUS Data Recovery Wizard for Mac if you have gone through data elimination.
macOS Monterey Update Not Found FAQs
Follow the below-mentioned FAQs to understand the topic better:
1. How to fix the macOS Monterey update stuck at x minutes?
The method to fix the macOS Monterey update stuck is to terminate the macOS download to fix the Monterey update for Mac that is stuck with less than a minute remaining. Examine the Applications folder once more to make sure there are no leftovers. Start your computer in Safe Mode next, then install the operating system.
2. How to install macOS Monterey on an unsupported Mac?
Follow the steps below:
Step 1. Put in your usual or any external USB drive.
Step 2. The OpenCore-Patcher application needs to be opened.
Step 3. Hit the "Create macOS installer" button, which is located in the man window of the application.
Step 4. The available macOS versions will pop up and hit the most recent version to install.
3. Why can't my Mac update to macOS Monterey?
It's possible that there isn't enough space available on your Mac. According to reports, macOS Monterey requires about 20GB of disc space for download and installation. You must clean your computer first and make room if you don't have enough already. Ensure that your Wi-Fi is operational.
4. How to update macOS Monterey with a USB?
Choose the USB icon for the USB Installer Drive at the boot options window and press "Enter" to continue. Choose your preferred language if you are asked. The installation setting will then start loading. Once done, choose "Utilities", download macOS, and select "Continue".
Was This Page Helpful?
Brithny is a technology enthusiast, aiming to make readers' tech lives easy and enjoyable. She loves exploring new technologies and writing technical how-to tips. In her spare time, she loves sharing things about her game experience on Facebook or Twitter.
Dany is an editor of EaseUS who lives and works in Chengdu, China. She focuses on writing articles about data recovery on Mac devices and PCs. She is devoted to improving her writing skills and enriching her professional knowledge. Dany also enjoys reading detective novels in her spare time.
Related Articles
-
Change Directory in Terminal Mac | Get All Information Here
![author icon]() Dany/2024-10-25
Dany/2024-10-25 -
How to Solve Samsung Smart TV USB Not Working [Updated 2024]
![author icon]() Cici/2024-07-08
Cici/2024-07-08 -
How To Maintain and Extend The Life Of Your USB Drives
![author icon]() Tracy King/2024-08-15
Tracy King/2024-08-15 -
How to Fix Steam Games Not Launching (Windows 10/11)
![author icon]() Roxanne/2024-10-23
Roxanne/2024-10-23

EaseUS Data Recovery Services
EaseUS data recovery experts have uneaqualed expertise to repair disks/systems and salvage data from all devices like RAID, HDD, SSD, USB, etc.