Featured Articles
Mac Recovery Mode is designed for users to self-troubleshooting various problems. Pressing Command + R, you can boot into Recovery Mode to repair the startup disk, reinstall macOS, or prevent the Mac from starting up normally. But sometimes things would go wrong. Users might have trouble booting their Mac into Recovery Mode. If you have encountered the same problem, then you will need this article.
| Workable Solutions | Step-by-step Troubleshooting |
|---|---|
| Fix 1. Boot into Recovery Mode | Turn off your Mac first, and press...Full steps |
| Fix 2. Check Keyboard Connections | Disconnect your current keyboard...Full steps |
| Fix 3. Create Bootable Installer | Open Terminal, paste one of the commands...Full steps |
| Fix 4. Boot Mac in Safe Mode | choose the Apple menu > Shut Down...Full steps |
| Fix 5. Restore Time Machine Backup | Press the power button and immediately press...Full steps |
| Fix 6. Reinstall OS | Press and hold the Option + Command + R key...Full steps |
But before checking the solutions, it's better for you to understand the possible reasons why Mac Command R is not working.
Possible Reasons of Mac Won't Boot into Recovery Mode
Your Mac failed to boot into Recovery Mode usually happens without notice. Below are some of the most possible reasons.
- 1. Your Mac is the M1 Mac. M1 Mac is introduced in November 2020. There is a new way for users to enter Recovery Mode on M1 Mac.
- 2. Your Mac is too old. For computers running Mac OS X Snow Leopard or older, they don't have a recovery partition. And that's why you can't press Command + R to boot into Recovery Mode.
- 3. Keyboard connection failure. If you are using a Bluetooth keyboard, it's possible that the keyboard is not connected to your Mac.
- 4. Your Recovery partition is damaged or deleted.
After understanding the possible reasons why you can't boot into recovery mode on your Mac, now you can follow the given methods to solve the problem.
Method 1. Boot into Recovery Mode for M1 Mac
Here are the detailed steps of how to enter Recovery on an M1 Mac.
Step 1. Turn off your Mac first, and long-press the on button.
Step 2. When the Apple logo appears you'll see text informing you that, if you continue holding the power button, you will access startup options.
Step 3. Select Options > Continue, and this will open Mac Recovery.

Method 2. Check Mac Keyboard Connections
This method is to help you to confirm that the problem is not caused by keyboard failure. You can disconnect your current keyboard, and connect another one that can normally work with another Mac to see if you can boot your Mac into Recovery Mode.
If you can, then your keyboard may be broken. You can change to a new one. If you can't, then you can try other methods.
Method 3. Create Bootable Installer
To create a bootable installer, you need a USB flash drive with at least 14GB in size, and a downloaded installer for macOS Big Sur, Catalina, Mojave, High Sierra, or El Capitan. You can download the installer on Apple's official website. The simplest way is to create through Mac Terminal. Here are the detailed steps:
Step 1. Connect the prepared USB flash drive to your Mac.
Step 2. Open Terminal, paste one of the following commands in it.
Big Sur:
sudo /Applications/Install\ macOS\ Big\ Sur.app/Contents/Resources/createinstallmedia --volume /Volumes/MyVolume
Catalina:
sudo /Applications/Install\ macOS\ Catalina.app/Contents/Resources/createinstallmedia --volume /Volumes/MyVolume
Mojave:
sudo /Applications/Install\ macOS\ Mojave.app/Contents/Resources/createinstallmedia --volume /Volumes/MyVolume
High Sierra:
sudo /Applications/Install\ macOS\ High\ Sierra.app/Contents/Resources/createinstallmedia --volume /Volumes/MyVolume
El Capitan:
sudo /Applications/Install\ OS\ X\ El\ Capitan.app/Contents/Resources/createinstallmedia --volume /Volumes/MyVolume --applicationpath /Applications/Install\ OS\ X\ El\ Capitan.app
Step 3. Press Return to enter the command.
Step 4. Enter your administrator password and press Return again.
Step 5. When prompted, type Y to confirm that you want to erase the volume.
Step 6. After the volume is erased, you will receive a notice saying that Terminal would like to access files on a removable volume. Click OK to allow the copy to proceed.
Step 7. When Terminal informs you that it's done, the volume will have the same name as the installer you downloaded, such as Install macOS Big Sur. You can now quit Terminal.
Method 4. Boot Mac in Safe Mode
Safe Mode can help you determine if the problem is caused by software loaded when your Mac starts up. Here's how to start up your Mac in safe mode.
Step 1. On your Mac, choose the Apple menu > Shut Down. After your Mac shuts down, wait 10 seconds.
Step 2. Restart your Mac, then immediately press and hold the Shift key.
Step 3. Release the Shift key when you see the login window.
Step 4. Log in to your Mac, now you're in the safe mode.
Method 5. Restore Mac with Time Machine Backup
If you have backed up your Mac with Time Machine before, you can use the Time Machine backup files to restore your Mac. Here’s how you can do it.
Step 1. Shut down your Mac first and then connect the Time Machine backup drive to your Mac.
Step 2. Press the power button and immediately press and hold the Option key.
Step 3. When you see the startup manager screen, you can release the Option key.
Step 4. Select the backup drive and click Return.
Step 5. Your Mac will boot into an OS X installer type screen. Here you can choose to restore from one of the backups.
Solved: USB Flash Drive Not Showing Up on Mac
Is the USB flash drive not showing up on Mac after inserting it in the USB port? Find solutions here. Download EaseUS Data Recovery Wizard for Mac when you want to recover data from a USB drive not recognized.

Method 6. Reinstall OS with Mac Internet Recovery
The last method you can try is to boot into Internet Recovery to reinstall macOS from Apple's server.
Step 1. Shut down your Mac first.
Step 2. Press the power button and immediately press and hold the Option + Command + R key.
Step 3. Wait until you see a spinning icon with a progress bar appear on the screen.
Note: Your Mac should be connected to a strong internet connection.

Bonus Tip: How to Recover Data from Mac
Although Mac computers are advanced enough, accidents can happen. An OS crash or an accident may lead to permanent data loss, especially when you don't have a Time Machine backup, you will have no way to find back your lost data.
EaseUS, as a pioneer in the field of data recovery, has developed exclusive and safe data recovery software - EaseUS Data Recovery Wizard for Mac to help users recover their data. With this tool, users can quickly restore deleted or lost data on Mac in seconds, and no technical experience is required.
Here is a detailed guide on how to use EaseUS Data Recovery Wizard for Mac to recover data. You can download this tool first and follow the guide to have a try.
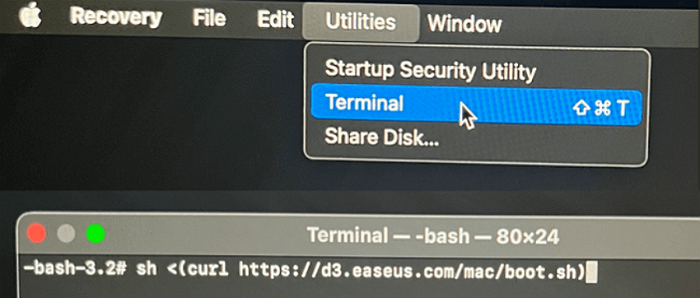
Step 1. Launch EaseUS Software in Recovery Mode
Select "Utilities > Terminal" from the top menu, and enter the command sh <(curl https://d3.easeus.com/mac/boot.sh). Hit "Return". Wait for the application to open, and it will take several minutes.
Note: If the Terminal displays either "No such file or directory" or "Could not resolve host," you should verify that the command line you entered is correctly spelled, ensure your Mac has a stable internet connection, and confirm that your macOS version is not lower than macOS 10.15.
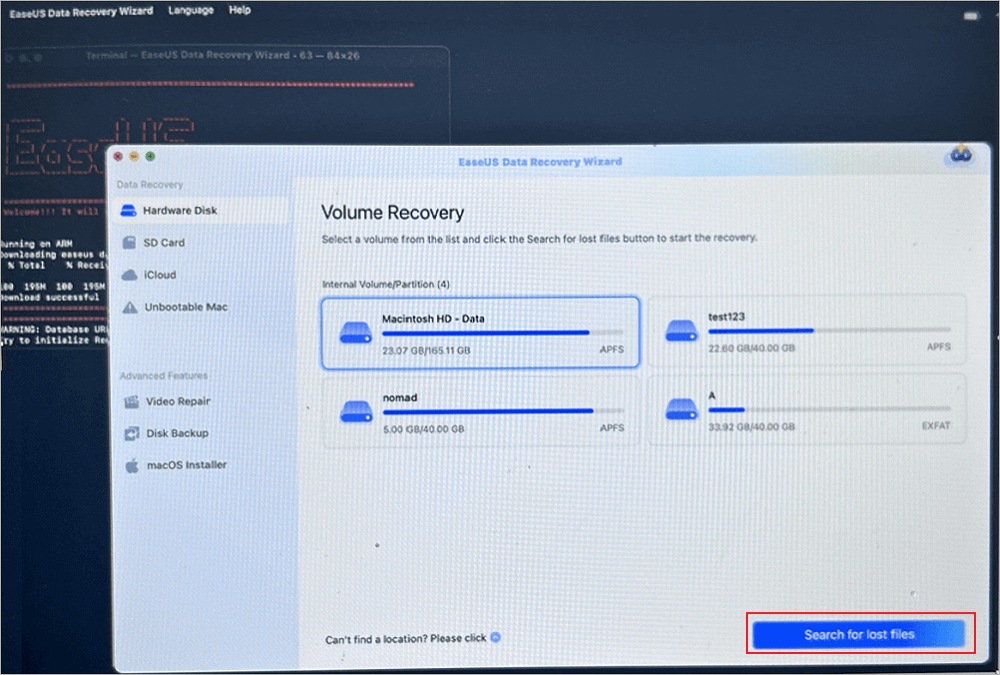
Step 2. Select the Volume on Your Mac Hard Drive
Select the volume where your lost data is stored, and click "Search for lost files". The EaseUS software will quickly locate all the recoverable data on the selected volume.
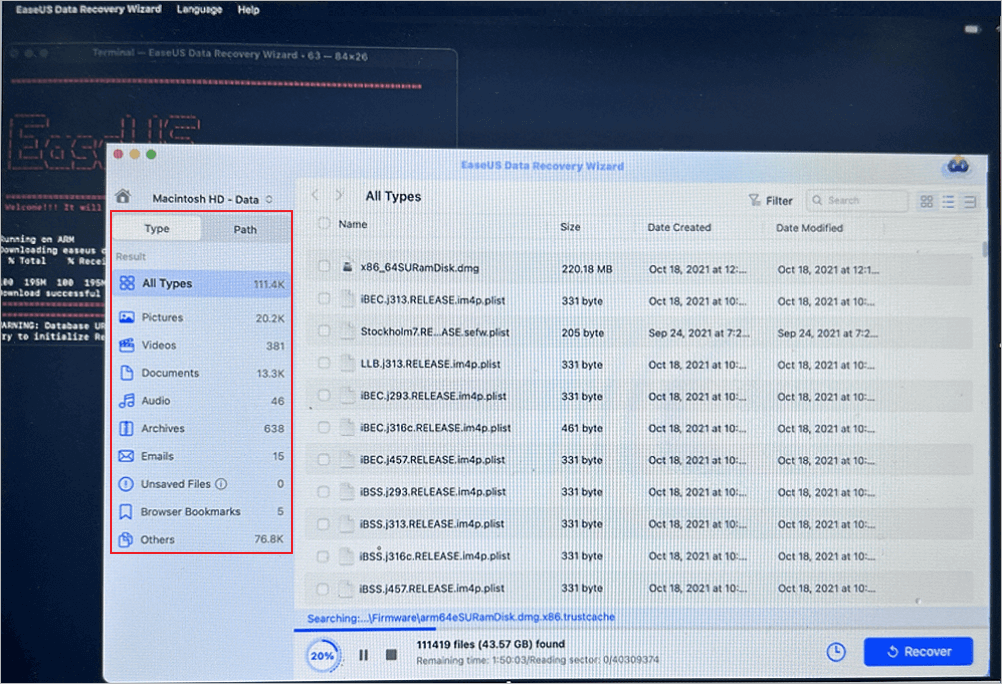
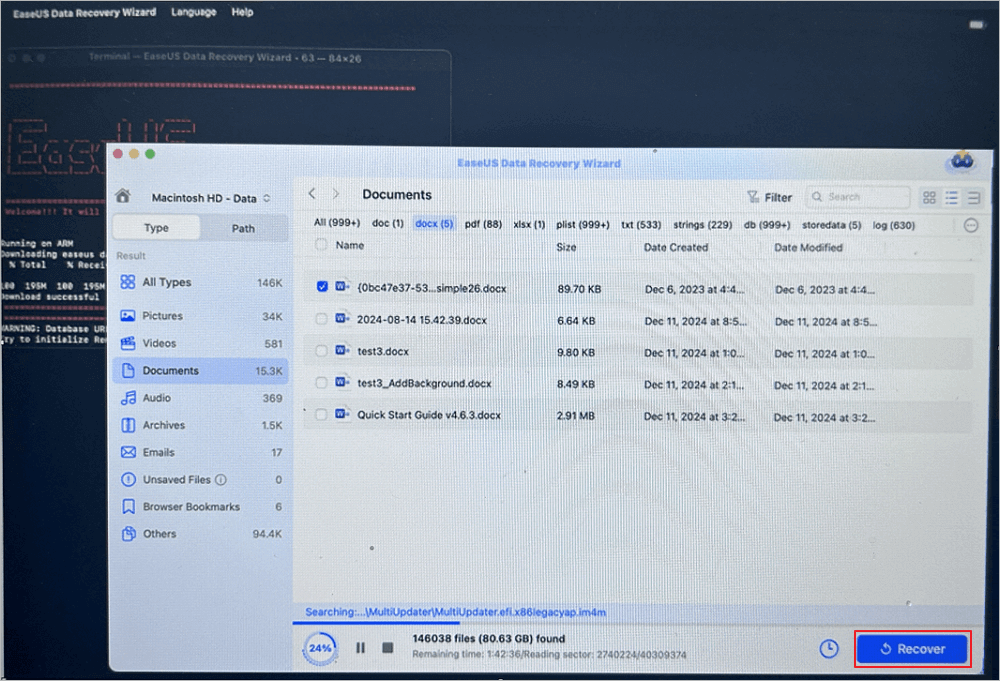
Step 3. Choose the Lost Data You Want
EaseUS software categorizes the scanned recoverable data by file type and storage path. Find the data you want by clicking "Type" or "Path" in the left panel. Then, check the boxes in front of the data you want to recover.
Step 4. Recover and Save Data on an External Disk
Click the "Recover" button, and a pop-up window will show up saying, "Please select a target location to save". Choose the external disk as the new storage location of your recovered data.
The Bottom Line
The reason why your Mac won't boot into Recovery Mode can be divided into two aspects. One is hardware malfunction, that is your keyboard may be broken. Another is there's something wrong with your Mac's recovery partition.
In this article, we have listed comprehensive solutions. No matter why your Mac won't boot into Recovery Mode, you can try to solve it with the provided solutions. What's more, a data recovery tool is also included on this page. You can have a free trial if you are interested in it.
Was This Page Helpful?
Finley is interested in reading and writing articles about technical knowledge. Her articles mainly focus on file repair and data recovery.
Jean is recognized as one of the most professional writers in EaseUS. She has kept improving her writing skills over the past 10 years and helped millions of her readers solve their tech problems on PC, Mac, and iOS devices.
Related Articles
-
How to Fix Mac Video Not Working [5 Tried Solutions]
![author icon]() Dany/Jan 19, 2026
Dany/Jan 19, 2026 -
How to Download macOS Mojave for Free | How-to
![author icon]() Dany/Jun 28, 2026
Dany/Jun 28, 2026 -
How to Fix Crucial SSD Not Mounting on Mac and Recover Data
![author icon]() Jaden/Jun 30, 2026
Jaden/Jun 30, 2026 -
Macintosh HD Download? Restore, Reinstall & Recover Data
![author icon]() Daisy/Jun 30, 2026
Daisy/Jun 30, 2026