Mac Recovery Mode Overview
Are you wondering what macOS Recovery Mode is? The Mac Recovery Mode is an excellent in-built feature of Mac that assists in recovering the system from a wide range of situations. For instance, you can start Mac in Recovery Mode to repair the internal storage device or set security options. You can also use macOS Recovery to reinstall macOS and restore files from Mac Time Machine backup.
Knowing how to boot Mac into Recovery Mode is an excellent idea. That way, you can repair files or reinstall the macOS base system with ease. In this article, we will discuss the Mac Recovery Mode in detail.
How to Boot Mac into Mac Recovery Mode
Do you want to know how to boot your Mac into Recovery mode? The steps differ based on the Mac model you have. Take a look at the sections below.
We have also attached a video to make it easier for you to understand.
- 00:24 Press the Power button
- 00:29 Press and hold the command and R keys till you see the Apple logo
- 00:35 Release the keys
- 01:13 The macOS Utilities window opens
Boot Mac into Mac Recovery Mode [Intel Macs]
Check out the steps to boot Intel Macs into Recovery mode:
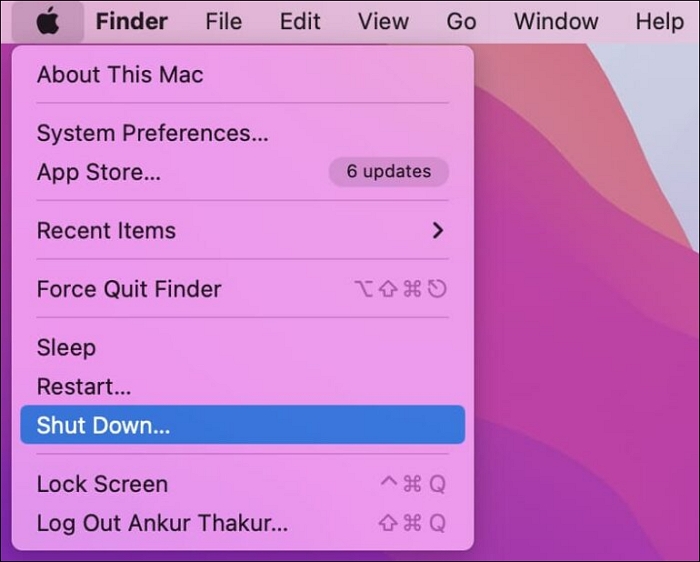
Step 1. Select the Apple logo on the screen. Choose Restart from the drop-down menu.

Step 2. Press the Command and R keys and hold them till you see the Apple logo. The macOS Utilities window opens. From here, you can repair the disk and reinstall macOS seamlessly.

Boot Mac into Mac Recovery Mode [Apple Silicon Macs]
Here are the steps you need to follow to boot Apple Silicon Macs into Recovery mode:
Step 1. Go to the Apple menu. Click on Shut Down. Wait for the system to turn off.
Step 2. Press the Power button and hold it. Wait till you see the "Loading startup options" on the scene. Choose Options. Select Continue.

Step 3. Choose the volume you want to recover (if prompted). Select Next.
Step 4. Choose the administrator account. Click on Next.
Step 5. Enter the password and select Continue.
What Can You Do in Mac Recovery Mode [Four Features]
The Mac Recovery Mode allows users to fix Mac startup issues and reinstall the operating system. As a result, you can improve the efficiency of the system significantly. However, it is vital to understand that third-party apps are unavailable in this mode. There is a limitation on the tasks and apps you can use.
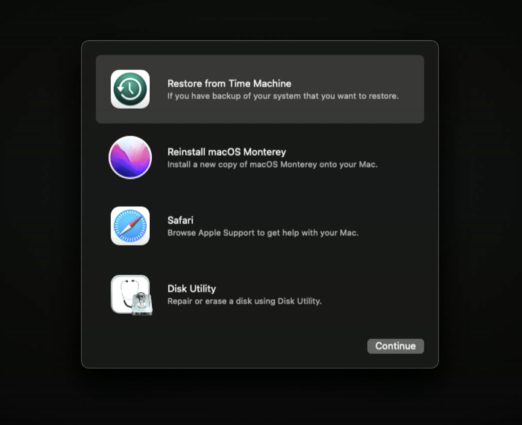
The macOS Utilities window offers four different functions. Let's take a look:
Function 1. How to Use Restore from Time Machine Option on Mac
Have you used Time Machine to back up files on your Mac? In that case, you can opt for the Restore from Time Machine option to restore those files. This option will help you restore Mac to a previous date, which can get back some important data or help you fix some update bugs.
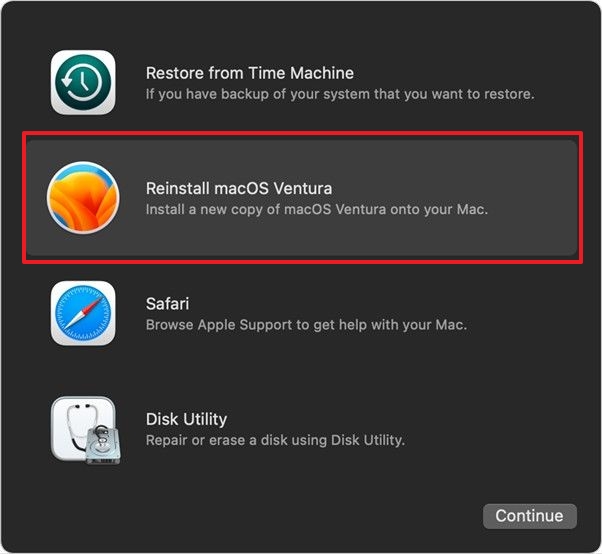
Function 2. How to Use Reinstall macOS Option on Mac
The following function is the Reinstall macOS option. Now, you can download and install a fresh version of the operating system on your device. This is necessary when your device has suffered a brutal virus attack. You will see the thumbnail of the macOS, which can be installed on the system.
Function 3. How to Use Safari Option on Mac
In the Safari option, you can take help from Apple support for various problems. You can visit the different Apple support pages to get more information, but bookmarks, browser add-ons, and extensions are not supported.

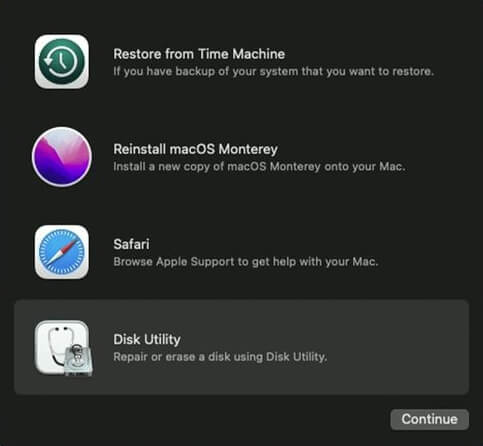
Function 4. How to Use the Disk Utility Option on Mac
If you want to repair or erase disks on your Mac, choosing Disk Utility is the best idea. You can erase or repair a Mac disk with Disk Utility, and you can also repair external hard drives with this option. You can use the Erase option to format the startup disks. Moreover, you can also utilize Disk Utility First Aid for repair purposes.
Rescue Data from Mac Before Fix Issues in Mac Recovery Mode
Do you want to use the Mac Recovery Mode to fix different problems? In that case, having a data backup is of utmost importance. If you have failed to do so or encounter issues booting your Mac and recovering data from the internal hard drive, you must opt for the best file recovery software for Mac. For that, you can choose EaseUS Data Recovery Wizard for Mac.
With this excellent data recovery program, you can recover deleted files Mac without type limits. These include music files, emails, photos, documents, videos, etc. Besides, you can retrieve data from different Mac-based devices such as fusion drives, SSD, HDD, memory cards, cameras, USB drives, and more!
Moreover, you can restore data irrespective of the situation. For instance, format during macOS update, system crash, human error, virus attack, hardware failure, etc., can lead to data loss. But you can use the tool to get back the data you lost, and this tool will help your rescue data when your Mac won't turn on after macOS Ventura.
The EaseUS Data Recovery Wizard for Mac is a professional and efficient data recovery software. It is user-friendly and requires the completion of a few simple steps. Both beginners and experts can use the tool without much hassle. Do you want to know how to use EaseUS Data Recovery Wizard for Mac in Recovery Mode when your Mac can't boot normally? Take a look at the steps listed below:
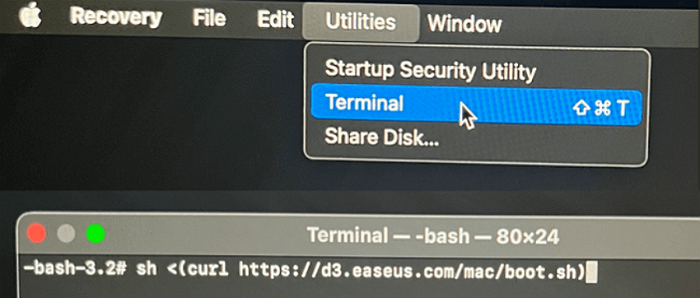
Step 1. Launch EaseUS Software in Recovery Mode
Select "Utilities > Terminal" from the top menu, and enter the command sh <(curl https://d3.easeus.com/mac/boot.sh). Hit "Return". Wait for the application to open, and it will take several minutes.
Note: If the Terminal displays either "No such file or directory" or "Could not resolve host," you should verify that the command line you entered is correctly spelled, ensure your Mac has a stable internet connection, and confirm that your macOS version is not lower than macOS 10.15.
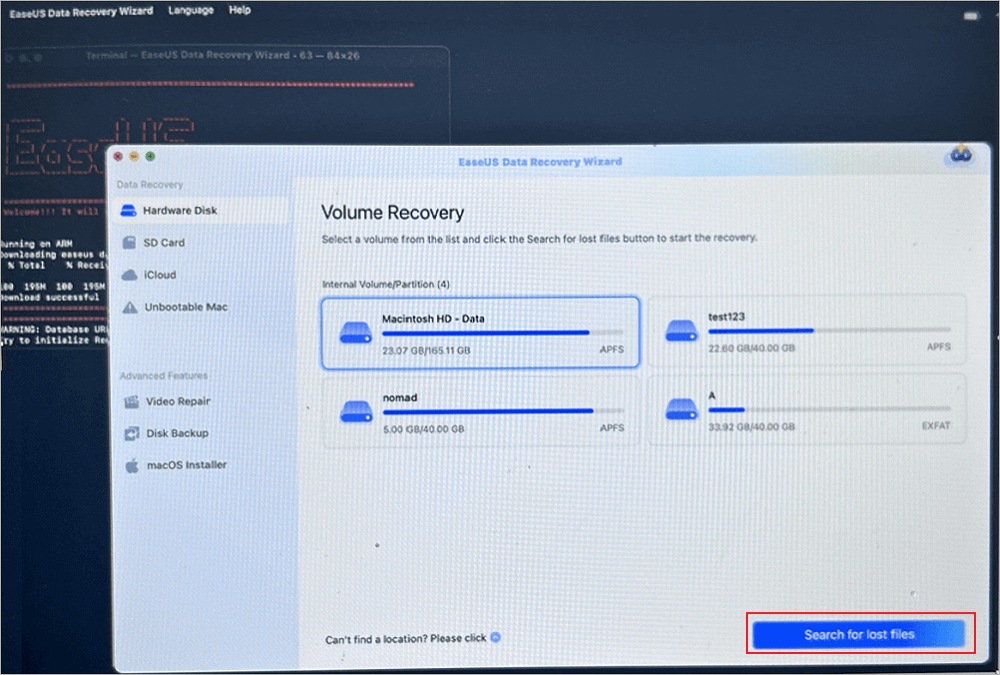
Step 2. Select the Volume on Your Mac Hard Drive
Select the volume where your lost data is stored, and click "Search for lost files". The EaseUS software will quickly locate all the recoverable data on the selected volume.
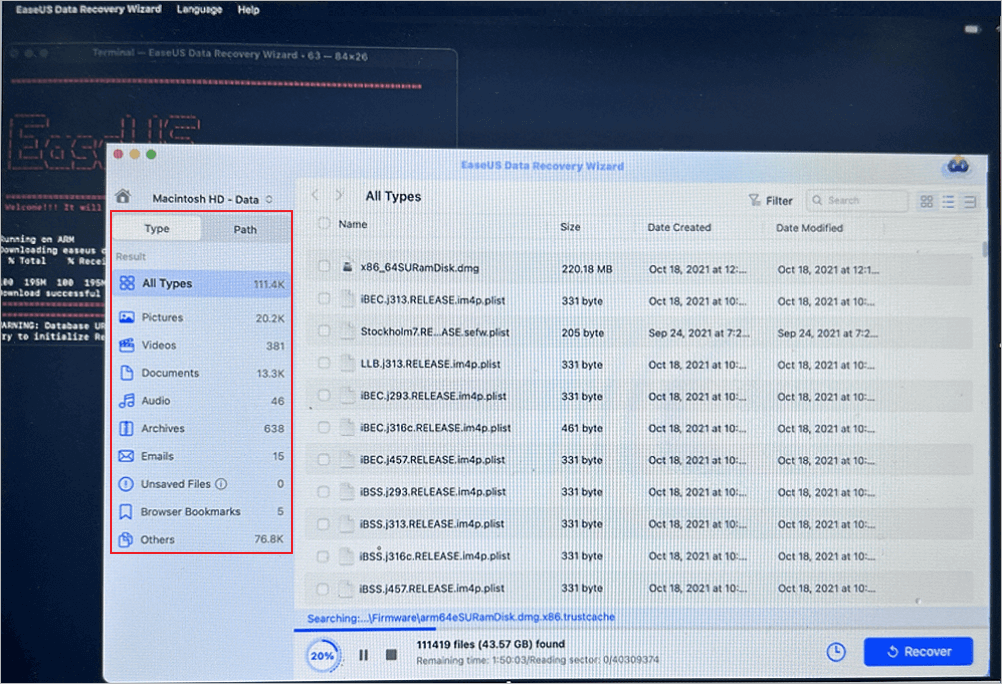
Step 3. Choose the Lost Data You Want
EaseUS software categorizes the scanned recoverable data by file type and storage path. Find the data you want by clicking "Type" or "Path" in the left panel. Then, check the boxes in front of the data you want to recover.
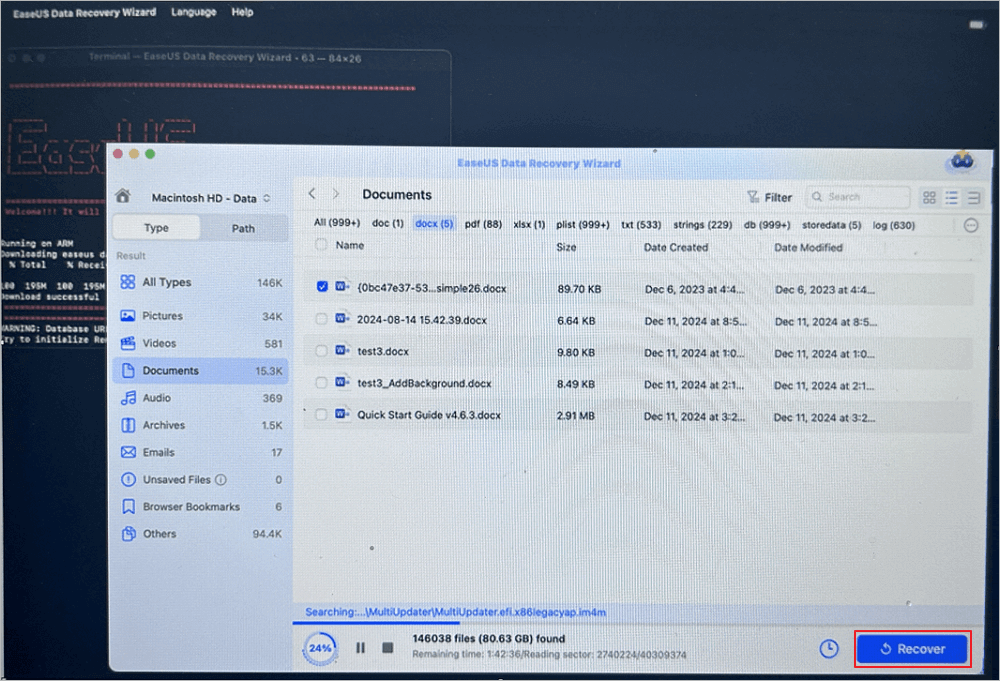
Step 4. Recover and Save Data on an External Disk
Click the "Recover" button, and a pop-up window will show up saying, "Please select a target location to save". Choose the external disk as the new storage location of your recovered data.
Summary
There are different situations where you might need to use Mac Recovery Mode. For instance, you might need to reinstall the operating system or repair the disks. The recovery mode's steps may vary based on the model you use.
The recovery mode comes with four different functions. These include - Restore from Time Machine, Reinstall macOS, Safari, and Disk Utility. However, data loss can occur when you use the recovery mode. In that case, opting for the assistance of a recovery tool is an excellent idea.
The EaseUS Data Recovery Wizard for Mac is a professional, reliable and efficient data recovery program. You can use this tool to retrieve different types of data with ease. Moreover, you can always contact the remote team for help if you find any difficulties. So, what are you waiting for? Start using EaseUS Data Recovery Wizard for Mac today!
Mac Recovery Mode FAQs
Now you know how to use the Mac Recovery Mode. However, it is always imperative to have more knowledge. For that, browse through the following questions and answers:
Will Recovery Mode erase everything on Mac?
Recovery mode has multiple functions you can choose from. If you opt for the Disk Utility function and move ahead with the Erase option, it will delete everything on Mac and erase Mac immediately.
How to Fix Mac Recovery Mode not working?
To fix Mac Recovery Mode not working, reset the SMC or try using the safe mode. You can also check whether the keyboard is working or the recovery partition is damaged or missing. Besides, you must ensure you have used the right key combinations.
What can I do in Mac Recovery Mode?
In the Mac Recovery Mode, you can use different functions. These include repairing the internal storage device, restoring files from Time Machine backup, reinstalling macOS, and setting up security options.
How do I start Mac in Recovery Mode with the keyboard?
To start Mac in Recovery Mode with the keyboard, you must simultaneously use the command and R keys. You can also use the Shift + Command + R keys combination.
Was This Page Helpful?
Brithny is a technology enthusiast, aiming to make readers' tech lives easy and enjoyable. She loves exploring new technologies and writing technical how-to tips. In her spare time, she loves sharing things about her game experience on Facebook or Twitter.
Dany is an editor of EaseUS who lives and works in Chengdu, China. She focuses on writing articles about data recovery on Mac devices and PCs. She is devoted to improving her writing skills and enriching her professional knowledge. Dany also enjoys reading detective novels in her spare time.
Related Articles
-
Silicon Power vs. Crucial SSD: Which SSD to Choose?
![author icon]() Larissa/2026-05-21
Larissa/2026-05-21 -
Automatically Copy Files When USB Drive Connected
![author icon]() Brithny/2025-07-04
Brithny/2025-07-04 -
How to Fix Windows Update Freezes Computer with 7 Solutions
![author icon]() Brithny/2025-07-16
Brithny/2025-07-16 -
How to Factory Reset Microsoft Surface with Every Possible Way
![author icon]() Jerry/2025-07-04
Jerry/2025-07-04
EaseUS Data Recovery Services
EaseUS data recovery experts have uneaqualed expertise to repair disks/systems and salvage data from all devices like RAID, HDD, SSD, USB, etc.