If you have Time Machine installed on your Mac, you may be confident that you will never miss any of your important documents. If you have a Mac, you can restore individual files from a Time Machine to new Mac, or you may travel back in time and restore your computer from the ground up if you have lost everything.
1. How to Recover Files Without Time Machine Backup
It is possible to use EaseUS Mac recovery software to recover lost files from SD cards and external memory device volumes on Mac OS X in a few easy steps. Recovering lost Mac data from macOS is made effortless and straightforward even for those without technical expertise, thanks to the EaseUS Data Recovery Wizard for Mac.
It comes with a preview mode to help you view the found files and recover deleted files on a Mac easily.
EaseUS Data Recovery Wizard Free offers up to 2 GB of free data recovery, including 500 MB available by default and an extra 1.5 GB unlocked after sharing on Facebook and X.
Before you restore individual files from a Time Machine to a new Mac, watch this video first. It provides you with more details on Mac document recovery.
- 00:11 - How to restore a specific item from a Time Machine backup
- 00:34 - Search your backup
- 00:49 - Browse through backups
- 01:13 - Preview the file

How-to Guide
Step 1. Scan for deleted files
Select the hard drive, external drive, or SSD where your important data & files were deleted and click "Search for lost files".

Step 2. Filter the lost files
The software will run quick and deep scans and work hard to find as many deleted files as possible on the selected volume. Filter wanted files through the "Type" and "Path" options.

Step 3. Recover deleted files
Double-click the deleted files to preview. Then, click the "Recover" button to get them back.

2. How to Restore OS from Time Machine
If you've altered your HDD with another one, macOS recovery is essential. So, does Time Machine restore OS? Sure, Mac's Time Machine has made it possible for Mac users.
Time Machine is supported by macOS 10.5 or a newer version. It was first launched in macOS 10.5 Leopard but is wholly revamped in macOS 11 Big Sur.
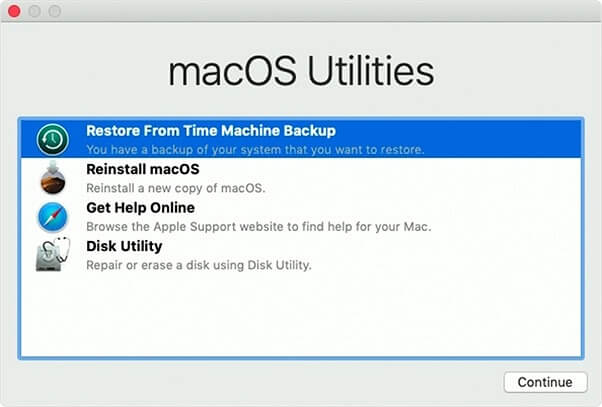
Step 1. Put the Mac in Recovery Mode
Restart your Mac. Press the Command + R keys until the machine boots into recovery mode. If you see the Apple logo on the screen, release the keys. Choose "Restore" from a Time Machine backup and click "Next" using the recovery mode.
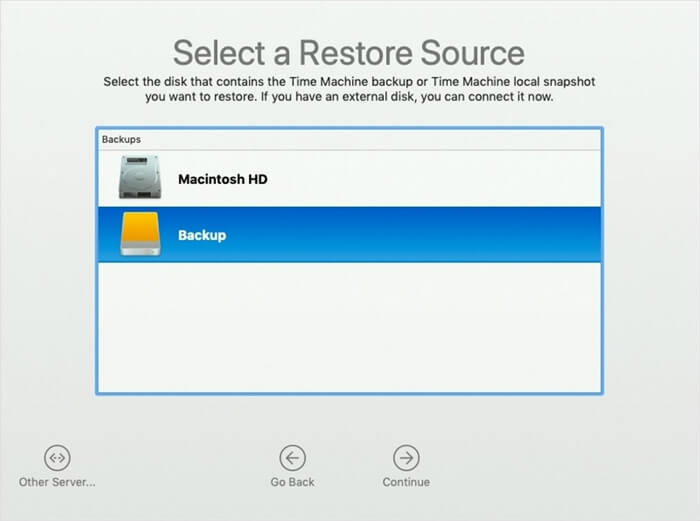
Step 2. Choose a Backup Drive
Click the "Continue" button on the Restore from Time Machine page. Hit "Continue" after selecting your Time Machine backup drive to proceed
Note: You'll need to enter the credentials to decrypt an encrypted drive.
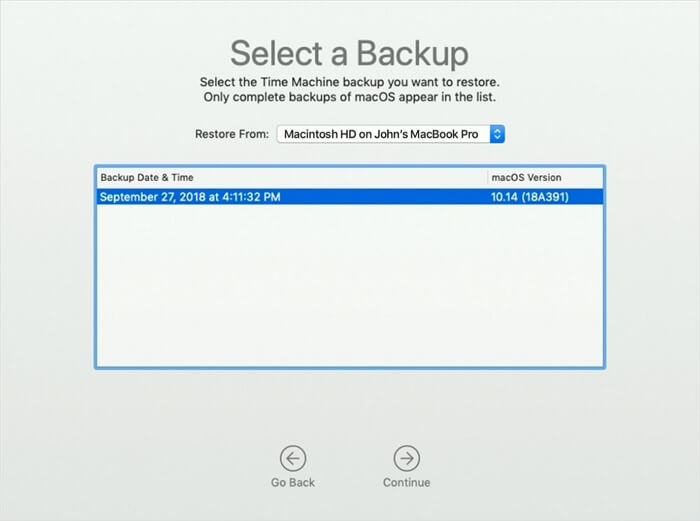
Step 3. Choose a Backup by Date
Click "Continue" once you've chosen a backup and sorted it by date. Then, you can restore your Mac to a previous date.
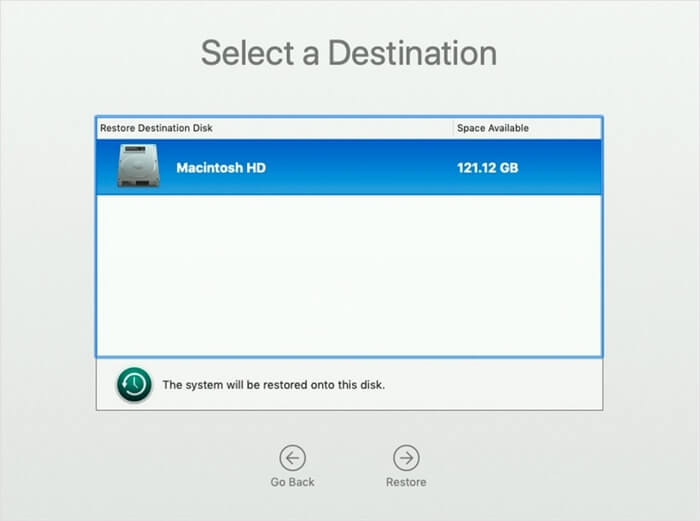
Step 4. Restore macOS
Restore the contents of your Mac's hard drive by selecting the drive and clicking on "Restore". Restart your Mac when you've finished.
3. How to Restore Files from Time Machine
Sometimes, you delete files unknowingly, format a hard drive containing some essential data, or empty the Mac Trash of your PC containing work files. Recovering the data securely in these scenarios is pretty necessary. And the good news for Mac users is that it's possible with Time Machine.
Typically, individuals restore a backup from Time Machine to restore their computer to the exact condition it was in a few days or weeks ago, depending on the situation. You'll need your Mac and an external hard disc with the Time Machine backup to complete this task successfully. However, ensure that you've previously backed up the files in Time Machine.
To recover files from a Time Machine, follow these instructions:
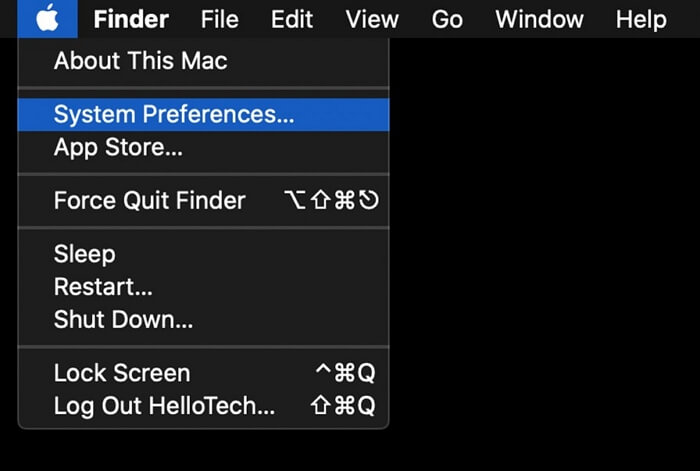
Step 1. Click on System Preferences
In the upper-left corner of your screen, click the "Apple logo". Then, choose "System Preferences" from the drop-down menu.
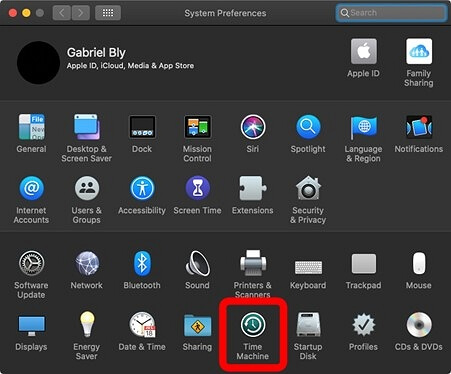
Step 2. Access Time Machine
Click the downward-pointing curved arrow around a clock face symbol to access the Time Machine. Open the "Time Machine" options by clicking on this icon.
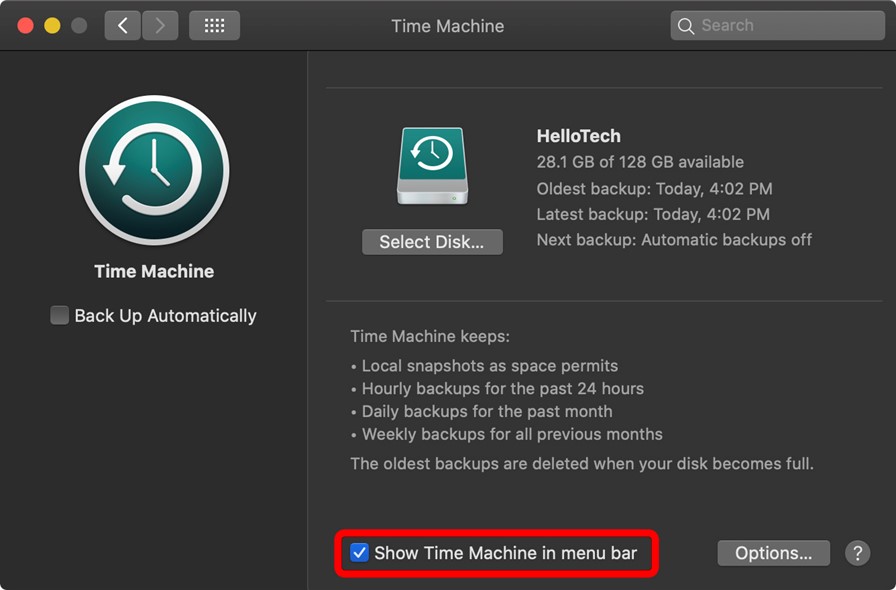
Step 3. Click on Time Machine in Menu Bar
Ensure the "Show Time Machine in the menu bar" option is checked. The Time Machine symbol has been added to the menu bar. It's time to press the button.
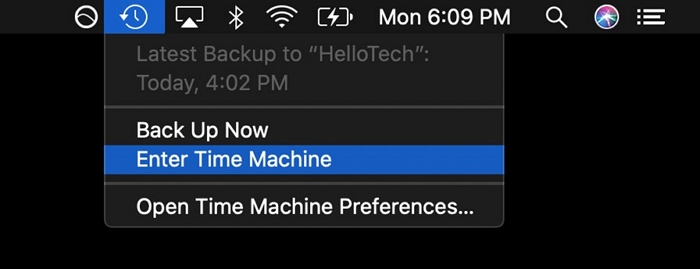
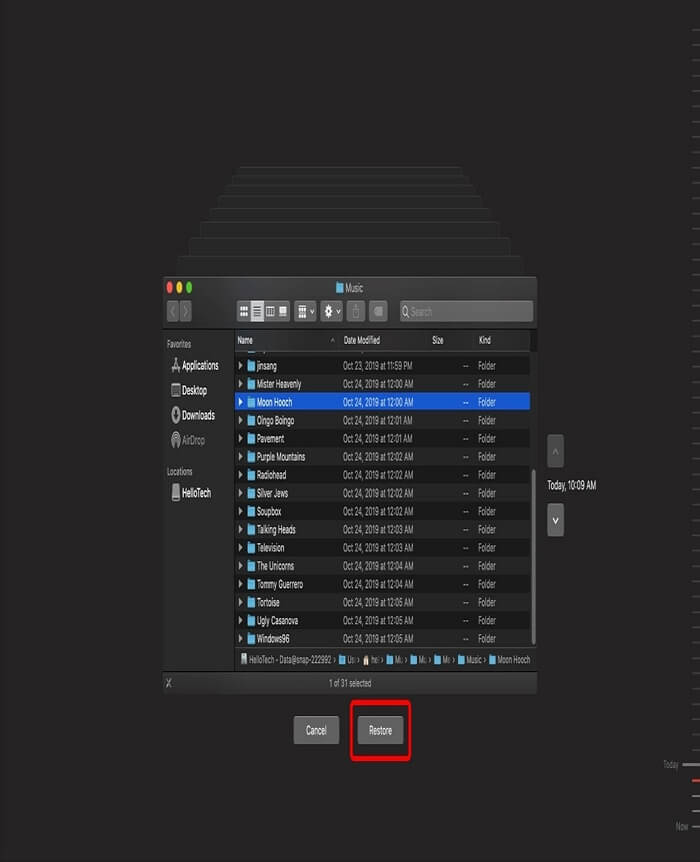
Step 4. Enter Time Machine
Click on the "Enter Time Machine" button. All of your previous Time Machine backups will be shown on this screen. Look for a file or folder in its original location to restore it.
Step 5. Restore the Files
Afterward, click the "Restore" button. This will transfer the file back to its previous place and restore the item.
Restore Files from Time Machine to Another Mac
It is possible to restore files to another Mac using Time Machine. To transfer files using Time Machine to another Mac, follow these instructions:
Step 1. Plug in USB Drive
Plug in the USB that contains the Time Machine Backup to the Mac you're transferring data.
Note: Ensure that the source Mac is running
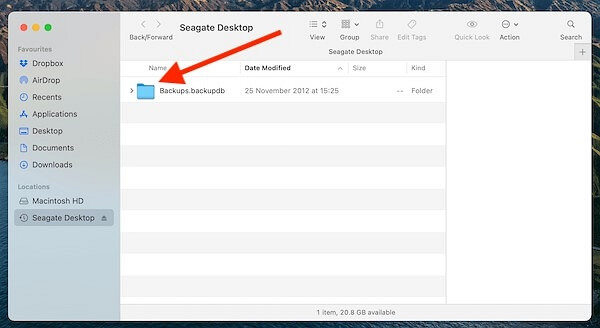
Step 2. Open the Time Machine Backup
Now, you'll see the Time Machine Backup drive. Open it and click on the database file to view the backup.
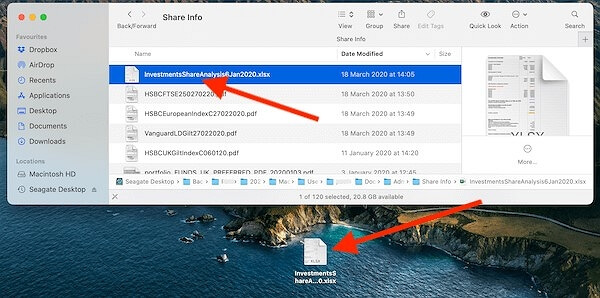
Step 3. Restore the Files
Copy the files you want to restore and paste to the new Mac.
Note: You can also drag and drop the files.
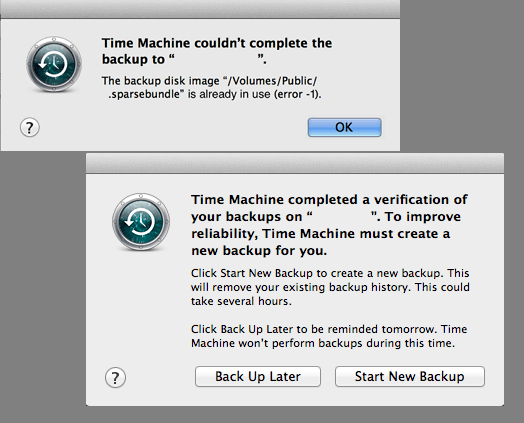
Time Machine Restore Button Greyed Out, How to Fix?
You may find the time machine restore button greyed out occasionally just the same as the above user experience, which the following issues may cause...
Conclusion
Losing data on your Mac is unpleasant, but the issue may often be lessened if you have Time Machine backups handy. You should utilize the program periodically to back up your essential information. Your backups can be the only method to recover from a significant data loss event. Moreover, we hope that you know How to Restore from a Time Machine after reading this article!
Was This Page Helpful?
Finley is interested in reading and writing articles about technical knowledge. Her articles mainly focus on file repair and data recovery.
Jean is recognized as one of the most professional writers in EaseUS. She has kept improving her writing skills over the past 10 years and helped millions of her readers solve their tech problems on PC, Mac, and iOS devices.
Related Articles
-
Cannot Update to macOS Tahoe? Try These Easy Solutions
![author icon]() Dany/Jun 21, 2026
Dany/Jun 21, 2026 -
Recover MKV Files on Mac | How to Open or Recover MKV File
![author icon]() Jaden/Jun 30, 2026
Jaden/Jun 30, 2026 -
9 Tips for How to Fix Mac Stuck on Apple Logo and Recover Data
![author icon]() Jean/Jun 21, 2026
Jean/Jun 21, 2026 -
How to Find Missing Folder in Outlook Mac: 6 Ways [No File Missing]
![author icon]() Brithny/Jun 14, 2026
Brithny/Jun 14, 2026