Featured Articles
The Trash folder on your Mac stores files deleted from your system, and you can move to Trash with shortcuts. This means that once you delete a file on Mac, it's not permanently removed but saved in the Trash. In the long run, this may fill up your Trash and take up a large chunk of space on your computer. The remedy is emptying your Trash to ensure your computer permanently deletes the files.
This article will teach you different methods regarding how to empty Trash on Mac. The methods are easy to learn. Additionally, we'll discuss how to force empty Trash Mac if other methods fail to delete all the files.
How to Empty Trash on Mac Manually or Automatically
If you want to clear files in your Trash folder, it's possible. Emptying your Trash will permanently delete all the files stored in it, creating more space on your Mac. If you want to get started with how to empty Trash on MacBook, you can apply three basic methods
- Empty Trash manually
- Empty Mac Trash automatically
- Force emptying the Trash
We'll discuss how each method works with detailed steps as follows.
NOTE: Emptying the Trash bin permanently erases data, so be careful. If you accidentally delete files you need, recover files from the emptied trash promptly using professional Mac data recovery software.
Method 1. Empty the Trash Manually
The primary way to empty your Trash on Mac is doing it manually. With the manual method, you have the opportunity to individually select the files to delete or delete all files at once. Below are the steps for this method:
Step 1. Open the Trash folder.
Step 2. Once the folder opens, navigate to the upper-right section and click on the Settings icon. Next, select "Empty Trash".
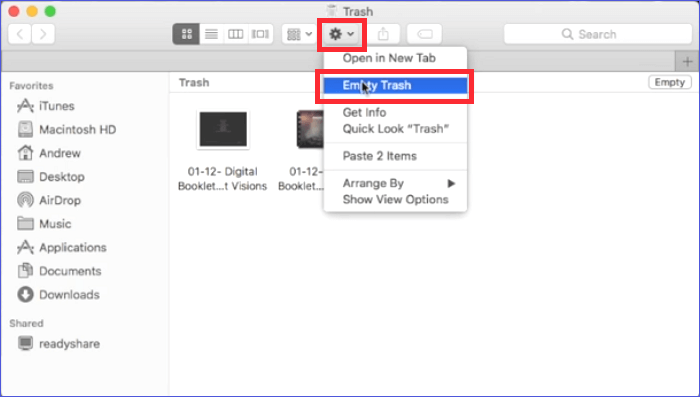
Step 3. On the message popup, click on the "Empty Trash" button. Proceed with deleting the Trash items.
Step 4. If you want to delete a chosen item in the Trash folder, click on it, then select "Empty Trash".
Tip: To delete items from your Trash without the confirmation message displaying, hit Option+Shift+Command+Delete.
Method 2. Empty the Trash Automatically
If you don't want to spend much time and effort deleting items from your Trash folder manually, you can choose to do it automatically. This method is hassle-free and allows you to continue with more important tasks without worrying about your Trash folder getting pilled up.
All Mac devices (including macOS Sonoma) have the option for you to automatically empty the Trash folder every 30 days. You can make this setting through the following steps:
Step 1. Open Finder.
Step 2. Go to "Finder" then "Preferences".
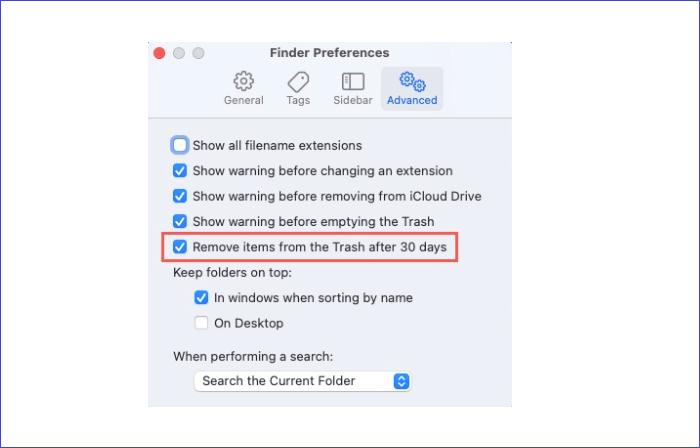
Step 3. Next, click on the "Advanced" tab.
Step 4. Ensure the option "Remove items from Trash after 30 days" is checked. Once you've done that, your Mac will automatically empty your Trash every 30 days.
Method 3. Force Empty Trash on a Mac
In situations when you try to empty Trash using the normal methods but they fail to work, you can try force-emptying it. This technique deletes files even when they're still in use or locked. The easiest way to force empty Trash Mac is via the Terminal. Below are steps to accomplish that:
Step 1. Open Terminal.
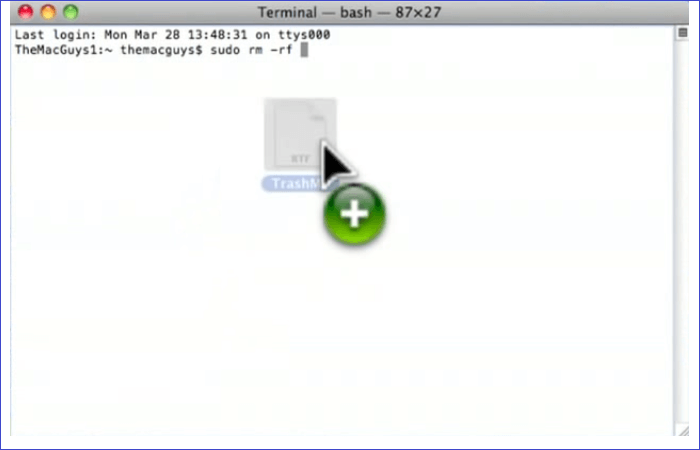
Step 2. Type the following command, then put a space after it: sudo rm -rf.
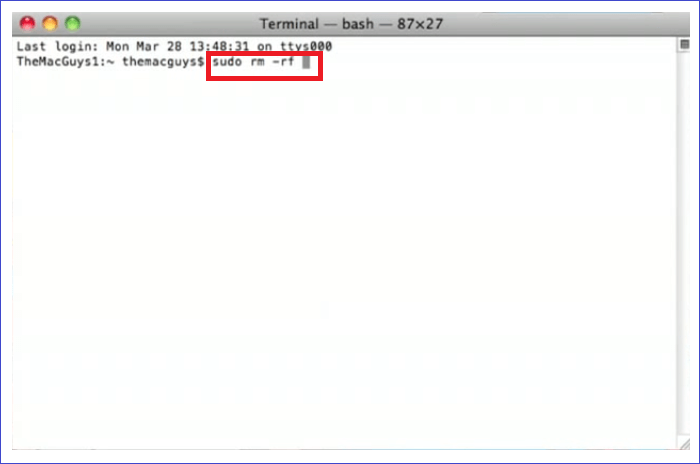
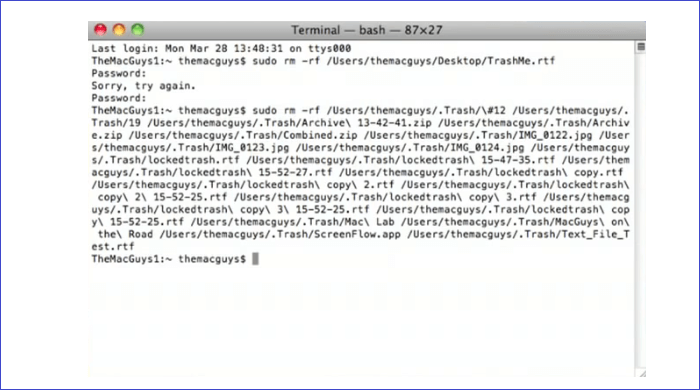
Step 3. Navigate to the Trash folder and select the files to delete. Drag these files to the Terminal window and press Return.
Step 4. Enter the admin password for your Mac and confirm it by pressing Return. Next, run the command to delete the selected files from your Trash. This will force delete all the files that had refused to empty manually or automatically.
More Helpful Guide: How to Recover Files from Emptied Trash on Mac
Have you ever encountered a situation where you've recently emptied your Trash and discovered that you still need some of the deleted files? How did you deal with the incident? This section will show you how to recover files from Emptied Trash using a professional Mac Trash recovery software called EaseUS Data Recovery Wizard for Mac.
This software becomes handy in data loss situations by allowing the recovery of music files, videos, photos, documents, etc. It allows you to scan for lost data on HDDs, SDDs, Time Machine backup drives, USB drives, SD cards, and cameras. With EaseUS Data Recovery Wizard for Mac, you can recover deleted files on Mac of different sizes ranging from smaller ones to huge files.
Other features of EaseUS Data Recovery for Mac include a file filter, support for bootable media, scan mode, data protection, file preview, and the ability to recover files to the cloud.
Below are steps to recover data from emptied Mac Trash using EaseUS Data Recovery Wizard for Mac:
Step 1. Select the location to scan
Launch EaseUS Data Recovery Wizard for Mac and choose the hard drive, SSD, SD card, USB flash drive, or TF card where you lost data. Click "Search for lost files" to start scanning.

Step 2. Filter lost Mac data
The software will automatically scan for lost data on MacBook/iMac. When the scan completes, filter wanted data through the "Type" and "Path" buttons.

Step 3. Recover lost data or files
Double-click a file to preview it. Then, click the "Recover" button to restore the lost data to another place.

Final Verdicts
The manual method is the most basic way to delete Trash on Mac. If you want to save on time and effort incurred in the manual technique, you can choose to do it automatically by setting your system to delete files from your Trash folder every 30 days. In situations where you encounter files that fail to delete from your Trash because they're locked or still in use, you can force remove them using the Terminal.
Deleting all files from your Trash folder is an excellent way to free up space and make your system work faster. If you want to recover files emptied from Trash, we recommend you use recovery software like EaseUS Data Recovery Wizard for Mac. This tool will help recover partitions on Mac quickly.
How to Empty Trash on Mac FAQs
Knowing how to empty Trash on Mac is important since it helps you to easily remove unnecessary files from your device and create additional space. To help you understand further about emptying Trash on Mac, we’ve answered the following questions for you.
1. How Do I Empty Trash?
You can empty Trash on Mac manually, automatically, or forcefully using Terminal. With the manual method, you'll have to individually select the files you want to empty from Trash. If you want to empty Trash automatically, you can set the system to do so every 30 days. If it becomes hard to empty specific files manually or automatically, you can use commands on Terminal to force remove them from your Trash folder.
2. Where Is the Trash Folder on Mac?
Where is Trash on Mac? To access the Trash folder on Mac, click its icon in the Dock. Alternatively, you can press Command+Shift+G on your keyboard and enter Trash to open the folder.
3. Why Can I not Empty the Trash on Mac?
When it becomes difficult to empty Trash on Mac, it could be that the selected files are still in use or are locked. To deal with such files, you'll need to force remove them using the Terminal.
4. How to Delete the Trash via the Terminal?
To conveniently delete Trash via Terminal, you can apply the following steps:
Step 1. Paste the following command into Terminal and press the Space key: sudo rm -rf.
Step 2. Open the Trash folder.
Step 3. Select the files you want to delete from Trash. Drag these files to the Terminal window.
Step 4. Hit Enter.
Step 5. Input your Mac password to confirm the deletion process. Next, press Enter. You've now deleted files from Trash using Terminal.
Was This Page Helpful?
Dany is an editor of EaseUS who lives and works in Chengdu, China. She focuses on writing articles about data recovery on Mac devices and PCs. She is devoted to improving her writing skills and enriching her professional knowledge. Dany also enjoys reading detective novels in her spare time.
Cedric Grantham is a senior editor and data recovery specialist of EaseUS. He mainly writes articles and how-to tips about data recovery on PC and Mac. He has handled 10,000+ data recovery cases and is good at data recovery of NTFS, FAT (FAT32 and ExFAT) file systems, and RAID structure reorganization.
Related Articles
-
ESC Key Not Working Mac: with 5 Practical Ways to Fix Escape Key Not Working
![author icon]() Brithny/Oct 25, 2024
Brithny/Oct 25, 2024 -
Fix the Installation Failed in the FIRST_BOOT Phase [100% Working]
![author icon]() Cici/Aug 05, 2024
Cici/Aug 05, 2024 -
How to Delete a User Profile From Windows 10 [Fixed]
![author icon]() Daisy/Jan 11, 2024
Daisy/Jan 11, 2024 -
Samsung T7 vs. T9: Which SSD to Choose?
![author icon]() Larissa/Nov 25, 2024
Larissa/Nov 25, 2024