What Is Disk Utility and When Will You Need It
Disk Utility is a macOS built-in disk repair tool that can help you solve common disk issues on Mac, and Disk First Aid is a valuable feature that can check whether the disk and volume are healthy. You can apply Disk Utility to repair your disk in many situations:
- Mac crashes frequently.
- Mac or MacBook won't turn on after macOS Ventura.
- Files or folders on Mac disappear unreasonably.
- USB flash drive or SSD not showing up on Mac.
The next part will discuss how to repair a Mac disk with Disk Utility. Before that, you can get information about how to repair a Mac disk with Disk Utility in Recovery Mode in the following video. Here are the highlights of this short video:
- 00:12 Recovery Mode introduction
- 00:41 How to run Disk Utility
- 00:57 Use Disk Utility to solve the disk problem
How to Open Disk Utility on macOS Ventura
When you want to repair a Mac disk on a working Mac, you should learn how to open Disk Utility with the Finder or the Launchpad. We will introduce both two ways to open Disk Utility on the working Mac, and we will take macOS Ventura as an example:
Method 1. Use the Finder to Open Disk Utility:
Step 1. Open the Finder on macOS Ventura.
Step 2. Click "Go" and then choose "Utilities" on macOS Ventura.
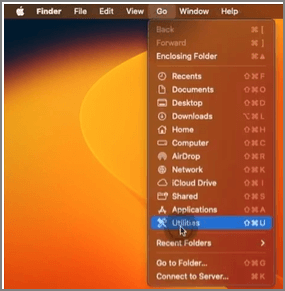
Step 3. Scroll down until you find Disk Utility, and double-clicking can help you open it.
Method 2. Use the Launchpad to Open Disk Utility:
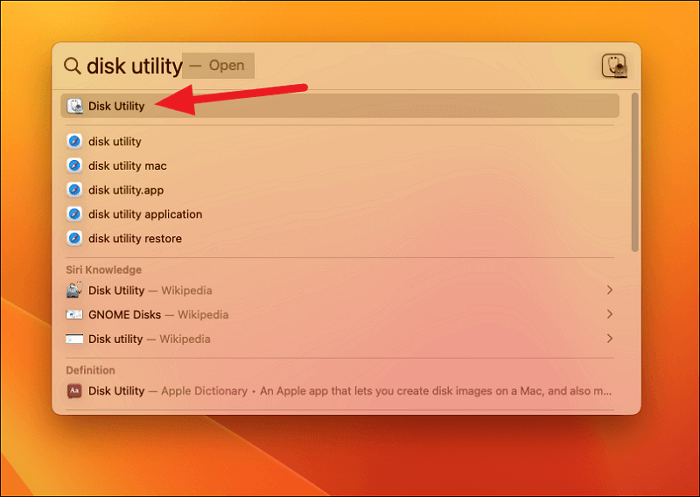
Step 1. You can click the macOS Launchpad in the Dock.
Step 2. Type in Disk Utility, and click the icon to open it.
How to Repair a Mac Disk with Disk Utility in 2 Ways
After finding a way to open Disk Utility, we can start to repair a Mac disk with Disk Utility. We will show detailed tutorials for repairing a Mac disk with Disk Utility when your Mac can boot and when your Mac fails to boot.
How to Repair a Mac Disk with Disk Utility When Your Mac Can Boot
When there are small errors appear on your disk, you can open Disk Utility on macOS to repair the disk errors. After opening Disk Utility by using Launchpad or the Finder, you should follow these steps:
Step 1. Choose "View" and click "Show All Devices".
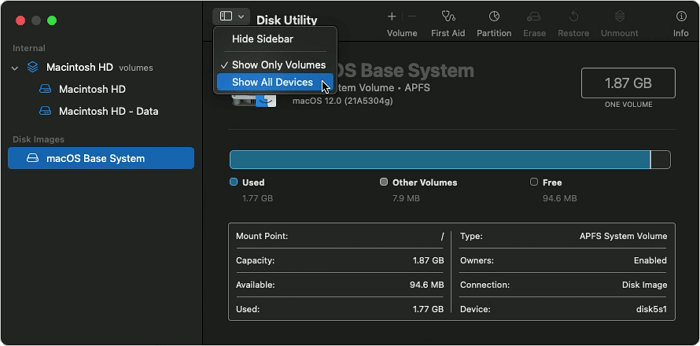
Step 2. All the available disks on Mac will show up in the sidebar.
Step 3. Select a Mac disk you want to repair.
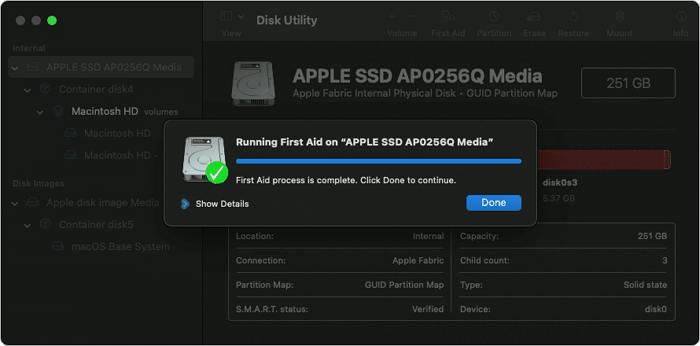
Step 4. Click the First Aid button, and then choose "Run".
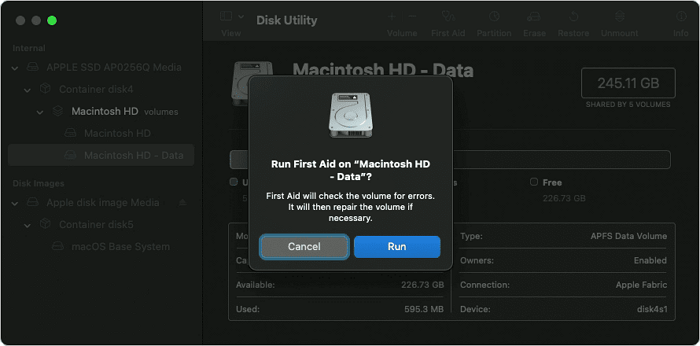
Step 5. You can click "Done" when the process is finished.
How to Repair a Mac Disk with Disk Utility When Your Mac Fails to Boot
Encounter serious disk errors that may cause your Mac to not boot normally. In that case, you can repair the disk with Disk Utility in Recovery Mode. By the way, if your macOS Ventura Recovery Mode missing, you may need to reinstall macOS Ventura first.
Step 1. Make sure your Mac or MacBook has shut down already.
Step 2. How to boot Mac into Disk Utility? For Apple Silicon Macs: Turn on the Mac and hold the power button. For Intel-Based Macs: Turn on the Mac and hold down the Command and R keys.
Step 3. Release the key until you see the Recovery Mode window.
Step 4. Choose "Disk Utility" and continue.
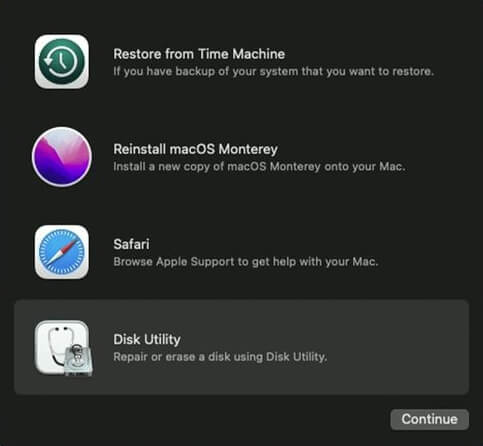
Step 5. Choose "View" and click "Show All Devices".
Step 6. All the available disks on Mac will show up in the sidebar.
Step 7. Select a Mac disk you want to repair.
Step 8. Click the First Aid button, and then choose "Run".
Step 9. You can click "Done" when the process is finished.
Note: If your macOS can't repair the disk, you can restart the Mac, use the FSCK command, or reformat the disk to solve the problem.
Rescue Data from a Corrupted Mac Disk with Software
When your Mac disk is damaged or corrupted, it is possible to recover data from it. You need to seek the help of professional recovery software – EaseUS Data Recovery Wizard for Mac.
EaseUS Data Recovery Wizard
- Support corrupt SD card recovery Mac and corrupted or damaged Mac disk, external hard drive recovery.
- Support graphic, video, music, document, and email recovery on Mac disk.
- Mac video repair, photo repair, audio repair, and document repair are available.
Step 1. Select the drive to be scanned
In the main EaseUS Data Recovery Wizard window, there will be a list of the drives connected to your Mac. Select the drive you need to recover lost/deleted files from, and click the "Search for lost files" button.

Step 2. Select your lost data/files
EaseUS Data Recovery Wizard for Mac will immediately scan your selected disk volume and display the scanning results on the left pane. You can sort the results to find the wanted files if you are looking for certain files.

Step 3. Recover lost/deleted data
Once you have found the desired files, preview the files and then click "Recover" to begin the recovery of your deleted/lost Mac files.

Repair a Mac Disk with Disk Utility FAQs
Do you want to know more about repairing a Mac disk with Disk Utility? Here are four questions you might be interested in:
How to repair bad sectors on an external hard drive on Mac with Disk Utility?
There are two workable ways to fix bad sectors on an external hard drive. You can repair bad sectors on external hard drive on Mac with the Disk Utility First Aid option or restore the target external hard drive to replace the failing external hard drive.
Is Disk Utility available in macOS recovery?
Yes, you can boot your Mac into macOS Recovery Mode and use Disk Utility to fix disk errors on your Mac. How to boot Mac into Recovery Mode?
- 1. Make sure your Mac or MacBook has shut down already.
- 2. For Apple Silicon Macs: Turn on the Mac and hold the power button. For Intel-Based Macs: Turn on the Mac and hold down the Command and R keys.
- 3. Release the key until you see the Recovery Mode window.
- 4. Choose "Disk Utility" and continue.
Can I recover data from a Corrupted Mac disk?
You can recover data from a corrupted Mac disk with EaseUS Data Recovery Wizard for Mac.
- 1. Install and launch the recovery software on Mac.
- 2. Scan the Mac disk to find lost files.
- 3. Filter and preview the files lost on the Mac disk.
- 4. Then, you can recover data from the corrupted Mac disk.
How to repair a Mac disk if my Mac cannot boot?
You need to boot Mac into Disk Utility to repair a Mac disk.
- 1. Make sure your Mac or MacBook has shut down already.
- 2. For Apple Silicon Macs: Turn on the Mac and hold the power button. For Intel-Based Macs: Turn on the Mac and hold down the Command and R keys.
- 3. Release the key until you see the Recovery Mode window.
- 4. Choose "Disk Utility" and continue.
- 5. Choose "View" and click "Show All Devices".
- 6. All the available disks on Mac will show up in the sidebar.
- 7. Select a Mac disk you want to repair.
- 8. Click the First Aid button and choose "Run ".
- 9. You can click "Done" when the process is finished.
Was This Page Helpful?
Dany is an editor of EaseUS who lives and works in Chengdu, China. She focuses on writing articles about data recovery on Mac devices and PCs. She is devoted to improving her writing skills and enriching her professional knowledge. Dany also enjoys reading detective novels in her spare time.
Related Articles
-
Windows 10 Update Assistant Is Stuck at 99%! 9 Ways to Fix It
![author icon]() Brithny/2024-10-25
Brithny/2024-10-25 -
Fixed: ATA/SATA Hard Drive Not Detected or Recognized in BIOS
![author icon]() Tracy King/2024-07-01
Tracy King/2024-07-01 -
The Best Practices for Using Encrypted USB Drives
![author icon]() Jaden/2024-10-30
Jaden/2024-10-30 -
Fixed: Windows 10 File History Doesn't Recognize the Hard Drive
![author icon]() Tracy King/2024-03-15
Tracy King/2024-03-15

EaseUS Data Recovery Services
EaseUS data recovery experts have uneaqualed expertise to repair disks/systems and salvage data from all devices like RAID, HDD, SSD, USB, etc.