Quick Navigation:
| Workable Solutions | Step-by-step Troubleshooting |
|---|---|
| 1. Restart the Mac |
Click the Apple icon from the menu...Full steps |
|
2. Use FSCK Command |
Restart your Mac and boot into Single User...Full steps |
|
3. Reformat Disk |
Get another empty external hard drive as...Full steps |
Disk Utility is a macOS built-in tool for disk erasing, formatting, and emergency repairing. Some might equal Disk Utility to Disk Management in Windows system. But they don't share the same functions. Disk Utility enables users to mount and unmount external drives that Finder has trouble mounting, format flash drives, and hard drives to a specific format, check and repair disk errors.
Overview of macOS Can't Repair the Disk
First Aid in Disk Utility is designed for users to repair the disk and other storage devices. It can be applied to various scenarios, like apps breakdown, file corruption, external device damage, or computer won't start up normally.
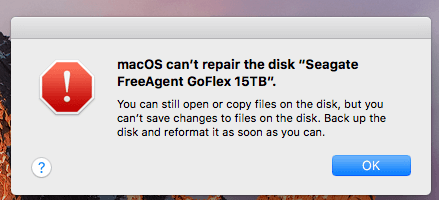
But you should also know that Disk Utility can't detect or repair all disk problems. On some occasions, when you try to repair the disk with First Aid, you will receive an error message saying "Can't repair the disk". To further describe the problem, you have received the error message, but you still can open or copy files on the disk, you just can't save changes to files on it.
Why Disk Utility Can't Repair My Disk?
In one case, the reason why Disk Utility stops repairing is that the First Aid failed. This usually happens when you try to fix the Macintosh HD, and the error message you receive could also be "The volume Macintosh HD could not be repaired". Besides the internal hard drive, First Aid failure can also occur with a USB flash drive, SD card, or external hard drive.
In another case, if your disk is badly damaged and is beyond the repair ability of First Aid, you would also see the error message. In this situation, all you can do is to back up the disk data as much as possible or to recover the data using data recovery software.
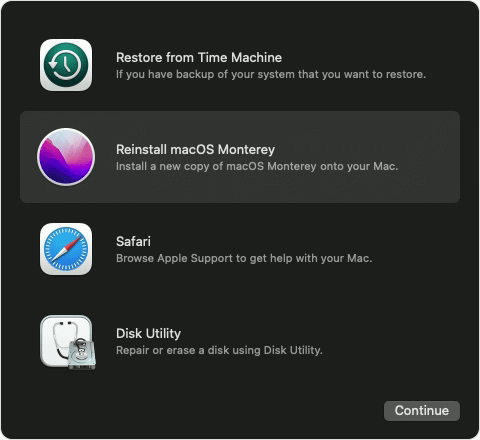
macOS Recovery - What Can Recovery Mode Do when macOS Breakdown?
Mac's recovery mode is designed for users to solve some serious problems. In this article, we will introduce everything you need to know about recovery mode. Keep reading and learn more details about it.
How to Fix Disk Utility Can't Repair the Disk?
All in all, there are three ways you could try to fix this problem. Generally, the methods we introduced here won't cause data loss. But for your sake, it is still recommended to make a backup of your disk. Now, here come the solutions.
Solution 1. Restart the Mac and Repair the Disk with First Aid Again
Surprise! This is the official suggested solution for all users who have encountered the macOS can't repair disk issue. Because a simple retry could solve the temporary First Aid failure. Here are the detailed steps:
Step 1. Click the Apple icon from the menu bar and select Restart.
Step 2. Click Restart again when the confirmation alert appears.
Step 3. Then your Mac will restart automatically, please wait with patience.
Step 4. After your Mac is turning on again, go to Applications > Disk Utility.
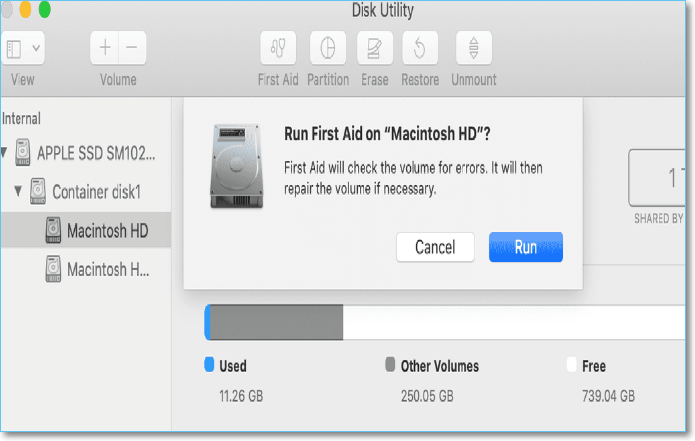
Step 5. Choose the disk you need to repair, click First Aid at the top bar.
Step 6. Click Run to confirm. And wait for the new round of First Aid repair to be finished.
Solution 2. Use FSCK Command to Repair Disk
When the First Aid fails, you can try to use the command line as an alternative. This method might seem a little complicated, but as long as you follow the guide step by step, it's actually simple to use. Here is what you need to do.
Step 1. Restart your Mac and boot into Single User mode. On older Macs, press and hold Command + S when hearing the startup sound. On M1 Macs, press and hold Command + R during restart, and then choose Utilities, and Terminal.
Step 2. Enter the command line: diskutil list and press Enter to list all connected external hard drives.
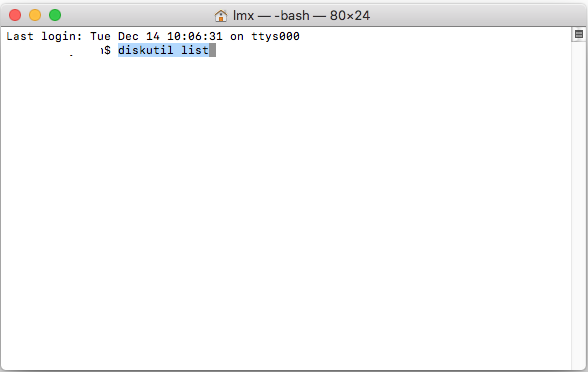
Step 3. The identifier in the last column represents the number of all external devices, remember the number of the external hard drive you want to repair.

Step 4. Enter the command line: /sbin/fsck_file system –fy /dev/drive identifier (e.g. disk0s2), press Enter to start the checking and repairing.
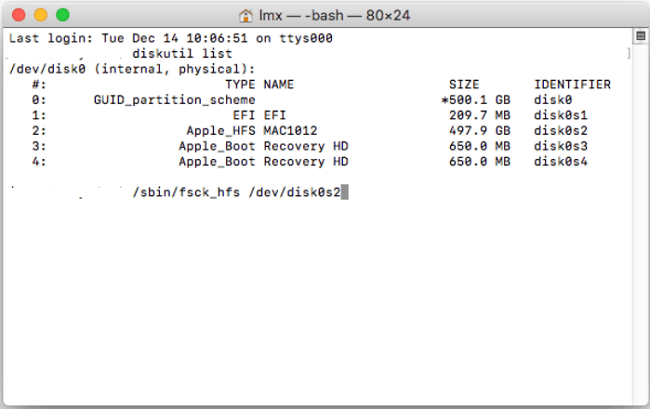
Step 5. Input Reboot and press Enter to restart your Mac.
If you see a line saying "The volume (the name of your drive) could not be verified completely", it means the FSCK tool can't repair the disk. Don't do anything and try the next solution.
Solution 3. Back-Up Disk Data and Reformat it With Disk Utility
If the above two methods can't fix the problem, the last resort is to back up the data in the target disk and reformat it. If the disk you want to repair is an internal hard disk, you could use Time Machine to create a backup. If the disk you want to repair is an external one, see if there is any backup software that can help. If not, you could try to recover the data using Mac data recovery software after formatting.
Backup with Time Machine
Step 1. Get another empty external hard drive as the backup drive. It should be larger than the data you need to back up.
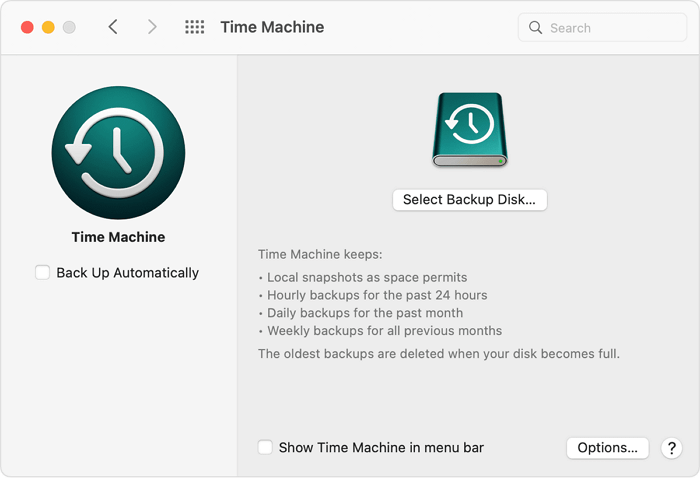
Step 2. Connect this empty drive to your Mac, click "Use as Backup Disk" when you see a dialog box asking if you want to use this drive for backup.
Step 3. Click Select Backup Disk and choose the disk you prepare, then click Use Disk.
Step 4. On the left column, select the Back Up Automatically option. Time Machine will automatically back up your entire Macintosh HD.
Format Disk with Disk Utility
Step 1. Go to Applications > Disk Utility.
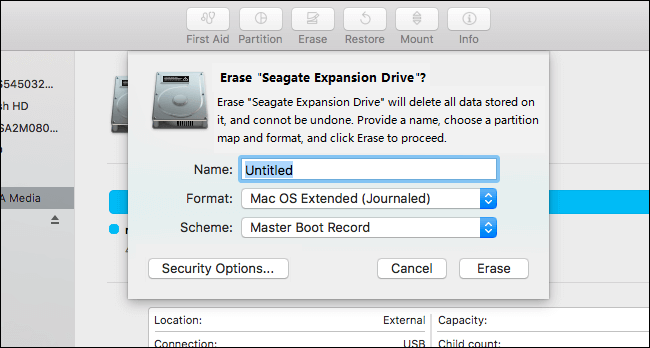
Step 2. Select the disk you need to format from the left side.
Step 3. Click Erase, enter the disk name, and choose a format. There will be a given format, generally, you don't need to change.
Step 4. Click Erase to start formatting.
Restore Time Machine Backup
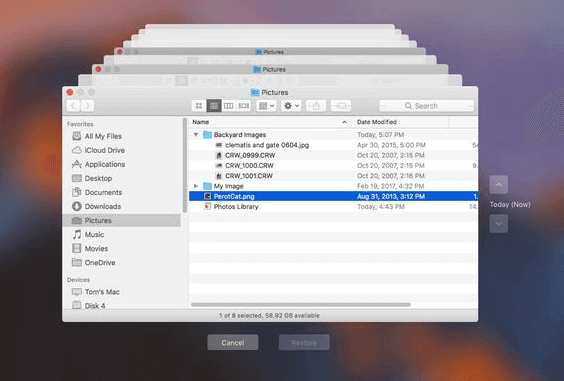
Step 1. Connect the Time Machine drive to your Mac and run Time Machine.
Step 2. Find the latest version prior to the reformatting of your disk. Select it. Hit the Restore button.
Recover Data from Formatted External Drive
If you have formatted an external drive, we suggest you use Mac data recovery software to recover data. EaseUS Data Recovery Wizard for Mac is a well-designed tool that covers all data loss scenarios. For example, recover data from emptied Trash, formatted external hard drive/USB flash drive/SD card, or recover data after OS crash.
Download the software from the button below, and follow the guide to see how to recover data from a formatted drive with EaseUS.
Step 1. Search for lost files
Correctly connect your external hard drive to your Mac. Launch EaseUS Data Recovery Wizard for Mac, and select the external hard drive. Then, click "Search for lost files" to find lost/deleted files on your external devices.

Step 2. Filter and find lost files
After the scan, all file types will be presented in the left panel. Select the file type to find wanted files on your external devices.

Step 3. Preview and recover
Click the file and preview it. Then, select the files you want to recover and click the "Recover" button. You can save your data to local and cloud drives.

Conclusion
Don't panic if you see the macOS can't repair disk message, it's a common and fixable issue. Try First Aid again first when you encounter the problem, if it doesn't help, the FSCK command and disk formatting are also worth trying. Last but not least, always remember to protect your data with backup.
Was This Page Helpful?
Cedric Grantham is a senior editor and data recovery specialist of EaseUS. He mainly writes articles and how-to tips about data recovery on PC and Mac. He has handled 10,000+ data recovery cases and is good at data recovery of NTFS, FAT (FAT32 and ExFAT) file systems, and RAID structure reorganization.
Jean is recognized as one of the most professional writers in EaseUS. She has kept improving her writing skills over the past 10 years and helped millions of her readers solve their tech problems on PC, Mac, and iOS devices.
-
EaseUS Data Recovery Wizard is a powerful system recovery software, designed to enable you to recover files you’ve deleted accidentally, potentially lost to malware or an entire hard drive partition.
Read More -
EaseUS Data Recovery Wizard is the best we have seen. It's far from perfect, partly because today's advanced disk technology makes data-recovery more difficult than it was with the simpler technology of the past.
Read More -
EaseUS Data Recovery Wizard Pro has a reputation as one of the best data recovery software programs on the market. It comes with a selection of advanced features, including partition recovery, formatted drive restoration, and corrupted file repair.
Read More
Related Articles
-
Recover Recently Deleted iCloud Drive Files on Mac [with 3 Methods]
![author icon]() Brithny/Apr 08, 2026
Brithny/Apr 08, 2026 -
Recover Unsaved/Deleted QuickTime Recordings [2026 Update]
![author icon]() Jean/Jan 19, 2026
Jean/Jan 19, 2026 -
How to Openand Restore chat.db on a Mac with 4 Methods
![author icon]() Brithny/May 19, 2026
Brithny/May 19, 2026 -
SD Card Deleted Files by Itself on Mac? 4 Fixes Without Data Loss
![author icon]() Brithny/May 19, 2026
Brithny/May 19, 2026