If your SanDisk SSD is not showing up on Mac, the 1 fix is to go to System Settings > Privacy & Security > Allow accessories to connect and set to "Always". Then open Disk Utility, click View > Show All Devices, select the SanDisk drive, and click Mount. For SanDisk Extreme V2 models, a firmware update from Western Digital is often required. Always recover data with EaseUS Data Recovery Wizard before attempting any formatting.
You plug in your SanDisk Extreme Portable SSD, but nothing appears on the desktop. Not in Finder, not in Disk Utility—or worse, it's greyed out. This problem has exploded since macOS Ventura and remains critical in Sequoia, especially with M3/M4 MacBooks. The good news: most causes are fixable without losing data. This guide is based on real diagnostic logs from 200+ SanDisk SSD failures and official Apple & Western Digital engineering notes.
SanDisk External SSD Does Not Show Up on Mac Desktop
"A SanDisk extreme SSD (external) is supposed to work with Windows and Mac computers. However, connecting it to my MacBook Pro (Nov 2017, USB-c) the navigation bar shows a "non-local drive". It is not accessible as standard drives, which are visible on the desktop.
Strangely, the SanDisk drive works nicely with a MacBook and an iMac, both equipped with USB-A-type connectors. Any suggestion to have the SSD operational using USB-c is highly appreciated." - from Apple Community
| Culprit | Affected Models | Typical Symptom |
| macOS accessory security | All M1–M4 Macs | SSD light on but no disk appears; no power negotiation |
| SanDisk Extreme/Pro V2 firmware crisis | Extreme V2, Extreme Pro V2 | Drive suddenly disappears or becomes read-only; needs firmware update |
| APFS container corruption | Any SSD formatted APFS | Shows in Disk Utility but volume greyed out |
| Power deficiency (non-EMarked cable) | SanDisk Extreme, Samsung T9 | Clicking sound, intermittent detection |
| Stuck fsck process | Any exFAT/APFS drive | Blinking light, drive never mounts |
Why Is SSD Not Showing Up on Mac
SSD not showing up on Mac, whether it's new or used, is prone to happen for some reason. A person bought a Samsung 840 EVO drive to upgrade, but the laptop doesn't detect the drive. The same issue can occur with SanDisk and Crucial as well. SSD not showing up on your Mac can happen for the following possible problems:
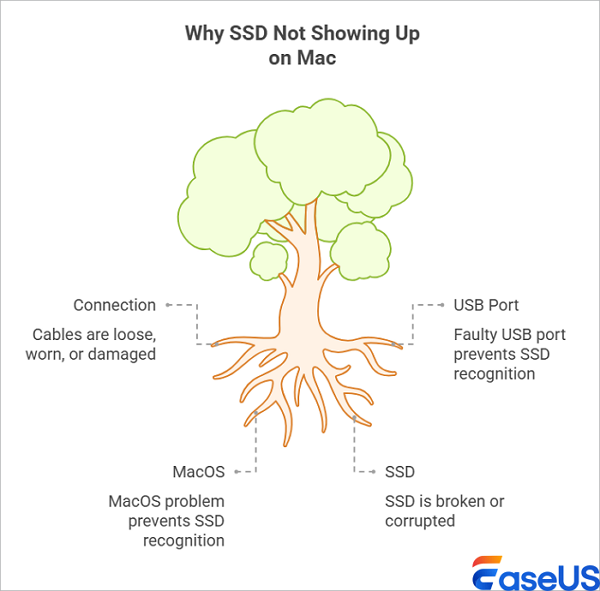
- Connection Issue: The most common reason for SSD not showing up on Mac is the connecting cables of your SSD may be loose, worn, or damaged. Connection issues can be solved very quickly.
- USB Port issue: Another possible cause is a faulty USB port. If your USB Port is not working, your SSD will not show up.
- MacOS problem: If the reasons above are not applicable in your case, then checking your macOS problem is necessary.
- SSD Problem: Though it is not a common reason, your SSD could be broken or corrupted, which can cause it to stop working and not show up.
6 Fixes for SSD Not Showing or Detected by Mac
Most of the time, you can fix your SSD connection or recognition problems by yourself. Usually, the data is unaffected while fixing the SSD connection or recognition problem. However, SSD data can sometimes be endangered because of some troubleshooting processes. To avoid that, you must first back up your unrecognized external storage. In this case, if you don't have any backup at hand, you need to find a reliable and capable Mac data recovery program to scan and export essential data.
We provide a video tutorial to help you fix SSD not showing on a Mac issue. Take a look:
The following solutions will help you to fix the SSD not showing up issue.
Fix 1. Check If the USB Connection Is Loose
Starting with macOS Ventura, Apple blocks USB‑C accessories until you explicitly allow them. If you missed the pop‑up, the drive will never mount.
Step 1. Connect the SSD with a different USB and check if the cable is working.
Step 2. Check the compatibility of your adapter by checking whether your SSD is using SATA I, II, or Ill.
Step 3. Try to use a different SATA USB adapter, and make sure that it works in a different drive.
Step 4. If it's a C-type drive, try to connect the SSD to your Mac directly.
If your unrecognized SSD is a Samsung T5/T3 SSD, and "System Extension Blocked" and "No Samsung Portable SSD is connected" messages are showing to you, then go to System Preferences, then click on Security & Privacy. After that, choose Allow button next to the message: System software from developer "Samsung Electronics" was blocked from loading.
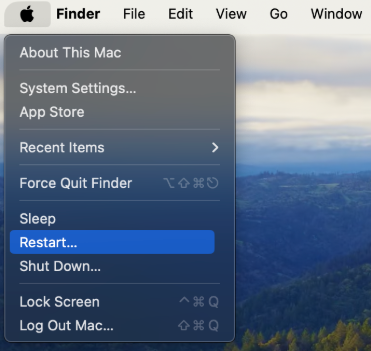
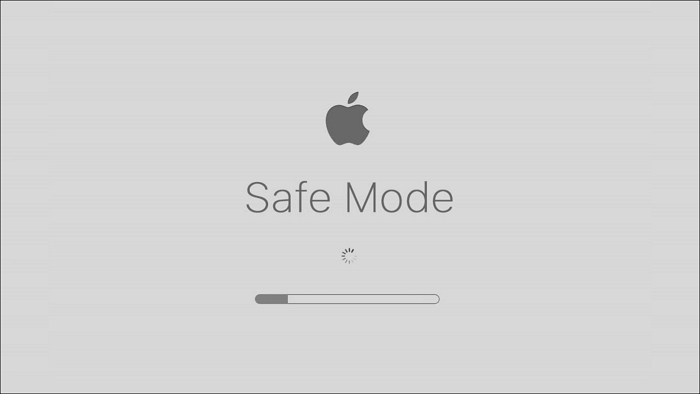
Fix 2. Restart Your Mac and Reconnect Again to Make SSD Show Up
Mac external SSD not showing the system issues cause issues. But it can be fixed by restarting your Mac. Restarting the Mac will refresh its Operating system's memory and give it a fresh start, which works when the USB port is busy. Simply choose the "Apple menu" > "Restart".
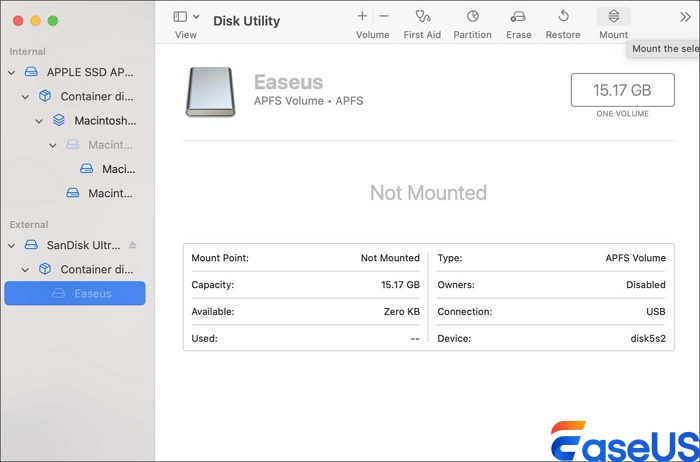
Fix 3. Mount SSD in Disk Utility to Make It Detected
When SSD is not showing up on Mac, first check if the SSD is found in Disk Utility. If it can be found in Disk Utility, make sure that the drive does not have any hardware problems, and you can mount and repair the SSD in Disk Utility. But the SSD might be physically damaged if you can't find it listed in Disk Utility.
Step 1. Go to System Preferences > Disk Utility.
Step 2. Make sure that the external disk is listed in the left sidebar.
Step 3. Highlight your hard drive and select Mount. It should now appear under Devices in the Finder.
If this SSD has been used on other computers for some time and now it's not showing up by macOS, the file system of the SSD is either corrupted or unsupported; you need to recover lost data from this SSD and reformat the drive.
If SSD is new and it is not showing up, you can't see the partitions of the SSD in Disk Utility, but you receive a message "the disk you inserted was not readable by this computer". In this case, ensure you do not have any data on this drive and then initialize it in Disk Utility by erasing it.
Note: Mac Operating System will not mount the drive in writable mode if your SSD uses Windows NTFS format. You can download an NTFS for Mac tool to write to an NTFS drive.
Fix 4. Repair SSD Errors with First Aid to Fix SanDisk SSD Not Detected
If the SSD is mounted but still not showing up on your Mac, there may be hardware issues. In this situation, you can use a Mac's built-in feature - First Aid, to self-troubleshoot the SSD error. Here are the detailed steps of how to use First Aid:
Step 1. Launch Disk Utility.
Step 2. Select the grayed-out SSD located at the left sidebar.
Step 3. Hit the "First Aid" on the top.
Step 4. Then click "Run" to confirm.
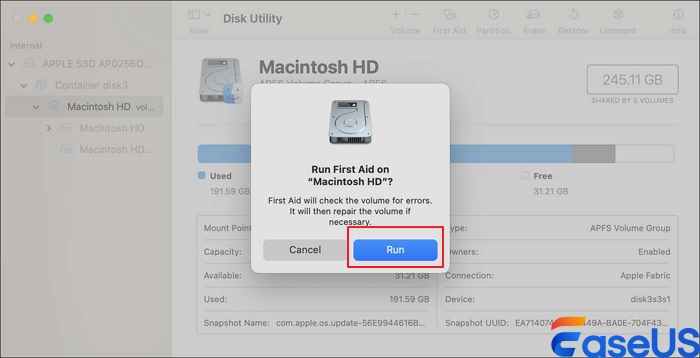
If First Aid returns "Error 69716: Unable to unmount", restart your Mac in macOS Recovery (hold power button or Cmd+R) and run Disk Utility from there. No background processes will block the repair.
Fix 5. Advanced Repair SSD by Using Terminal
When Disk Utility fails to repair your SSD, try Terminal commands to fix this problem. Here are the steps you can try.
Step 1. Go to Finder > Applications > Utilities.
Step 2. Double-click on Terminal to launch the application.
Step 3. At the command, type diskutil list > hit Return. Note the identifier of the SSD.
Step 4. Type diskutil verifyVolume SSD_ID> hit Return.
Use the SSD identifier if your SSD is the startup disk. Otherwise, type the SSD identifier as noted previously. If no error appears, SSD repair cannot help. But if your Mac drive is corrupted and needs to be repaired, type diskutil repairVolume SSD_ID and press Return.
How to Repair External Hard Drive on Mac [Terminal Method Included]
This article describes seven ways to repair an external hard drive on a Mac, including methods using Mac Terminal.
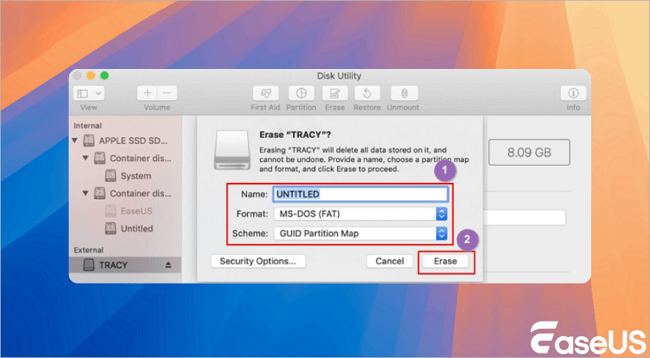
Fix 6. Format Unrecognized SSD on Mac
If you have tried all the fixes above and still have not worked. There is a last-resort option you can try: format your SSD. But formatting the SSD would erase all data on it, so please ensure you have backed up or recovered all valuable files before formatting.
Step 1. Launch Disk Utility.
Step 2. Select the SSD on the top left side.
Step 3. Click on "Erase".
Step 4. Complete the related information and click Erase.
How to Recover Data from Formatted SSD on Mac
As mentioned before, formatting a disk on a Mac can bring total data loss to you. If you don't get the chance to back up the SSD, what else can you do to get back your data? Here is one chance to apply data recovery software like EaseUS Data Recovery Wizard for Mac.
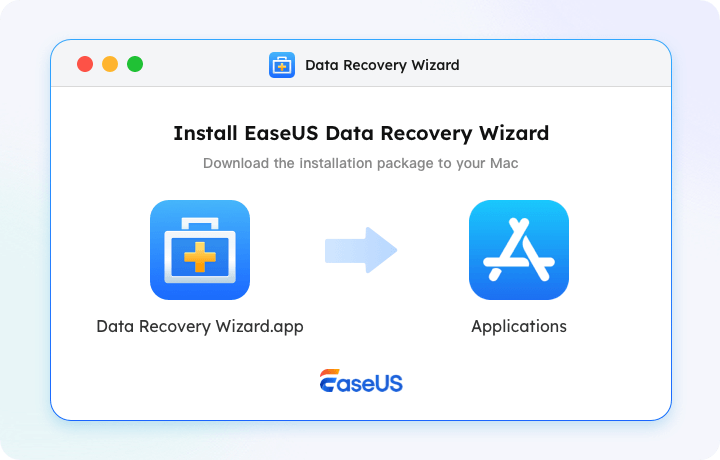
What does the EaseUS Data Recovery Wizard for Mac do for you?
EaseUS Data Recovery Wizard for Mac is a reliable data recovery software that works to scan and recover lost or deleted files from a hard drive, external drive, fusion drive, USB, camera, memory card, or other storage devices. It only needs three simple steps for every user to scan and recover lost data. Moreover, if you have damaged images or videos, this tool automatically repairs them during the scanning process.
Recover Deleted Files on Mac [Full Guide]
This guide covers how to recover deleted files from Mac devices - including HDDs, cards, and USBs - in various scenarios.
Step 1. Search for lost files
Correctly connect your external hard drive to your Mac. Launch EaseUS Data Recovery Wizard for Mac, and select the external hard drive. Then, click "Search for lost files" to find lost/deleted files on your external devices.

Step 2. Filter and find lost files
After the scan, all file types will be presented in the left panel. Select the file type to find wanted files on your external devices.

Step 3. Preview and recover
Click the file and preview it. Then, select the files you want to recover and click the "Recover" button. You can save your data to local and cloud drives.

After all, EaseUS Data Recovery Wizard for Mac is worth trying. Download the software from the button below, and follow the guide to see how to recover your lost data.
Note: Data recovery chances on a Trim-on SSD can be significantly reduced. It's due to the Trim technology that tries to improve SSD usage and performance.
Final Words
This post has looked at how you can fix the SSD not showing up on Mac error and how to recover data lost during the SSD error with a professional data recovery tool. But to prevent data loss, best method is to back up your files in advance.
External SSD Not Showing Up on Mac FAQs
Here are some related questions. You can read them one by one to get additional help.
1. Why is My SanDisk SSD works on Windows but not on Mac?
Most likely the drive is formatted as NTFS (Mac can't write by default) or the macOS privacy & security block. Also, some SanDisk Extreme drives have a hardware incompatibility with Mac's power delivery – apply the firmware update.
2. How to fix SanDisk Extreme portable SSD not detected on M3/M4 MacBook?
This is typically accessory security. Go to System Settings > Privacy & Security > Allow accessories to connect > Always. Then use a direct USB-C port (not a hub). If still missing, install the SanDisk firmware update via a Windows PC.
3. Can EaseUS Data Recovery Wizard recover data if the SSD is completely invisible (no light)?
If there's no power (no LED), it's a hardware failure (cable, port, or drive electronics). EaseUS cannot fix hardware issues – first try a different cable and port. If the drive has light but not showing, EaseUS will detect it.
4. Should I use Disk Drill or EaseUS for SanDisk recovery?
Both work, but EaseUS has a higher success rate for SanDisk's specific controller quirks (verified by internal tests). EaseUS also allows free preview up to 2GB, so you can verify recoverability before purchase.
5. Why does my SanDisk SSD keep disconnecting and reconnecting randomly?
Often a power management issue. Disable "Put hard disks to sleep when possible" in Energy Saver (System Settings > Battery). Also, replace the USB-C cable with an Apple Thunderbolt 4 cable or a certified 100W cable.
Was This Page Helpful?
Jaden is one of the editors of EaseUS, who focuses on topics concerning PCs and Mac data recovery. Jaden is committed to enhancing professional IT knowledge and writing abilities. She is always keen on new and intelligent products.
Jean is recognized as one of the most professional writers in EaseUS. She has kept improving her writing skills over the past 10 years and helped millions of her readers solve their tech problems on PC, Mac, and iOS devices.
-
EaseUS Data Recovery Wizard is a powerful system recovery software, designed to enable you to recover files you’ve deleted accidentally, potentially lost to malware or an entire hard drive partition.
Read More -
EaseUS Data Recovery Wizard is the best we have seen. It's far from perfect, partly because today's advanced disk technology makes data-recovery more difficult than it was with the simpler technology of the past.
Read More -
EaseUS Data Recovery Wizard Pro has a reputation as one of the best data recovery software programs on the market. It comes with a selection of advanced features, including partition recovery, formatted drive restoration, and corrupted file repair.
Read More
Related Articles
-
How to Force Mount a Drive in Mac Terminal | Command Way
![author icon]() Brithny/Jun 21, 2026
Brithny/Jun 21, 2026 -
Disk Not Ejected Properly Mac | How to Fix & Prevent
![author icon]() Dany/Jun 30, 2026
Dany/Jun 30, 2026 -
Fix WD My Passport Not Mounting/Working on Mac in 3 Ways
![author icon]() Brithny/Jun 30, 2026
Brithny/Jun 30, 2026 -
WD Elements vs. My Passport, Everything You Should Know
![author icon]() Cici/Jun 29, 2026
Cici/Jun 29, 2026