-
![]()
-
![]()
-
![]()
-
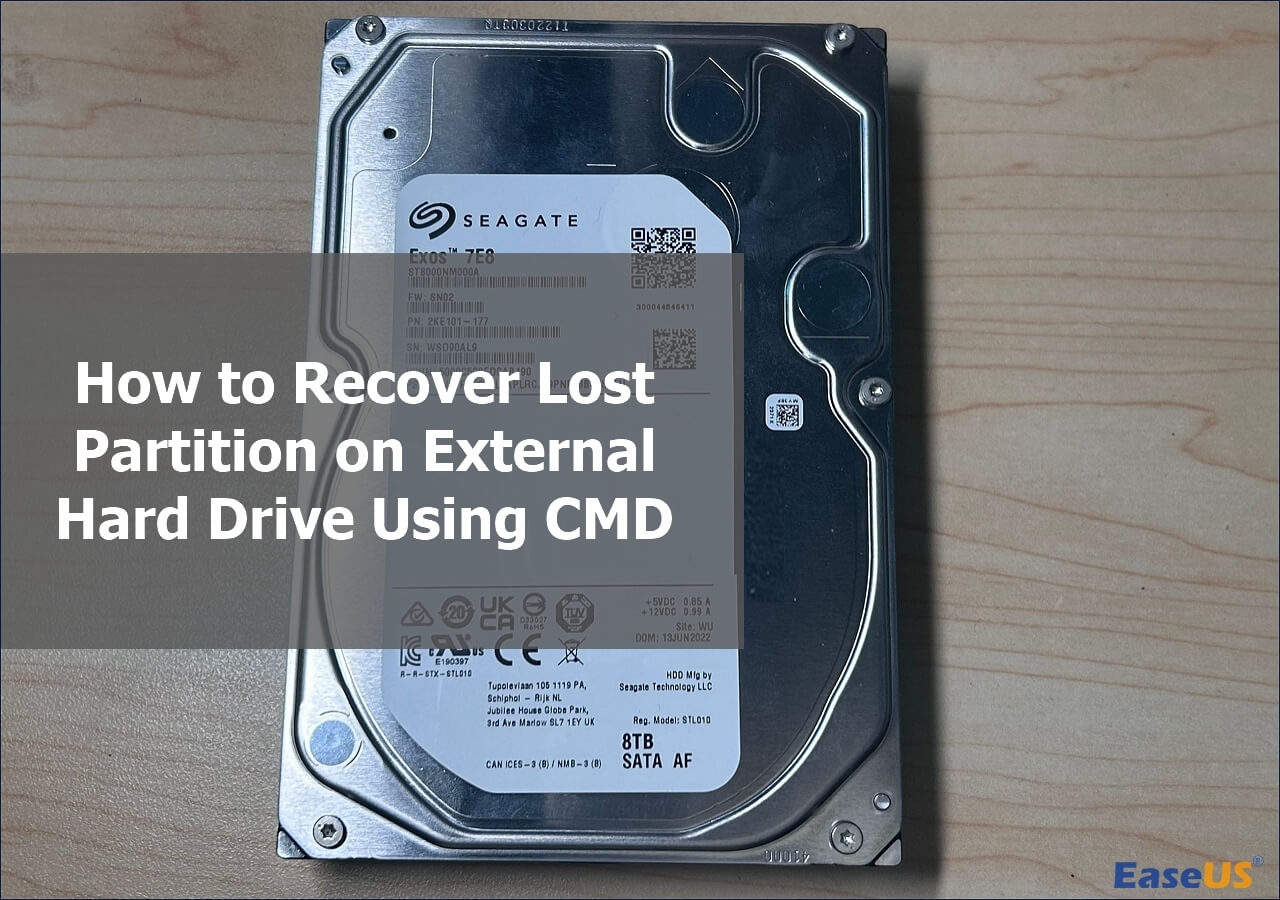
![]() How to Recover Lost Partition on External Hard Drive Using CMD
How to Recover Lost Partition on External Hard Drive Using CMD June 30,2026
 6 min read
 -
![]() The Parameter Is Incorrect | Drive Is Not Accessible [Solved]July 02,20266 min read
The Parameter Is Incorrect | Drive Is Not Accessible [Solved]July 02,20266 min read -
![]() How to Recover Data from Corrupted or Scratched CD/DVDJuly 02,20266 min read
How to Recover Data from Corrupted or Scratched CD/DVDJuly 02,20266 min read -
![]()
-
![]() Fix Seagate External Hard Drive Not Working Without Losing DataJune 30,20266 min read
Fix Seagate External Hard Drive Not Working Without Losing DataJune 30,20266 min read -
![]()
-
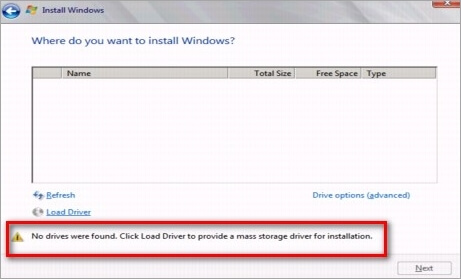
![]() 5 Ways to Fix the Drive Where Windows Installed Is LockedJune 30,20266 min read
5 Ways to Fix the Drive Where Windows Installed Is LockedJune 30,20266 min read
Page Table of Contents
Full solutions to restore a hard drive or external hard drive's full capacity:
| Workable Solutions | Step-by-step Troubleshooting |
|---|---|
| Fix 1. Scan and remove virus | If you have anti-virus software installed, run...Full steps |
| Fix 2. Convert MBR to GPT | Download and launch EaseUS Partition Master...Full steps |
| Fix 3. Create New Volumes | Disk Management, right-click unallocated space...Full steps |
| Fix 4. Show Hidden Partition | In Disk Management, right-click the New Volume...Full steps |
| For More Fixes | Add unallocated space to partition and recover...Full steps |
The provided methdos can be applied to fix the following issues and restore your storage device to its full capacity with ease:
- 1tb hdd only showing 500GB
- 500GB hard drive shows only 130gb of space
- 1TB hard drive only shows 127GB
- external hard drive only showing 32GB
- hard drive only shows 4GB
- 4TB Hard Drive shows only 2TB
If you are having a similar issue on your device and want to make use of all sapece on your HDD, SSD, or external hard drive, pick up the right solution and follow steps to fix this issue now.
Causes of Hard Drive Shows Half or Partial Capacity
Hard Drive, like HDD/SSD, plays an essential role in reading and writing data. The bigger the hard drive, the better. So we don't need to worry that there is low disk space warning when keep installing programs, games or saving huge documents, movies, music and whatever we want in daily computer use.
However, many people found that they invest in a large hard drive of 1TB, 2TB, 4TB, but only seeing half capacity, or even partial capacity available for usage. What's the problem? Why is the hard drive not showing its correct size?
In general, the hard drive showing wrong size issue happens to a lot of users, and the following reasons may account for the problem:
- Virus or malware infection
- The hard drive, SSD, or external hard drive is with MBR style
- Files invisible
- Partition deleted or lost, showing unallocated
Recover Data First Before Fixing HDD Shows Half Capacity Issue
Applies to: Scan and restore all existing available data on the hard drive, SSD, or external hard drive which shows half or only partial space in Windows PC.
If you have saved valuable data on the hard drive, SSD, or external hard drive that only has half or partial space visible, you should first take action to scan and restore all valuable data to another secure device first. If you have files to recover, download and install EaseUS Data Recovery Wizard.
It's hard disk data recovery software that specializes to recover data after deleting, formatting, or virus infection from all types of storage devices regardless of their capacity show only half, partial, or full:
Video Tutorial of Restoring Data from External HDD
Step-by-Step Guide:
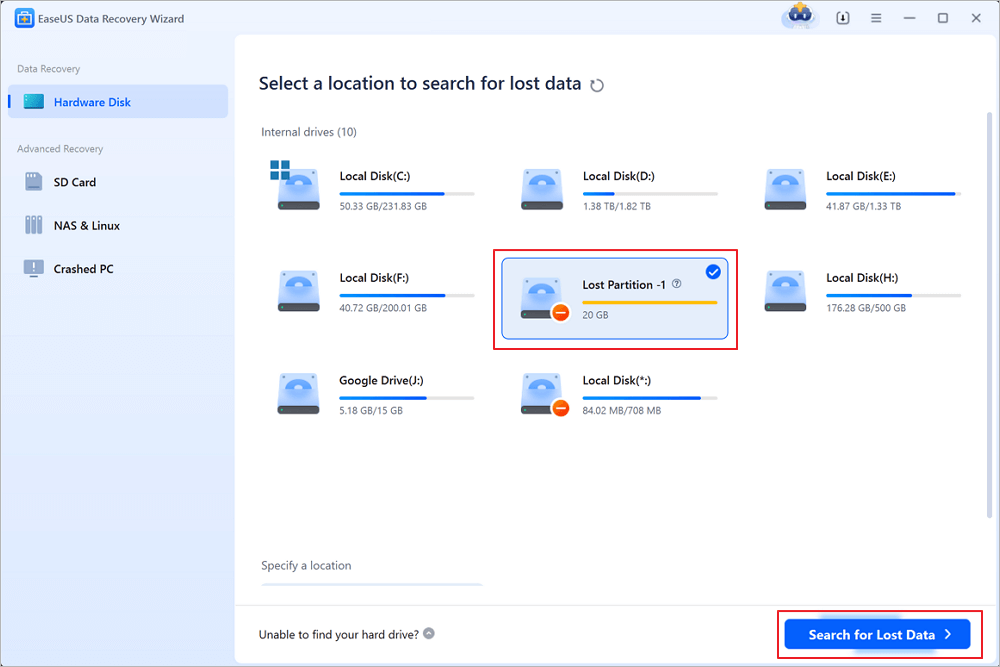
Step 1. Select and scan the lost partition
Launch EaseUS Data Recovery Wizard, select "Lost Partition" and click "Search for Lost Data" to search for all the lost data from your lost or deleted partition. If there are many lost partitions, you can identify them through its partition size.
Note: Since the Windows system doesn't support the Linux file system, the Ext2 or Ext3 partition will be recognized as lost partition with no drive letter in the software. If you want to recover data from Ext2/Ext3 partition, you can follow these steps.
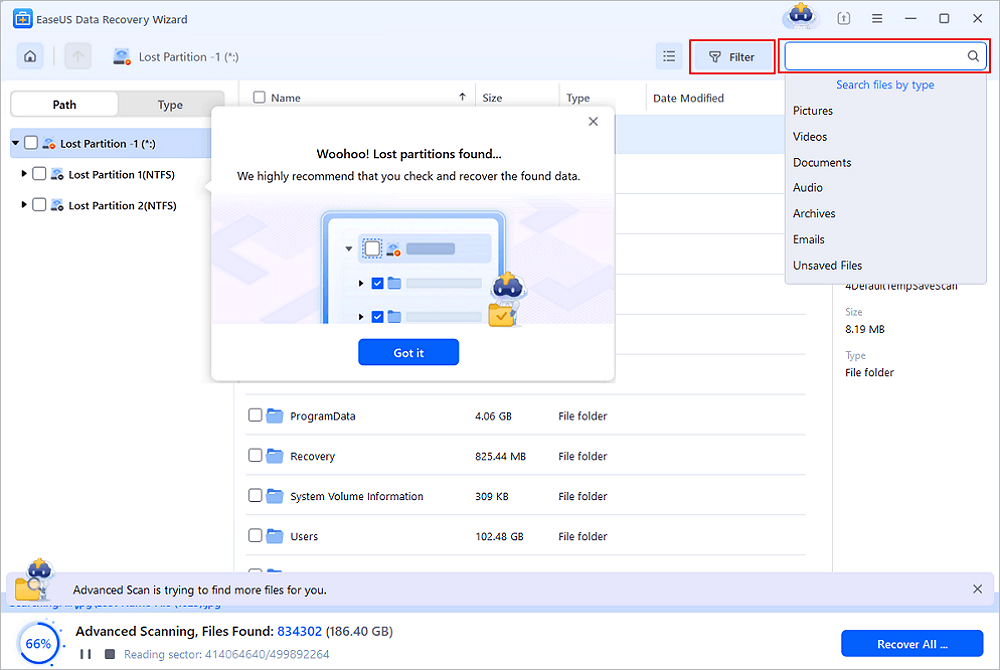
Step 2. Filter the scanned results
Because there will be a lot of scanned files, you can choose a file category for quick filtering, such as Pictures, Videos, Documents, Audio, and Others. Or if you remember the file name, you can just look it up in the search box in the upper right corner.
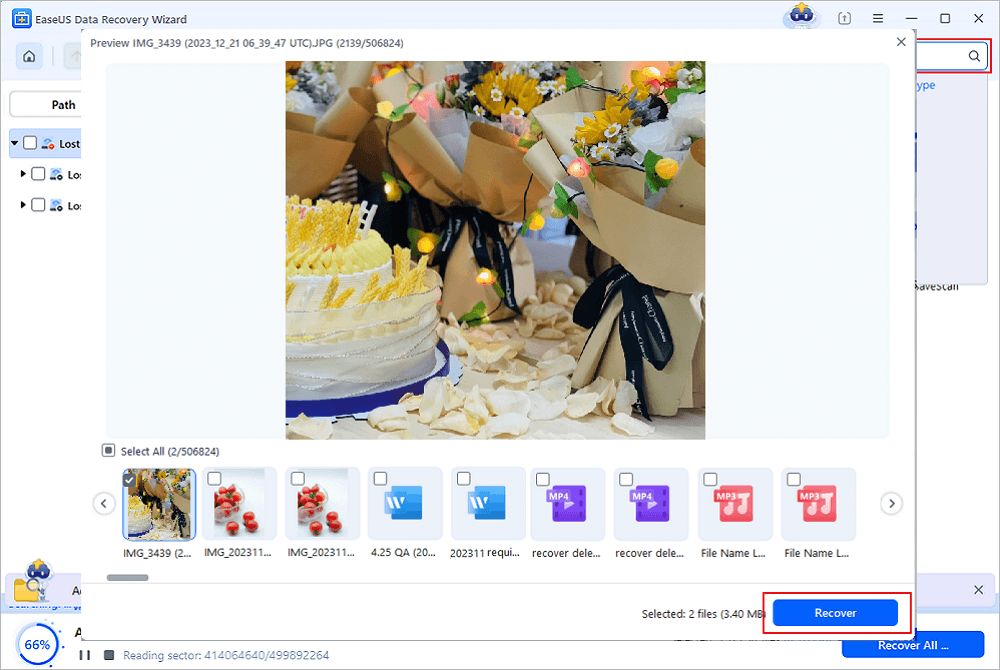
Step 3. Preview and recover data from the lost partition
Before recovery, you can preview the file to make sure it is the data you need. Choose all the files you need and click "Recover" to restore them. Choose a storage location (including cloud storage, such as OneDrive, Google Drive, etc.), and click "Save" to save your recovered files.
6 Fixes to Reclaim Full Size of Hard Drive That Shows Only Half or Partial Capacity
After knowing the reasons, you can feel released for a while because we're going to share corresponding solutions with you.
Method 1. Remove Virus That Makes Hard Disk Showing Wrong Size
Applies to: Fix HDD/SSD, or external hard drive not showing full capacity due to virus infection.
When your hard drive is infected with virus or malware which eats some storage space on your hard drive, it only shows half or patial capacity. You can perform antivirus software to keep your drive clean and safe.
Step 1. To check virus or malware infection
If you have anti-virus software installed, run the anti-virus software for the first time. If you don't have an anti-virus software, try Avast, AVG,etc., download and install one on your PC.
Step 2. Keep your problematic HDD, SSD, or external hard drive connected to PC correctly.
Step 3. Run antivirus software to scan your device and clear up the existing virus, malware.
For people who don't have the software, you can also refer to this linked page and learn how to use cmd to remove virus in Windows 10/8.1/8/7.
Method 2. Convert MBR to GPT to Restore Full Capcity of Large HDD/SSD
Applies to: Fix large hard drive, SSD, or external hard drive only shows half or partial capacity due to MBR limitation.
Another reason that may stop your disk from showing full capcity is due to the limit of MBR partition style. As we know, MBR only works with disks up to 2TB in size, at the same time, allows for creating 4 partitions in total.
If you have a particularly large-capacity hard drive that is over 2TB but initialized to MBR style, you will only get 2TB storage capacity in total. To make full use of the rest space you don't see, you need to convert MBR to GPT.
EaseUS Partition Master is a perfect choice to convert hard disk between MBR and GPT, it's super easy and guaranteed with zero data loss during the conversion.
Step 1. Download and launch EaseUS Partition Master on your computer.
Step 2. Go to Disk Converter, select "MBR => GPT" and click "Next" to continue.

Step 3. Select the target MBR disk that you tend to convert to GPT, and click "Convert" to start the conversion.

Once the MBR to GPT conversioni process completes, you will get the full size of your HDD, SSD, or external hard drive again.
Method 3. Create New Volume to Make Use of Unallocted Space on Disk
Applies to: Make use of unallocated space on hard drive or ssd which only shows half or partial space.
Sometimes, the hard drive showing half capacity is because the other half space is unallocated. You can create new simple volumes on the disk to make full use of the other half or partial unused space:
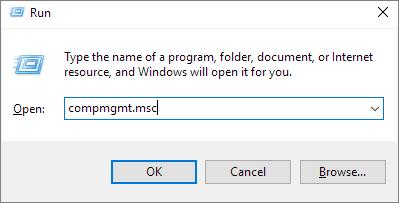
Step 1. In Windows 10/8.1/8/7, press Windows + R hotkeys to bring up the Run box, type diskmgmt.msc and hit Enter.
Step 2. On the disk map, check if the hard drive partition displays as Unallocated.
If yes, you can create a new simple volume on the unallocated space with the continuing steps.
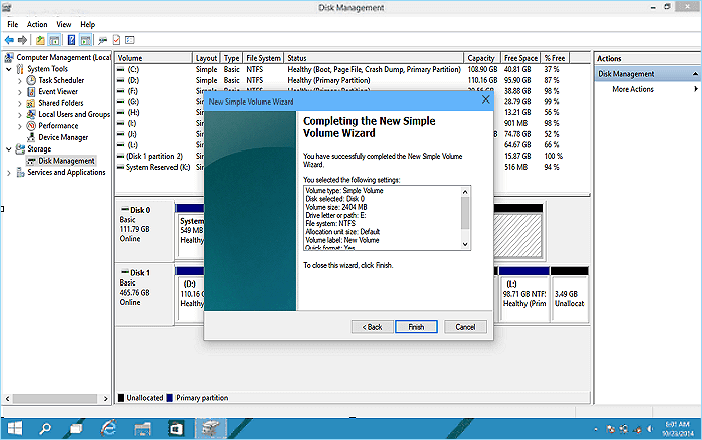
Step 3. Right-click on the unallocated space and select "New Simple Volume".
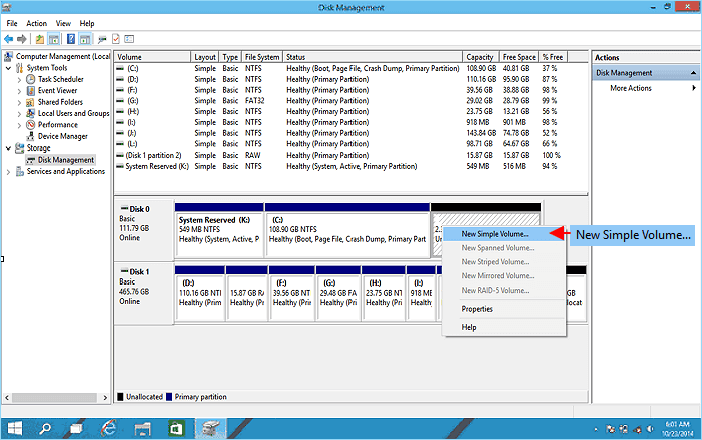
Step 4. Set a new drive letter, file system and size for the new volume.
Step 5. Follow the onscreen instruction guidelines to finish the process.
If you need to create more partitions with the unallocated space, repeate the process untile you've used all unallocated space on the target disk. After this, you will be able to see the full capacity and make full use of the disk sapce again.
Method 4. Show Hidden Partition That Makes Disk Showsing Wrong Size
Applies to: Fix hard drive or ssd showing wrong capacity on Windows 10/8/7 due to hidden partition.
When other half space of your disk is hidden somewhere or you hide some partitions with partial space on your computer disk, you may not be able to see its full capacity in Windows File Explorer.
The way to fix this issue is to unhide or show hidden partition on computer with the following steps:
Step 1. Keep your target disk is connected to PC correctly and open Disk Management.
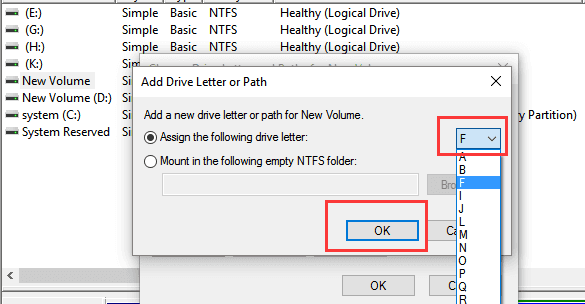
Step 2. Right-click the partition named as New Volume which as no drive letter and select "Change Drive Letter and Paths for New Volume".
Step 3. Click "Add" to assign a new drive letter for the partition to make visible in Windows File Explorer.

- For example, you can assign the drive letter F for the hidden partition and click "OK".
After this, you can restart PC and when you reopen File Explorer, you will be able to view and access to other half or partial hidden partitions of your disk.
Method 5. Add Unallocated Space to A Neighbor or Non-adjacent Partition
Applies to: Make full use of unallocated sapce on hard drive, or external hard drive by adding unallocated space to a neighbor or non-adjacent partition.
When there is unused space on your disk or external hard drive, you may also not be able to see its full capacity on computer. Only half or partial space is visible.
In this case, you can either try to create new simple volumes as recommended in Method 3 or try the tips below to add unallocated space to other existing partitions that are adjacent or non-adjacent.
#1. Add Unallocated Space to A Neighbor Partition
If the unallocated space is behind to an existing partition, you can add the unallocated space to extend the neighbor partition using Disk Management:
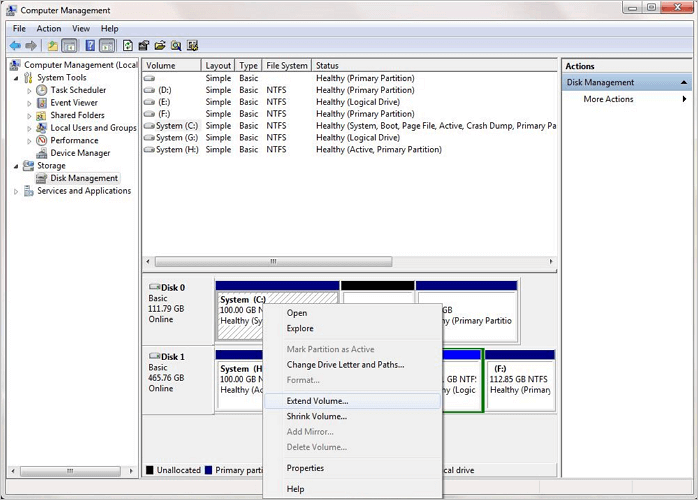
Step 1. Open Disk Management on your computer and locate the unallocted space.
Step 2. Right-click on the neighbor partition that you want to extend, and choose "Extend Volume" to continue.
Step 3. Set and add more size to your target partition and click "Next" to continue.
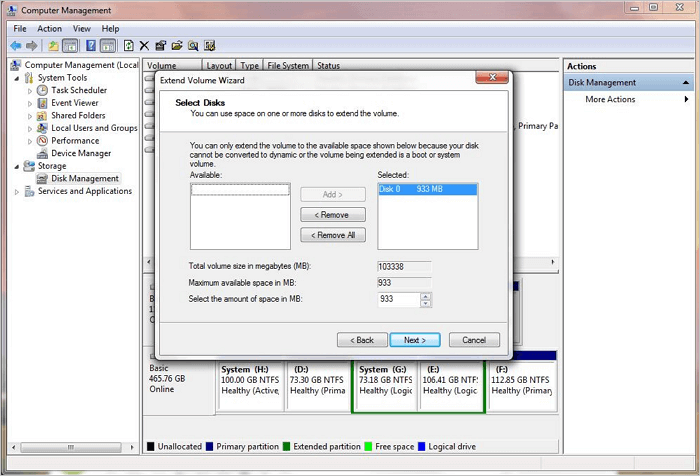
Step 4. Click "Finish" to complete the process.
#2. Add Unallocated Space to Non-adjacent Partition
If you want to add the unallocated space to a non-adjcenet partition, you can apply EaseUS Partition Master with its Resize/Move feature for help.
It allows you to freely move unallocated space next to a target partition and extend it with ease:
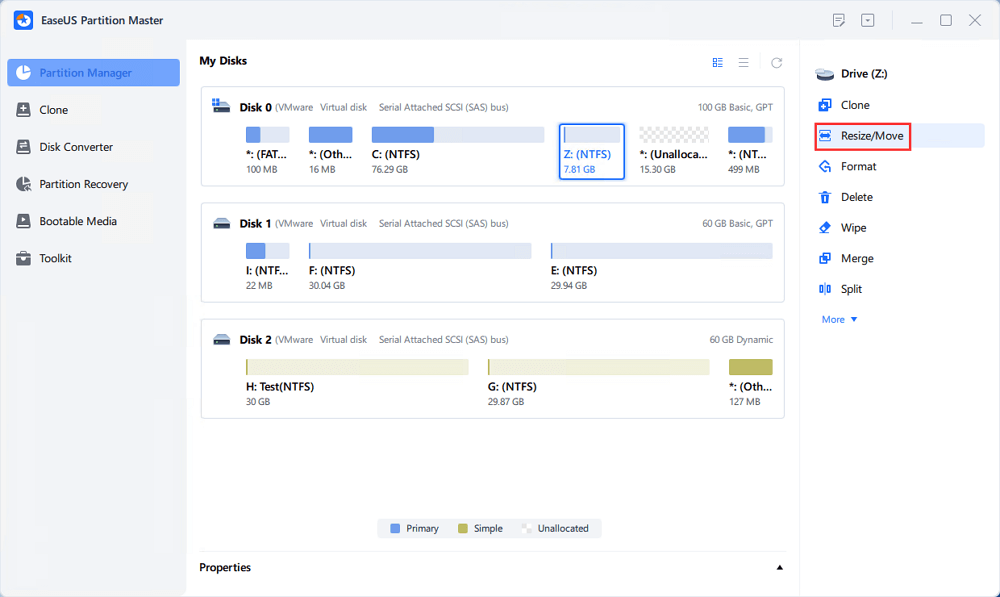
Step 1. Locate the Target Partition.
Go to Partition Manager, locate the target partition and select "Resize/Move".
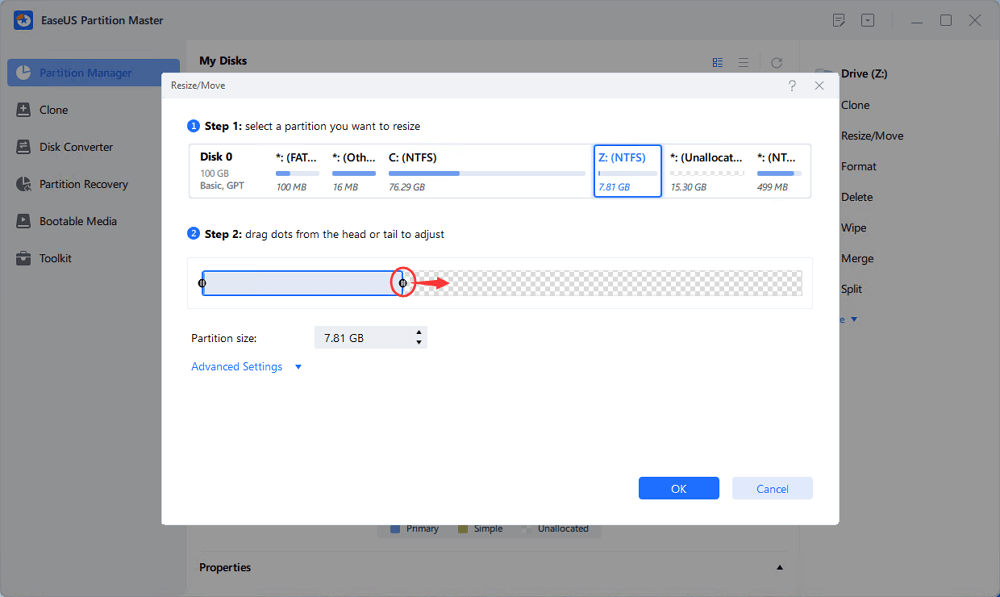
Step 2. Extend the Target Partition.
Drag the partition panel rightward or leftward to add the unallocated space into your current partition, or you can click click "fill in all unallocated" to allocate all space to the target partition. Then, click "OK" to confirm.
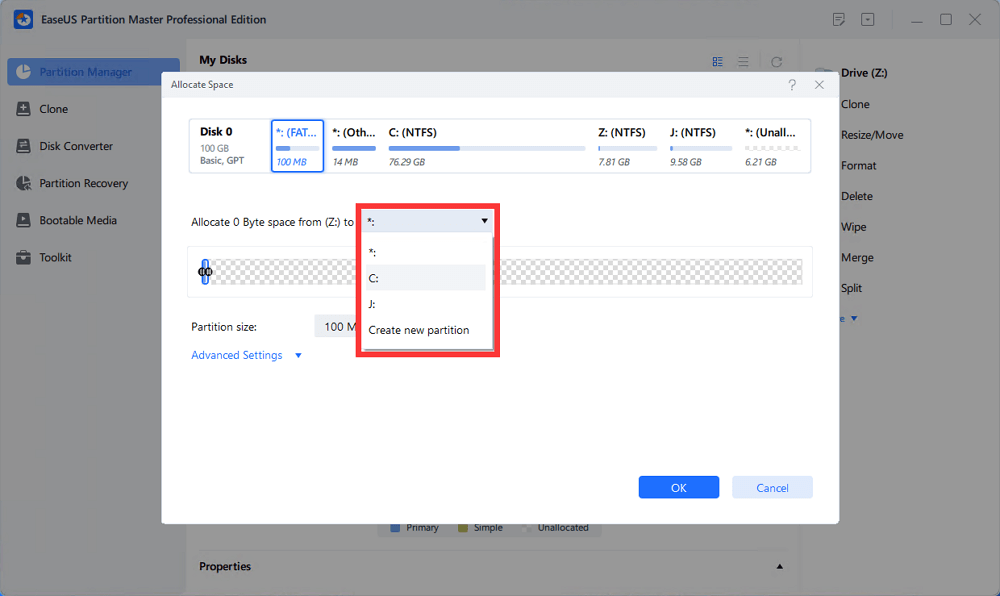
Extra Option: Get Space from Another Drive
If there is not enough unallocated space on your disk, right-click on a big partition with enough free space, select "Allocate space".
Then select the target partition that you want to extend at the allocate space to column.
Step 3. Execute Operations to Extend Partition.
Drag the dots of the target partition into the unallocated space and click "OK".
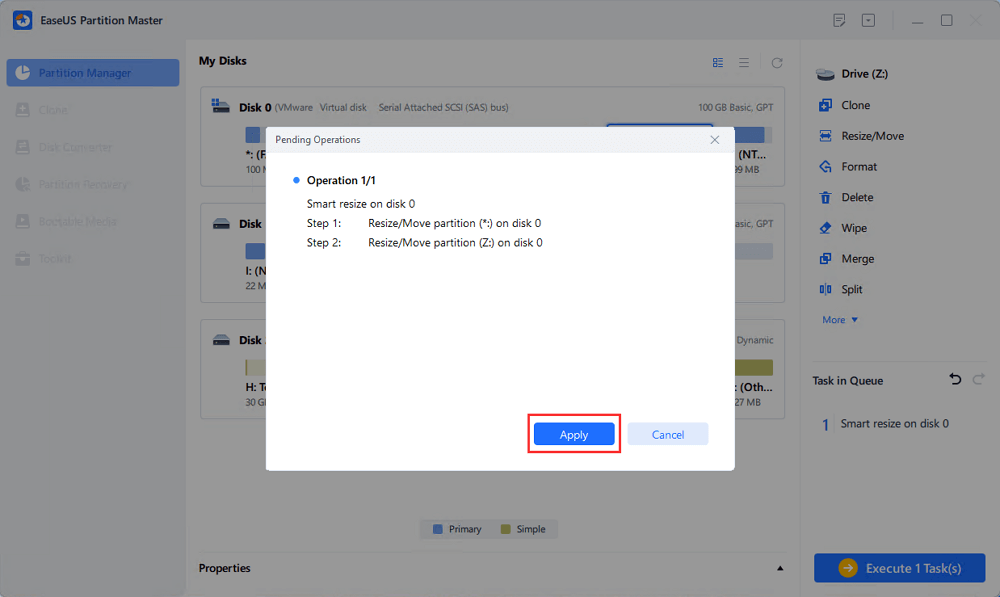
Then Click the "Execute Task" button and click "Apply" to keep all the changes.
Method 6. Perform Partition Recovery and Restore Full Disk Capacity
Applies to: Fix hard drive, SSD shows only partial space as partition gets deleted or lost.
When some partitions on your disk gets deleted or lost, you may not be able to see its full capacity but only partial storage space visiable on Windows PC.
To bring the full capacity back on your disk without losing any data, you can either try EaseUS Data Recovery Wizard to restore data and create new partitions on the unallocated space as shown in Method 3 or run a reliable partition recovery software to bring all lost, deleted, even hidden partitions with data back at one time.
EaseUS Partition Recovery is capable of helping you to recover a whole lost, deleted or hidden partition along with data on it. It looks like you never lost the partition at all.
Step 1: Run EaseUS Partition Recovery on your PC.
Select the disk or device where you lost partition(s), click "Scan" to continue.

Step 2: Wait for the scanning process to complete.
Let the program scan selected disk and find the lost partition(s).
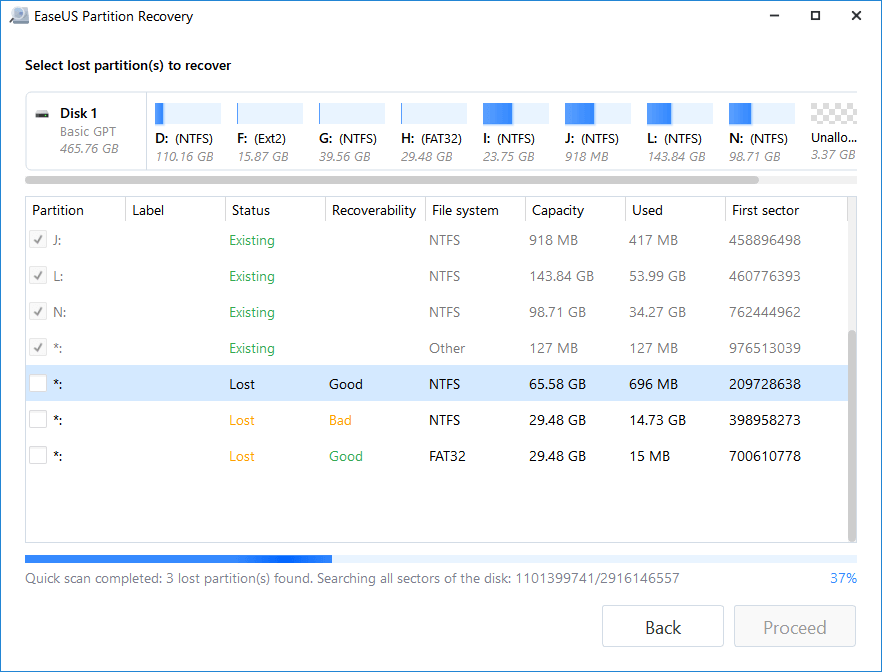
Step 3: Preview and restore lost partition(s).
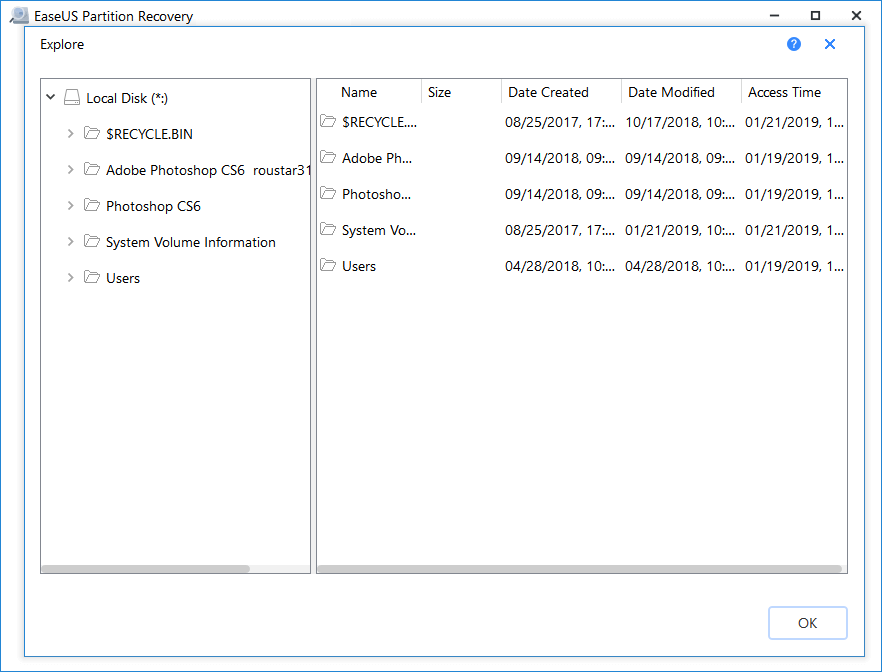
Double-click on the partition which is marked as "Lost" with "Good" recoverability.
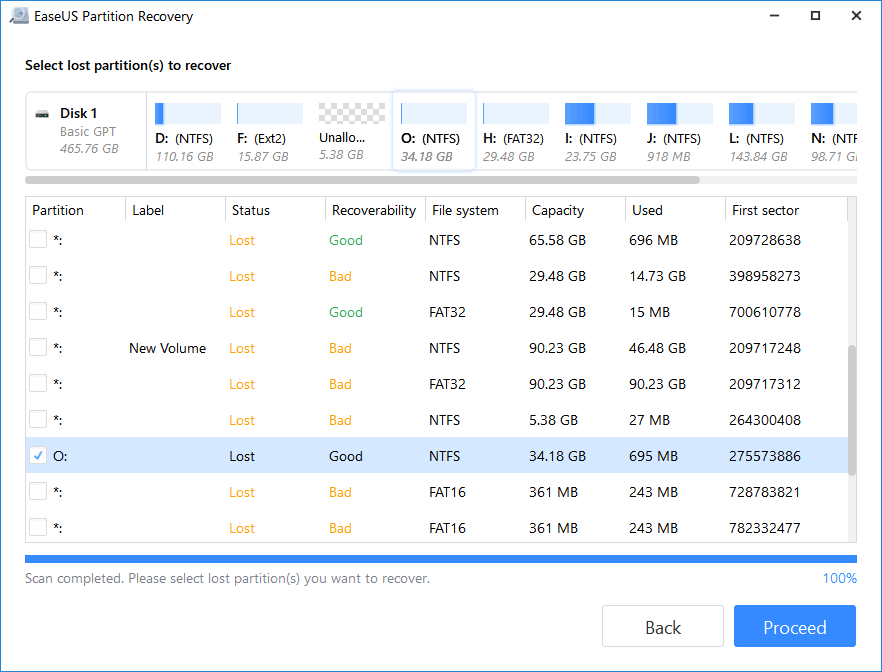
Preview the content of the lost partition. Click "OK" and click "Proceed" to start restoring the lost partition.
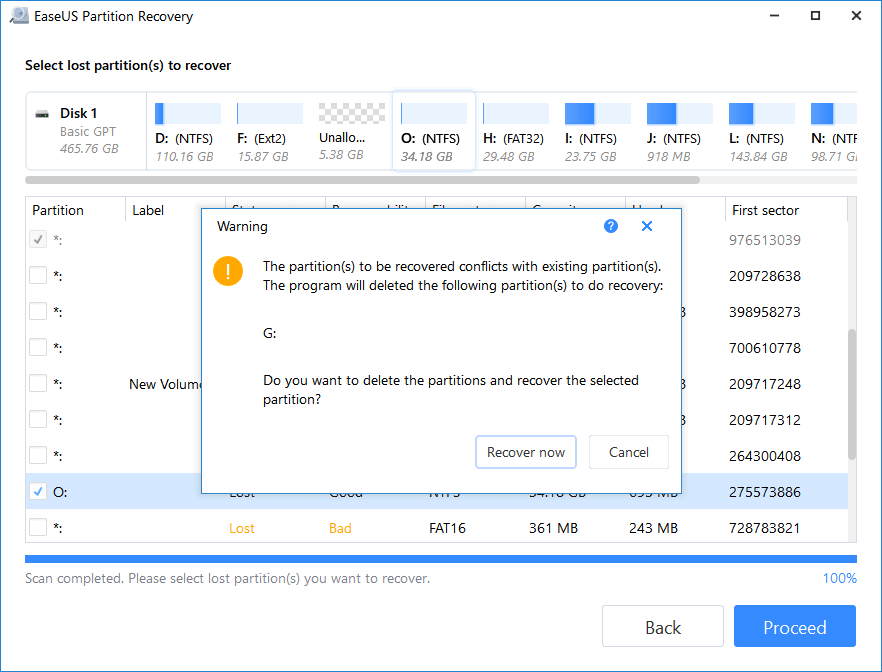
Step 4: Click "Recover Now" to finish the partition recovery process.
Note: If the program warns you that there is a conflict, back up the listed partition with essential data to an external hard drive first. Then execute the final operation to restore your lost partition.
Conclusion
This page explains why do the hard drive, SSD, or external hard drive shows only half or partial capacity on your computer. When you meet 1TB hard drive only shows 500GB, 2TB external hard drive showing 127GB, or 500GB SSD shows only 32GB, etc. on your PC, don't worry.
You can first apply reliable data recovery software like EasUS Data Recovery Wizard to scan and restore your valuable data from the invisiable partial space. Then apply the provided 6 methods to bring your halpf or other partial sapce back on your disk by clearing up virus, converting disk from MBR to GPT, recover deleted partition, show hidden partition, create new volume on unallocated space, or add unallocated space to existing partitions, etc., with ease.
Always remember that no matter how you decide to make full use of your disk space, creating a full backup of your valuable data and run virus cleaner software to keep your device clean and safe are the two most important things.
Was this page helpful?
-
![]()
Updated by
Tracy became a member of the EaseUS content team in 2013. Being a technical writer for over 10 years, she is enthusiastic about sharing tips to assist readers in resolving complex issues in disk management, file transfer, PC & Mac performance optimization, etc., like an expert.…

20+
Years of experience

160+
Countries and regions

72 Million+
Downloads

4.9 +
Trustpilot Score


