-
![]() How to Fix Crucial SSD Not Detected on Windows PC [No Data Loss]
How to Fix Crucial SSD Not Detected on Windows PC [No Data Loss] July 23,2026
 6 min read
 -
![]()
-
![]()
-
![]() Free Download Bad Sector Repair Tool - Flobo Hard Disk RepairJuly 23,20266 min read
Free Download Bad Sector Repair Tool - Flobo Hard Disk RepairJuly 23,20266 min read -
![]()
-
![]() Fixe Maxtor External Hard Drive Not Working/Recognized Without Data LossJuly 23,20266 min read
Fixe Maxtor External Hard Drive Not Working/Recognized Without Data LossJuly 23,20266 min read -
![]()
-
![]() The Parameter Is Incorrect | Drive Is Not Accessible [Solved]July 23,20266 min read
The Parameter Is Incorrect | Drive Is Not Accessible [Solved]July 23,20266 min read -
![]() Unable to Eject External Hard Drive? Fices for Windows 10/11July 23,20266 min read
Unable to Eject External Hard Drive? Fices for Windows 10/11July 23,20266 min read -
![]()
Page Table of Contents
PAGE CONTENT:
Glyph users usually encounter a confusing problem: the Glyph hard drive not showing up. While this is normal, it can be unsettling, possibly resulting in data loss. Obviously, no one would want to lose their important data stored in the Glyph external hard drive - from family photos to work files.
Worry no more! This article addresses and resolves users' challenges when their Glyph hard drive is not showing up as expected.
[First-Aid] Recover Lost Data from the Glyph Hard Drive
When the Glyph hard drive fails to show, users may face concerns about data loss. Hence, users can rely on a dependable data recovery solution, i.e., the EaseUS Data Recovery Wizard - to protect their critical information. This sophisticated tool is intended to deal with data loss caused by file system faults, system crashes, or unintentional file deletions.
EaseUS Data Recovery Wizard's Key Features:
- EaseUS Data Recovery Wizard can recover deleted file formats, including documents, photos, videos, and more.
- The user-friendly design guarantees that users of all technical abilities can explore and use the product efficiently.
- The application offers fast and deep scan options, allowing consumers to pick the appropriate level of thoroughness.
- Users can use EaseUS Data Recovery Wizard to create a WinPE bootable USB recovery from damaged hard drives.
Get EaseUS Data Recovery Wizard now to restore access to lost data. This adaptable solution serves as a digital first-aid kit, providing data protection and Recovery simultaneously in the case of an unforeseen data loss incident.
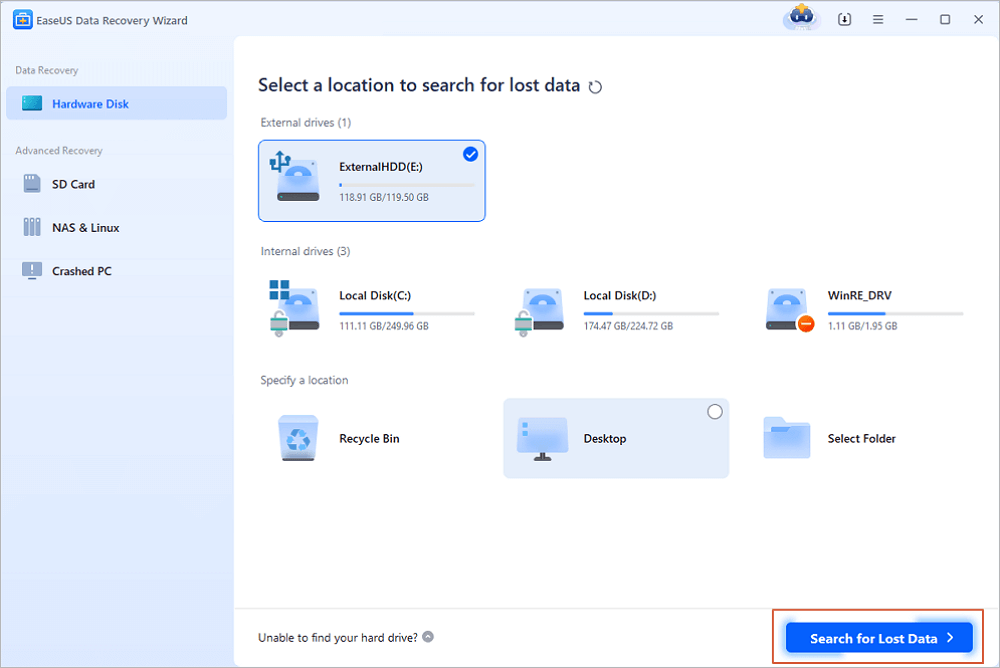
Step 1. Use a correct USB cable to connect your external hard drive to your computer. Run EaseUS Data Recovery Wizard and you will see your external disk under External drives. This software supports all the popular external disk brands, including WD, Seagate, Toshiba, LaCie, SanDisk, Samsung, etc.
Select the external hard drive and then click the "Search for Lost Data" button.
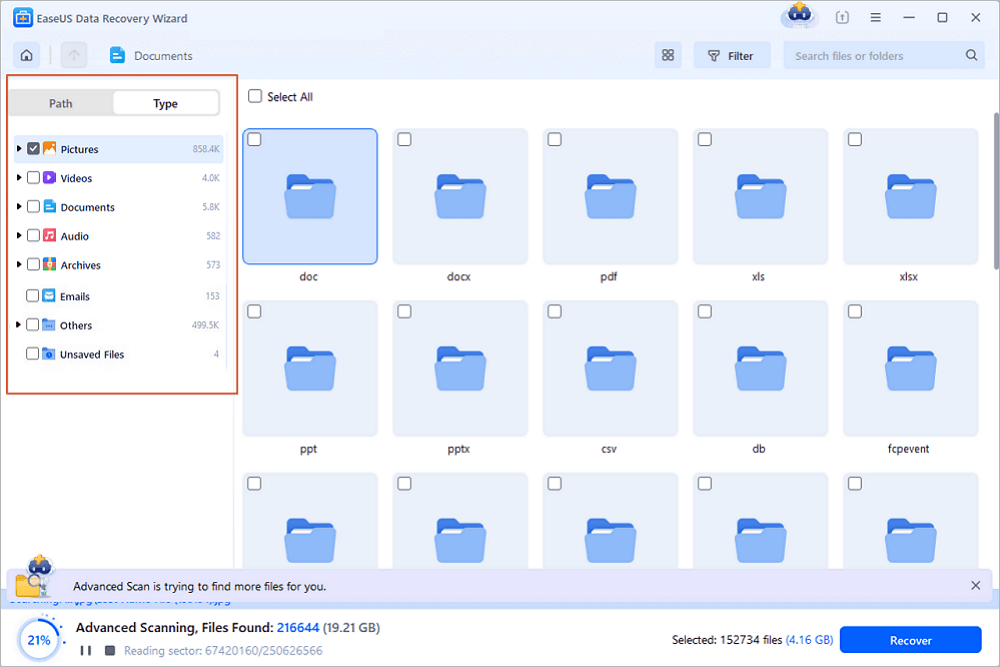
Step 2. As soon as the scan process starts, the software will find more and more lost and deleted data and display the data in the scan results. The recovered data will be nicely organized. You can quickly find the target files/folders by file type or search in the search box with exact file name.
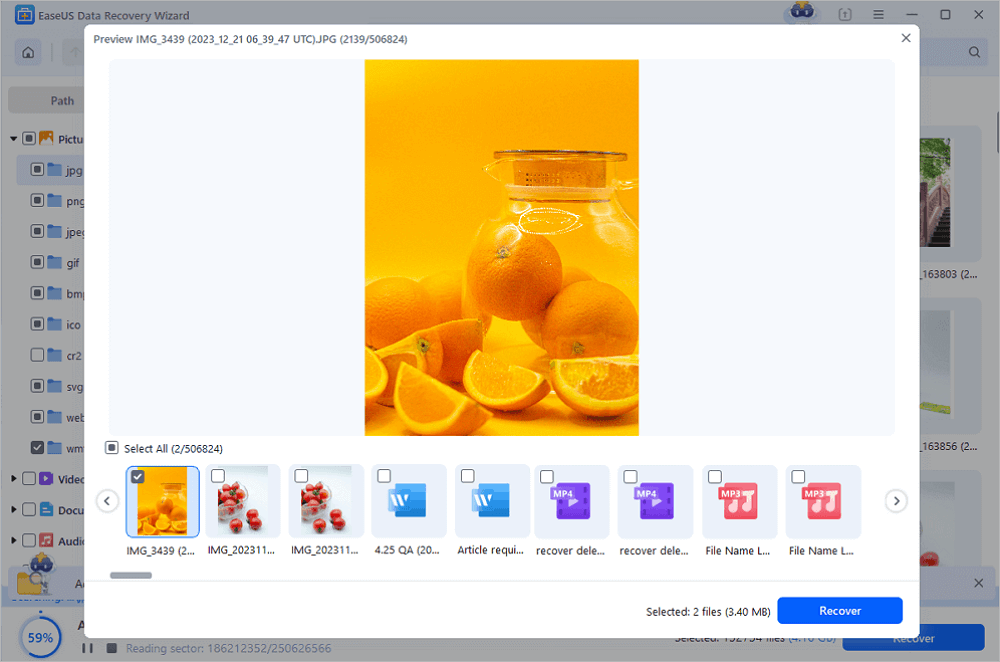
Step 3. You can preview the files found by EaseUS Data Recovery Wizard's scanning algorithms. Then, select files and click "Recover". To avoid data overwriting, we recommend that you save the recovered data to a different drive than the original Seagate drive.
💡Tip: You can restore data on the local disks, external hard drives, and also the cloud storage.
If you find this information helpful, please share it with others on social media to assist them in overcoming this common challenge.
How to Fix Glyph Hard Drive Not Showing Up Issues
When your Glyph hard drive refuses to appear, the inconvenience can be significant, particularly if critical data is at stake. In this part, we'll look at how to deal with the "hard drive not showing up" problem, restore connection and regain access to your important information. To understand the fixes, see the video instructions below.
- 00:22 - The hard drive is not showing up or being detected on your windows
- 00:59 - Click the little plus sign next to the USB
- 02:01 - Assign and specify the drive letter
Following are some of the fixes to help fix Glyph Hard Drive not showing up issues:
#Method 1. Checking Cable Connections
When dealing with an issue with your Glyph hard drive, the first step is to verify cable connections. Faulty or loose connections can impair communication between the hard disk and the computer, resulting in problems with identification. Check that all wires are firmly connected, and try using different cables to rule out any possible flaws.
#Method 2. Updating Drivers
Outdated or unsuitable drivers might cause Glyph hard drives to malfunction. Driver updates are critical for ensuring compatibility with your operating system. Follow these steps to update drivers Windows 11:
Step 1. Connect your Glyph external hard drive to your computer and double-check that it is recognized.
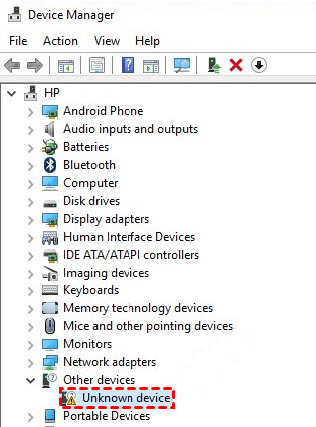
Step 2. Type Device Manager in the Search bar on your screen.
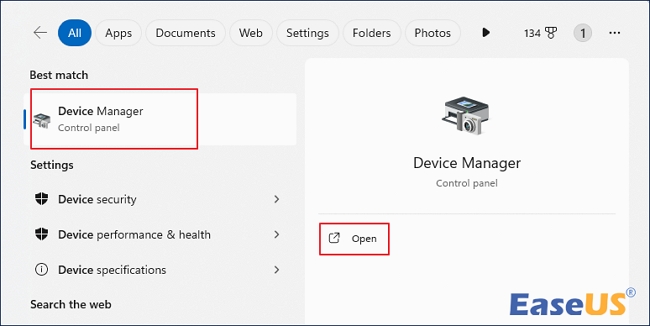
Step 3. Locate the category for your Glyph external hard drive in Device Manager under Disk Drives.
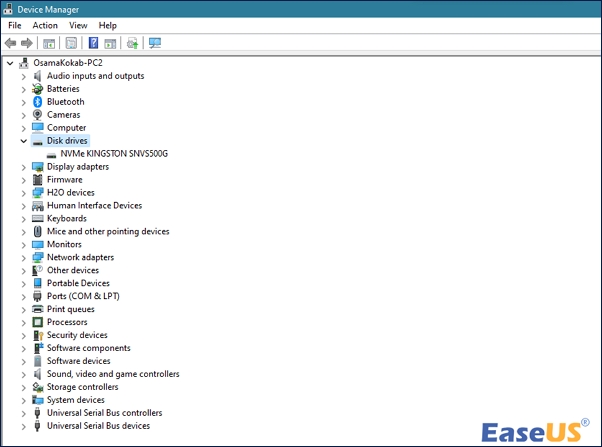
Step 4. Right-click the Glyph device and choose "Update driver." Select the option to run the updated driver automatically.
| 📣Note: If a new driver is discovered, follow the on-screen directions to finish the installation. |
Step 5. After updating the drivers, restart your computer to implement the changes.
Method 3. Perform System Restore
If your laptop has trouble identifying your external hard drive, a system restore is a potential option that returns your PC to a previous state. To do a system restore, follow these steps:
Step 1. Access the Control Panel from the main desktop screen.
Step 2. Set the view in the Control Panel to Large Icons for easier navigation.
Step 3. Search for the "Recovery" option in the Control Panel.
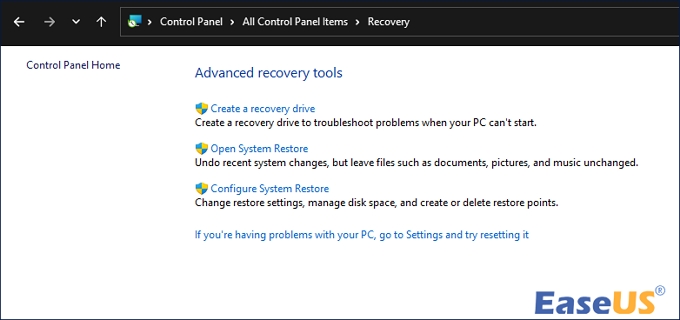
Step 4. Select Recovery, then "Open System Restore," and then click Next.
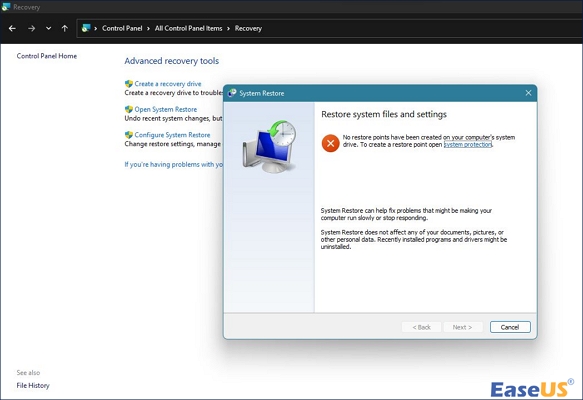
Step 5. Select a restore point associated with the problematic program, driver, or update, then click Next.
Step 6. To begin the system restoration, follow the instructions and click Finish.
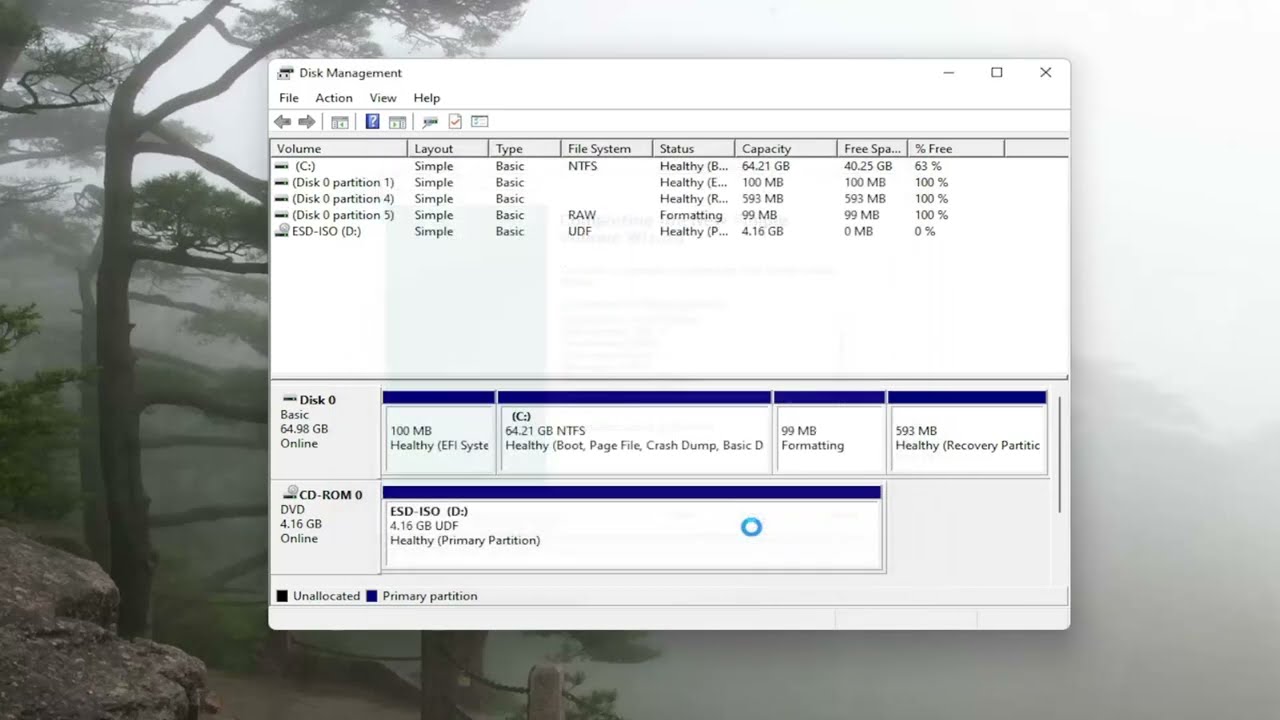
Method 4. Disk Management
When your Glyph hard drive does not appear in Windows, initializing and formatting the disk can typically remedy the problem. Here's a step-by-step procedure:
Step 1. Right-click the Start Icon and choose Disk Management from the menu that appears.
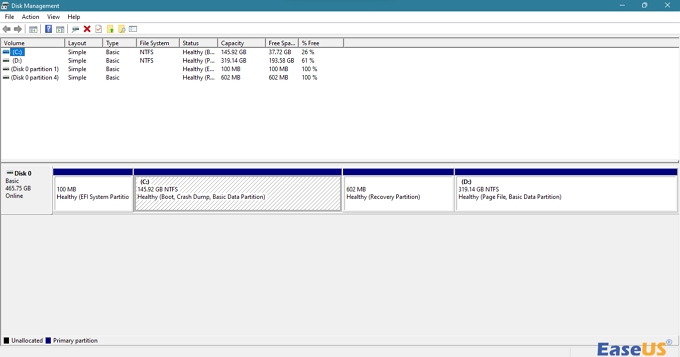
Step 2. When requested to initialize the drive, choose GPT and press "Next."
Step 3. Right-click on the unallocated area with the black striation and choose "New Simple Volume."
Step 4. Use the New Simple Volume Wizard to set the volume size and a drive letter.
Step 5. Select the NTFS file system and execute a fast format on the drive.
Why Glyph Hard Drive Not Showing Up
The confusing situation of a Glyph hard drive not appearing on your Windows system might be caused by several underlying issues. Understanding these possible causes is essential for successful troubleshooting.
❎Faulty Connections: Loose or broken connections might interfere with communication between your Glyph hard drive and the computer, resulting in hard drive detection failure. Check that all wires are firmly attached, and experiment with different cords.
⏱️Outdated or Incompatible Drivers: The drivers that allow your Glyph hard drive to interface with the operating system can be obsolete or incompatible. Updating drivers guarantees smooth compatibility and can help alleviate recognition difficulties.
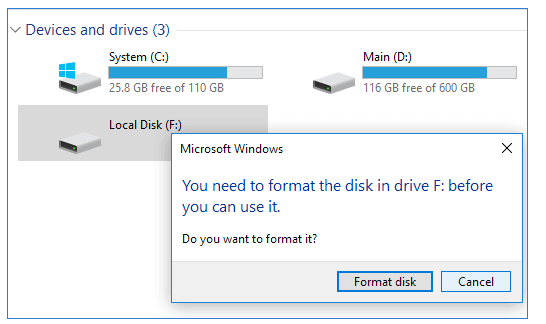
🗂️Partitioning and Formatting Issues: Problems with the hard drive's partitioning or formatting might cause it to go unnoticed by the system. Examining the drive's state in Disk Management might reveal partition-related issues that need to be resolved.
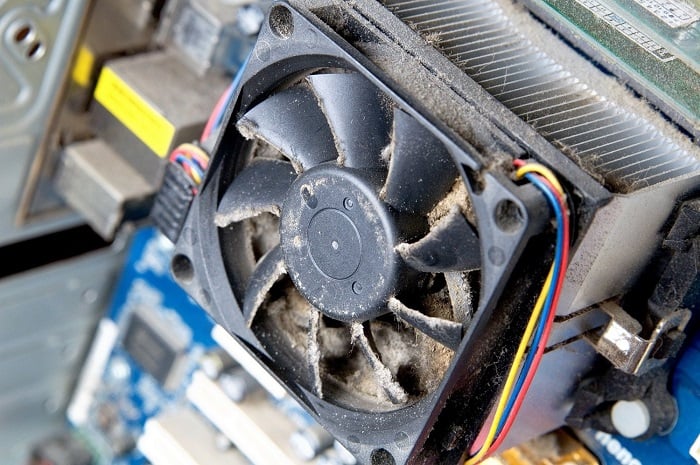
🔋Power Management Settings: Power-saving options can lead the hard drive into sleep mode, resulting in non-recognition. Adjusting power management settings eliminates drive interruptions caused by power-related setups.
To Sum Up
The Glyph hard drives not showing up is a problem that can be detected and fixed in many ways. This article thoroughly answers data recovery, connection issues, and device setup. Using EaseUS Data Recovery Wizard offers another layer of data protection and recovery.
Users can improve their Glyph external hard drive experience by recognizing reasons and applying patches. Remember that prompt intervention, appropriate diagnosis, and trustworthy hard drive recovery tools preserve data integrity and device performance.
Glyph Hard Drive Not Showing Up FAQs
Following are some questions that come up when you search glyph hard drive not showing up issue:
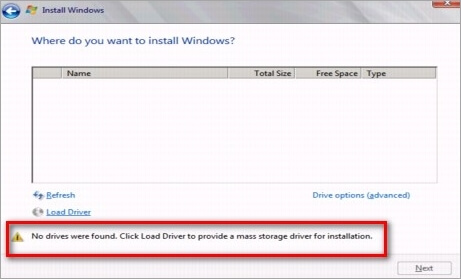
1. Why is my hard drive device not showing up?
If Windows doesn't recognize your internal hard disk, use Disk Management to format the drive. Launch Disk Management. When requested to initialize the drive, choose GPT and press "Next." Right-click on the unallocated area with the black striation and choose "New Simple Volume." Set the volume size and a drive letter. Select the NTFS file system and execute a fast format on the drive. To finish the New Simple Volume Wizard, press the "Next" button.
2. Why is my hard drive inserted but not showing?
If the hard disk displays in Disk Management but cannot be used to retrieve data, format, or assign a drive letter, there may be a logical issue. DiskPart can help you show up the hard drive in this case.
3. How do I initialize my hard drive?
Follow the steps below to initialize your hard drive:
- 1. Right-click This PC/My Computer and choose Manage to open Computer Management.
- 2. Open Disk Management from the left sidebar.
- 3. Plug your external HDD into your PC. A new SSD or HDD will be initialized.
4. How do I restore an uninitialized hard drive?
You can initialize the hard drive manually if there's any error. Open Disk Management and right-click on the uninitialized disk. Click on Initialize Disk, and all errors should now be resolved. If it still persists, you can try EaseUS Data Recovery Wizard to recover data from uninitialized disks.
Was this page helpful?


20+
Years of experience

160+
Countries and regions

72 Million+
Downloads

4.9 +
Trustpilot Score


