
-
![]()
-
![]()
-
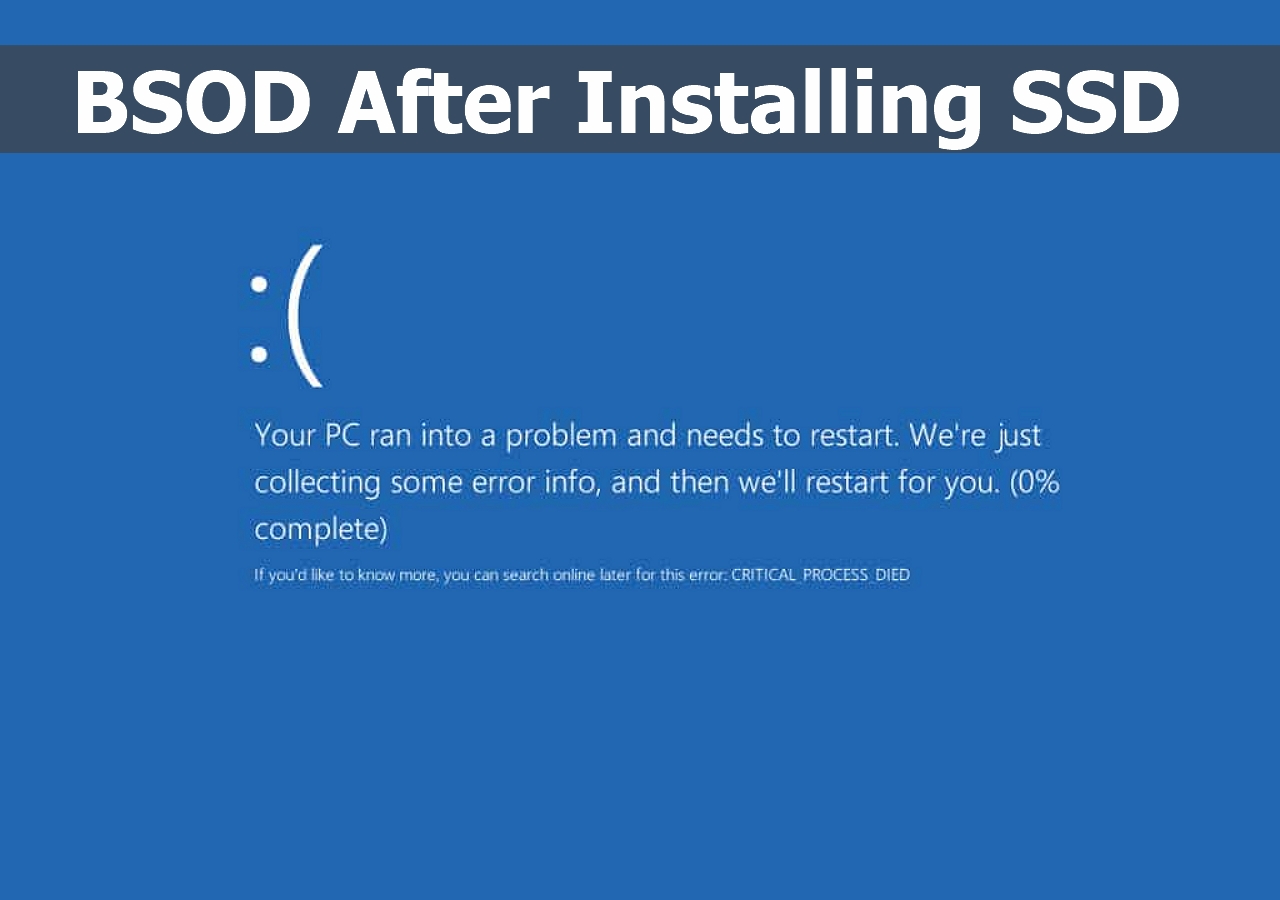
![]() BSOD After Installing SSD | Solved Without Losing Data
BSOD After Installing SSD | Solved Without Losing Data January 29,2026
 6 min read
 -
![]() How to Fix Windows Update Error 0x800f081f [Top 5]February 12,20266 min read
How to Fix Windows Update Error 0x800f081f [Top 5]February 12,20266 min read -
![]()
-
![]()
-
![]() [Solved] PowerPoint Won't Play Audio or Video on Windows 10January 29,20266 min read
[Solved] PowerPoint Won't Play Audio or Video on Windows 10January 29,20266 min read -
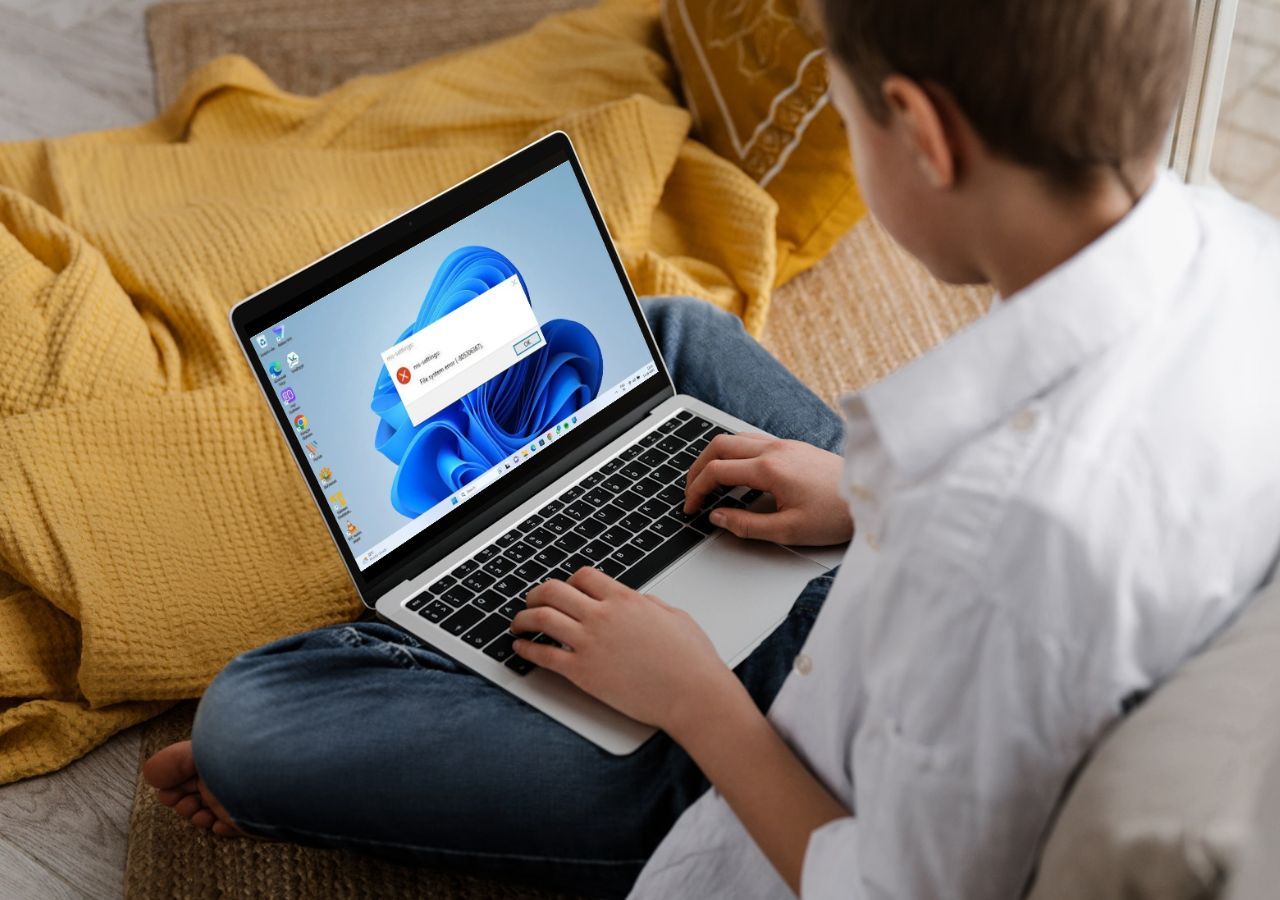
![]() Windows Cannot Find Ms-Settings: How to Fix the File System ErrorJanuary 29,20266 min read
Windows Cannot Find Ms-Settings: How to Fix the File System ErrorJanuary 29,20266 min read -
![]() 4 Ways to Force Update Windows 11 to the Latest VersionFebruary 12,20266 min read
4 Ways to Force Update Windows 11 to the Latest VersionFebruary 12,20266 min read -
![]() Fixes for Adobe Photoshop Has Stopped Working Without Losing FilesFebruary 12,20266 min read
Fixes for Adobe Photoshop Has Stopped Working Without Losing FilesFebruary 12,20266 min read
Page Table of Contents
PXE-E61 media test failure check cable is a common black screen boot error you might encounter on Acer/Lenovo/HP/DELL. When your PC tries to boot from a network and is unable to find a bootable drive or disk, this error text pops up. It's annoying, but the best news is that you can fix this error without a hitch.
| Workable Solutions | Step-by-step Troubleshooting |
|---|---|
| Restore Data When Encountered PXE-E61: Media Test Failure | Since Windows is often installed on partition C, most people choose to reinstall the system there,...Full steps |
| Fix 1. Solve 'PXE-E61: Media Test Failure, Check Cable' in BIOS | Unplug the USB and 1394 (Firewire) devices linked to your PC. If there's a floppy disk drive, you...Full steps |
| Fix 2. Remove Bootable Devices to Fix PXE-E61 | Once your computer is turned on, the operating system attempts to access the bootable network...Full steps |
| Fix 3. Fix This Media Test Failure by Disconnecting the Network Drive | As you have already installed Windows OS on your HDD, the linked network drive is set to...Full steps |
| Fix 4. Reset BIOS to Fix 'PXE-E61: Media Test Failure, Check Cable' | Boot into BIOS on your PC. Press the "Delete" key on the keyboard. Select "Advanced Setup" and...Full steps |
The full name of PXE is Preboot eXecution Environment, which means that in computing, the PXE specification elaborates a methodized client-server ecosystem that boots a software assembly restored from a network on PXE-authorized clients. It needs a PXE-efficient network interface controller or NIC on the client side and utilizes a tiny set of industry-oriented network protocols, such as TFTP and DHCP.
Are you wondering what causes this "PXE-E61 media test failure" error? These are the primary reasons shown below:
- Corrupted boot sector.
- Your PC has power problems.
- The system HDD or network drive is physically corrupted, damaged, or crashed.
- The Ethernet cable isn't connected appropriately or is damaged.
Although they cause this issue, we have gathered a few fixes to efficiently resolve this. Let's get started with the fixes below!
Restore Data When Encountered 'PXE-E61: Media Test Failure, Check Cable' Error
Since Windows is often installed on partition C, most people choose to reinstall the system there, even though doing so will erase all of the disk's contents. To ensure their safety, you have to retrieve any crucial files that may be on partition C. Your PC is unbootable now, and you must conduct C drive recovery using a top-notch file recovery tool.
EaseUS Data Recovery Wizard is worth using as it spots the erased data on the storage devices and helps find the existing items on the drive.
This premium software possesses a bootable edition that lets you get files off a laptop that won't turn on. If you're itching to buy this software, you should know its best-in-class features listed below:
- ✅It supports a wide array of file system types, including NTFS recovery, FAT, HFS+, and more.
- ✅It retrieves limitless data deletion because of formatting, unbootable or corrupted systems, USB drives, SD cards, partition loss, and cameras.
- ✅Recover deleted files from the hard drive without any storage space limit.
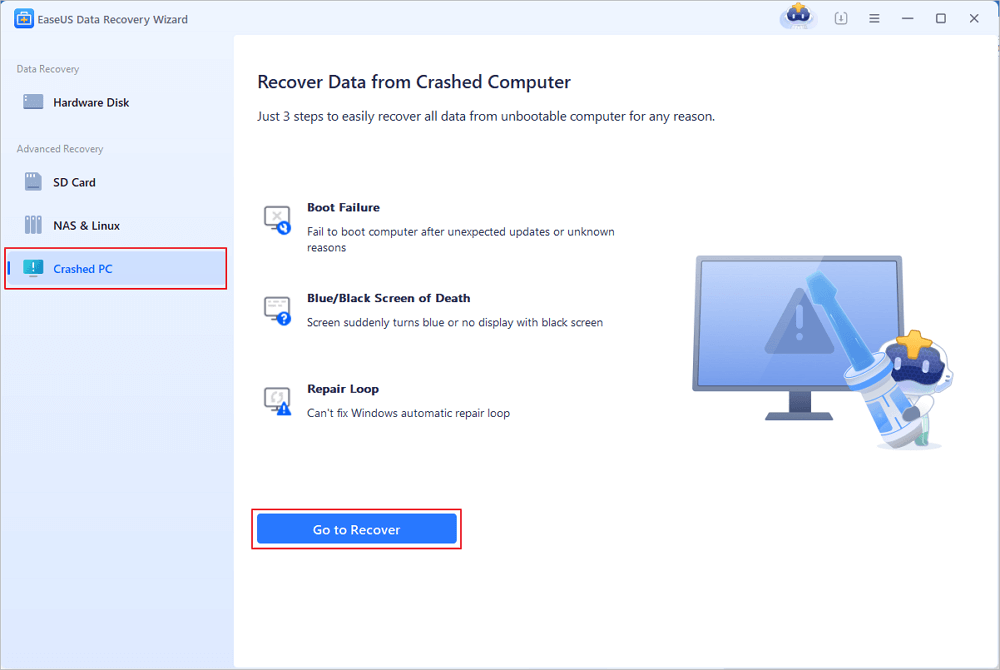
Step 1. Create a bootable disk
Launch EaseUS Data Recovery Wizard, choose "Crashed PC" and click "Go to Recover".
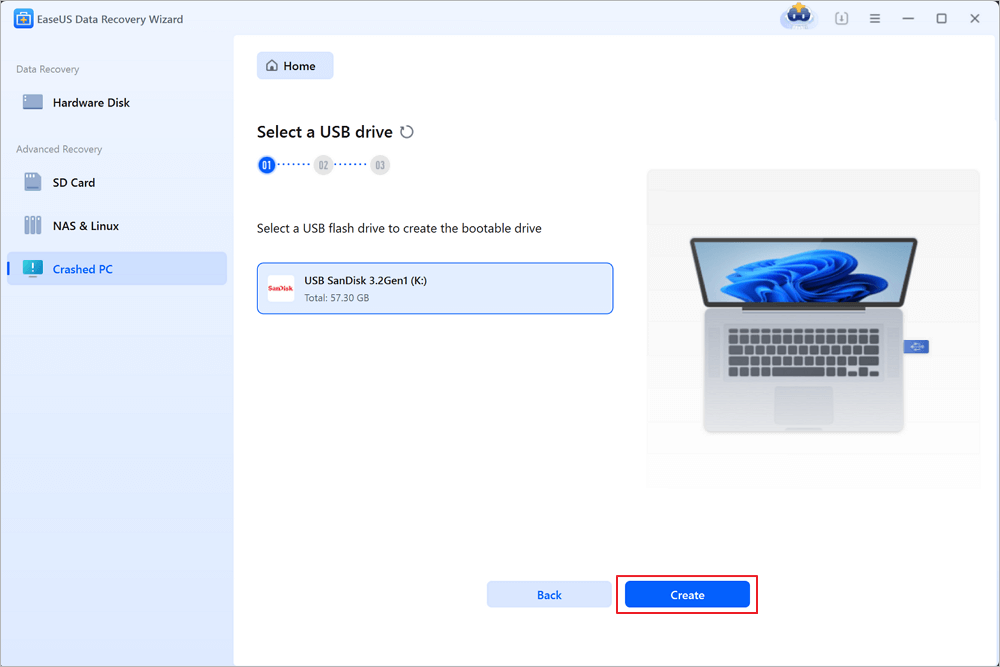
Select an empty USB to create the bootable drive and click "Create".
⚠️Warning: When you create a bootable disk, EaseUS Data Recovery Wizard will erase all data saved in the USB drive. Back up important data beforehand.
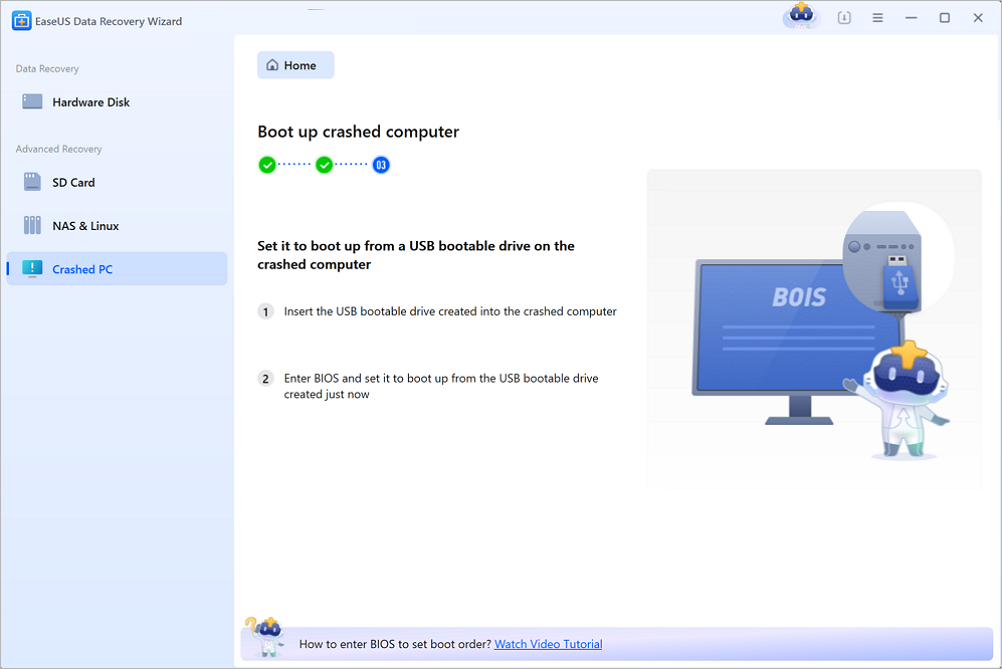
Step 2. Boot your computer from the bootable USB
Connect the bootable disk to the PC that won't boot and change your computer boot sequence in BIOS. For most users, it works well when they restart their computer and press F2 simultaneously to enter BIOS.
Set to boot the PC from "Removable Devices" (bootable USB disk) beyond Hard Drive. Press "F10" to save and exit.
Step 3. Recover data from a crashed system/PC
After booting from EaseUS Data Recovery Wizard bootable disk, select the drive you want to scan to find all your lost files. Preview and recover the files you need to a safe location.
💡Tip: You can restore data on the local disks, external hard drives, and also the cloud storage.

Download this professional data retrieval software now! If you like this passage, please share this with your mates on social media.
Fix 1. Solve 'PXE-E61: Media Test Failure, Check Cable' in BIOS
If your PC's BIOS is mistakenly misconfigured and USB boot has the maximum priority in the boot sequence, your PC will initially boot from the USB device. This will undoubtedly lead to the PC's unbootable problem, and you might encounter the PXE-E61: Media Test Failure, Check Cable error. Furthermore, to ensure the success rate, it would be better to eliminate the non-system disks from your PC. These are the steps to follow:
Step 1. Unplug the USB and 1394 (Firewire) devices linked to your PC.
Step 2. Eliminate the CD/DVD discs from your PC's drives.
Step 3. If there's a floppy disk drive, you must take it out of the drive.
Step 4. Press the "Power" button for 5 seconds to turn off the PC. Then, hit the "Power" button to turn it back on.
If you would like to boot from a network drive, you must verify that it is at the top of the boot order. If not, adjust the BIOS configuration to be at the highest position. Here's how you can go about it:
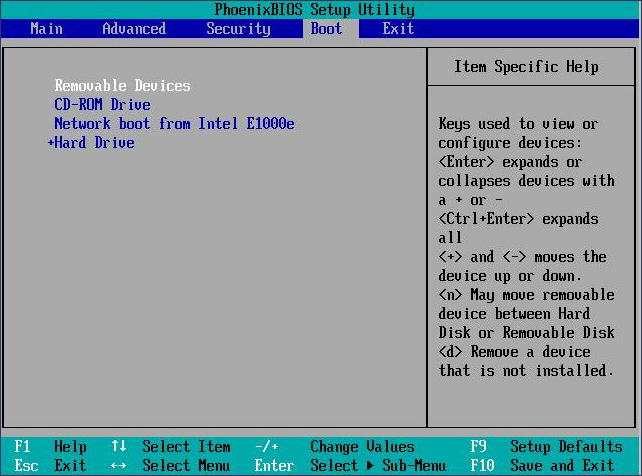
Step 1. Open the BIOS setup utility. Restart your PC, and hit the key to access the BIOS setup utility after the PC turns on, which is the F2 key.
Step 2. Move to the "Boot" menu to modify the boot sequence.
Step 3. Employ the keys mentioned on the list to set a network drive as the maximum priority to boot from. The greatest boot priority belongs to the device positioned at the summit of the device line.
Fix 2. Remove Bootable Devices to Fix PXE-E61
Once your computer is turned on, the operating system attempts to access the bootable network drive. The PXE-E61: Media Test Failure problem may arise from an incorrect or faulty hardware interface prohibiting the system from booting. In that case, you must thoroughly examine the network drive and ensure the power cables are precisely linked and not corrupted.
When the booting order is incorrect, and the USB boot has the top preference, the BIOS will attempt to launch from USB immediately. If the linked USB flash drive cannot be booted, it will look for a bootable drive on the network, and you can receive the Media Test Failure error. Therefore, removing the bootable devices is crucial to skip booting from USB.
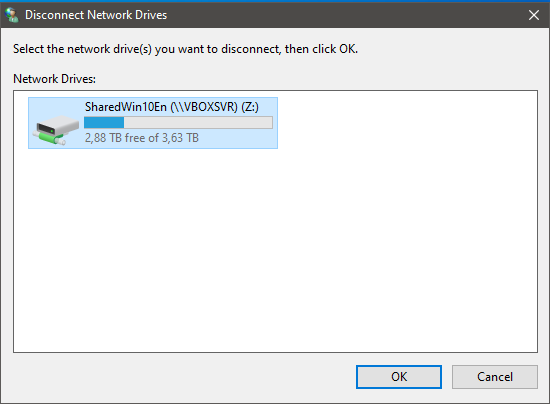
Fix 3. Fix This Media Test Failure by Disconnecting the Network Drive
As you have already installed Windows OS on your HDD, the linked network drive is set to the maximum priority in the boot order that doesn't have Windows OS installed. Your PC will attempt to boot from the network drive, which might fail, leading to the "PXE-E61: Media Test Failure, Check Cable" error.
In order to resolve the error, you should verify the cable error and detach the network drive by unfastening the network cable.
Fix 4. Reset BIOS to Fix 'PXE-E61: Media Test Failure, Check Cable'
You may alternatively reset the BIOS to its primary settings, which helps boot your system from the internal HDD. Check the following guide to reset BIOS:
Step 1. Boot into BIOS on your PC.
Step 2. Press the "Delete" key on the keyboard.
Step 3. Select "Advanced Setup" and press the Enter key.
Step 4. Now, choose "Reset CMOS Configuration" to reset BIOS.
Hope you have learned all these manual ways, and you can mark this passage by sharing it.
Fix 5. Contact Professional Data Recovery Services to Fix the Media Test Failure
You should not attempt another arbitrary step if none of the fixes resolves the problem. Instead, contact a professional data recovery service supplier to prevent any loss of information. The data ultimately holds greater significance.
If you are unable to resolve the "PXE-E61: Media Test Failure" verify connection boot fault, you must first retrieve your files. Then, to prevent irreversible data loss, you should restore your data with EaseUS data recovery services.
The experts at EaseUS provide complete recovery and repair services when you fail to tackle intricate restoration scenarios, such as partition loss, reformatting drive, system boot error, virtual disk corruption, and more. Contact EaseUS experts now!
Consult with EaseUS data recovery experts for one-on-one manual recovery service. We could offer the following services after a FREE diagnosis
- Repair corrupted RAID structure, unbootable Windows OS, and corrupted virtual disk files
- Recover/repair lost partitions and re-partitioned drives
- Unformat hard drives and repair RAW drives(Bitlocker encrypted drives)
- Repair USB drives and solve computer boot issues
Conclusion
After reviewing this article, you should be able to resolve the PXE-E61 Media test failure check cable issue by applying several techniques. Whether you use a laptop from DELL, Acer, HP, Lenovo, or another manufacturer, you will discover a workable solution here.
We talked about potential reasons for the hard disk problem and different fixes. We also discussed the significance of using experienced data recovery services to fix this mistake. Hiring Data Recovery Professionals, such as EaseUS Data Recovery Wizard, is always the most effective option in such situations.
PXE-E61: Media Test Failure, Check Cable FAQs
These are the FAQs to consider for a better understanding:
1. How do I fix the PXE-E61 media test failure?
Removing external USB hard drives, resetting the BIOS boot sequence, or disconnecting the wireless network drive are several fixes for the PXE-E61 media test failure.
2. Why do I encounter PXE-E61 on my laptop?
This error occurs when the Boot from LAN option in the BIOS setup is set to use. Therefore, if you would like to fix the problem, you need to change the "Boot from LAN" item to "Do Not Use" in the BIOS setup.
3. How do I stop PXE from booting in BIOS?
In that case, you need to enter "setup" once the PC is switched on > Hit the "Advanced" tab and spot the "Integrated Devices" option > Locate the "Network Interface Controller" option > Toggle it "On" rather than "On with PXE" to turn PXE off.
Was this page helpful?
-
Dany is an editor of EaseUS who lives and works in Chengdu, China. She focuses on writing articles about data recovery on Mac devices and PCs. She is devoted to improving her writing skills and enriching her professional knowledge. Dany also enjoys reading detective novels in her spare time. …


20+
Years of experience

160+
Countries and regions

72 Million+
Downloads

4.9 +
Trustpilot Score


Free Data
Recovery Software
Recover data up to 2GB for free!