
Content
Page Table of Contents
About the Author
Hot Topics
What is WinPE Bootable Disk
WinPE, known as Windows Pre-installation Environment, is a lightweight version of different Windows OS, such as Windows 10/8/7/XP. It is a minimal operating system where you can prepare a PC for installation, deployment, and Windows servicing.
Why Need to Create a WinPE Bootable Disk
WinPE bootable disk supports to manage hard disk partitions when Operating System crashes, resize primary drive to reinstall other OS, and even manage partitions on a computer without Operating System. Moreover, it allows you to recover deleted partition, extend system partition, and rebuild MBR without losing any data. The most important thing is that the WinPE bootable disk can boot a crashed computer and boot a computer without OS. Here in this guide, we will tell you how to create a WinPE bootable disk in two ways.
Method 1. Create WinPE Bootable Disk in Simple Steps
Creating a WinPE bootable disk is very complicated. It does not only contains many steps but also requires users to have advanced computer knowledge. As a result, we recommend a third-party tool - EaseUS Partition Master to help Windows beginners. EaseUS Partition Master is specialized in computer partition management. It allows users to resize, move, extend partitions, change SSD from MBR to GPT, and even migrate OS to HDD/SSD on computers without losing data under different Windows OS. More importantly, it can help users to create WinPE bootable disk with fewer steps.
Now download EaseUS Partition Master and follow the guide below to see the easiest method of creating a WinPE bootable disk.
Step 1. To create a bootable disk of EaseUS Partition Master, you should prepare a storage media, like a USB drive, flash drive or a CD/DVD disc. Then, correctly connect the drive to your computer.
Step 2. Launch EaseUS Partition Master, and find the "Bootable Media" feature on the left. Click on it.
Step 3. You can choose the USB or CD/DVD when the drive is available. However, if you do not have a storage device at hand, you can also save the ISO file to a local drive, and later burn it to a storage media. Once made the option, click the "Create" button to begin.
- Check the Warning message and click "Yes".
Step 4. When the process finishes, you'll see a pop up window, asking if you want to restart computer from the bootable USB.
- Reboot Now: it means you want to restart the current PC and enter EaseUS Bootable Media to manage your disk partitions without OS.
- Done: it means you don't want to restart the current PC but to use the bootable USB on a new PC.
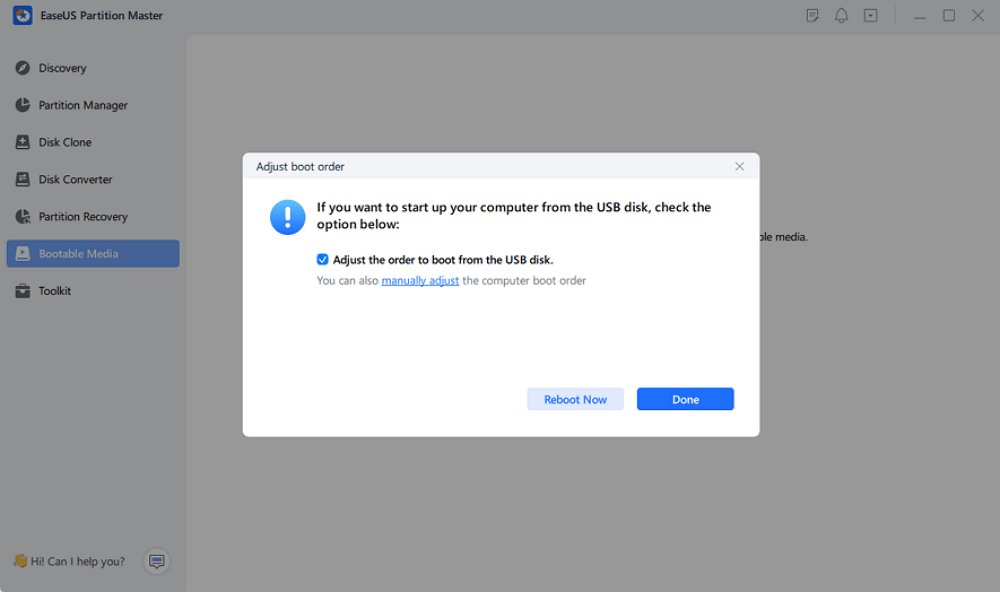
Note: To use the bootable disk on a new PC, you need to resart the target computer and press F2/F8/Del key to enter BIOS, and set the USB bootable disk as the first boot disk.
Wait patitiently and your computer will automatically boot up from the USB bootable media and enter EaseUS WinPE desktop.

This software can also be applied in the following scenario:
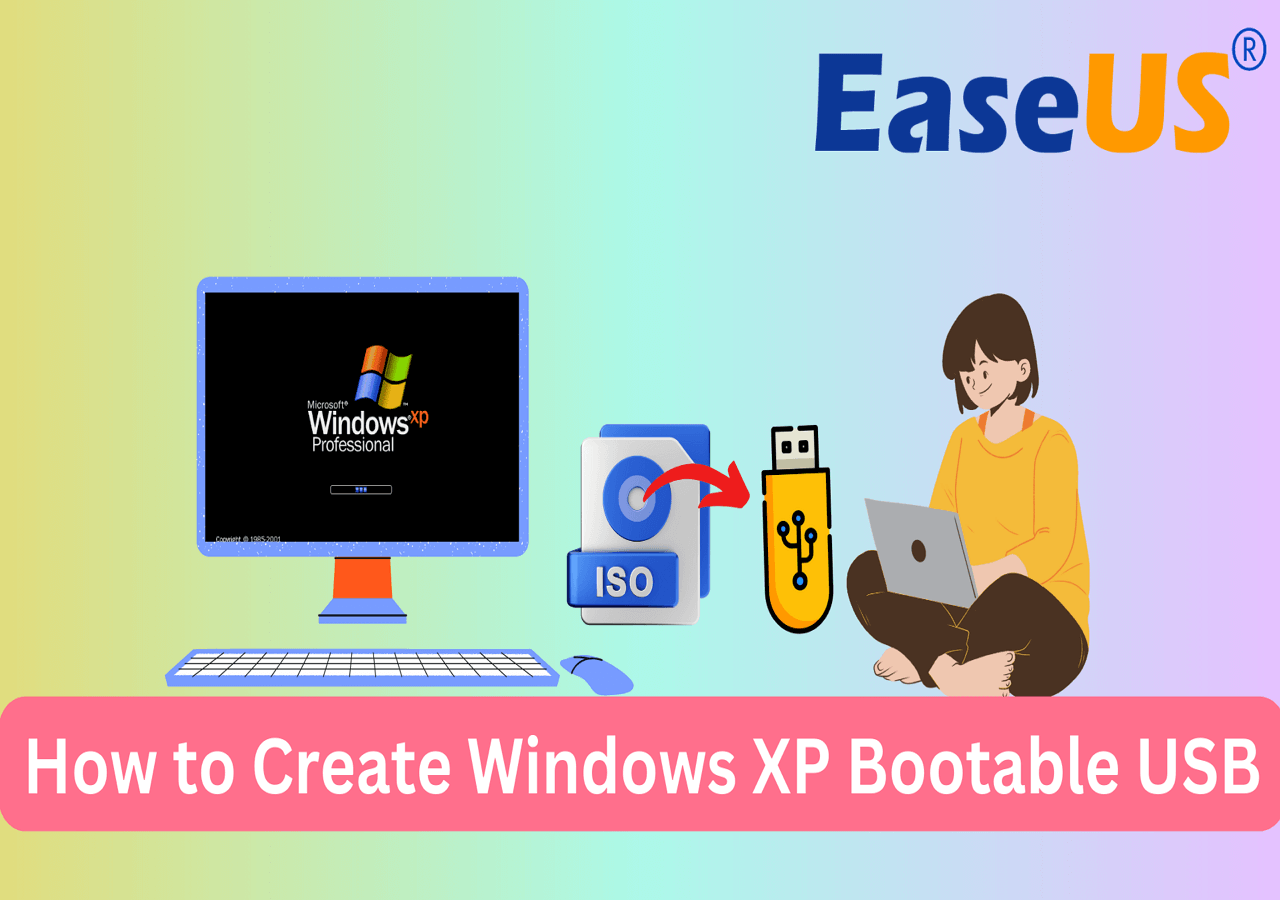
How to Create Windows XP Bootable USB | Full Guide
There are three practical methods that teach you how to create a Windows XP bootable USB with safe and easy operations.
Method 2. Create WinPE Bootable Disk with Windows ADK
Another method you could apply is to use Windows ADK. This method is a little complicated. If you want to have a try, follow the step-by-step guide below.
Step1. Download the Windows ADK (Assessment and Deployment Kit). It contains the CopyPE and MakeWinPEMedia command-line utilities.
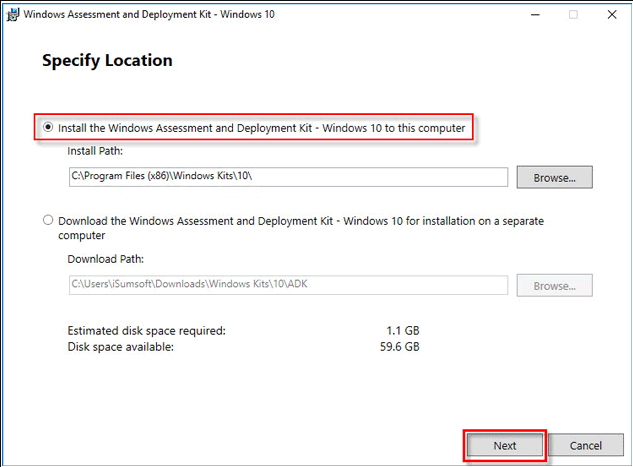
Step 2. Launch the ADK tool, select the "Install the Windows Assessment and Deployment Kit-Windows 10 to this computer" and click "Next".
Step 3. On the subsequent page, click "Next" and "Accept".
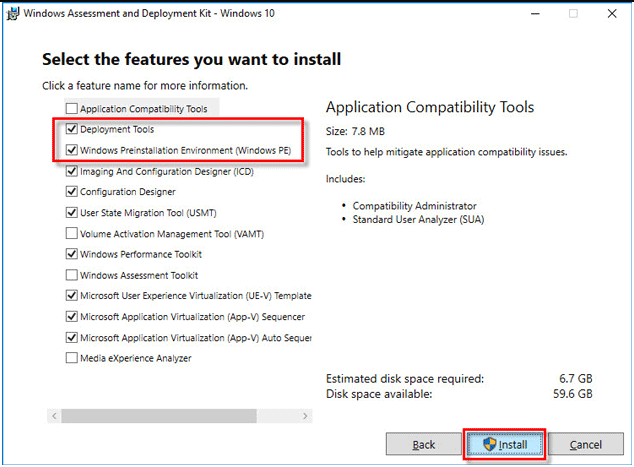
Step 4. Choose the "Deployment Tools" and "Windows Preinstallation Environment (Windows PE)" options and click "Install".
Step 5. Close the installation process when it's finished. Open the Start menu and go to "Windows Kits". Right-click "Deployment and Imaging Tools Environment" and head to "More" > "Run as administrator".
Step 6. When it runs, execute the command: copype amd64 G:\WinPEx64 (replace G:\ with your drive letter).
Step 7. Then execute the command: MakeWinPEMedia /ISO G:\WinPEx64 G:\WinPEx64\WPE64.iso. When you see "100% complete" and "Success", it means you've successfully created WinPE files.
Step 8. Now you can navigate to the G drive or where you created the WinPE files. There you will see a WinPE iso file.
Then you can connect the target disk to the computer, and burn ISO files to it to make it bootable. For this task, you can use Windows To Go (an available feature in Windows 10 Education/Enterprise/Pro and Windows 8/8.1 Enterprise).
Step 9. Type "Windows To Go" in the search box to launch this tool.
Step 10. It will automatically search for all inserted USB drives. Choose the destination USB drive and then "Next" to continue.
Step 11. Click "Add search location" to search for the Windows installation ISO file and choose the mounted ISO file.
Step 12. On the next window, you can set a BitLocker password to encrypt your Windows To Go workplace.
At last, you will get a WinPE bootable disk for Windows 10.
How Can We Help You
About the Author
"I hope my articles can help solve your technical problems. If you are interested in other articles, you can check the articles at the bottom of this page. Similarly, you can also check my Twitter to get additional help."
Brithny is a technology enthusiast, aiming to make readers' tech lives easy and enjoyable. She loves exploring new technologies and writing technical how-to tips. In her spare time, she loves sharing things about her game experience on Facebook or Twitter.
Product Reviews
-
I love that the changes you make with EaseUS Partition Master Free aren't immediately applied to the disks. It makes it way easier to play out what will happen after you've made all the changes. I also think the overall look and feel of EaseUS Partition Master Free makes whatever you're doing with your computer's partitions easy.
Read More -
Partition Master Free can Resize, Move, Merge, Migrate, and Copy disks or partitions; convert to local, change label, defragment, check and explore partition; and much more. A premium upgrade adds free tech support and the ability to resize dynamic volumes.
Read More -
It won't hot image your drives or align them, but since it's coupled with a partition manager, it allows you do perform many tasks at once, instead of just cloning drives. You can move partitions around, resize them, defragment, and more, along with the other tools you'd expect from a cloning tool.
Read More
Related Articles
-
Best Bootable Disk Wipe USB Free Download 2026🚩
![author icon]() Sherly/2026/06/17
Sherly/2026/06/17 -
How to Create Bootable USB to Wipe Hard Drive
![author icon]() Cici/2026/06/30
Cici/2026/06/30 -
Getting Windows 11 Boot Loop? Troubleshoot This Error Now - EaseUS
![author icon]() Tracy King/2026/06/17
Tracy King/2026/06/17 -
How to Reset Administrator Password on Windows 10
![author icon]() Sherly/2026/06/28
Sherly/2026/06/28


