
Content
Page Table of Contents
About the Author
Hot Topics
Updated on Jun 17, 2026
The Disk Check utility or CHKDSK utility is one of the excellent options that you would find unique and practical in more ways than one. Primarily, we use it to check the errors on the disk or in the file system. However, there are times when the chkdsk runs at every Startup. That can be utterly annoying, and you may be looking to find the methods to skip disk checking on Windows 11.
Let us try finding the best options to help you disable disk check on Startup.
| Fixes for Stoping Disk Checking | Duration | Complexity |
|---|---|---|
| 5-10 minutes | Complex | |
| 2. Registry Editor | 5-8 minutes | Medium |
| 3. EaseUS Partition Master | 3-5 minutes | Easy |
For Windows beginners, I'd suggest that you try Method 1 or 2 to end the Disk Checking error and then turn to Method 3 to check and fix the disk error with third-party software. It's easier for Windows beginners to try.
Stay focused here and follow one of the methods; you can resolve the disk-checking error and make your PC boot up normally again. Also, don't forget to share this tutorial guide online to help more people fix the same issue on their computers with success:
How to Stop Disk Checking on Windows 11?
Finding the chkdsk command run every time you start your Windows can be very annoying. This process of Windows can delay the Startup of your PC unnecessarily. That would make it quite an obvious choice to stop chkdsk on Startup. Let us find out how to stop disk checking in Windows 11 with ease.
Here are the different methods to help you how to stop chkdsk on Startup in Windows 11.
Fix 1. Use Command Prompt to Stop Disk Checking
Windows Command Prompt can be your best choice to help stop chkdsk on Startup. The built-in feature does not need you to install anything.
Here we go with the steps:
Step 1. Choose Command Prompt on your Windows 11. Make sure that you have launched it with administrative privileges.
Step 2. Type the Command below. Here C refers to the disk on which you want to stop disk checking at Startup.
chkntfs /x C:
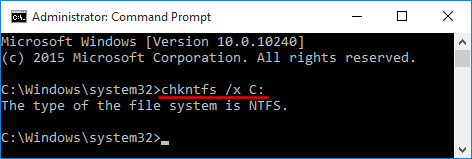
The command /x is used to disable the auto-check for the selected drive. If you want to disable chkdsk on multiple drives, you can use the Command here - chkntfs /x c: d: e:
If you want to enable the disk checking at every Startup, you can enter the Command on Command Prompt - chkntfs /d. Here, d refers to the drive letter you want to allow the disk to check feature.
Fix 2. Run Registry Editor
The Windows registry should be one of the excellent options for enjoying a great experience in how to stop chkdsk on Startup. You can check out the steps below to find the best options for the purpose.
Here are the steps you can follow:
Step 1. Go to Windows search and look for Windows registry. You can get it by launching the RUN dialog box, typing in Regedit, and clicking OK.
Step 2. Follow the path here below.
HKEY_LOCAL_MACHINE\SYSTEM\CurrentControlSet\Control\Session Manager.
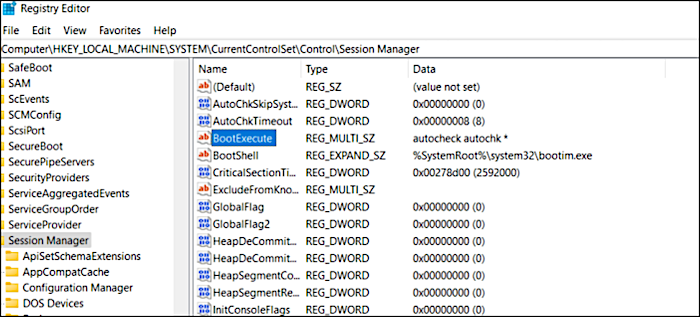
Step 3. Double-click on BootExecute on the right pane.
Step 4. On the Edit Multi-String window, delete all the IDs except autocheck autochk *.
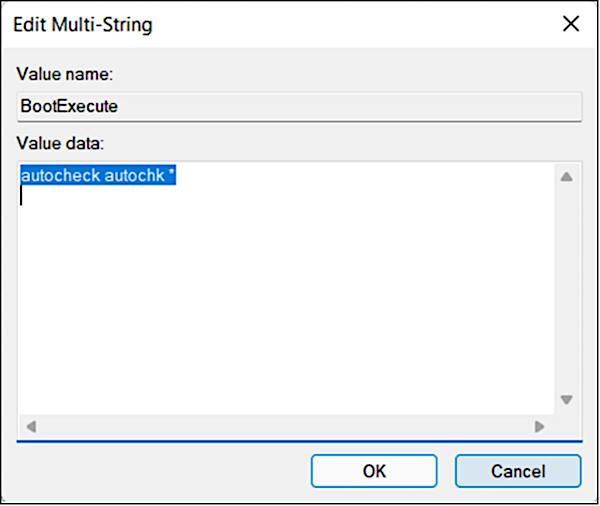
That would do it. You have efficiently enabled the option to skip disk checking on Windows 11. Close the Registry Editor, restart your PC, and make the necessary changes. On your next Startup, you will find that disk checking has been stopped while starting Windows 11.
Run CHKDSK Alternative After Disabling Disk Check from Startup
After you disable the Disk Check feature from startup, you may stop here. However, if you plan to find a reliable disk error-checking utility to help you monitor disk health and conditions, stay here. EaseUS Partition Master is the perfect choice for all your needs, providing you with an entire disk and partition manager program for Windows. It should be the right option for helping you take total control over your hard disks and other external drives.
The Check File System feature of the EaseUS Partition Master works in the same way as the built-in CHKDSK utility on Windows. You can use the feature to help you scan and repair disk errors and bad sectors.
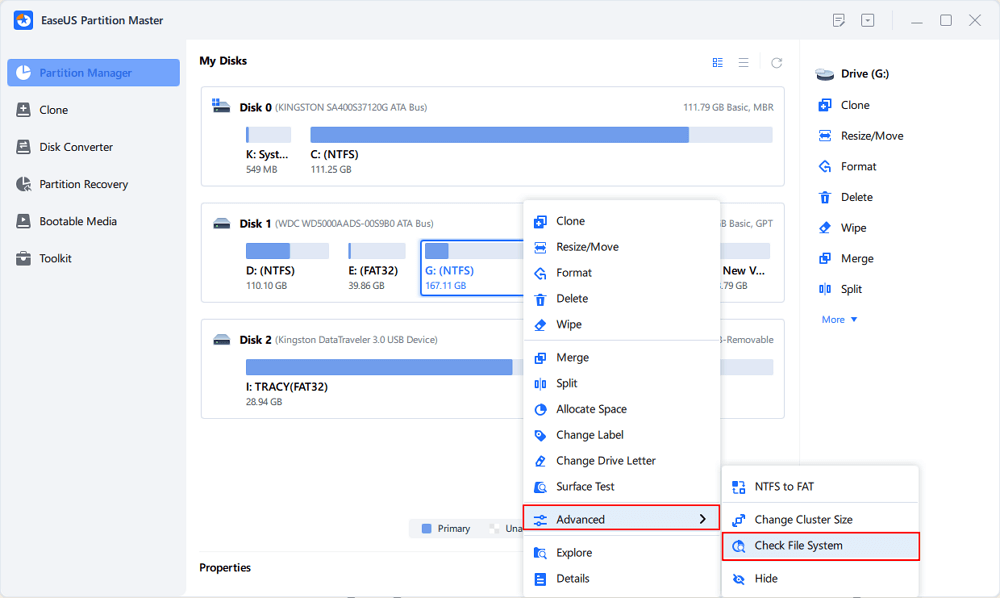
Step 1. Open EaseUS Partition Master on your computer. Then, locate the disk, right-click the partition you want to check, and choose "Advanced" > "Check File System".
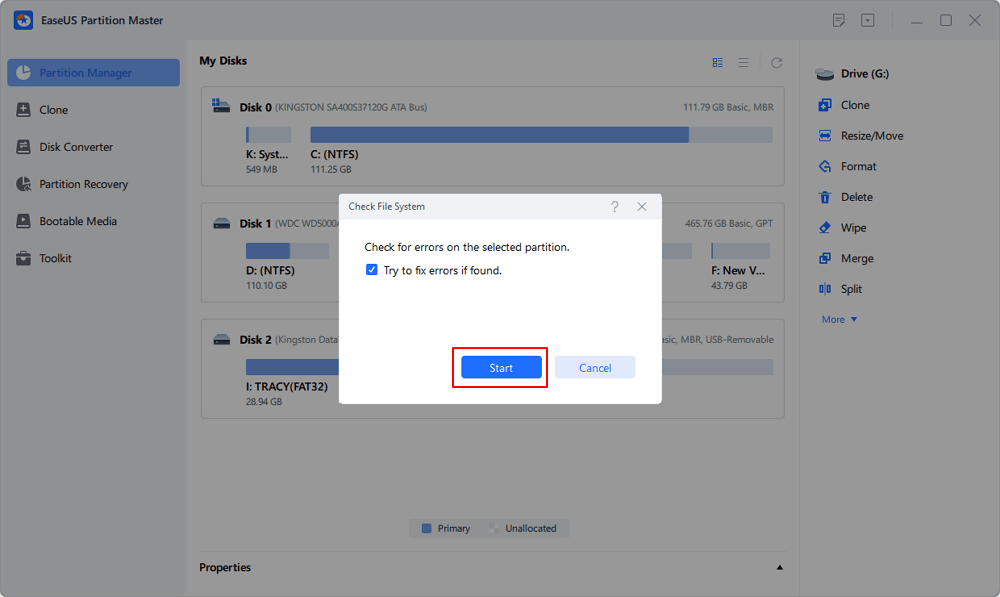
Step 2. In the Check File System window, keep the "Try to fix errors if found" option selected and click "Start".
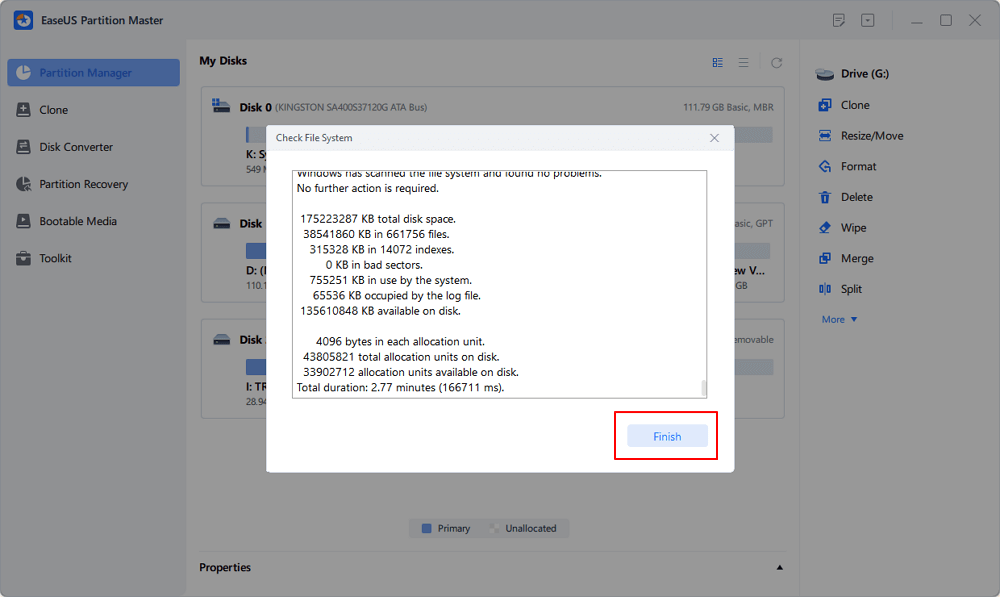
Step 3. The software will begin checking your partition file system on your disk. When it completes, click "Finish".
It can simply work effectively to fix the bad sectors relatively efficiently. This feature is also available on the free version, and you do not need to go with the Pro version to get access to the part.
Some of the features that you would find unique can include
- It helps you convert NTFS to FAT32.
- It allows you to split partitions in a direct manner.
- It reduces the chances of restarting frequently.
- It is the best disk wipe software.
You can use the tool to help you create, format, and delete the partition. It can also be an excellent choice for assisting you in resizing and moving the partition. You can even merge different partitions and wipe data more effectively and efficiently. Also, don't forget to share this comprehensive disk management software online to help more people master their computer disk space wisely:
Why Does My PC Keep Disk Checking?
There are several reasons you would find Chkdsk running automatically at every Startup. It may be due to multiple reasons. It would be advisable to see why the chkdsk command keeps running at every Startup.
One of the reasons why the chkdsk command runs at the Startup can be:
- An illegal or improper shutdown of your PC.
- The system finds any files that are corrupt or have issues.
- You might have scheduled it to run, or Windows itself would have scheduled it to run.
The Concluding Thoughts
The disk checking options at the Startup are not a virus or any other issue. It does not generally harm your computer in any way. Ideally, it indicates an error or problem with your hard disk or file system. It is always advisable to execute a hard disk health check at least once a week or during the first run of your Windows PC. If the operating system finds any error in your file system or the drive, it will keep running the disk checking before you can enter the OS. You can use any of the options outlined above to ensure your success in disabling disk checks on Startup.
If you are looking for an effective technique on which methods you would want to utilize, EaseUS Partition Master is our prime recommendation. EaseUS Partition Master could be a prominent option to check and fix disk errors to stop disk checking from the startup in Windows 11.
How Can We Help You
About the Author
Updated by Tracy King
Tracy became a member of the EaseUS content team in 2013. Being a technical writer for over 10 years, she is enthusiastic about sharing tips to assist readers in resolving complex issues in disk management, file transfer, PC & Mac performance optimization, etc., like an expert.
Product Reviews
-
I love that the changes you make with EaseUS Partition Master Free aren't immediately applied to the disks. It makes it way easier to play out what will happen after you've made all the changes. I also think the overall look and feel of EaseUS Partition Master Free makes whatever you're doing with your computer's partitions easy.
Read More -
Partition Master Free can Resize, Move, Merge, Migrate, and Copy disks or partitions; convert to local, change label, defragment, check and explore partition; and much more. A premium upgrade adds free tech support and the ability to resize dynamic volumes.
Read More -
It won't hot image your drives or align them, but since it's coupled with a partition manager, it allows you do perform many tasks at once, instead of just cloning drives. You can move partitions around, resize them, defragment, and more, along with the other tools you'd expect from a cloning tool.
Read More
Related Articles
-
6 Ways to Test Hard Drive Speed for Free [2026 🔥]
![author icon]() Brithny/2026/06/29
Brithny/2026/06/29 -
Effective Fixes for Windows Was Unable to Complete the Format SD Card and USB Drive
![author icon]() Jean/2026/06/17
Jean/2026/06/17 -
Best Open Source Partition Software with Its Alternative Free Download
![author icon]() Tracy King/2026/06/30
Tracy King/2026/06/30 -
3 Reliable Ways to Wipe SSD on Windows 11
![author icon]() Tracy King/2026/06/30
Tracy King/2026/06/30


