What Is the Time Machine on macOS Sonoma
When using your Mac, you may have noticed a small time icon and the name of the program "Time Machine". The program's name suggests the program's purpose: to restore a Mac from Time Machine to a past point in time, including its settings and stored data, or restore Time Machine backup to another Mac.
The Time Machine app is a built-in backup application on macOS that can restore individual files, restore your Mac to an earlier version, or set up a new Mac. Besides, you can use the all-in-one software EaseUS Data Recovery Wizard for Mac Pro to back up your data.
Back Up Your Mac and Never Lose Data
Back up and restore your MacBook/iMac without Time Machine, iCloud, or external hard drives.
On Apple's latest release of macOS Sonoma, you can also use Time Machine to recover data lost after updating your system. If you're interested in how to recover your Mac from Time Machine, read on!
How to Set Up Time Machine on Your Mac
Once you've set up Time Machine to back up your Mac data automatically, you'll never have to worry about losing it again! So before you can use Time Machine to restore your data, you need to know how to set it up. Here are the steps to set up your Time Machine:
Step 1. Launch "Disk Utility", and format an external hard drive to Mac OS Extended (Journaled) or any other format on macOS.

Note that you should ensure it has enough space to store your backup data.
Step 2. Connect the hard drive to your Mac after Mac hard drive format.
Step 3. Click "Time Machine", and select "Open Time Machine Settings".
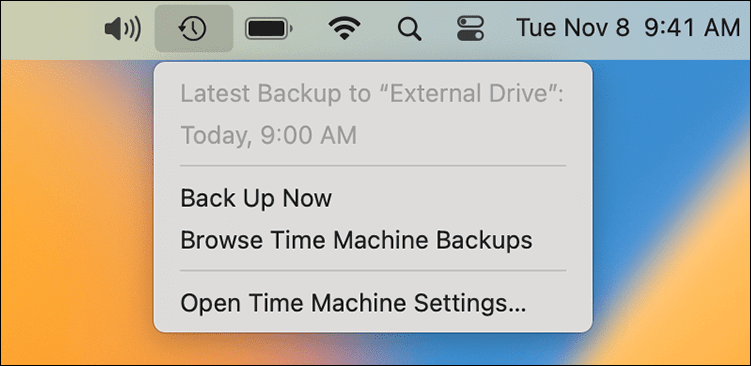
Step 4. Choose the external hard drive and turn on the "Back Up Automatically" option to back up your Mac.

What is the best file system for Mac? APFS or Mac OS Extended? If you are not sure which one to choose to format your external hard drive, read this article to figure it out!

APFS vs Mac OS Extended [Beginner's Guide]
This article discusses which one is the best file system on macOS: APFS or Mac OS Extended? Read more >>
Restore Your Mac from Time Machine: 2 Situations
Once your data is automatically backed up by Time Machine, you don't have to worry about losing it. The following are some of the most common scenarios in which the Time Machine is used to recover data:
- Recovering permanently deleted files on Mac.
- Restoring files that have been incorrectly updated.
- Transferring data from Mac to Mac (Old to New).
Recovering Mac data via Time Machine can be categorized into two scenarios: recovering a single deleted file or restoring macOS. Read on to learn the details of each situation.
Situation 1. Restore Individual File with Time Machine
When you accidentally delete an important file, you can restore it via Time Machine if you set up an automatic backup. Refer to the following steps to recover your files:
Step 1. Open "Spotlight" by pressing "Command + Space Bar" or by clicking the 🔍 icon in the top menu.
Step 2. Type time machine in the search box and press "Enter" to locate the Time Machine on your Mac.
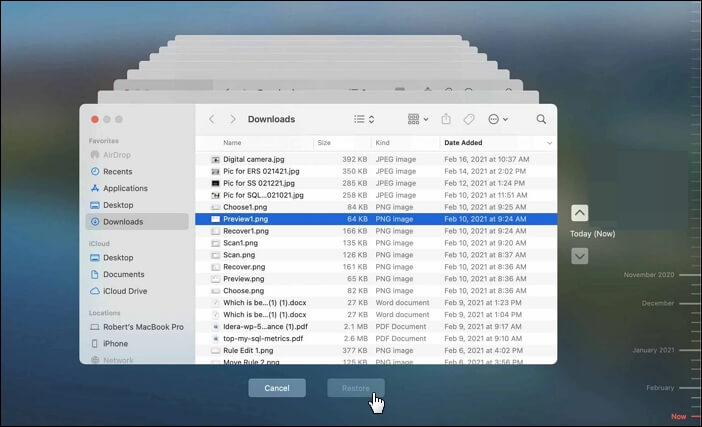
Step 3. Open Time Machine and find the deleted files you want to restore.

Step 4. Click "Restore" to get the deleted files back to their original location.
If you need to recover not just one accidentally deleted file, but the entire computer to a specific date, read on.
Situation 2. Restore Your Mac with Time Machine
If you need to recover the entire Mac data to a specific point in time, then you need to use Migration Assistant, a built-in utility on macOS. Check out:
Step 1. Go to "Applications > Utilities", and launch "Migration Assistant".
Step 2. Connect your external hard drive to your Mac
Step 3. Click the "Continue" option when the Migration Assistant window pops up.
Step 4. Select the "From a Mac, Time Machine backup or Startup disk" option.

If the Migration Assistant is not responding, don't worry; read this article to fix the error.

8 Ways to Fix Migration Assistant Not Working on Mac
Is Migration Assistant not working on your Mac? Worry no more; this article will help fix the issue with multiple methods! Read more >>
Share this article on social media to help others learn how to restore their Mac with Time Machine.
Pros and Cons of Using Time Machine
Using Time Machine to restore your Mac from a backup can save you time and hassle by eliminating the need for you to copy and paste separate backups of files you may need. All while preserving your personal data, preferences, and apps.
As we mentioned before, apart from Time Machine on your Mac, you can use the EaseUS data recovery software to back up your essential data; check out the following steps:
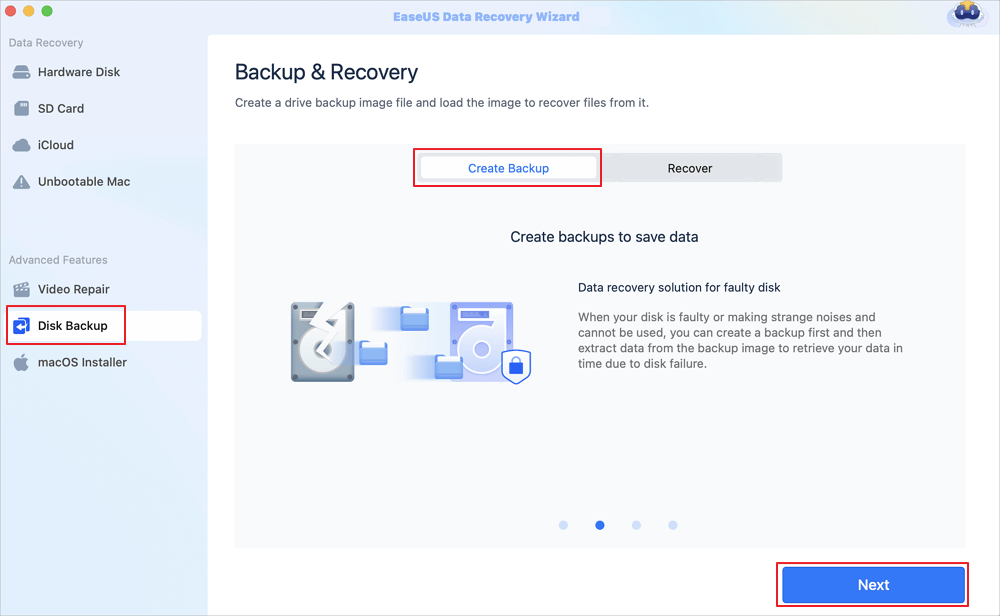
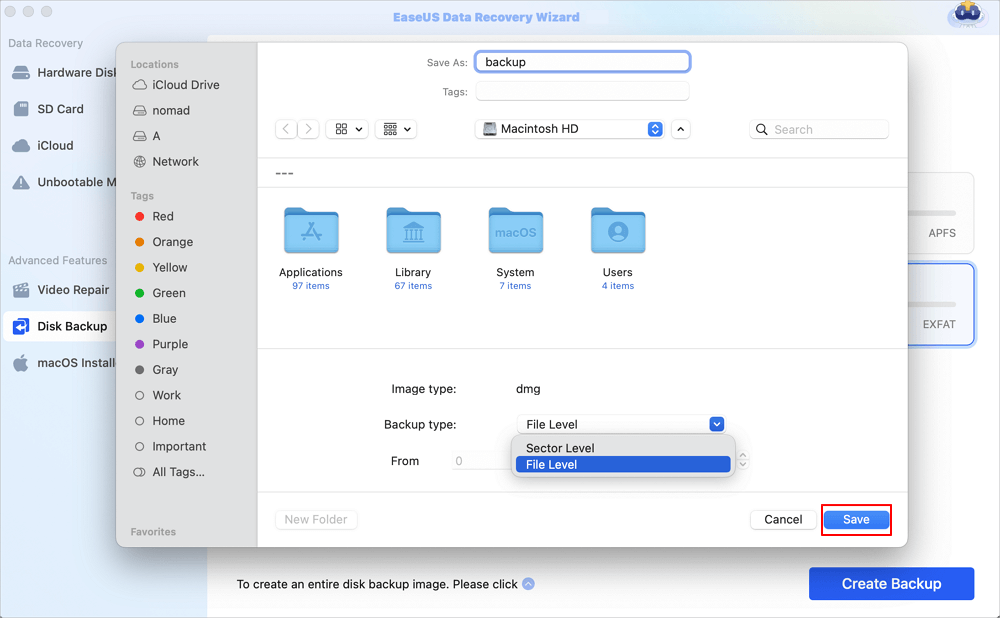
Step 1. Click "Disk Backup" > "Create Backup" > "Next" in EaseUS Data Recovery Wizard for Mac's main interface. You can create a drive backup image file in case the data is overwritten.
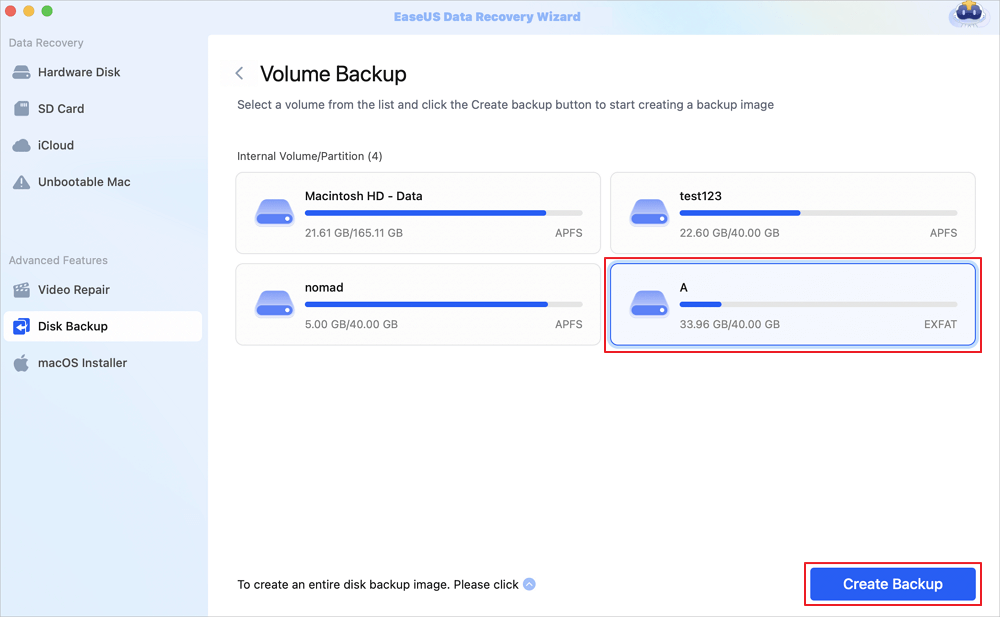
Step 2. Select an internal volume to back up, and click "Create Backup". If you want to create backups and recover data from an external hard drive, USB flash drive, or SD card, remember to connect the storage device to your Mac in advance.
Step 3. Choose a place to save your backup files, and change the name of your backup file, then click "Save". It is not wise to save backups in the same storage device that you want to recover data from.
Also, here are some limitations to using Time Machine to restore your Mac from a backup, such as it doesn't back up files stored in iCloud, including photos, contacts, calendars, etc. In addition, it doesn't actively encrypt your backups, which means your files can be viewed by anyone with access to your backup disks!
✨Bonus Tip: Recover Data Without Time Machine
What if a Time Machine backup is accidentally deleted, and the Time Machine Restore is greyed out? You're probably sweating at the thought of this possibility. But don't panic, and we present you with a very effective solution.
EaseUS Data Recovery Wizard for Mac Pro is a powerful data recovery tool that can recover deleted Time Machine backups, and restore your data on a new Mac.
With its easy-to-use interface, you can easily restore your lost or deleted files without any data recovery experience. Check out the following steps to recover deleted files without Time Machine:
Step 1. Search for lost files
Select the disk location to search for lost files (it can be an internal HDD/SSD or a removable storage device) on macOS Sierra, High Sierra, Mojave, Catalina, Big Sur, Monterey, Ventura, and the latest Sonoma. Click the "Search for lost files" button.

Step 2. Go through the scanning results
EaseUS Data Recovery Wizard for Mac will immediately scan your selected disk volume and display the scanning results.

Step 3. Select the file(s) and recover
In the scan results, select the file(s) to preview and click the "Recover" button to have them back.

Conclusion
Use Time Machien's automatic backup feature on your Mac to avoid data loss for any reason. If you haven't backed up your deleted files, don't worry! With EaseUS Data Recovery Wizard for Mac Pro, you can retrieve permanently deleted files in just three steps!
Was This Page Helpful?
Brithny is a technology enthusiast, aiming to make readers' tech lives easy and enjoyable. She loves exploring new technologies and writing technical how-to tips. In her spare time, she loves sharing things about her game experience on Facebook or Twitter.
-
EaseUS Data Recovery Wizard is a powerful system recovery software, designed to enable you to recover files you’ve deleted accidentally, potentially lost to malware or an entire hard drive partition.
Read More -
EaseUS Data Recovery Wizard is the best we have seen. It's far from perfect, partly because today's advanced disk technology makes data-recovery more difficult than it was with the simpler technology of the past.
Read More -
EaseUS Data Recovery Wizard Pro has a reputation as one of the best data recovery software programs on the market. It comes with a selection of advanced features, including partition recovery, formatted drive restoration, and corrupted file repair.
Read More
Related Articles
-
How to Recover Files Deleted by RM on Mac
![author icon]() Tracy King/Jun 07, 2026
Tracy King/Jun 07, 2026 -
How to Mount a Seagate Hard Drive on a Mac [Wihout Data Loss]
![author icon]() Brithny/May 19, 2026
Brithny/May 19, 2026 -
How to Recover Deleted DNG Files on Mac and How to Open Them
![author icon]() Jaden/Jun 15, 2026
Jaden/Jun 15, 2026 -
EaseUS Free Mac Data Recovery Software for Mac OS X and macOS
![author icon]() Daisy/Jan 19, 2026
Daisy/Jan 19, 2026