Migrating data from an old Mac to a new one can be challenging, especially when transferring large amounts of files, documents, and applications. Luckily, Apple's Migration Assistant is a handy tool designed to make this process easier. However, users may sometimes encounter issues where Migration Assistant fails, leaving them no solution. This can be a frustrating experience, especially if you rush to transfer your data to a new Mac.
Fortunately, there are several effective fixes to overcome this issue. This article will walk you through the 8 best solutions to fix Migration Assistant not working on your Mac. These fixes range from simple troubleshooting techniques, such as checking shared settings and restarting your Mac, to more advanced solutions, such as running Apple's diagnostics center and reinstalling macOS. Each solution is explained in easy-to-follow steps, so stick with us.
What Is Migration Assistant Used for
Are you curious about the reasons behind the hype? There are various scenarios in which you may have to switch to a new laptop and transfer data from a broken Mac to a new one. For instance, if your previous Mac is no longer fulfilling your requirements and is outdated or your old mac encounters technical issues that cannot be remedied, you may have to transfer your data to a new one.
This is where Migration Assistant comes in. It is software developed by Apple that simplifies transferring data, settings, and applications from an old Mac to a new one. The software is easy to use, fast, allows customizable transfer, and automatically copies everything to the new Mac, ensuring that all important files and settings are safely transferred.

Why Is Migration Assistant Stuck or Frozen
Is your migration assistant app not working? This part is for you as it thoroughly explains why many users encounter issues with migration assistants now working on Mac. This includes both hardware and software-related causes that disrupt the normal functionality of the tool, so let us look into that one by one:
- 💽Disk drive issues: Migration Assistant may not work properly if the disk drive on either the old or new Mac is experiencing issues, such as being full or having errors.
- 🖥️Out-dated Mac operating system: Migration Assistant is designed to work with the latest macOS version. If either the old or new Mac is running an outdated operating system, users may experience problems with the software.
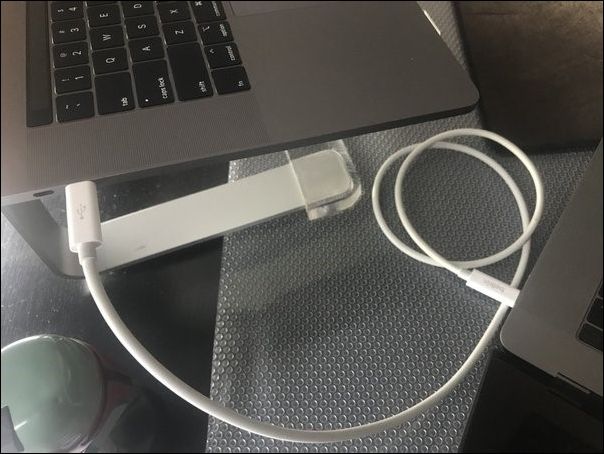
- 🔌Faulty USB/Ethernet cable: If users use a USB or Ethernet cable to transfer data between the old and new Mac, a faulty cable may cause Migration Assistant to become stuck or frozen.
- 🧱Firewall or antivirus software: Sometimes, firewall or antivirus software can interfere with the data transfer process, causing Migration Assistant to become stuck or frozen.
- 📱Too many applications are running: If too many applications are running on either the old or new Mac, the software may become overwhelmed and unable to transfer data.
How to Fix Migration Assistant Not Working
This section will help you overcome the migration assistant not working with 8 fine methods with easy-to-follow steps. However, before proceeding with any fixes, it is important to safeguard your data security by backing up important files and documents.
- Fix 1. Check Sharing Settings
- Fix 2. Check the Internet or Cable Connection
- Fix 3. Disenable the Firewall on Mac
- Fix 4. Run Apple Diagnosis
- Fix 5. Use Target Disk Mode on Mac
- Fix 6. Clean Reinstall macOS
- Fix 7. Start Mac in Recovery Mode
- Fix 8. Migrate from a Time Machine Backup Instead
Fix 1. Check Sharing Settings
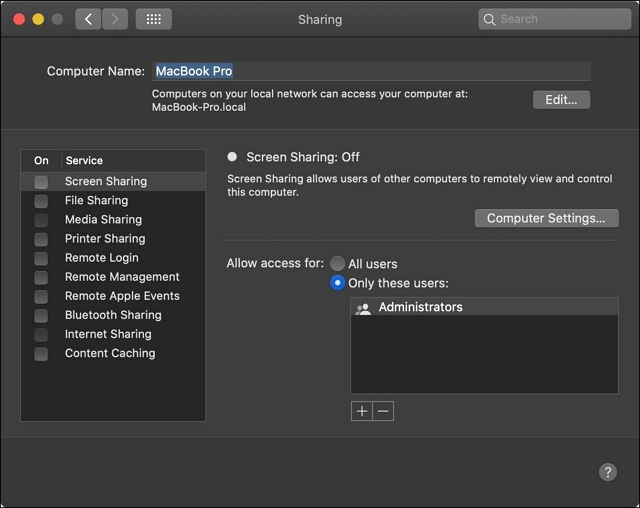
Sharing settings on a Mac refers to the various options and permissions that allow other users or devices to access your Mac's files, printers, and other resources over a network. These sharing settings can be useful for transferring files between two Macs, accessing files remotely, or collaborating on a project with other users.
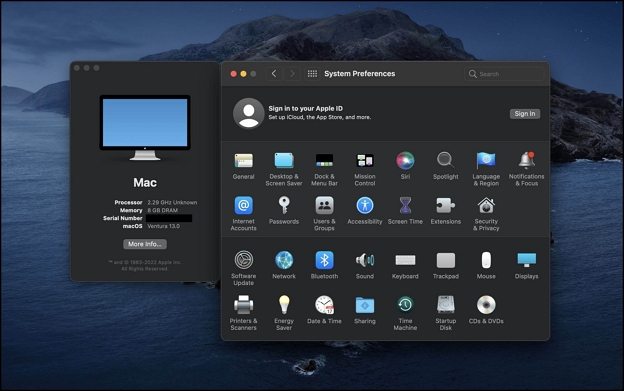
Step 1. Click the Apple menu in your old Mac's upper-left corner.
Step 2. Select "System Preferences" from the drop-down menu.
Step 3. Go to "General" and then the "Sharing" option in the System Preferences window.
Step 4. Check the name in the "Computer Name" field. If it is different from the name of your new Mac PC, enter the name in the field.
How to Solve Windows Migration Assistant Not Working
Discover effective solutions to fix Windows Migration Assistant not working issues. Learn step-by-step troubleshooting tips to ensure a smooth transition to a new Windows system.
Fix 2. Check the Internet or Cable Connection
A functional internet or cable connection is important when using the Migration Assistant because it allows data transfer to occur quickly and efficiently. The Migration Assistant can transfer data over a Wi-Fi or wired network, but a wired network is often faster and more reliable. To check the connection, follow these steps:
Step 1. Click the Apple menu in the upper-left corner of your Mac's screen.
Step 2. Select "System Preferences" from the options.
Step 3. Click on "Network" in the System Preferences window.

Step 4. Look for the green dot next to your active connection type (such as Wi-Fi or Ethernet) to confirm that your internet or cable connection is working. If the dot is not green, you may need to troubleshoot your connection or contact your internet service provider.

Fix 3. Disenable the Firewall on Mac
A firewall is a security feature that helps protect your Mac from unauthorized access and incoming network traffic. One way to fix the migration assistant not working is by disabling the firewall on your mac using the following easy steps:
Step 1. From the top-left navbar, click on the Apple icon.
Step 2. From the drop-down options displayed, click on "System preferences."
Step 3. Click "Security & Privacy" in the System Preferences window.

Step 4. Click on the "Firewall" tab from the top, then click on the lock icon in the bottom left corner of the window and enter your administrator password. Finally, click the "Turn Off Firewall" button to disable the firewall on your Mac.
Fix 4. Run Apple Diagnosis
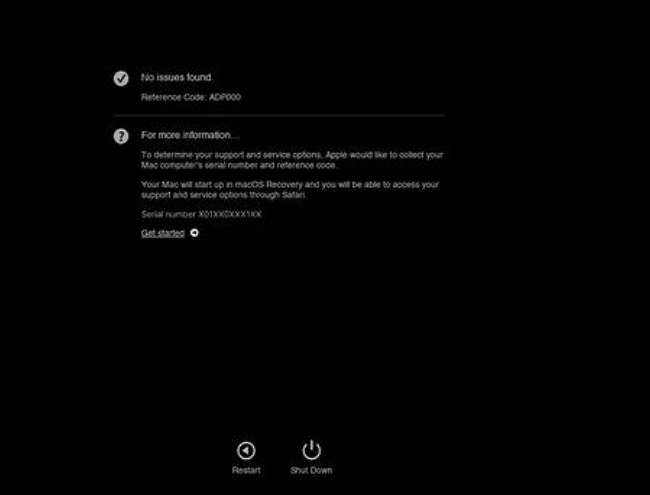
Apple Diagnostics is a handy built-in tool to identify hardware or software-related issues on your mac. If your migration assistant app is now working properly, running these tests can help you highlight the issue and take the necessary action to fix it. To run the test, follow these steps:
Step 1. Make sure your Mac is turned off.
Step 2. Turn on your Mac, and immediately press and hold the "D" key on your keyboard until the Apple Diagnostics screen appears.
Step 3. Follow the on-screen instructions to run the diagnostic tests once the Apple Diagnostics screen appears and wait.

Step 4. After completion, a summary of the detected issues on your mac will be displayed.
Fix 5. Use Target Disk Mode on Mac
Target Disk Mode is a useful feature that allows you to transfer files and data between two Macs quickly and easily. It can be particularly useful if one of the Macs has a problem with its internal drive, as it allows you to access the files and data on the problematic mac from another. To use the target disk on mac, follow these steps:
Step 1. Turn off both macs you want to use for Target Disk Mode.
Step 2. Connect the two Macs using a Thunderbolt, FireWire, or USB-C cable, depending on the ports available on both Macs.
Step 3. Turn on the Mac you want to use as the target disk while holding down the "T" key on the keyboard. This will start the target disk mode.
Step 4. Once the target Mac has entered target disk mode, the screen will display the Thunderbolt, FireWire, or USB-C symbol, indicating it now acts as an external hard drive.
Fix 6. Clean Reinstall macOS
A clean reinstall of macOS can help resolve issues with your mac, such as slow performance or software glitches, such as the migration assistant not working. It is worth noting that a clean reinstall of macOS will eradicate all data on your mac's internal drive, including applications, settings, and user data. Therefore, backing up your data before performing a clean reinstall is essential to avoid data loss.
Step 1. Restart your Mac.
Step 2. Hold down your keyboard's "Command" and "R" keys until the Apple logo appears. This will boot your Mac into Recovery mode.
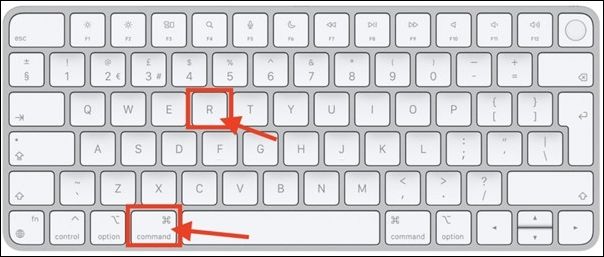
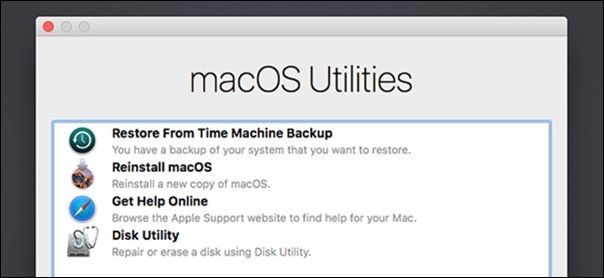
Step 3. Select "Reinstall macOS" from the options provided once in Recovery mode. Follow the on-screen instructions to complete the reinstallation process.

Step 4. After reinstallation, you can restore your files and data from your backup. You can also reinstall any necessary applications from the App Store or other sources.
Fix 7. Start Mac in Recovery Mode
Mac Recovery Mode is a special boot mode on macOS that provides various built-in tools and utilities for repairing, troubleshooting, and reinstalling macOS on your Mac. It is designed to help you recover from common problems, including the migration assistant not working properly. To enter it, follow these quick steps mentioned below:
Step 1. Power off your Mac.

Step 2. Press the power button to turn on your Mac, and hold down the "Command" and "R" keys on your keyboard immediately after pressing the power button until you see the Apple logo.
Step 3. Once you have successfully Started Mac in Recovery mode, you can access various utilities for repairing and troubleshooting your Mac, such as Disk Utility, Terminal, and Reinstall macOS.
Step 4. When you are finished using Recovery Mode, restart your Mac normally to exit.
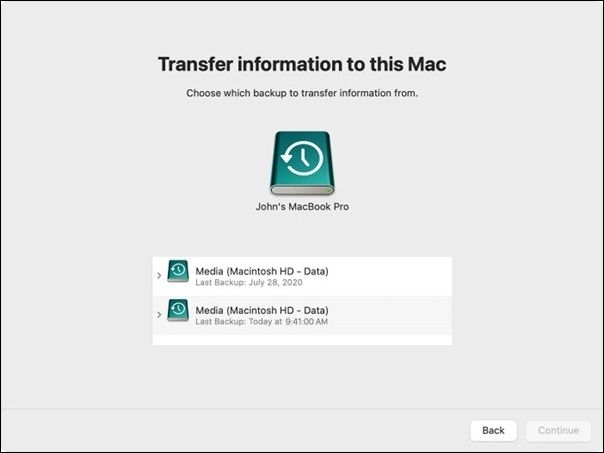
Fix 8. Migrate from a Time Machine Backup Instead
Migrating from a Time Machine backup is a useful option if you are setting up a new Mac or restoring your existing Mac to its previous state. Here are the steps to migrate from a Time Machine backup:
Step 1. Connect your external hard drive or Time Capsule to your mac with your Time Machine backup.
Step 2. Open the Migration Assistant app in the utility folder within the Applications folder.
Step 3. Select "From a Mac, Time Machine backup, or startup disk" when prompted to choose how to transfer your information.
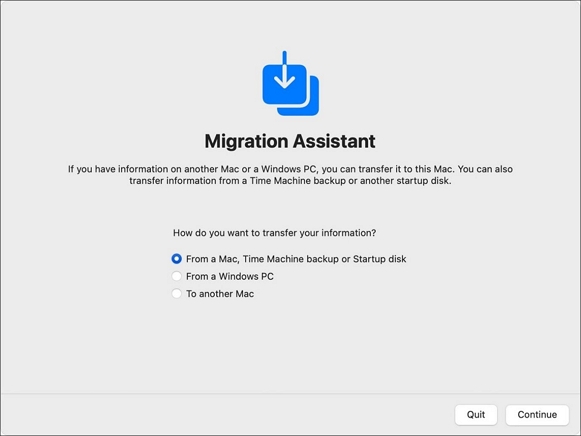
Step 4. Choose the Time Machine backup you want to migrate from and select the specific data you want to transfer before clicking "Continue."
PC users have proved the efficacy of these fixes. If one of the methods is helpful to resolve the migration assistant not working, share it on Facebook, Twitter, Instagram, and other social media platforms!
Migration Assistant VS. Time Machine
| Feature | Migration Assistant | Time Machine Backup |
| Transfer methods | Wireless or wired | External hard drive or Time Capsule |
| Time of use | Initial setup or Migrating to a new Mac | Scheduled or on-demand backups |
| Data transferred | User accounts, applications, and settings | Files and folders selected for backup |
| Flexibility | Limited to Mac-to-Mac transfer | For backup and restore on multiple Macs |
| Purpose | Transfer data from an old Mac to a new one | Backup files and data regularly |
Regarding which is better for specific scenarios, it depends on your specific needs. If you are setting up a new Mac or migrating to a new one, Migration Assistant is the better option, as it is specifically designed for that purpose. If you want to back up your data regularly or have the ability to restore specific files or folders, then Time Machine is the better choice.
However, if you have already lost your data, you can still recover deleted files on Mac. It is possible to restore your Mac without a Time Machine backup. Applying professional data recovery software can be wise. You don't have to close this page to search for recovery tools. You can click the button below to download EaseUS Data Recovery Wizard for Mac.
How to use EaseUS Data Recovery Wizard for Mac? Follow the steps listed below -
Step 1. Select the drive to be scanned
In the main EaseUS Data Recovery Wizard window, there will be a list of the drives connected to your Mac. Select the drive you need to recover lost/deleted files from, and click the "Search for lost files" button.

Step 2. Select your lost data/files
EaseUS Data Recovery Wizard for Mac will immediately scan your selected disk volume and display the scanning results on the left pane. You can sort the results to find the wanted files if you are looking for certain files.

Step 3. Recover lost/deleted data
Once you have found the desired files, preview the files and then click "Recover" to begin the recovery of your deleted/lost Mac files.

Final Words
In conclusion, migrating data from an old Mac to a new one can seem like a daunting task, but with the help of tools like the Migration Assistant, the process can be relatively straightforward. However, sometimes the tool becomes irresponsive. We hope this article has helped you fix this issue with 8 simple fixes and easy-to-follow steps. Next time you encounter an issue using the migration assistant not working, you can seek guidance from this article.
Migration Assistant Not Working FAQs
Are you still having doubts? Worry no more! This section will answer some of the commonly asked questions given below:
1. How long should Apple Migration Assistant take?
The time the Apple Migration Assistant takes to transfer data can vary depending on several factors. The amount of data being transferred, the speed of your mac's hard drive, the internet or cable connection used, and the type of connection can all impact transfer time. On average, the transfer can take a few hours if you send a moderate amount of data between two macs.
2. What to do if Mac Migration Assistant freezes?
If the Mac Migration Assistant freezes during the transfer process, there are a few steps you can take to resolve the issue:
- Force Quit the Migration Assistant.
- Restart your mac.
- Reconnect your devices.
- Try a different connection method.
3. Does Apple Migration Assistant transfer everything?
There are certain items that the Migration Assistant may not transfer, such as some system settings, preferences, and login items. Besides this, some third-party applications may not be compatible with the new macOS version, and the Migration Assistant will not transfer them. It is important to check for compatibility issues before beginning the transfer process and ensure that all of your important data is backed up before transferring it.
4. Can I migrate Windows to Mac with Migration Assistant?
The Migration Assistant can only transfer certain types of data, including user accounts, documents, emails, and contacts from Windows 7/8/10/11 to mac. However, the Migration Assistant cannot transfer Windows operating system files or third-party applications, and some file formats may not be compatible with macOS.
Was This Page Helpful?
Sherly joined EaseUS in 2022 and she has always loved writing articles and enjoys the fun they bring. She receives professional training here, focusing on product performance and other relative knowledge. She has written over 200 articles to help people overcome computing issues.
Jaden is one of the editors of EaseUS, who focuses on topics concerning PCs and Mac data recovery. Jaden is committed to enhancing professional IT knowledge and writing abilities. She is always keen on new and intelligent products.
Related Articles
-
How to Fix Windows Startup Repair Infinite Loop
![author icon]() Jean/2026-06-30
Jean/2026-06-30 -
How to Activate Windows 11 for Free Permanently | 3 Easy Ways
![author icon]() Jerry/2025-07-10
Jerry/2025-07-10 -
How to Fix Outlook Rules Not Working [8 Ways Included]
![author icon]() Jerry/2025-07-04
Jerry/2025-07-04 -
[All Methods to Fix] Selected Boot Image Did Not Authenticate
![author icon]() Jerry/2026-06-18
Jerry/2026-06-18
EaseUS Data Recovery Services
EaseUS data recovery experts have uneaqualed expertise to repair disks/systems and salvage data from all devices like RAID, HDD, SSD, USB, etc.