-
![]() Windows Cannot Find Ms-Settings: How to Fix the File System Error
Windows Cannot Find Ms-Settings: How to Fix the File System Error July 23,2026
 6 min read
 -
![]() 8 Easy Fixes | CLOCK_WATCHDOG_TIMEOUT Error on Windows 11/10July 23,20266 min read
8 Easy Fixes | CLOCK_WATCHDOG_TIMEOUT Error on Windows 11/10July 23,20266 min read -
![]()
-
![]()
-
![]()
-
![]() League of Legends Replays & Highlights, Where to Find and How to RecoverJuly 23,20266 min read
League of Legends Replays & Highlights, Where to Find and How to RecoverJuly 23,20266 min read -
![]() Fix the Hypervisor Error in Windows 11 with 4 Easy WaysJuly 23,20266 min read
Fix the Hypervisor Error in Windows 11 with 4 Easy WaysJuly 23,20266 min read -
![]() Discord Not Opening, Stuck or Not Responding on StartupJuly 23,20266 min read
Discord Not Opening, Stuck or Not Responding on StartupJuly 23,20266 min read -
![]()
-
![]()
Page Table of Contents
How to fix system_thread_exception_not_handled issue in 6 ways:
| Workable Solutions | Step-by-step Troubleshooting |
|---|---|
| Fix 1. Boot Into Safe Mode | Click on "Start". While pressing the Shift button on your keyboard, click on "Restart"...Full steps |
| Fix 2. Uninstall Incompatible Programs | Click on the start menu and go to "Settings". The above screen will appear. Go into "Apps"...Full steps |
| Fix 3. Uninstall or Upgrade Faulty Driver | Click on the Start menu and search for the "Device Manager". Once it appears, click on it...Full steps |
| Fix 4. Repair System Files | Launch the command prompt through the Start menu and run it as an administrator...Full steps |
| Fix 5. Perform Startup Repair | Click on "Troubleshoot" and "Advanced options". Click on "Startup Repair"...Full steps |
| Fix 6. Perform System Restore | Go to "Settings" and click on "Updates & Security". Now, click on the "Recovery" option...Full steps |
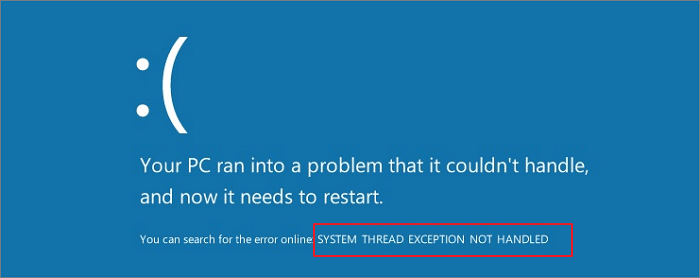
Often times windows users face the common error: system_thread_exception_not_handled (nviddmkm.sys or atikmpag.sys). This can happen with any Windows 10/11 user for a lot of reasons for example, because of outdated drivers.
This error can occur all of a sudden on your computer or laptop screen while using it. Also, the same "system_thread_exception_not_handled Windows 10" error can occur once you turn on your system. Some users even call it a death screen as they assume their Windows OS is all done.
In reality, there are some quick fixes to this solution. In this article, we will discuss how to fix system_thread_exception_not_handled nvlddmkm.sys error on Windows 10/11.
What Does System Thread Exception Not Handled Mean
This error means that an exception has been generated by the system thread, which the error handler is unable to handle.
A variety of factors cause this error, but the most frequent offender is a device driver. When a driver becomes outdated or damaged, it may cause difficulties with your system.
Another possible source of this problem is a faulty system file. System files are essential for Windows to function correctly, and if they become damaged, the result may be numerous problems. For example, this error might occur if there's a problem with your Registry or Winsock files. You can fix this error with various methods.
System Thread Exception Not Handled Error Causes
Now, this system error can occur because of many reasons. Below are some of those reasons.
Corrupt Files
Your corrupt system files are the number one reason why such an error can ruin your experience. So, in this regard, it is best to fix those corrupt files (More on this later). With this approach, you can get rid of this blue death screen.
Issue with a Running Background Program
When you see the error message "system_thread_exception_not_handled," a problem occurs with one of the programs running in the background. This program is responsible for tasks like drawing graphics and playing sound.
Malfunctioning Device Driver
The "system_thread_exception_not_handled" error is generally caused by a malfunctioning device driver. A device driver is a program that allows your computer to communicate with hardware devices. When there is an issue with a device driver, the system thread may fail, resulting in the error message.
Solutions to Solving System Thread Exception Not Handled in Windows 10/11
Now for the "system_thread_exception_not_handled Windows 10" error, there are some fixes that you can implement. Here we will be sharing a total of 6 solutions to this common error. You can opt for any of these to get rid of this error. So, let us take a look at these fixes.
Fix 1. Boot Into Safe Mode
So, one solution to this error is to get into your Pc's safe mode. Now, before we dive into it, we have to understand the importance of this safe mode. The safe mode in your system is the mode that lets you find out the possible causes of any unexpected Windows error.
In this case, we are trying to fix the "system_thread_exception_not_handled Windows 10" error. So, first, we will have to boot our system into safe mode. Here is how you can do this.
Step 1. Click on "Start". While pressing the Shift button on your keyboard, click on "Restart" from the Start menu.
Step 2. The following screen should appear. It is the Windows RE (recovery environment screen). From here, you have to click on "Advanced options".
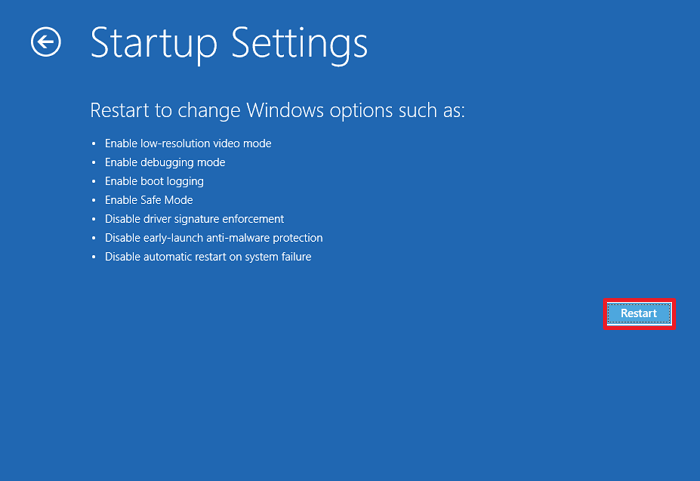
Step 3. Now click on the "Startup Settings" to view the available booting options.
Step 4. From here, click on "Restart".
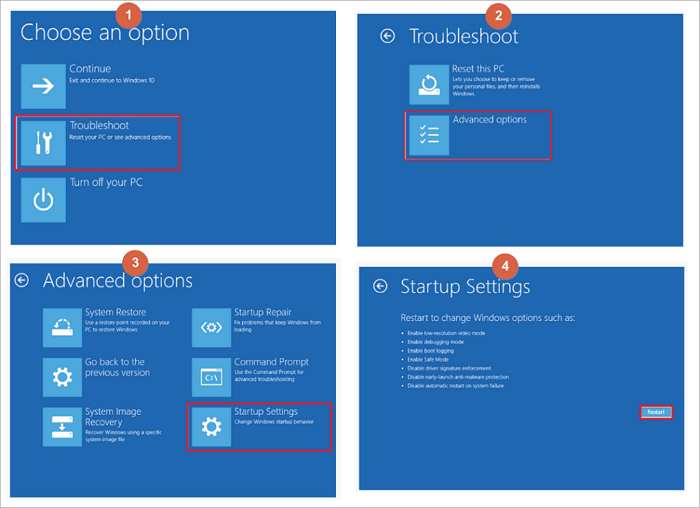
Step 5. Once the Windows restart, it will give you the following options to boot the system. Click on option no 4, "Enable safe mode" to boot your system in safe mode.
This way, you can boot your system in safe mode. Note that some of the fixes require you to enable your Windows in Safe Mode. So, this step is a must to do for some of the fixes to the error we are trying to get rid of.
Fix 2. Uninstall Incompatible Programs
The system thread exception error also sometimes occurs because of an incompatible program installed. Now, in most cases, a user doesn't have an idea that a certain program in their windows 10/11 can cause such unexpected errors.
So, you have to uninstall that particular program creating this issue. Usually, a recently installed software or an application is the culprit here. So, uninstall that specific application first. To do so, simply follow these steps.
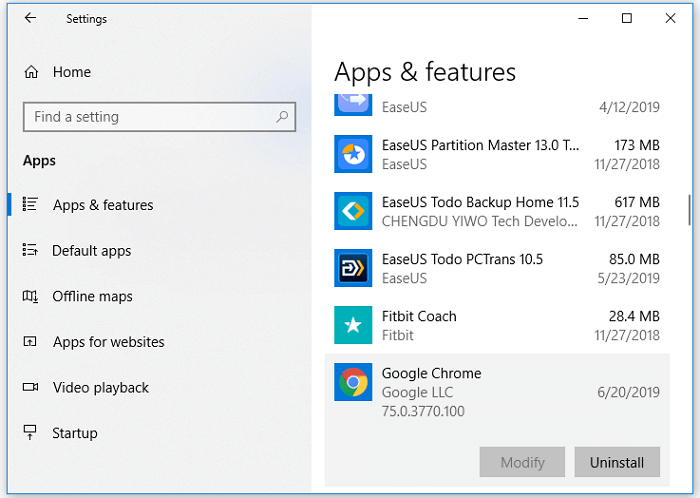
Step 1. Click on the start menu and go to "Settings". The above screen will appear. From here, you have to go into "Apps".
Step 2. From the list of installed apps, choose the program that you have recently installed. Click on it and choose "Uninstall".
So, this way, you can easily uninstall the recently installed program on your Windows 10/11.
Fix 3. Uninstall or Upgrade Faulty Driver
The recently updated or some faulty drivers can also cause the system_thread_exception_not_handled error in windows 10/11. As we discussed in the case of the recently installed program, the recently updated driver can also cause your windows to behave like this.
So, to fix this issue, you have to uninstall or upgrade that faulty driver.
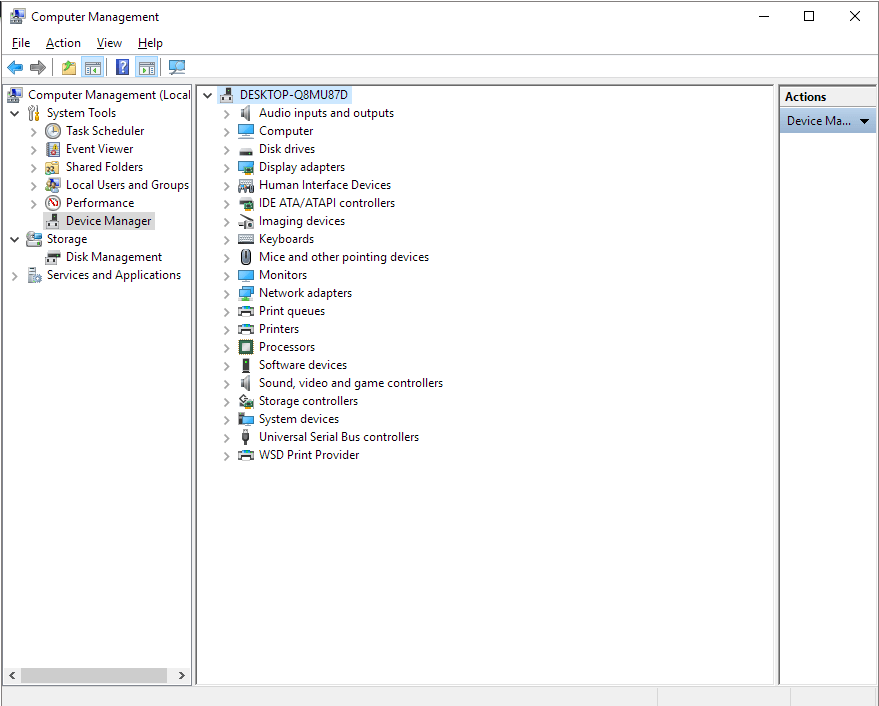
Step 1. Click on the Start menu and search for the "Device Manager". Once it appears, click on it.
Step 2. The Device Manager will show all the drivers installed in your Windows 10/11. From here, you have to figure out the faulty or recently installed driver.
Step 3. Right-click on the faulty driver, and you will get a few options. From this option, choose "Uninstall".

Step 4. And that's it. Your faulty driver is no longer a part of your Windows OS.
Fix 4. Check and Repair Problematic System Files
We discussed how a faulty program and a driver could cause such errors. Now, let us explain to you another reason for such errors. Your system's problematic files can also cause this issue. So, the best fix in this regard is to repair those faulty files.
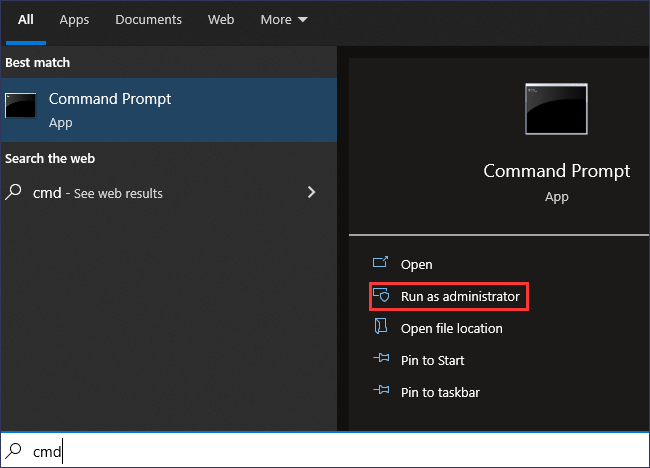
Step 1. Launch the Command Prompt through the Start menu and run it as an administrator.
Step 2. Now type DISM/ Online /Cleanup Image /ScanHealth. Press the enter button to run this command.
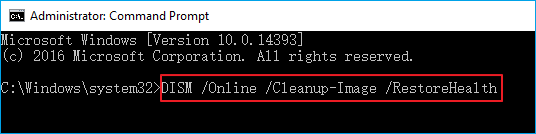
Step 3. Once you have entered this command, you have to wait a bit. During this time, Windows will automatically repair all those corrupted files.
Fix 5. Perform Startup Repair
Another way to solve this common error is to perform startup repair. This repair method is easy and will repair those broken, old, and malfunctioning files in your system. So, here is how to perform a startup repair.
Step 1. You have to go to your Windows Advanced Startup options to perform a startup repair. To enter into this mode, you just have to press F11 as soon as your system boots. Click on "Troubleshoot" to proceed further.
Step 2. When you have accessed the Advanced Startup options, you have to click on "Advanced options".
Step 3. From here, click on "Startup Repair". The windows will ask you to choose the account name and its password. Just enter that. The windows will start repairing those corrupted files for your ease.

Fix 6. Perform System Restore
If none of the above-mentioned methods work for you, you can opt for the system restoring option. Here are the steps to follow.
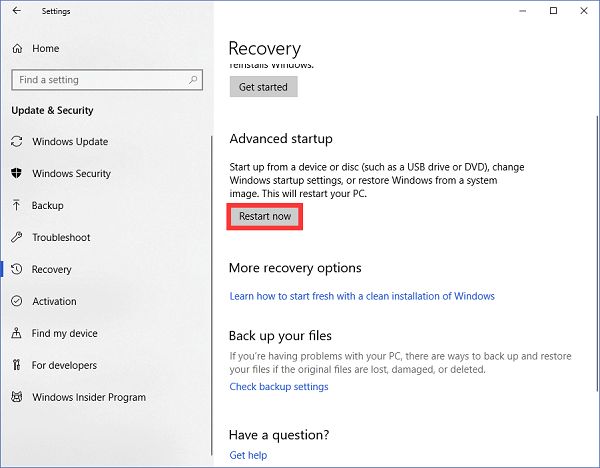
Step 1. Go to "Settings" and click on "Updates & Security". Now, click on the "Recovery" option.
Step 2. You will be directed to the Advanced startup of Windows. Click "Restart now".
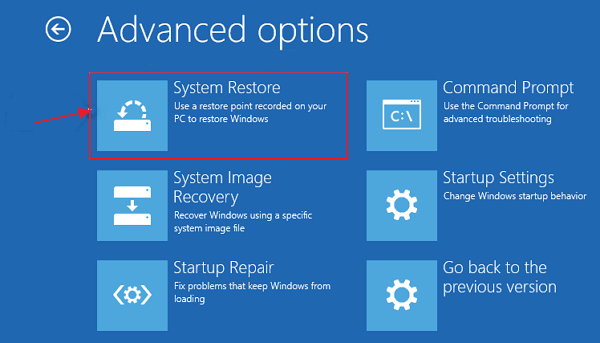
Step 3. Now, click on "System Restore". Again, the windows will ask you to choose the account name and its password. Just enter that. The system will start to restore.
How to Restore Data from a Computer That Cannot Boot Windows 10/11
When the BSOD system_thread_exception_not_handled problem error occurs or other boot issues appear, you won't be able to access your systems' files and data stored in them. Do not worry, and you can get out of this situation as well. Reliable data recovery software such as EaseUS Data Recovery Wizard can help you solve this issue.
With this data recovery program, you can recover more than 100 file types from all the common storage devices with ease. It enables you to recover data from a PC/laptop hard drive that won't boot in a WinPE environment. EaseUS advanced data recovery software also supports NAS data recovery and Linux data recovery.
Now, download this 100% safe and secure data recovery software to restore files efficiently.
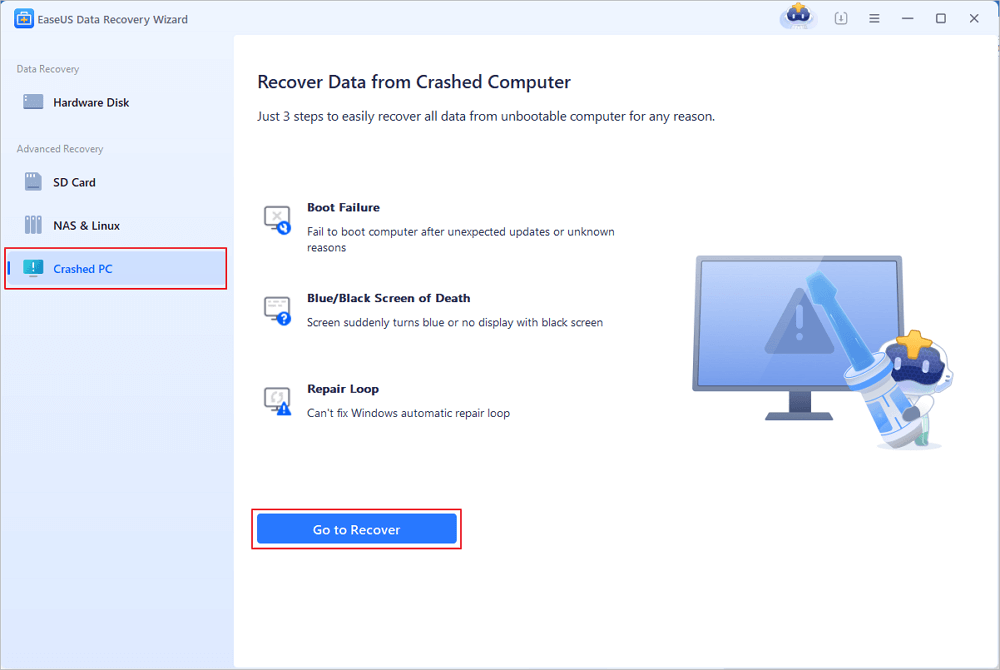
Step 1. Create a bootable disk
Launch EaseUS Data Recovery Wizard, choose "Crashed PC" and click "Go to Recover".
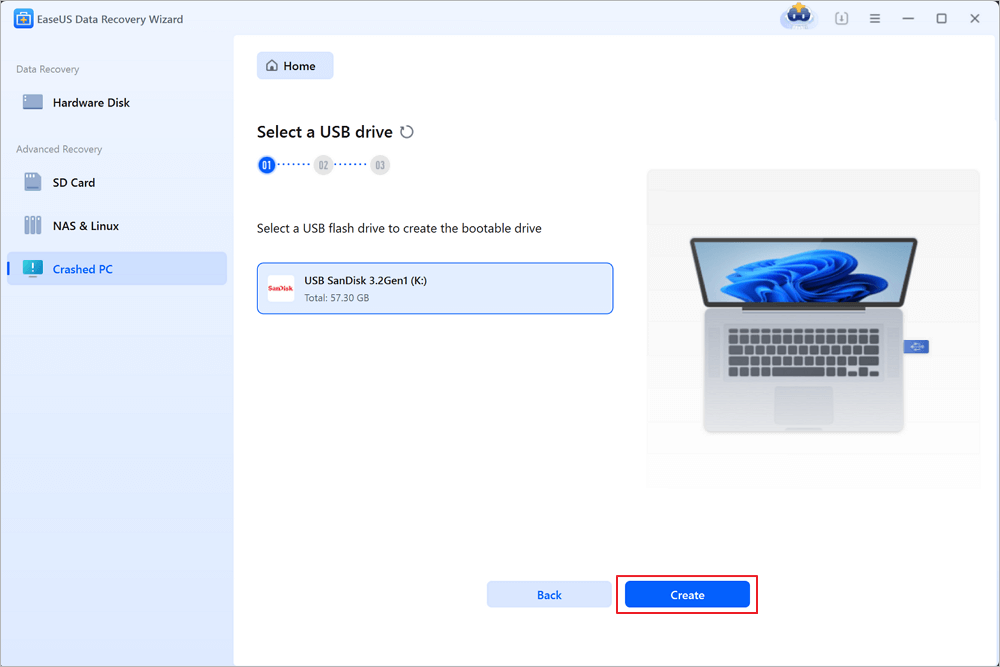
Select an empty USB to create the bootable drive and click "Create".
⚠️Warning: When you create a bootable disk, EaseUS Data Recovery Wizard will erase all data saved in the USB drive. Back up important data beforehand.
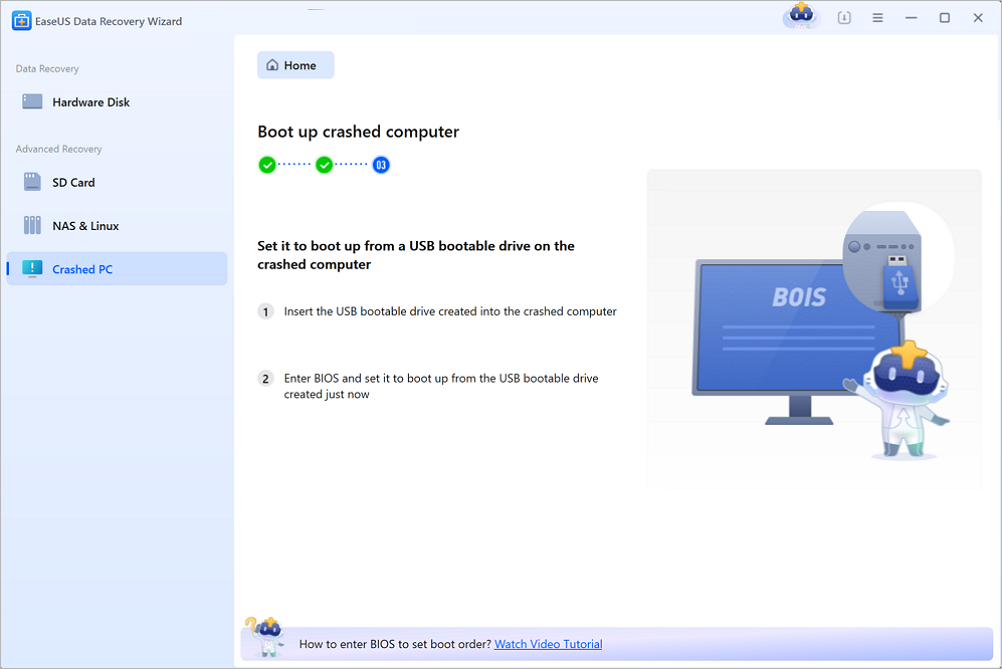
Step 2. Boot your computer from the bootable USB
Connect the bootable disk to the PC that won't boot and change your computer boot sequence in BIOS. For most users, it works well when they restart their computer and press F2 simultaneously to enter BIOS.
Set to boot the PC from "Removable Devices" (bootable USB disk) beyond Hard Drive. Press "F10" to save and exit.
Step 3. Recover data from a crashed system/PC
After booting from EaseUS Data Recovery Wizard bootable disk, select the drive you want to scan to find all your lost files. Preview and recover the files you need to a safe location.
💡Tip: You can restore data on the local disks, external hard drives, and also the cloud storage.

Conclusion
With more than 5 fixes, you know now how to fix system_thread_exception_not_handled nvlddmkm.sys error on windows 10/11. The reasons why this error occurs can be many. If any of the above-highlighted methods doesn't work for you, the Ease US Data Recovery Wizard is always there to rescue you.
It can help you recover your data files on a fast and hassle-freeway. Its user interface is clean and straightforward. So, Download EaseUS Data Recovery Wizard today!
Was this page helpful?
-
Cedric Grantham is a senior editor and data recovery specialist of EaseUS. He mainly writes articles and how-to tips about data recovery on PC and Mac. He has handled 10,000+ data recovery cases and is good at data recovery of NTFS, FAT (FAT32 and ExFAT) file systems, and RAID structure reorganization. …


20+
Years of experience

160+
Countries and regions

72 Million+
Downloads

4.9 +
Trustpilot Score


