-
![]()
-
![]() Fixes for Adobe Photoshop Has Stopped Working Without Losing Files
Fixes for Adobe Photoshop Has Stopped Working Without Losing Files February 12,2026
 6 min read
 -
![]() Fix Seagate External Hard Drive Light Blinking but Not Working/Detecting Error
Fix Seagate External Hard Drive Light Blinking but Not Working/Detecting Error February 12,2026
 6 min read
 -
![]() How to Work on Large Excel Files Without Crashing (5-Step Guide)
How to Work on Large Excel Files Without Crashing (5-Step Guide) February 12,2026
 6 min read
 -
![]() How to Perform External Hard Drive Data Recovery [Windows & Mac]
How to Perform External Hard Drive Data Recovery [Windows & Mac] February 12,2026
 6 min read
 -
![]() How to Fix Bootrec /fixboot Element Not Found Issue on Windows 11/10/7
How to Fix Bootrec /fixboot Element Not Found Issue on Windows 11/10/7 January 29,2026
 6 min read
 -
![]() EaseUS Data Recovery Wizard Stuck Or You Recieve Error Messages? Fixes Here!
EaseUS Data Recovery Wizard Stuck Or You Recieve Error Messages? Fixes Here! February 12,2026
 6 min read
 -
![]() Windows Has Problem Ejecting USB Mass Storage Device | 6 Ways
Windows Has Problem Ejecting USB Mass Storage Device | 6 Ways January 29,2026
 6 min read
 -
![]() Hard Drive Not Showing Up or Detected in Windows (Fixed)
Hard Drive Not Showing Up or Detected in Windows (Fixed) January 29,2026
 6 min read
 -
![]() How to Recover Deleted Files After Reinstalling Windows 11 | 3 Ways
How to Recover Deleted Files After Reinstalling Windows 11 | 3 Ways January 29,2026
 6 min read
Page Table of Contents
Issue: Recuva Deep Scan Stuck
Some Recuva users are saying that running Recuva deep scan on a hard disk, USB flash drive or a memory card sometimes gets stuck or frozen. It does not complete when goes to 0%, 16%, 25% or even 100%. According to a user of Recuva from forum.piriform.com:
"I am running Recuva deep scan on an external hard drive of about 600GB. After running for an hour or so, it finds tens of thousands of files but still says that the scan is 0% complete and that it won't be finished until 8 days from now...How long does Recuva deep scan take? I am thinking that the Recuva deep scan is stuck."
Recuva, as one of the best data recovery software for Windows, is the choice of many users who have suffered data loss on their storage devices like hard drives, USB flash drives, SD cards, digital cameras, and more. Like any other existing program, Recuva is also at the risk of being stuck or frozen while running, especially when performing a deep scan.
What Is Recuva Deep Scan
A deep scan, sometimes called full scan, is a feature on almost all data recovery software, not existing exclusively on Recuva. Another feature that generally appears together with the deep scan is called "quick scan". For a better understanding of the concept, I will explain both.
- A quick scan is the simplest way to search for files on the selected drive because it only looks for deleted files only by searching for entries that are marked as deleted.
- A deep scan contains the quick scan phase and the process of searching for lost files in the unallocated cluster by their headers and footer. Simply speaking, a deep scan can find more files, including existing files, RAW files (files without specific name or path), and more.
Given that, if users fail to find their wanted files after a quick scan, they will switch to a deep scan instead.
How Long Does Recuva Deep Scan Take
There is no specific answer to the question "How long does Recuva deep scan take?" Why? The time a deep scan will take varies according to the size of the select partition/disk, the amount of the files stored, and the hard drive condition. Therefore, it's actually common for a deep scan to take hours on a large disk, and, in some extreme cases, it may take days for the data recovery software to complete the scanning.
Why Is Recuva Deep Scan Stuck
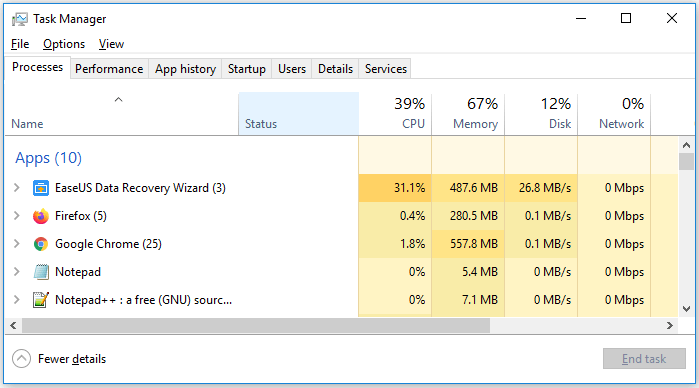
If you are scanning a large disk with lots of files, you can consider waiting for a longer time since hours of scanning is normal in such a case. To check whether Recuva is running properly, go to Task Manager and check the values of "CPU", "Memory", and "Disk". If these values are changing, Recuva is working, not stuck.
While if Recuva deep scan takes an unusually long time, still stuck at stage 1 after hours, or you are sure it's stuck, it may suggest that the software is stuck due to overload or there are some issues with the disk or partition, e.g. bad sectors.
How to Fix Recuva Deep Scan Stuck
Based on the possible causes, there are three solutions for you to fix the Recuva deep scan stuck issue.
Method 1. Force Quit Recuva and Reconnect the Hard Drive
Refreshing the software is the easiest way to fix the stuck issue.
Step 1. Right-click any space on the taskbar and choose "Task Manager".
Step 2. Click "Recuva" > "End task".
Step 3. Reconnect the device you attempt to scan and make sure Windows can recognize the device. (If the hard drive is not recognized, fix the problem first.)
Step 4. Launch Piriform Recuva and reinitiate the deep scan.
Method 2. Fix the Disk Corruption and Restart Deep Scan
The bad sectors on a disk will inevitably slow down the deep scan. The more the bad sectors on the disk, the slower the deep scan will be. Thus, repair the bad sectors and then scan the disk will speed up the scanning process accordingly.
However, there are two types of bad sectors, logical bad sectors and physical bad sectors. The former can be repaired using utilities like chkdsk. The latter, unfortunately, can only be blocked using some third-party software.
Method 3. Choose Recuva Alternative
The last working solution is to apply the Recuva alternative, the EaseUS Data Recovery Wizard - EaseUS Data Recovery Wizard. EaseUS data recovery software outranks its equivalents in scanning speed, recovery quality, and success rate. Here is the result of five popular data recovery tools scanning the same disk on the editor's computer.
| Product Name | Recover My Files | Recuva | Disk Drill | Stellar Data Recovery | EaseUS Data Recovery Wizard |
|---|---|---|---|---|---|
| Scanning Time | 1h | > 1h | > 1h | 37min | 27min |
| Files Found | 321,297 files | 111,213 files | 2,254 files | 414,170 files | 784,741 files |
| File Size | 13.80GB | no size shown | 1.92GB | 19.84GB | 38.53GB |
As you can see, EaseUS Data Recovery Wizard takes the least time to finish the deep scan and finds the most files. Isn't it a good alternative when Recuva deep scan is stuck or frozen?
When you select a drive to scan is EaseUS Data Recovery Wizard, it will start a quick scan first and then initiate the deep scan automatically. Unlike Recuva, you can recover files during the scanning process whenever you want with EaseUS software. Besides, you can stop the deep scanning anytime.
Three Steps to recover files:
Step 1. Run EaseUS Data Recovery Wizard on your computer. Choose the drive where you lost files and click "Search for Lost Data". If your lost files were on an external storage device, connect it to your computer firstly.

Step 2. The software will quickly scan the deleted files immediately, and then automatically perform a deep scan to find more lost files. After the scan is completed, you can use "Filter" or "Search box" to quickly locate specific file types.

Step 3. Click the "Preview" button or double-click on a file for a full preview. Finally, select the desired files, click "Recover" and choose another safe location or Cloud drive to save all the files at once.

If EaseUS Data Recovery Wizard also is stuck during the deep scan, you can follow the related guide to fix the problem or contact our support team ([email protected]) for help.
The Bottom Line
When Recuva deep scan is stuck, you first need to figure out it's a real stuck or just a normal sign of scanning a large drive. If it is really frozen, you have three ways available to cope with the problem. When the first two methods fail or you find Recuva not working, don't hesitate to try the Recuva alternative and enjoy a new experience.
Was this page helpful?
-
Jaden is one of the editors of EaseUS, who focuses on topics concerning PCs and Mac data recovery. Jaden is committed to enhancing professional IT knowledge and writing abilities. She is always keen on new and intelligent products.…
-
Evan Galasso is a digital forensics and data recovery engineer with over 10 years of experience in the field. He presents opinions on the current state of storage media, reverse engineering of storage systems and firmware, and electro-mechanical systems of SSDs and HDDs.…

20+
Years of experience

160+
Countries and regions

72 Million+
Downloads

4.9 +
Trustpilot Score


Free Data
Recovery Software
Recover data up to 2GB for free!
