
Content
Page Table of Contents
About the Author
Hot Topics
At least once, we have experienced a frustrating situation where our system gets stuck on the "Diagnosing Your PC" screen during startup. Instead of logging in to the desktop, you find yourself staring at the loading screen of diagnosis. The time it takes to diagnose the PC depends on your system's specifications and the problem's severity. It may take a few minutes or 1-2 hours to proceed normally.
Several factors can contribute to this situation, including corrupt system files, registries, or updates. But there's no issue in this world without a solution. Read this guide thoroughly to learn how to fix the Diagnosing Your PC issue.
How to Fix Windows Stuck on Diagnosing Your PC
We will present every fix that may work on your device, depending on the specific cause. Take notice of all these fixes and apply them individually to see which fits your situation:
- 1. Hard Restart Windows PC
- 2. Use the Windows Boot Repair Tool
- 3. Run Windows Startup Repair
- 4. Boot in Safe Mode and Clear the Space
- 5. Run SFC and DISM
- ...
For more effective ways and step-by-step guides, continue to read the following content. If you think this guide is helpful in solving the boot error, click the social buttons and share it with others in need.
1. Hard Restart Windows PC
Sometimes, all you have to do is just hard restart your Windows, and it automatically lets you go ahead to the Diagnosing Your PC screen. Following are some of the reasons this fix may work:
- A hard restart may clear the temporary glitches and issues preventing the system from booting correctly.
- It can also remove the problematic drivers and allow Windows to start without hindrance.
You can perform a hard restart on your PC simply by applying these steps:
Step 1. The first action is to unplug all the power cables or put out the battery in the case of a laptop. Once done, wait for a while to let all temporary cache clear.
Step 2. After that, re-plug cables in your system or reinstall the battery in the laptop. Press the "Power" button and hold it until your PC starts.
2. Use the Windows Boot Repair Tool
If your PC doesn't start usually and still gets stuck on the Diagnosing Your PC screen, there's a powerful fix. You can quickly eliminate this problem using the EaseUS Partition Master Professional. With the Boot Repair feature, you can create a Bootable USB and repair your problematic Windows.
This tool scans for missing or corrupted system files needed for booting Windows. Then, it replaces or repairs these files to ensure the OS can start correctly. You can also resolve Windows registry-related issues through this tool. Overall, you can get a wide range of solutions covered with this sole all-in-one tool.
Step 1. Start EaseUS Partition Master after connecting the external drive/USB to your computer, go to "Bootable Media," and click "Create bootable media."

Step 2. Select an available USB Drive or CD/DVD and click "Create." You can also burn the Windows ISO file to the storage media.

Step 3. Connect the created bootable drive to the new computer and reboot the computer by pressing and holding F2/Del to enter the BIOS. Then, set the WinPE bootable drive as the boot disk and press F10 to exit.
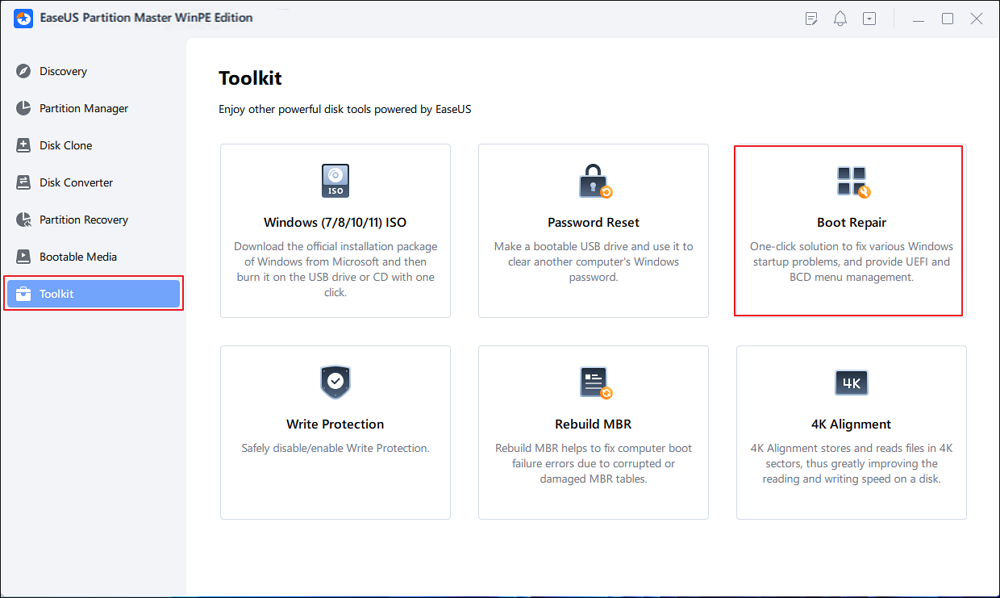
Step 4. Boot the computer again and enter the WinPE interface. Then, open EaseUS Partition Master and click "Boot Repair" under the "Toolkit" option.
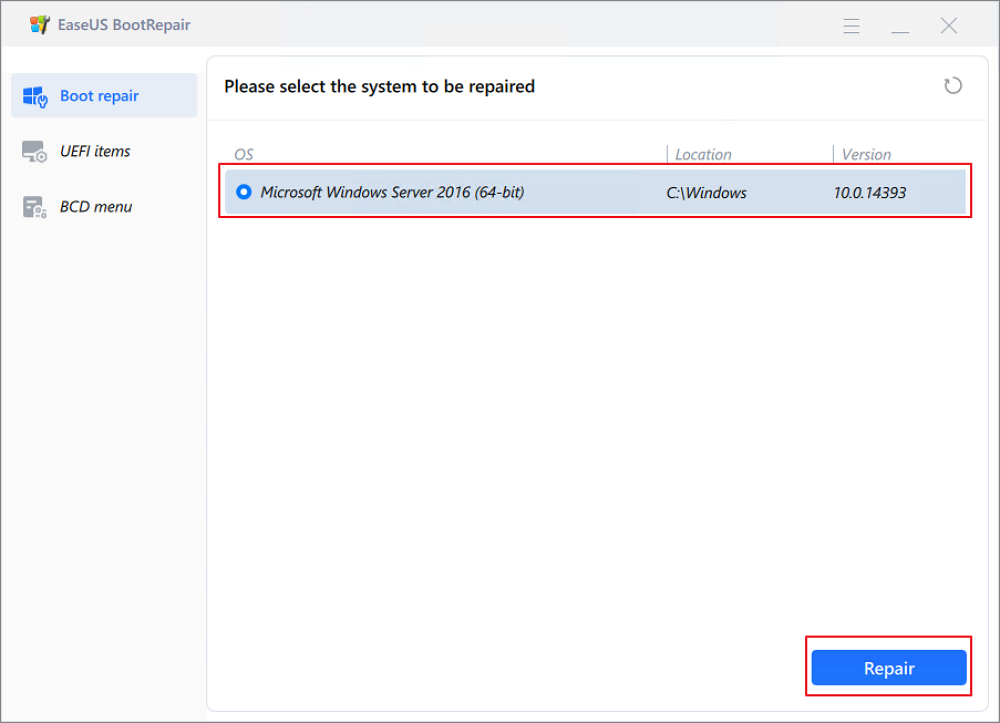
Step 5: Select the system you want to repair and click "Repair."
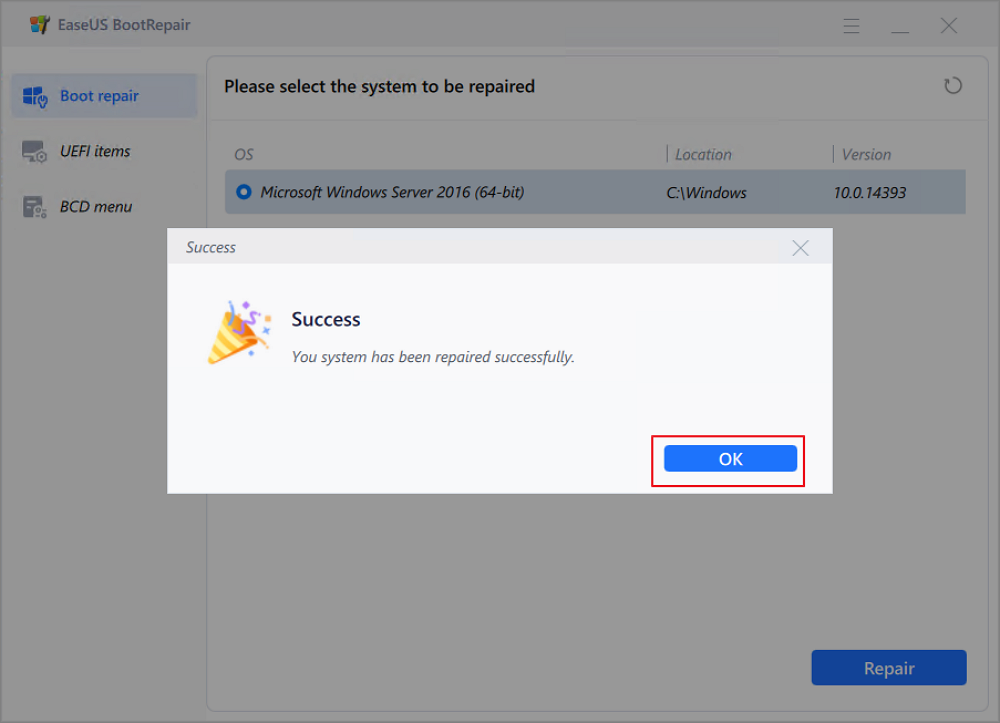
Step 6. Wait a moment, and you will receive an alert that the system has been successfully repaired. Click "OK" to complete the boot repair process.
⭐Need More Help
For more advice and detailed guidance, you can contact the EaseUS experts as follows:

EaseUS experts are available to provide you with 1-on-1 manual services (24*7) and help fix Windows boot error, BSOD or computer boot loop issues. Our experts will offer you FREE evaluation services and efficiently diagnose and resolve system boot failure, Windows stop codes and OS lagging issues using their decades of experiences.
- 1. Fix BSOD - blue/black screen of death error due to Windows update or other reasons.
- 2. Get rid of Windows boot error such as no bootable device found, or BCD file corruption.
- 3. Serve to fix 0X000_error codes on Windows system or OS boot loop issues.
The Boot Repair feature of this tool has proved effective for many startup-related Windows problems. Go through this simple guide to use the Boot Repair feature.
3. Run Windows Startup Repair
Another alternative way to fix this issue is to run the Windows Startup Repair feature. It can benefit this scenario for the below-mentioned reasons.
- Startup Repair can detect and repair disk errors that contribute to startup problems.
- Registry errors can also cause this issue and may be resolved through this fix.
Follow these steps to execute a successful Startup Repair operation.
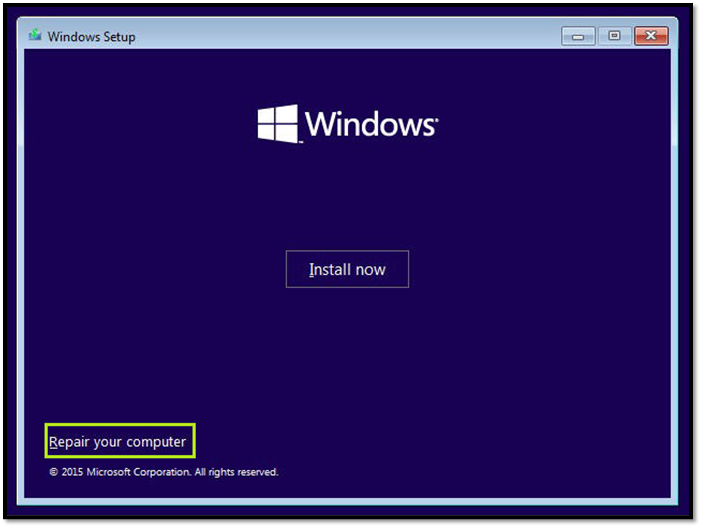
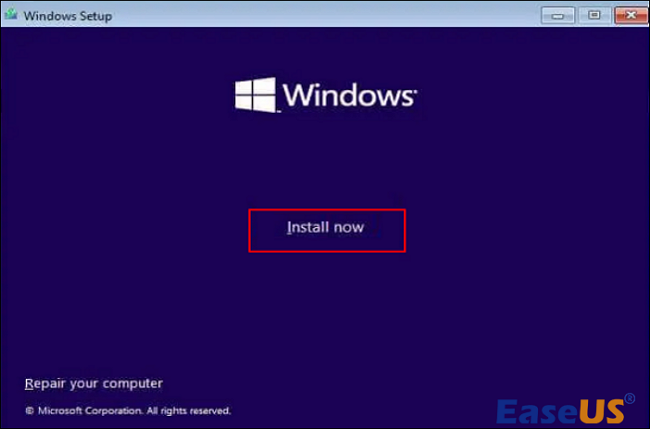
Step 1. Begin by inserting the Windows installation disc into your PC and restarting it. Then, hit any function key to boot Windows from media.
Step 2. After going through general preference, you will reach the "Install now" screen. Hit the "Repair your computer" option to go to the "Choose an option" window.
Step 3. Go to "Troubleshoot," then click "Advanced Options." Finally, choose the "Startup Repair" option. It will take some time to repair your PC automatically.
4. Rebuild the BCD
Boot Configuration Data is a crucial database that contains boot parameters and settings required for Windows to start up properly. Windows may fail to boot if it becomes corrupted and get stuck on the 'Diagnosing Your PC' screen. So, rebuilding the BCD proves to be quite effective in resolving this problem. For this purpose, EaseUS Partition Master offers a unique Rebuild MBR feature.
MBR, or Master Boot Record, is the first sector of the computer's hard drive. It contains information about how the PC is partitioned and how to load its OS. Thus, using the Rebuild MBR feature of this tool, you can easily solve the corrupted boot case.
Step 1. Create a WinPE bootable disk
- Launch EaseUS Partition Master, and click "Bootable Media" on the toolbar. Select "Create bootable media".
- Click "Next" to finish the process.
Step 2. Boot EaseUS Partition Master Bootable USB
- Connect the bootable USB or CD/DVD to your PC.
- Press F2 or Del when you restart the computer to enter the BIOS screen. Set and boot your computer from "Removable Devices" or "CD-ROM Drive". And then EaseUS Partition Master will run automatically.
Step 3. Rebuild MBR
- Click "Toolkit" and choose "Rebuild MBR".

- Select the disk and the type of MBR. Then, click "Rebuild".

- After that, you can see "MBR has been successfully rebuilt on Disk X".

5. Boot in Safe Mode and Clear the Space
Safe Mode loads Windows with a minimal set of drivers and startup programs. It may work because:
- It allows you to run anti-malware scans to detect and remove any malicious software causing the problem.
- Performing a disk cleanup while in Safe Mode can free up space by removing temporary files, cached data, and other unnecessary items.
Check out these steps to boot your Windows in Safe Mode and fix the Diagnosing Your PC issue:
Step 1. Turn your device on and repeatedly press the "F8" key to access the "Choose an option" screen. Once accessed, choose the "Troubleshoot" option and go to "Advanced options."
Step 2. Afterward, select the "Startup Settings" options and enable Safe Mode by clicking the "Restart" button and then pressing "F4." After choosing this option, Windows will boot in Safe Mode.
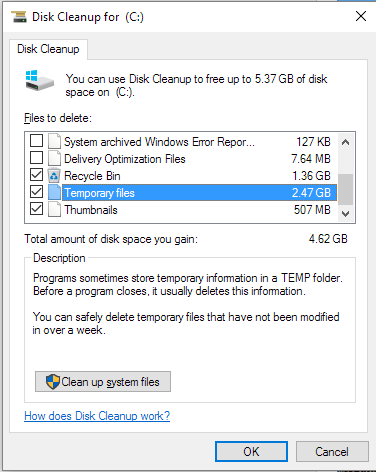
Step 3. Now, open the Disk Cleanup and clear the space:
- Hit "Win + R" to launch the "Run" window and enter the "cleanmgr" command.
- Choose the Windows drive and hit "OK."
- Finally, check the files you want to clean and click the "OK" button.
After this, you can restart your system in Normal Mode.
6. Run SFC and DISM
SFC and DISM are the command-line tools that can scan the system file errors and repair the Windows media. If the critical system files required for booting are corrupted, it can lead to startup issues.
Also, DISM focuses on repairing the Windows Component Store, which can cause boot problems if impaired. So, you can get out of the 'Diagnosing Your PC' screen by running the SFC and DISM using this method:
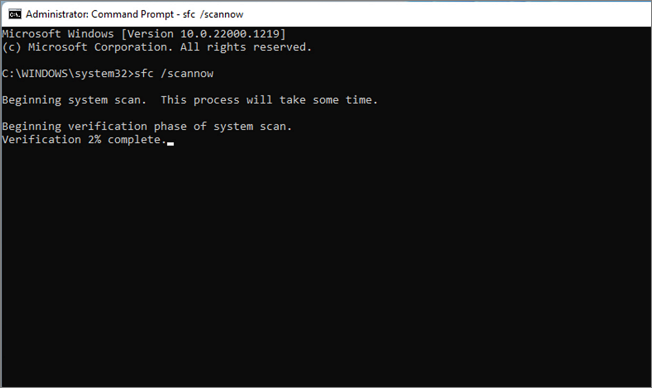
Step 1. After going to the "Advanced options" menu, as discussed above, head to "Command Prompt." Type the "sfc /scannow" command and press "Enter."
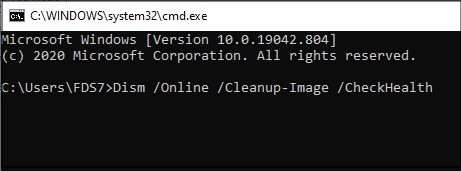
Step 2. Now, run the "Dism /Online /Cleanup-Image /CheckHealth" command, press Enter, then "Dism /Online /Cleanup-Image /ScanHealth," again Enter, and finally the "Dism /Online /Cleanup-Image /RestoreHealth" command and hit "Enter."
You're good to go now after restarting.
7. Use System Restore Points
Windows has a feature allowing users to create Restore Points to get to a previous functional state if needed. So, using System Restore Points may help with this issue due to the following reasons:
- You may install an impair software or make a significant change that causes this issue. So, restoring to the previous point can resolve it.
- Even the corrupted Windows updates can contribute to this problem and can be fixed through Restore Points.
To use this fix for resolving the stuck on Diagnosing Your PC screen problem, follow this step-by-step guide:
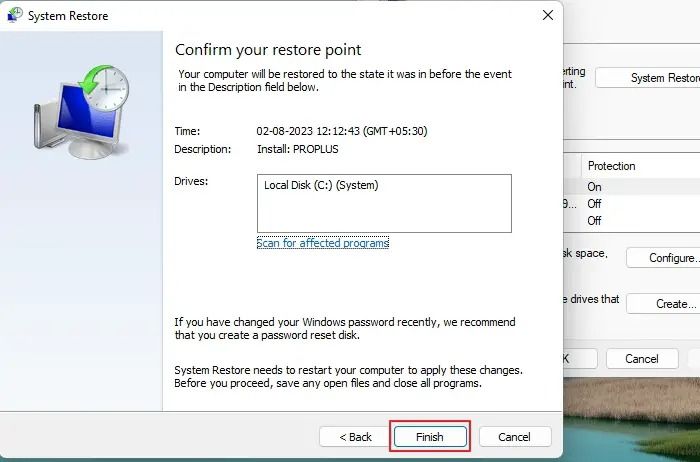
Step 1. Once you reach the "Advanced options" menu, click the "System Restore" option. Then, hit "Next" and check the "Show more restore points" box.
Step 2. After choosing a desired restore point, click "Next" and "Finish."
Reboot your device to run it normally.
8. Uninstall Recent Updates
In this method, your Windows system removes the recently installed updates and gets to the previous stable update version. The reason for this action to work is:
- Updates may occasionally introduce incompatibility issues with specific configurations, hindering Windows from booting properly.
- In some cases, updates may not install properly and cause the system to become unstable. So, you can simply uninstall those updates.
These are the steps given below to uninstall recent updates.
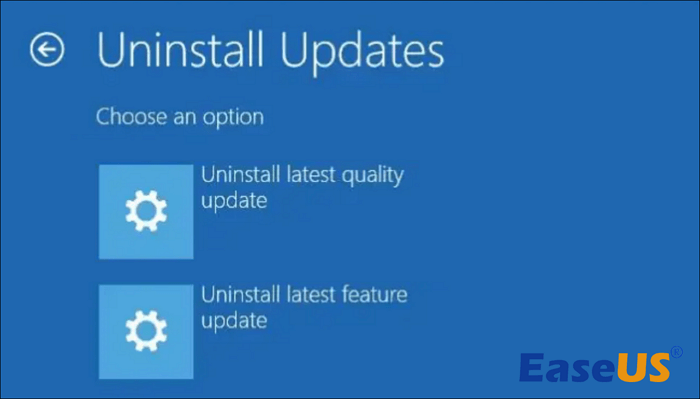
Instructions. Head to the "Advanced options" screen and choose the "Uninstall Updates" option. Now, select the "Uninstall latest quality update/Uninstall latest feature update" option, and you can restart your PC to get it to the working state.
9. Disable Auto Repair
Auto Repair is a Windows facility that diagnoses your PC and gets it to repair mode. This repairing mode is the one that lets your system go into diagnosing. So, if you disable it, you may bypass that stuck screen issue.
To disable the Auto Repair feature of your Windows, go through these steps:
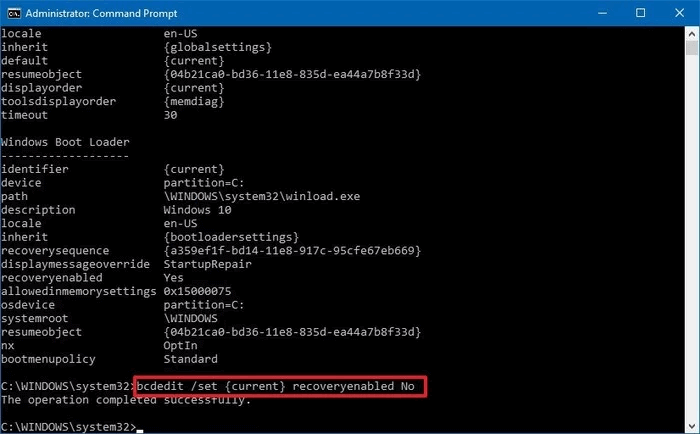
Step 1. From the "Advanced options" screen, go to the "Startup Settings" option and hit the "Restart" button. After that, press the "F4" key to enable Safe Mode.
Step 2. After restarting, hit "Win + R" to reach the "Run" menu. Then, type "cmd" and hit "Enter" to access the command prompt. Input the "bcdedit /set recoveryenabled NO" command and press "Enter" to disable it successfully.
10. Recover Windows Registry
The Windows registry is a database that contains configuration settings and options for operating systems and installed apps. It can cause critical boot problems if it becomes corrupted due to software conflicts and malware.
Therefore, recovering the registry can restore it to a healthy state and resolve the Diagnosing Your PC screen scenario.
Step 1. After getting to the "Advanced options" from the "Troubleshoot" menu, select "Command Prompt." Type the "copy c:\windows\system32\config\RegBack* c:\windows\system32\config" command and hit "Enter."
Step 2. A prompt will ask you about the type of data restore. Type "All" and press "Enter." After that process, restart your system and check if the issue is resolved.
11. Reinstall Windows
Now that you have tried all the above fixes and if the Diagnosing Your PC stuck screen issue persists, there's one last option left. You can reinstall the whole Windows to get rid of this situation. It creates an error-free fresh registry that won't need to be diagnosed.
Plus, it will install all the new system files and drivers without glitches and corruption. If you need to reinstall Windows, simply refer to this link and install it with the step-by-step guide.
How to Install Windows 10 Without Product Key | Full Guide
You can install Windows 10 without product key by downloading the Windows 10 ISO from Microsoft. This page will offer a comprehensive solution on how to do it.
Why Windows 10/11 Stuck on Diagnosing Your PC
We have enlisted all the solutions that may resolve your issue of being stuck on the Diagnosing Your PC screen. Now let's talk in detail about the possible reasons for this problem. Here is a typical case:
I've had problems with my laptop for the last 24 hours, and it's gotten to this screen but never advanced to the advanced startup blue screen. A bunch of searching hasn't helped me, and I don't have money to buy anything, although I have another laptop that is broken (HP Windows 10), if that means anything. from Microsoft Community
Auto Repair utility usually works to solve startup issues, but sometimes, there may be temporary faults. Also, your Windows may face corrupted BCD files or improperly installed updates. Insufficient disc space may also contribute to this issue.
Hence, all these issues play their part in bringing up the boot-loading problem. Follow this page and fix the error easily and quickly.
Final Words
In final Words, your PC may occasionally experience some startup issues for several reasons we mentioned. These issues may lead to your screen getting stuck on the Diagnosing Your PC screen. We have explained in detail how to eliminate this problem through many practical solutions.
However, in a sincere opinion, EaseUS Partition Master is your ultimate partner in dealing with such situations and even more. The Boot Repair feature of this tool allows you to resolve almost any boot-related complication. Besides this, you can enjoy even more features of this tool; try it.
FAQs About Windows Diagnosing Your PC
Still, there is some confusion about the Windows 10/11 stuck on diagnosing Your PC issue? Check out these commonly asked queries and their answers in this guide.
1. How much time does diagnosing your PC take?
The time may vary depending on the situation's complexity and the device specifications. It can take from a few minutes to more than an hour on average.
2. What to do when your PC is diagnosed?
Wait patiently, as it normally takes some time. If it gets stuck, use the above-mentioned fixes. For the most appropriate approach, simply use the EaseUS Partition Master tool to repair the boot.
3. Why is my computer showing diagnosing your PC?
Your PC may show this screen due to damaged essential system files or corrupted drivers. Faulty registry files or malware can also be the root cause of it. In the extreme case, your faulty hardware may also impact this situation.
How Can We Help You
About the Author
Updated by Tracy King
Tracy became a member of the EaseUS content team in 2013. Being a technical writer for over 10 years, she is enthusiastic about sharing tips to assist readers in resolving complex issues in disk management, file transfer, PC & Mac performance optimization, etc., like an expert.
Cici is the junior editor of the writing team of EaseUS. She accepted the systematic training on computers at EaseUS for over one year. Now, she wrote a lot of professional articles to help people resolve the issues of hard drive corruption, computer boot errors, and disk partition problems.
Product Reviews
-
I love that the changes you make with EaseUS Partition Master Free aren't immediately applied to the disks. It makes it way easier to play out what will happen after you've made all the changes. I also think the overall look and feel of EaseUS Partition Master Free makes whatever you're doing with your computer's partitions easy.
Read More -
Partition Master Free can Resize, Move, Merge, Migrate, and Copy disks or partitions; convert to local, change label, defragment, check and explore partition; and much more. A premium upgrade adds free tech support and the ability to resize dynamic volumes.
Read More -
It won't hot image your drives or align them, but since it's coupled with a partition manager, it allows you do perform many tasks at once, instead of just cloning drives. You can move partitions around, resize them, defragment, and more, along with the other tools you'd expect from a cloning tool.
Read More
Related Articles
-
Samsung SD Card Format Tool Free Download 2026 [Step-by-step Guide]
![author icon]() Tracy King/2026/06/17
Tracy King/2026/06/17 -
Steam Deck Speed Test, Everything You Should Know
![author icon]() Tracy King/2026/06/17
Tracy King/2026/06/17 -
Partition Wizard Software (Full Version) Free Download for Windows Servers in 2026
![author icon]() Tracy King/2026/06/30
Tracy King/2026/06/30 -
Patriot Formatter | The Best USB Format Tool for Patriot Flash Drive
![author icon]() Brithny/2026/06/17
Brithny/2026/06/17


