
Content
Page Table of Contents
About the Author
Hot Topics
The media is write-protected, which means that the media (usually a disk) cannot be written. Several things may cause this error, including physical write-protection switches or software protections. In order to fix this problem, the write protection must be disabled. EaseUS has collected five practical solutions to fix this write-protected problem in this post. Keep following and learn what you need.
How to Fix "The Media is Write-protected" in Windows - 5 Ways
This "the media is write-protected "error might occur for a few different reasons. It could be due to a corrupted file system, incorrect permissions, or physical damage to the storage device. Whatever the cause, don't worry; in this article, we'll show you some quick and easy fixes that will help you remove write protection and get your storage device working again in no time. Don't forget to share this guideline with your friends or other users in need:
#1. Use Software to Remove Write Protection
A straightforward way to remove write protection is using EaseUS Partition Master. This partition manager is designed to manage and protect your drive partitions. The software can disable write protection on your external hard drives within one click. Additionally, it will not harm your data during the removal operation.
EaseUS Partition Master has many advantages, such as resizing, moving, copying, merging, splitting, and converting partitions without data loss. It is also compatible with Windows 10/8.1/8/7 and XP.
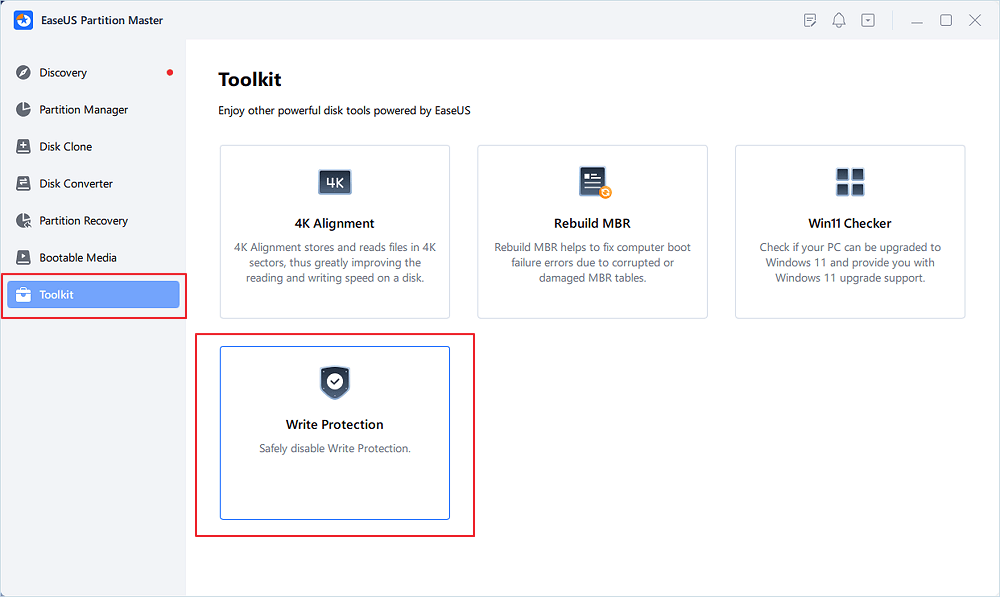
Step 1. Download and install EaseUS Partition Master, go to the Toolkit section, and click "Write Protection".
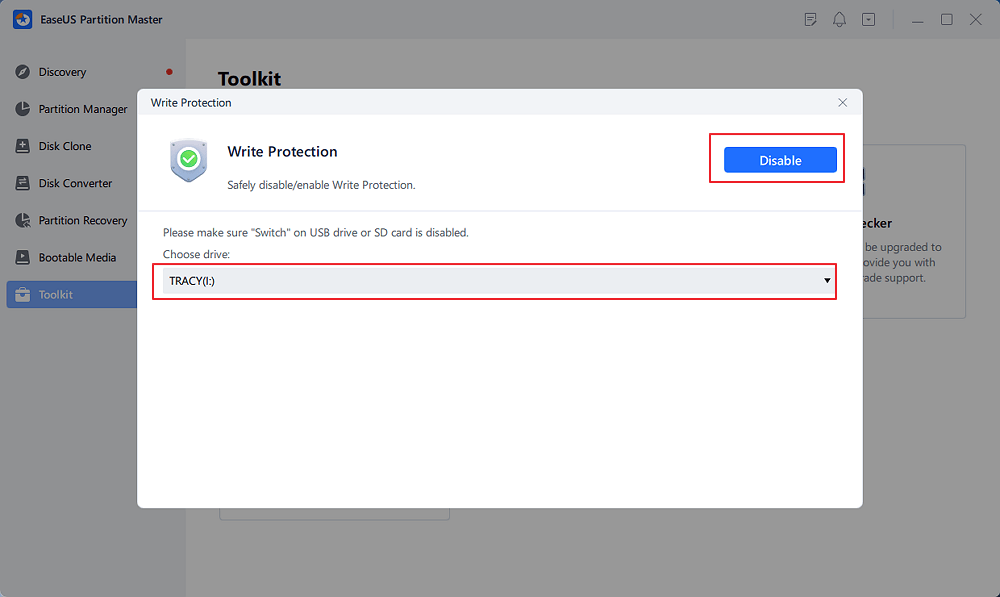
Step 2. Select your write protected USB, USB external disk or SD card, and click "Disable".
#2. Check the Physical Switch when the Media is Write-protected
The physical write protection switch on the device may cause this error message. If the physical write protection switch is on, writing to the media will not be possible. To check the physical write protection switch, please follow the instructions below:
Step 1: Locate the physical write protection switch on the device. The location of the switch will vary depending on the make and model of the device. The switch is located on the side or the bottom of many devices.
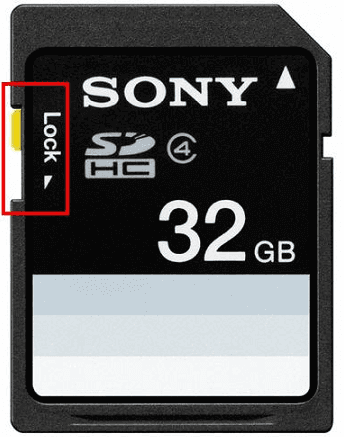
Step 2: Check the switch position. If the switch is in the "on" position, moving it to the "off" position to write to the media will be necessary.
Step 3: Once the switch has been moved to the "off" position, try writing to the media again. Please contact your device manufacturer if you cannot write to the media. You can also try the following fixes in our article.
#3. Uncheck Read-only in Properties when the Media is Write-protected
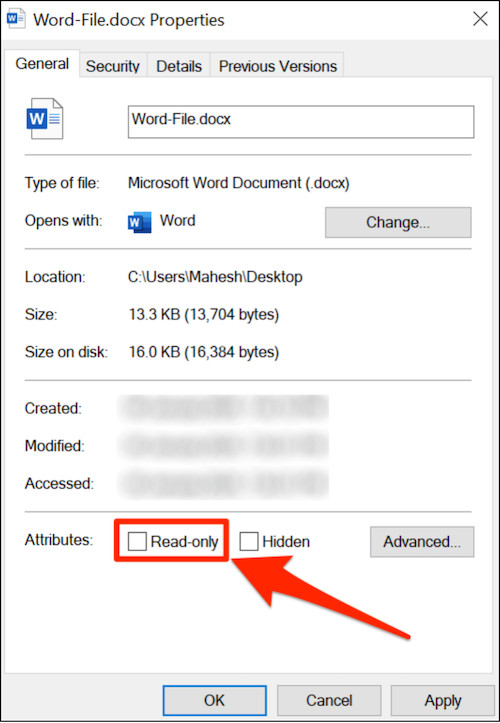
"The media is write-protected" error typically occurs because the file or drive is set to read-only, which means that it can only be read and not modified. The read-only setting can be disabled in the properties menu for the file or drive. Once disabled, the users should be able to copy, delete, or move the files without issues.
Step 1: Open "File Explorer" and select the write-protected files.
Step 2: Right-click the file and click "Properties".
Step 3: You can uncheck the "Read-Only" option under the "General" tab.
#4. Run CMD to Remove Write Protection
Corrupted system files can also cause "the media to be write-protected." If so, try running the System File Checker (SFC) and Deployment Image & Servicing Management (DISM) scans. The SFC checks and fixes corrupted system files, while the DISM scan will repair the Windows image. Share the detailed tutorial by clicking the buttons below since CMD commands are difficult for inexperienced users to understand.
To run the SFC and DISM scan, follow the steps given below:
Step 1: Press the Windows + R key simultaneously and type "cmd."
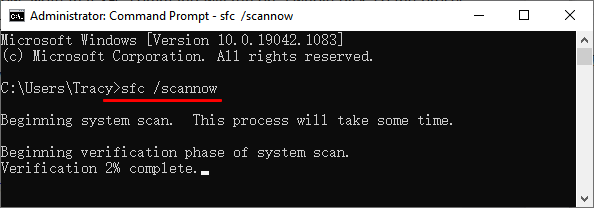
Step 2: Type "sfc /scannow" and press Enter. It may take 20-30 minutes to scan. Do not close the Command Prompt during this process.
Step 3: Restart your computer and repeat step 1 to open the command prompt.
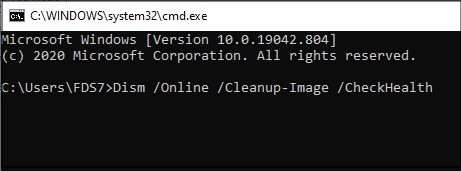
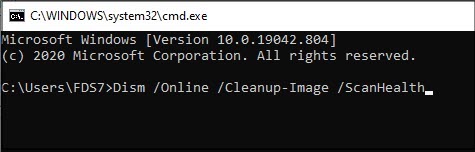
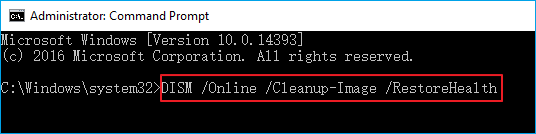
Step 4: Type the following command and press Enter after typing each command.
- Dism /Online /Cleanup-Image /CheckHealth
- Dism /Online /Cleanup-Image /ScanHealth
- Dism /Online /Cleanup-Image /RestoreHealth
#5. Scan Virus to Remove Write Protection
In some instances, the "media is write-protected" error may be caused by malware that has infected your computer. Malware can cause various issues on your computer, including errors. Some malware can write-protect drives to prevent their deletion. If you suspect that malware is the cause of the error, you should scan your system with an antivirus program. You can choose the Windows built-in Windows Defender antivirus to scan.
Step 1: Click "Update & Security" in Windows Settings.
Step 2: Click on "Windows Security".
Step 3: Click "Virus & threat protection" under the "Protection area."
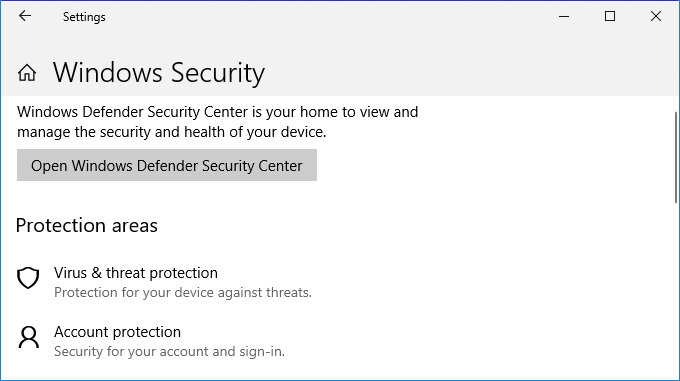
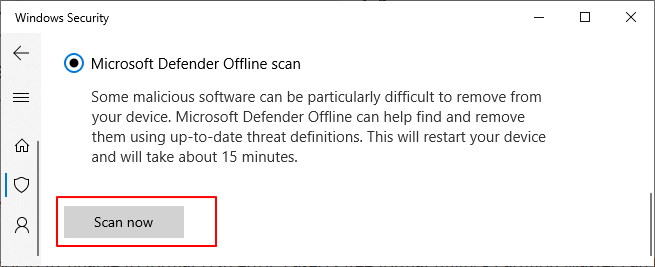
Step 4: Click "Scan options." We recommend you choose "Microsoft Defender Offline" here.
Step 5: Click "Scan now."
Aside from trying Microsoft Defender, you can also turn to third-party anti-malware utilities like TotalAV for help. This software provides you with reliable time protection to fight against viruses, malware, and even online threats:
TotalAV is an Award Winning Antivirus and Security Software. It Provides Real-Time Protection from Viruses, Malware & Online Threats.
Antivirus Protection Enabled
Bonus Tip: Format the Device after Removing the Write Protection
The media is write-protected. An error can be fixed by following the methods above. Once write protection is removed, users can format their device with EaseUS Partition Master Professional.
- Right-click the external drive or USB you intend to format and choose "Format".
- Set the Partition label, File system (NTFS/FAT32/EXT2/EXT3/EXT4/exFAT), and Cluster size if you intend to change. Then click "OK".
- Click "Yes" to continue.
- Click the "Execute 1 Task(s)" button and click "Apply" to format your selected external hard drive or USB stick.
Relate articles about removing write protection:
Conclusion
When the media is write-protected, the data on the media cannot be modified. This can be incredibly annoying for users, especially if they don't know how to fix the problem. In our article, we have shown you some solutions to remove write protection. Whichever method you choose, be sure to follow the instructions carefully so that you don't cause any damage to your computer. With a little effort, you should be able to get rid of the write protection and reaccess your files.
How Can We Help You
About the Author
Sherly joined EaseUS in 2022 and she has always loved writing articles and enjoys the fun they bring. She receives professional training here, focusing on product performance and other relative knowledge. She has written over 200 articles to help people overcome computing issues.
Written by Tracy King
Tracy became a member of the EaseUS content team in 2013. Being a technical writer for over 10 years, she is enthusiastic about sharing tips to assist readers in resolving complex issues in disk management, file transfer, PC & Mac performance optimization, etc., like an expert.
Product Reviews
-
I love that the changes you make with EaseUS Partition Master Free aren't immediately applied to the disks. It makes it way easier to play out what will happen after you've made all the changes. I also think the overall look and feel of EaseUS Partition Master Free makes whatever you're doing with your computer's partitions easy.
Read More -
Partition Master Free can Resize, Move, Merge, Migrate, and Copy disks or partitions; convert to local, change label, defragment, check and explore partition; and much more. A premium upgrade adds free tech support and the ability to resize dynamic volumes.
Read More -
It won't hot image your drives or align them, but since it's coupled with a partition manager, it allows you do perform many tasks at once, instead of just cloning drives. You can move partitions around, resize them, defragment, and more, along with the other tools you'd expect from a cloning tool.
Read More
Related Articles
-
How to Check/View Disk Storage/Usage on Windows 10/11
![author icon]() Tracy King/2026/07/01
Tracy King/2026/07/01 -
FAT32 Format Not Opening [Fixed]
![author icon]() Tracy King/2026/06/29
Tracy King/2026/06/29 -
Optimize SSD Performance with 4K Alignment Software and Speed Up PC
![author icon]() Tracy King/2026/06/17
Tracy King/2026/06/17 -
Hard Drive Keeps Losing Disk Space
![author icon]() Jean/2026/06/17
Jean/2026/06/17


