Page Table of Contents
About the Author
Hot Topics
Updated on Jan 29, 2026
How to shrink C drive on Windows 10? You are in the right place if you are looking for a detailed answer about shrinking C drive. On this page, you can get three free tools to successfully shrink C drive without destroying data.
Before starting the step-by-step guide, let's address some people's confusion about shrinking the C drive.
How to Shrink C Drive on Windows - 3 Free Tools
In this section, you can use two built-in tools provided by Windows and a good third-party tool: EaseUS Partition Master Free, to shrink your C drive.
All three tools allow you to use them for free. You can find the most suitable tool according to the following comparison:
| Comparison | |||
|---|---|---|---|
| For unmovable files | Can skip unremovable files to shrink the C drive | Unable to shrink C drive | Unable to shrink C drive |
| Supported format | For all formats, such as NTFS, FAT32, exFAT, and other formats | Only NTFS | Only NTFS |
| Space size that can be reduced | Can reduce the space of C drive by more than half | Only half of the total space can be reduced | Only half of the total space can be reduced |
| Operation Difficulty | Simple | Medium | Difficult |
| Suitable Users | For all people | For experienced | For experts |
According to the comparison table, EaseUS Partition Master is the most versatile and compatible. No matter your system or format, it can help you shrink your C drive effortlessly.
Before shrinking the C drive beyond the limit, you can clean up some useless and junk files in the C drive to expand more necessary space. Read on, and we will provide detailed step-by-step guides on all three methods. You can choose whichever method you prefer.
Solution 1. Shrink C Drive via EaseUS Partition Master - No Data Loss
EaseUS Partition Master Free is a comprehensive all-in-one application. It offers a powerful feature to shrink partitions:
- It can break the limits even if there is a corrupted file system in the C drive or there are immovable files.
- This tool can relocate files and shrink partitions without damaging any files.
- A special file movement algorithm enables fast shrinking and moving partitions to shrink.
- It supports various versions, including Windows 7/10/11 and Windows Vista/XP.
Note: If you want to resize C drive under Windows Server 2012/2016/2019, please refer to EaseUS Partition Master Server for editing.
The tool provides more powerful performance than Windows built-in tools and simplifies their steps. The following is a step-by-step guide to shrinking a C drive using this versatile utility:
Step 1: Locate and select target partition to shrink
Go to the Partition Manager section, right-click on the partition that you want to shrink and select "Resize/Move".
Step 2: Adjust to shrink partition
Use your mouse to drag the end of the target partition to shrink partition space.
You can also adjust the partition size box to shrink the target partition. Once done, click "OK" to continue.
Step 3: Execute operation
Click the "Execute 1 Task(s)" button and "Apply" to keep all changes.
In addition to partition capacity management, the tool offers a lot of other features to manage partitions easily:
- Partition hard drive or SSD
- Copy partitions
- Extend partitions
- Create partitions on unallocated space
- Delete, merge, and split partitions
If you meet any partition errors, you can also resort to EaseUS Partition Master!
Solution 2. Shrink C Drive via Disk Management
Starting with Windows 7, Disk Management has added the functions "Shrink Volume" and "Extend Volume." It can only extend and shrink NTFS partitions. But it has no problem with C drive. C drive is in NTFS format by default. Here are the steps to shrink C drive using Disk Management:
Step 1. Right-click on the Windows icon and select Disk Management."
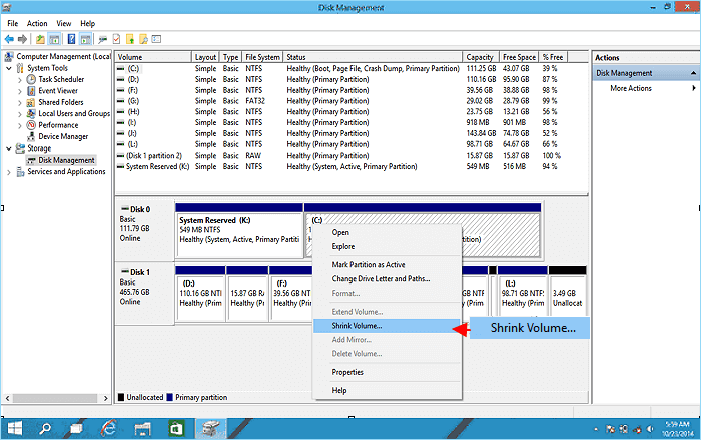
Step 2. Right-click on the C drive and select "Shrink Volume." Disk Management will query the disk for available shrink space.

Step 3. Enter the amount of space you want to shrink and click "Shrink. (Or you can resize it by clicking the up and down buttons after the input box. But you should not shrink the space up to 37152 MB.)
Wait a moment, and you will see the unallocated space next to the C drive.
- Notice:
- If there is a file system error on the C drive or non-removable files, you can't shrink volume in Windows. Please turn to EaseUS Partition Master to repair it.
Solution 3. Shrink C Drive via Diskpart
Diskpart is one of the built-in tools provided by Windows that specializes in managing disks and partitions. It offers very many features, such as formatting and resizing partitions. But this is all used at the command prompt. If you are unfamiliar with the command line, please choose this way carefully. Any wrong command parameter may cause data loss.
If you have experience with Diskpart, please refer to the following steps to resize C drive:
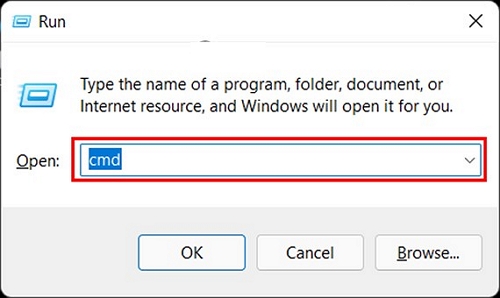
Step 1. Hold down Windows+R to open the Run window and type cmd.

Step 2. Launch the command prompt and enter the following commands and press Enter after each command:
diskpart
list volume
select volume x(enter the volume number you want to shrink)
shrink desired=(enter the size you want to resize)
exit
After this, you will see the unallocated space. In addition, you can use it to access other management, such as checking hard disk health using CMD. If you are not familiar with the command, select EaseUS Partition Master. It is the best CMD alternative tool.
If you think this passage is helpful in shrinking the C drive, you can also click the button below to share it with other people in need. We will continue to talk about more information about shrinking C drive beyond the limit.
Bonus Tip: How to Shrink C Drive in Windows 10 Beyond Limit
Many users may be confused when using Windows built-in tools to shrink partitions. The system provides the maximum possible shrink size, but you can't shrink the volume beyond a given point. For example, a user wants to shrink a partition with more than 130GB of free space, but Disk Management only provides 1GB as the space available for shrinking. Why does this error happen?
Because the virtual memory page file, hibernation, and system volume information folders limit the size of the available shrink space. If these files are in the middle of the total space, only one side is available for shrinking partitions.
Fortunately, with EaseUS Partition Master, you can shrink C drive on Windows 10 beyond the limit. It can relocate these files without damaging them and help you shrink C drive. If you meet other limitations to prevent you from shrinking C drive, click this tutorial and fix it.
Fix Unable to Shrink C Drive on Windows
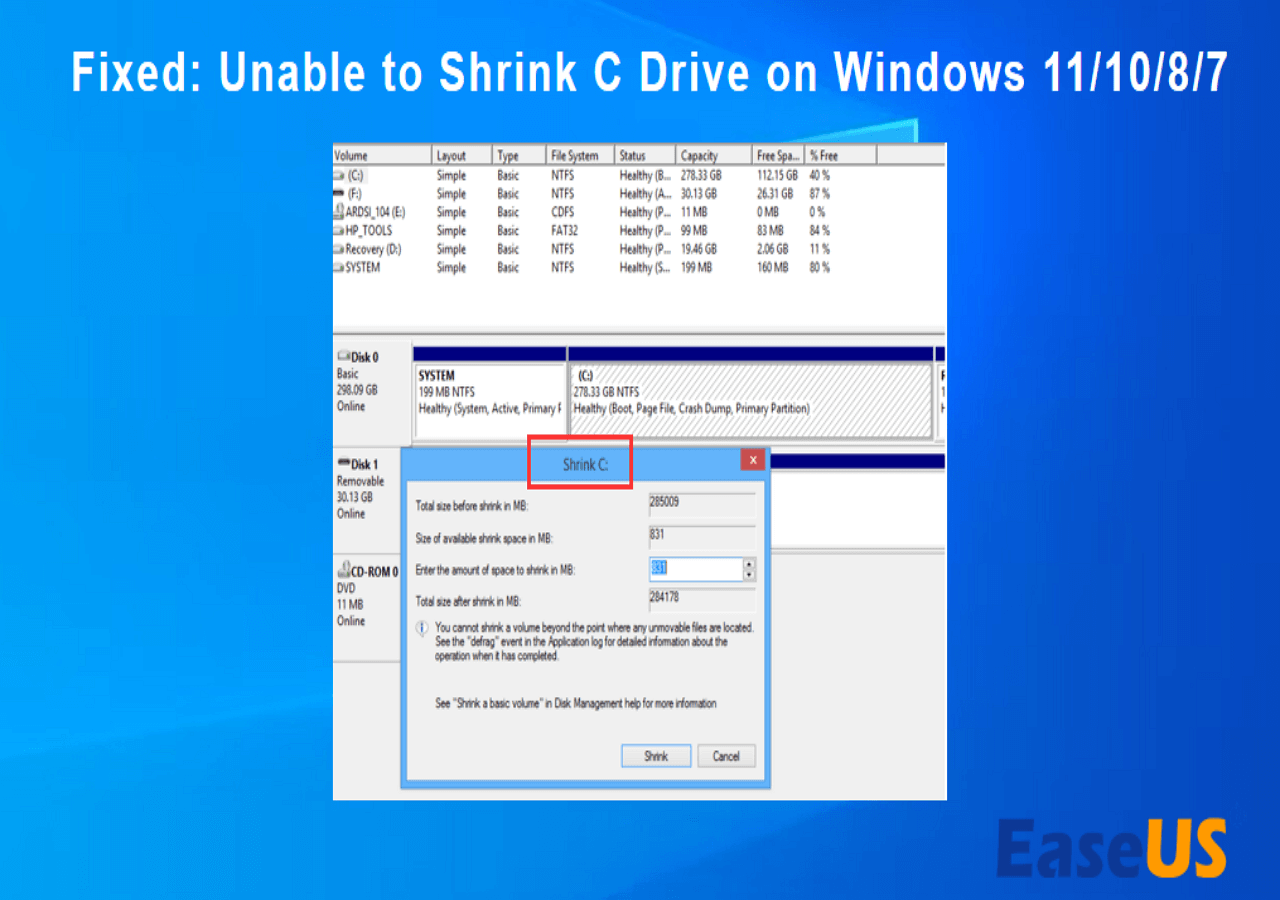
In this article, you can get the reasons why Disk Management is unable to shrink C drive and 4 efficient solutions based on these reasons.

Can I Shrink C Drive on Windows?
Of course, you can shrink C drive on Windows. Shrinking C drive means reducing the size of the target partition and creating unallocated space that you can use. Usually, you can shrink C drive in the two situations to protect and manage your hard drive better:
- If the system drive is the only C drive, it is better to shrink the partition. Because to improve the performance of your computer, you should avoid the C drive full error.
- Separating data from the system will help to improve data security. Shrinking C drive allows you to create a new partition to store your other programs.
It is safe to shrink C drive and you can easily reduce the size of your C drive without losing data. But be careful. You should not shrink too much space. Usually, the C drive should be at least 1/3 size of the total space.
Conclusion
Downsizing a volume from a C drive makes full use of the disk that is not using its full space. And you can better protect your data while improving performance. Whatever the reason you want to shrink your C drive, this article can greatly help you. This page provides three different ways to shrink your C drive in Windows.
Disk Management and Diskpart can meet basic needs. But EaseUS Partition Master is a better choice, especially if you encounter immovable files or file system format errors.
Even if you are new to the computer, you can successfully reduce the size of your C drive. Besides shrinking the space on your C drive, it can also create and merge partitions. Some other advanced features, such as converting MBR to GPT, are also fully supported by this tool!
FAQs About How to Shrink C Drive
The above gives three solutions to shrink C drive. Shrinking partitions, many people may also have some doubts about data security. The following are some common questions and answers.
1. How much should I shrink C drive?
This depends largely on the capacity of your hard drive. The C drive usually requires between 10% and 30% of your hard drive space. Setting the C drive to 120-200GB is reasonable. Once you have set the C drive size, you can reduce the space on the C drive and create other unallocated space.
2. Is it safe to shrink C drive?
Yes, it is safe to shrink the C drive. Shrinking C drive means moving out the unused space. This process will not lose data on the C drive and will have no other negative impact on the C drive. And keeping data and systems separate can protect data better.
3. Why can't I shrink C drive?
Windows may sometimes not allow you to use the shrink volume feature. This is mainly due to the following reasons:
- Some unremovable system files are at the end of the volume, such as page files and hibernation files.
- The C drive has the wrong file system format. It is not in NTFS format.
- There is a lot of fragmentation or insufficient space on the C drive.
4. How to increase C drive on Windows 10?
If unallocated space exists behind the C drive, you can increase the C drive space on Windows 10 by expanding the C partition. If the unallocated space is adjacent to the C drive, you can use Disk Management to extend C drive:
Step 1. Type diskmgmt.msc in the run window and open Disk Management.
Step 2.Right-click on the C partition and select Expand Volume.
How Can We Help You
About the Author
Sherly joined EaseUS in 2022 and she has always loved writing articles and enjoys the fun they bring. She receives professional training here, focusing on product performance and other relative knowledge. She has written over 200 articles to help people overcome computing issues.
Cici is the junior editor of the writing team of EaseUS. She accepted the systematic training on computers at EaseUS for over one year. Now, she wrote a lot of professional articles to help people resolve the issues of hard drive corruption, computer boot errors, and disk partition problems.
Product Reviews
-
I love that the changes you make with EaseUS Partition Master Free aren't immediately applied to the disks. It makes it way easier to play out what will happen after you've made all the changes. I also think the overall look and feel of EaseUS Partition Master Free makes whatever you're doing with your computer's partitions easy.
Read More -
Partition Master Free can Resize, Move, Merge, Migrate, and Copy disks or partitions; convert to local, change label, defragment, check and explore partition; and much more. A premium upgrade adds free tech support and the ability to resize dynamic volumes.
Read More -
It won't hot image your drives or align them, but since it's coupled with a partition manager, it allows you do perform many tasks at once, instead of just cloning drives. You can move partitions around, resize them, defragment, and more, along with the other tools you'd expect from a cloning tool.
Read More
Related Articles
-
4TB Hard Drive Only Shows 2TB Windows | Why & How to Fix
![author icon]() Jean/2026/01/29
Jean/2026/01/29 -
Best exFAT to FAT32 Converter (with Guide)
![author icon]() Oliver/2026/01/29
Oliver/2026/01/29 -
How to Fix Windows 10 Won't Install on SSD | 100 % Working⭐
![author icon]() Cici/2026/01/29
Cici/2026/01/29 -
System Reserved Partition Deleted? 4 Ways to Recover It Here
![author icon]() Tracy King/2026/01/29
Tracy King/2026/01/29
Hot Topics
EaseUS Partition Master

Version 20.0 is here - full exFAT support, easier disk partitioning, and PC performance optimization.


