
Content
Page Table of Contents
About the Author
Hot Topics
With Microsoft's announcement that support for Windows 10 will end in October 2026, many Windows 10 users intend to upgrade to Windows 11 for free software upgrades, technical support, or security fixes. However, some of them failed because of the lack of minimum hardware requirements for Windows 11 and relevant precautions.
If you're interested, please read further to learn how to prepare disk for Windows 11 upgrade with five steps. Besides, you can also learn to install Windows 11.
Please share this post to help more users prepare disk for Windows 11 upgrade!

5 Steps to Prepare Disk for Windows 11 Upgrade🔥
The following content describes how to prepare disk for Windows 11 upgrade. Please check them out one by one.
Step 1. Check System Compatibility
Please ensure your Windows OS can meet the minimum hardware requirements for Windows 11.
🚩Processor: 1GHz (gigahertz) or faster with two or more cores on a compatible 64-bit processor or system on a chip.
💾Memory: 4GB or greater.
💎Storage: 64GB or larger.
✔️Graphics card: Work with DirectX 12 or later, with a WDDM 2.0 driver.
▶️System firmware: UEFI with Secure Boot.
‼️TPM: Trusted Platform Module (TPM) version 2.0.
💻Display: 8 bits per color channel, a 9" or larger monitor, and a high definition (720p) display.
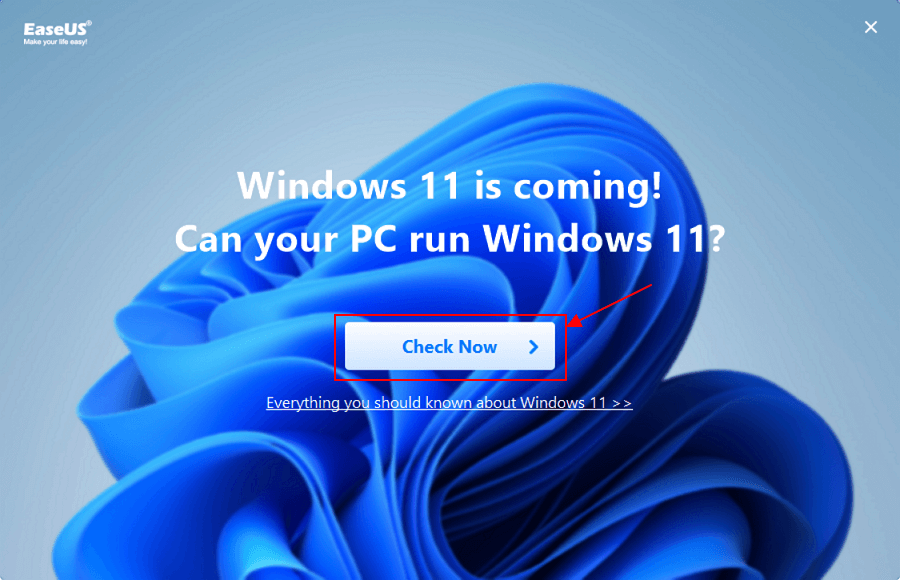
You can also run EaseUS Partition Master to check whether your Windows can run the Windows 11 operating system or not.
Step 1. Launch EaseUS Partition Master and click "Built-in Toolkits".
Step 2. Click "Win11 Checker" to open this feature. Then click the Check Now button to start.
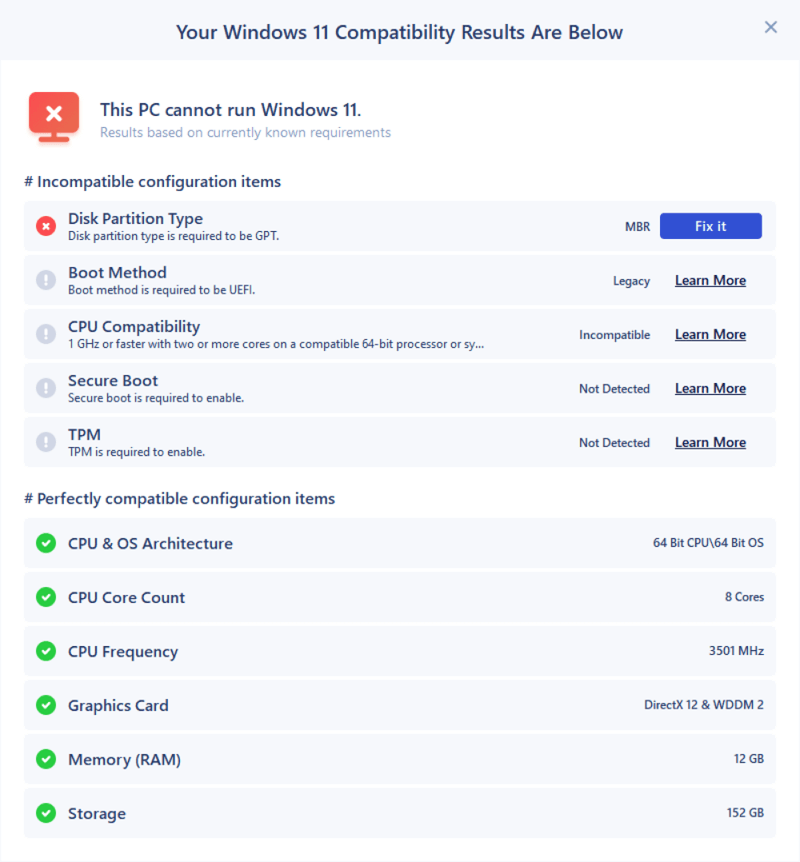
Step 3. The Windows 11 compatibility result window will soon appear. All the incompatible and compatible configuration items will be listed.
Step 2. Set up your Microsoft Account to Transfer Files or Backup Your Data
To prevent potential data loss, especially during the partition resize or disk format conversion, you'd better do the following things.
- If your files are not large, you can manually copy all essential files (Documents, Photos, Videos, etc.) to an external hard drive or USB drive.
- Transfer your files and data to your new Windows 11 with an MS account because all Microsoft programs and services, including Microsoft 365, OneDrive, Microsoft Edge, and the Microsoft Store, are connected to your device through a single account.
- If your desired data is large, you can use Windows' built-in backup features like Windows Backup and Restore or another third-party backup software like EaseUS Todo Backup.
Step 3. Convert MBR to GPT via EaseUS Partition Master
Since Windows 11 is only compatible with UEFI, you are prompted to use the GPT partition style instead of MBR. More precisely, if your selected disk has an MBR partition table, you cannot install Windows 11 OS on this disk. In this case, the partition manager recommended above can also help you convert MBR disk to GPT disk without losing data.
Step 1. Download and launch EaseUS Partition Master on your computer.
Step 2. Go to Disk Converter, select "MBR => GPT" and click "Next" to continue.

Step 3. Select the target MBR disk that you tend to convert to GPT, and click "Convert" to start the conversion.

Step 4. Extend C Drive via EaseUS Partition Master
As mentioned above, Windows 11 at least needs 64 GB. However, if your C drive is out of space or your Windows becomes slow, you're recommended to extend the C drive to release more space for temporary files and future updates.
Extend System C drive with unallocated space
- 1. Right-click on the System C: drive and select "Resize/Move".
- 2. Drag the system partition end into the unallocated space so to add it to the C: drive. And click "OK".
- 3. Click "Execute Task" and "Apply" to execute the operations and extend the C drive.
Step 5. Create a Windows Bootable USB | 2 Ways
This step is the last step to prepare disk for windows 11 upgrade. This step provides two feasible plans: one uses EaseUS Partition Master, and the other refers to the official method provided by Microsoft.
🚩Option 1️⃣Use EaseUS Partition Master
Step 1. To create a bootable disk of EaseUS Partition Master, you should prepare a storage media, like a USB drive, flash drive or a CD/DVD disc. Then, correctly connect the drive to your computer.
Step 2. Launch EaseUS Partition Master, and find the "Bootable Media" feature on the left. Click on it.
Step 3. You can choose the USB or CD/DVD when the drive is available. However, if you do not have a storage device at hand, you can also save the ISO file to a local drive, and later burn it to a storage media. Once made the option, click the "Create" button to begin.
- Check the Warning message and click "Yes".
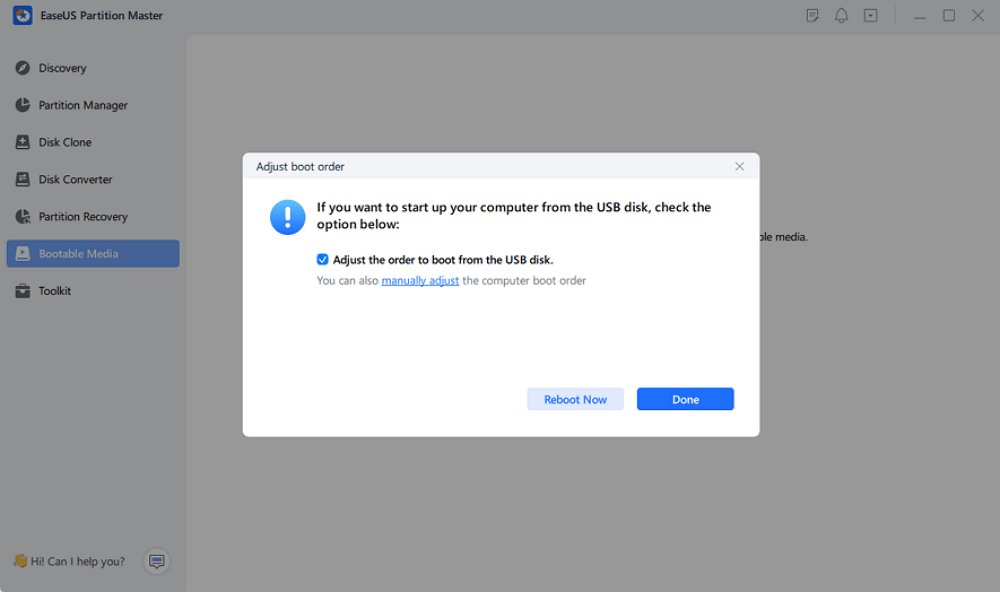
Step 4. When the process finishes, you'll see a pop up window, asking if you want to restart computer from the bootable USB.
- Reboot Now: it means you want to restart the current PC and enter EaseUS Bootable Media to manage your disk partitions without OS.
- Done: it means you don't want to restart the current PC but to use the bootable USB on a new PC.
Note: To use the bootable disk on a new PC, you need to resart the target computer and press F2/F8/Del key to enter BIOS, and set the USB bootable disk as the first boot disk.
Wait patitiently and your computer will automatically boot up from the USB bootable media and enter EaseUS WinPE desktop.

🚩Option 2️⃣Create installation media for Windows
Before creating a bootable USB, please note the following points.
- Recommendation
- Prepare a PC with a stable internet connection. The internet connection affects how long it takes to download.
- Prepare a new USB stick with at least 8 GB of space because this process will erase all the existing data on your USB drive.
- Please prepare your 25-character product key. The product key is incorporated in the firmware of a lot of contemporary products. It is not necessary to manually enter the product key if it is included in the device's firmware. Rather, the product key is applied automatically if the firmware's product key corresponds to the Windows version and edition being installed.
Let's show how it works.
Step 1. Open the Download Windows 11 website via any browser.
Step 2. Under the Create Windows 11 Installation Media tab, select Download Now > launch MediaCreationTool.exe on your Windows.
Please share this post to help more users prepare disk for Windows 11 upgrade!
Bonus tips: Recommended Method to Install Windows 11
After learning how to prepare disk for windows 11 upgrade, this section guides you to install Windows 11 operating system via Windows Settings.
Step 1. Press Windows + I to open Windows Settings > select Update & Security > click Windows Update.
Step 2. In the Windows Update window, click Check for updates.

Step 3. A notification in the Windows Update window indicates whether Windows 11 is prepared for installation on the device. Please click Download and Install.
Step 4. In the Software License Terms window, click Accept and install > your Windows OS automatically begins downloading and refreshing. Please wait patiently.
Conclusion
How to prepare disk for Windows 11 upgrade? This article shows you five specific phases with clear operating steps. Please check them carefully before upgrading your Windows 10 to Windows 11. As you can see, EaseUS Partition Master seems to be a comprehensive helper. So, don't hesitate to download it now! In addition, you can also find the most recommended way to install Windows 11.
FAQs
You may have a clear understanding of how to prepare disk for Windows 11 upgrade. Moreover, this part lists several relevant topics.
Q1: Why Windows 10 users want to upgrade to Windows 11?
A1: Because Windows 11 introduces additional productivity capabilities and functionality to meet the challenges of the hybrid world.
Q2: Are there other ways to install Windows 11?
A2: Of course, there are. You can use the Windows 11 Installation Assistant to upgrade or use the Windows 11 installation media.
Q3: How do I know if my disk is MBR or GPT?
A3: Press Windows + X > select Disk Management to open it > find the disk that contains your target drive (like the C drive) > right-click on it > select Properties > click Volumes > check the partition style of your chosen disk.
Please share this post to help more users prepare disk for Windows 11 upgrade!
How Can We Help You
About the Author
Updated by Tracy King
Tracy became a member of the EaseUS content team in 2013. Being a technical writer for over 10 years, she is enthusiastic about sharing tips to assist readers in resolving complex issues in disk management, file transfer, PC & Mac performance optimization, etc., like an expert.
"I hope my articles can help solve your technical problems. If you are interested in other articles, you can check the articles at the bottom of this page. Similarly, you can also check my Twitter to get additional help."
Product Reviews
-
I love that the changes you make with EaseUS Partition Master Free aren't immediately applied to the disks. It makes it way easier to play out what will happen after you've made all the changes. I also think the overall look and feel of EaseUS Partition Master Free makes whatever you're doing with your computer's partitions easy.
Read More -
Partition Master Free can Resize, Move, Merge, Migrate, and Copy disks or partitions; convert to local, change label, defragment, check and explore partition; and much more. A premium upgrade adds free tech support and the ability to resize dynamic volumes.
Read More -
It won't hot image your drives or align them, but since it's coupled with a partition manager, it allows you do perform many tasks at once, instead of just cloning drives. You can move partitions around, resize them, defragment, and more, along with the other tools you'd expect from a cloning tool.
Read More
Related Articles
-
How to Fix Windows 10 Won't Install on SSD | 100 % Working⭐
![author icon]() Cici/2026/06/17
Cici/2026/06/17 -
How to Manage Partitions with Disk Partition CMD in Windows 11/10?
![author icon]() Daisy/2026/06/17
Daisy/2026/06/17 -
There Is No Disk in the Drive. Please Insert a Disk into Drive
![author icon]() Tracy King/2026/06/17
Tracy King/2026/06/17 -
How to Install Windows 10 on Second Hard Drive | 2 Ways🔥
![author icon]() Cici/2026/06/17
Cici/2026/06/17


