
Content
Page Table of Contents
About the Author
Hot Topics
| Workable Solutions | Step-by-step Troubleshooting |
|---|---|
| 1. EaseUS Partition Master | Step 1. To create a bootable disk of EaseUS Partition Master, you should prepare a storage media, like a USB drive...Full steps |
| 2. Disk Management | Step 1. Right-click on Disk 4 (or your USB's drive letter); Step 2. Click on Format; Step 3. Click on Yes...Full steps |
| 3. CMD | Step 1. Win+R and Type CMD; Step 2. Type Diskpart and enter; Step 3. Then type list disk in Diskpart Window...Full steps |
How Do I Convert Bootable Disk or Bootable USB to Normal in Windows 11
Looking to convert your bootable USB back to normal in Windows 11? Follow along as we explore all the options.
Gone are the days when you'd need a DVD reader or ROM to install operating systems. Nowadays, all you need is a pen drive and access to quick internet. Then, you can use the said device to make it bootable and install any Windows or operating system that you wish to.
However, with its advantages come the drawbacks of turning your USB bootable. Some of them include losing specific chunks of data or even a whole section of the storage on this removable media.

On the other hand, many users claim they end up losing the drive letter entirely after making it bootable. That's why so many people are looking to find the solution to their lost data or space on USB devices.
Today, we'll be exploring a few ways to convert bootable disks back to normal in Windows 11. Therefore, let's get started.
How Do I Convert a Bootable USB to Normal in Windows 11
Some would say converting a bootable USB back to normal in Windows 11 or any other operating system is as simple as formatting it. While that's not entirely wrong, and it does work in many cases, it's not always the case for some people.
You're brought to this article because you might have tried everything in your might to fix the said problem. However, there is a little checklist you should ensure before you get started. For instance:
- Has your USB suffered physical damage?
- Have you stored/copied all the necessary data from the device?
- Have you stored Windows files and other essentials on your disk?
The first point should help you fix your problem before attempting any other steps from this article. Suppose your USB has suffered physical damage, such as water exposure, broken components, etc. In that case, it's futile to try and bring it back to life.
It could be that your drive warmed up a little too much while installing Windows, and the components onboard got dented or disrupted. Moreover, it's not even that uncommon. So, analyze thoroughly and see if you find any physical damage.
If there's no such thing and your USB is working fine, make sure you copy all the necessary files. Don't worry about the Windows itself; you can always download another ISO image, or you might already have one.
However, make sure you copy your own personal files before you format them.
Convert Bootable USB Back to Normal with Full Capacity in Windows 11
Now that we know the problem and take the necessary pre-measured, let's talk about the fix itself. If you wish to use your USB for normal purposes again, then there are three methods that we can try.
To convert the bootable disk to normal in Windows 11, we'll be trying three methods that are guaranteed to work. Here they are:
A tool can help you do it effortlessly without taking up your precious time. While using disk management and CMD command will require you to thoroughly understand technical computing. Therefore, let's get started and analyze each of these methods:
1. Convert a Bootable Disk/USB to Normal with Bootable Format Tool
Finding a tool that makes your problem go away isn't that difficult. However, finding a dependable tool that guarantees to remove or fix your problem is a challenge. But, with EaseUS Partition Master, you don't have to worry about fixing your USB.
Step 1. To create a bootable disk of EaseUS Partition Master, you should prepare a storage media, like a USB drive, flash drive or a CD/DVD disc. Then, correctly connect the drive to your computer.
Step 2. Launch EaseUS Partition Master, and find the "Bootable Media" feature on the left. Click on it.
Step 3. You can choose the USB or CD/DVD when the drive is available. However, if you do not have a storage device at hand, you can also save the ISO file to a local drive, and later burn it to a storage media. Once made the option, click the "Create" button to begin.
- Check the Warning message and click "Yes".
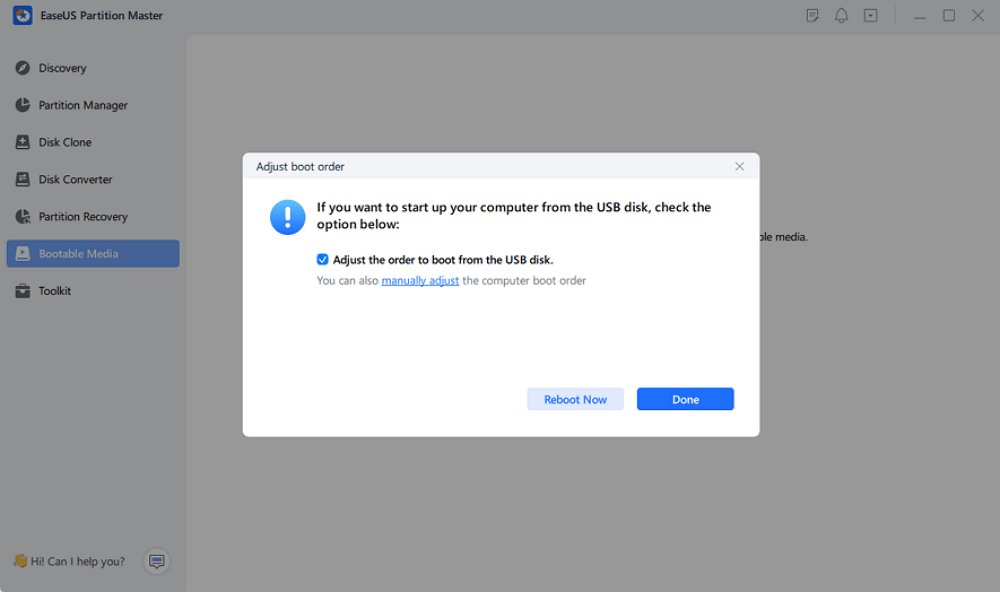
Step 4. When the process finishes, you'll see a pop up window, asking if you want to restart computer from the bootable USB.
- Reboot Now: it means you want to restart the current PC and enter EaseUS Bootable Media to manage your disk partitions without OS.
- Done: it means you don't want to restart the current PC but to use the bootable USB on a new PC.
Note: To use the bootable disk on a new PC, you need to resart the target computer and press F2/F8/Del key to enter BIOS, and set the USB bootable disk as the first boot disk.
Wait patitiently and your computer will automatically boot up from the USB bootable media and enter EaseUS WinPE desktop.

Besides helping you turn your USB back to normal, it can help you with additional benefits, such as:
- Convert NTFS to Fat32 and vice versa.
- Other convertible formats include exFAT and EXT2/3/4.
- Wipe hard disk data.
- Reformat Windows 10.
- Resize or move partition.
All these factors about EaseUS Partition Master make it the best option you have to convert bootable USB to normal in Windows 11. Besides these options, you also get to convert MBR to GPT or migrate your windows from one primary partition to another.
2. Restore Bootable Disk or Bootable USB to Full Capacity Using Disk Management
Now we'll be talking about another way of restoring your USB device. However, instead of a third-party tool, we'll be using a tool that you can find in windows. Therefore, go to your Windows 11 search bar, and look for "Disk management". Once you turn it on, here's what you will see:
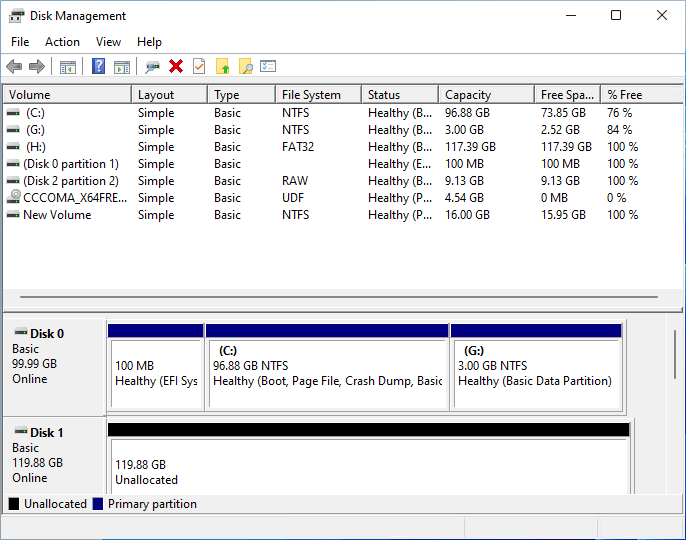
Disk Management allows you to access all of your physical drives, removable and internal. However, we'll be clicking on Disk 4 because that's our USB drive. Here's how:
Step 1. Right-click on Disk 4 (or your USB's drive letter).
Step 2. Click on Format.
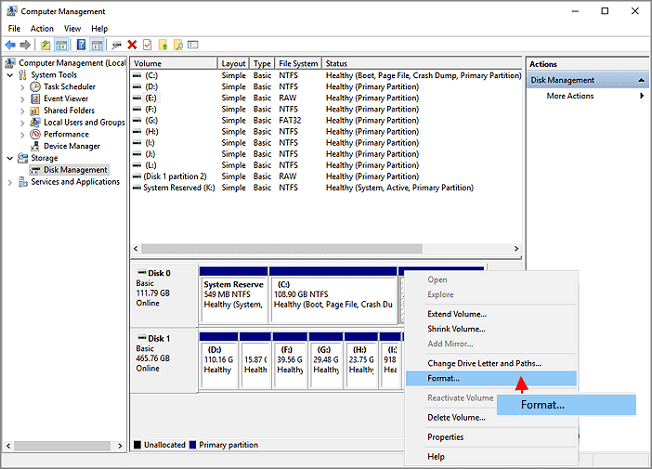
Step 3. Click on Yes.
Step 4. Once you get this dialogue box, click on “NTFS” or any other format you wish to use. Make sure you click “Perform a quick format” before clicking “OK”.
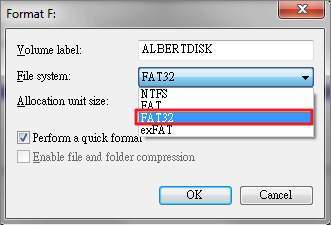
Once done, the disk manager will format your USB drive, and you will be able to see it normally on your computer again.
3. Unboot Bootable USB to a Normal One Using CMD
While both of the previous steps are guaranteed to work, you can use CMD if you aren't convinced. CMD, or command prompt, in Windows, is a special tool that you can use for your disk drives in many ways.
In the case of your USB, here's what you should do:
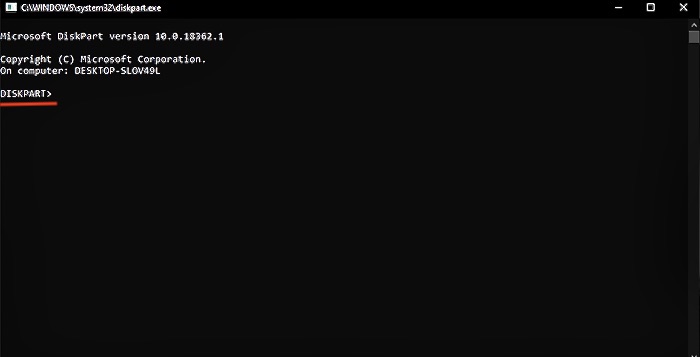
Step 1. Win+R and type CMD.
Step 2. Type Diskpart and enter.
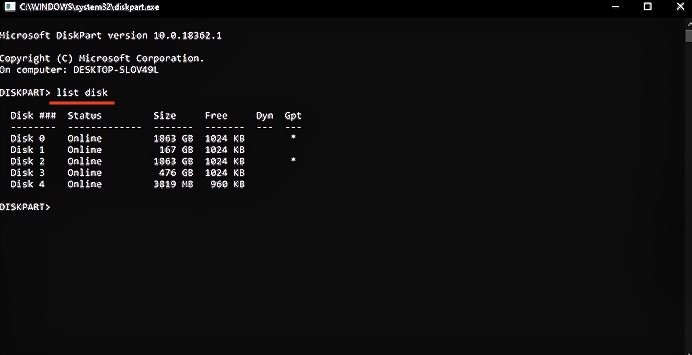
Step 3. Then type list disk in Diskpart Window.
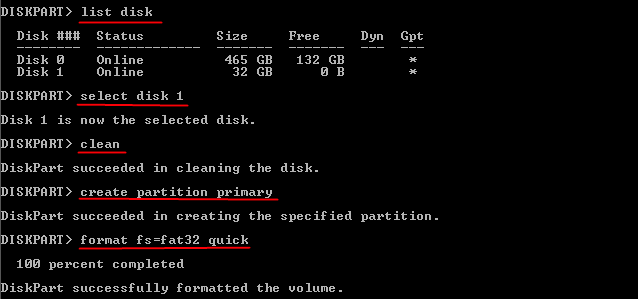
Step 4. Since Disk 4 is our USB drive, we'll type in “Select Disk 4”. After that, we'll type these commands:
- Type clean and let it work
- Type create partition primary
- Type format fs=fat32 quick
Once you follow these steps, you should be able to see your USB in the normal format in your computer/This PC window.
Conclusion
All these steps can help you get your USB back. However, it's suggested that you use EaseUS to ease your problems. It will not only guarantee to convert bootable disk or bootable USB to normal in Windows 11, but it will also do so seamlessly.
How Can We Help You
About the Author
Oliver is an EaseUS professional writer who dares explore new areas. With a passion for solving tech issues with straightforward guides for common users, Oliver keeps honing his writing craft by developing in-depth solutions for disk and partition management, computer boot-up issues, file transfer, etc.
Written by Tracy King
Tracy became a member of the EaseUS content team in 2013. Being a technical writer for over 10 years, she is enthusiastic about sharing tips to assist readers in resolving complex issues in disk management, file transfer, PC & Mac performance optimization, etc., like an expert.
Product Reviews
-
I love that the changes you make with EaseUS Partition Master Free aren't immediately applied to the disks. It makes it way easier to play out what will happen after you've made all the changes. I also think the overall look and feel of EaseUS Partition Master Free makes whatever you're doing with your computer's partitions easy.
Read More -
Partition Master Free can Resize, Move, Merge, Migrate, and Copy disks or partitions; convert to local, change label, defragment, check and explore partition; and much more. A premium upgrade adds free tech support and the ability to resize dynamic volumes.
Read More -
It won't hot image your drives or align them, but since it's coupled with a partition manager, it allows you do perform many tasks at once, instead of just cloning drives. You can move partitions around, resize them, defragment, and more, along with the other tools you'd expect from a cloning tool.
Read More
Related Articles
-
How to Burn ISO to USB? 2024 Complete Guide 🔥
![author icon]() Tracy King/2024/04/19
Tracy King/2024/04/19 -
Optimize SSD Performance with 4K Alignment Software and Speed Up PC
![author icon]() Tracy King/2024/04/19
Tracy King/2024/04/19 -
6 Ways to Test Hard Drive Speed for Free [2024 🔥]
![author icon]() Brithny/2024/04/19
Brithny/2024/04/19 -
Why Does Computer Keep Crashing? 10 Instant Ways to Fix Computer Keeps Crashing
![author icon]() Cedric/2024/04/19
Cedric/2024/04/19
Hot Topics in 2024


EaseUS Partition Master

Manage partitions and optimize disks efficiently