- Video Recovery
- SD Card Recovery
- Recycle Bin Recovery
- Recover Data from USB
- Recover Deleted Emails
- Hard Drive Not Showing Up in Windows
- Recover Unsaved Word Documents
- Recover Deleted Files in Windows 10
- Recover Files from Virus Infected Hard Drive
- Best Free Photo Recovery Software
- Recover Files from Formatted Hard Drive
Sometimes, you connect a WD external hard drive to your Mac, but it won't show up on Finder or Disk Utility. Why is a WD hard drive not showing up on a Mac? Many causes can lead to this error, such as incorrect settings, a corrupted WD hard drive, an incompatible file format, etc.
In this article, we will tell you 7 effective ways to fix the WD hard drive not showing up on a Mac:
- Fix 1. Check the USB Cable with Another Device
- Fix 2. Check Settings in Finder and Disk Utility
- Fix 3. Eject the WD Hard Drive and Reboot Your Mac
- Fix 4. Force Mount the WD Hard Drive in Disk Utility
- Fix 5. Run First Aid to Repair the WD Hard Drive Error
- Fix 6. Change the Format of the WD Hard Drive
- Fix 7. Reset NVRAM or PRAM on Your Mac
Suppose the WD hard drive is not showing up on a Mac due to incorrect settings. Congratulations, and the only thing you need to do is change the settings on your Mac without worries about data loss.
However, unfortunately, if the worst situation happens, your WD hard drive is corrupted, and you may face data loss risk. In this case, consider recovering data before fixing the error.
Preparation: Recover Data from the WD Hard Drive
Fixing the WD hard drive issues, such as the WD Passport not showing up on a Mac, may cause data loss, so you should recover the stored data first to avoid permanently losing it.
Consider using professional and trusted data recovery software EaseUS Data Recovery Wizard for Mac, which can recover stored data on an external hard drive, internal hard drive, SD card, USB flash drive, and more. Besides, its powerful scan ability can help you see all files on a Mac hard drive, including hidden, deleted, and lost files.
EaseUS data recovery software can help you easily recover data from hard drives under the following conditions:
- An external hard drive was detected but didn't show up on your Mac or Windows PC.
- An external hard drive isn't showing up on macOS Ventura, macOS Sonoma, or earlier OS versions.
- The WD My Passport is not mounting on a Mac, or the WD Easystore is not mounting on a Mac.
In addition, the EaseUS software can fix corrupted hard drives on a Mac and recover stored data on it. Here are steps to recover your WD hard drive that is not showing up on your Mac:
Step 1. Search for lost files
Correctly connect your external hard drive to your Mac. Launch EaseUS Data Recovery Wizard for Mac, and select the external hard drive. Then, click "Search for lost files" to find lost/deleted files on your external devices.
Note: Before data recovery, you'd better click "Disk Backup" from the left sidebar to create a backup of your external hard drive to avoid further data loss. After backing up the external hard drive, the software can recover data from your external hard drive's backup, and you can remove the external hard drive and use it again.

Step 2. Filter and find lost files
After the scan, all file types will be presented in the left panel. Select the file type to find wanted files on your external devices.

Step 3. Preview and recover
Click the file and preview it. Then, select the files you want to recover and click the "Recover" button. You can save your data to local and cloud drives.

After recovering your stored data, you can fix the WD hard drive not showing up on a Mac issue without worrying about data loss! If you think this post is informative, share it on social media to help others learn how to fix this error.
Fix WD Hard Drive Not Showing Up on Mac with 8 Ways
We tested 7 effective ways to fix the WD hard drive not showing up on Mac Finder or Disk Utility. Take a look!
Fix 1. Check the USB Cable with Another Device
Try to use another USB cable or another computer to check if the problem is the hard drive itself, the USB cable, or your Mac.
Fix 2. Check Settings in Finder and Disk Utility
When you plug in a WD external drive, but it doesn't show up on your Mac, the first reason to consider is that you haven't turned on the display settings. Follow the steps below:
Step 1. Click on the "Finder" tab at the top menu, and go to "Finder > Preferences (or Settings) > General".
Step 2. Check the "External disks" option.

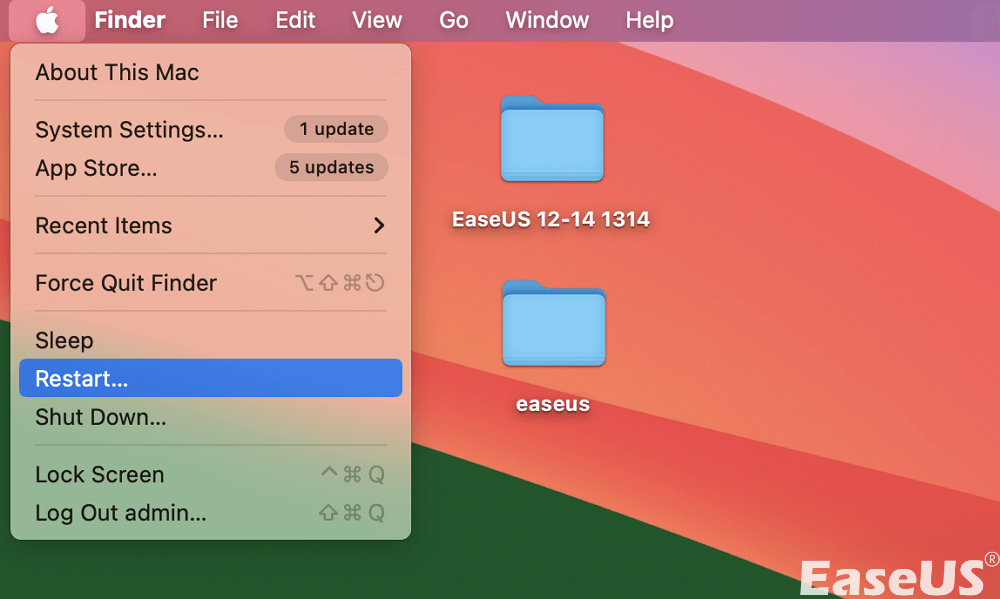
Fix 3. Eject the WD Hard Drive and Reboot Your Mac
Rebooting your MacBook Pro or Air can also solve many system glitches on macOS. But before you reboot your Mac, ensure the WD hard drive is safely ejected. Here are the steps:
Step 1. Click the Apple icon at the top menu.
Step 2. Click "Restart" to reboot your machine.
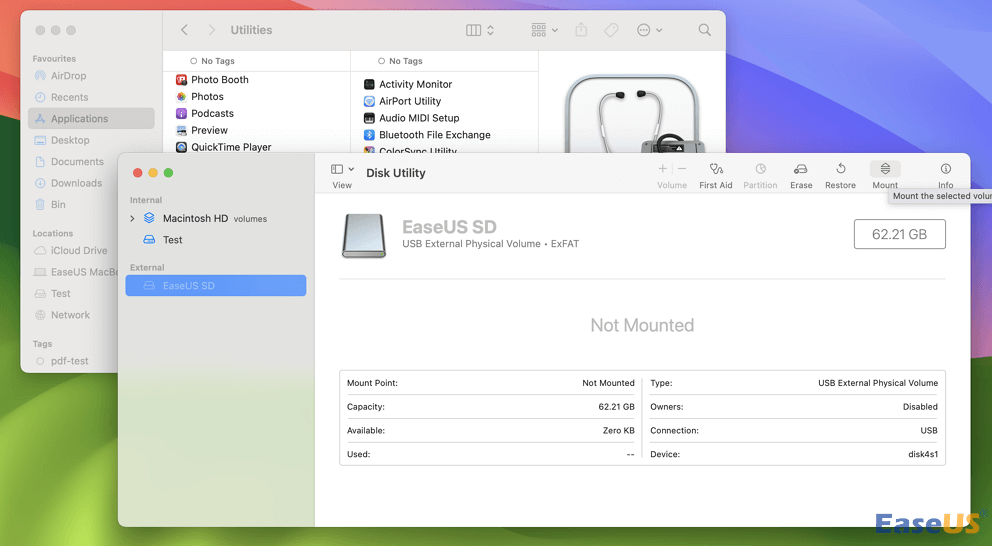
Fix 4. Force Mount the WD Hard Drive in Disk Utility
Besides, if the WD hard drive is not showing up on your Mac because it's not mounted, follow the steps below to force mount it:
Step 1. Open "Disk Utility" from the "Finder > Applications > Utilities" folder.

Step 2. Choose the WD hard drive from the Disk Utility window, and click "Mount" at the top option list.
Fix 5. Run First Aid to Repair the WD Hard Drive Error
If your WD hard drive isn't showing up on your Mac due to it being corrupted, don't worry! Here are steps to repair it with the built-in feature on macOS:
Step 1. Open Disk Utility, and choose the WD hard drive at the left panel.
Step 2. Click "First Aid" at the top menu, and then click "Run" to confirm.

Wait for the First Aid process to finish; you can access the WD hard drive. If the First Aid process fails, this article can help you solve this problem.

Disk Utility First Aid Process Has Failed [with 5 Proven Ways to Fix It]
This article discusses how to fix the 'First Aid process has failed error' on a Mac. Read more >>
Fix 6. Change the Format of the WD Hard Drive
The incompatible file system format will also lead to the WD hard drive not showing up on your Mac. Here are the steps to reformat it:
Step 1. Open Disk Utility, and choose the WD hard drive at the left panel.
Step 2. Click "Erase" at the top menu, and a pop-up window appears.
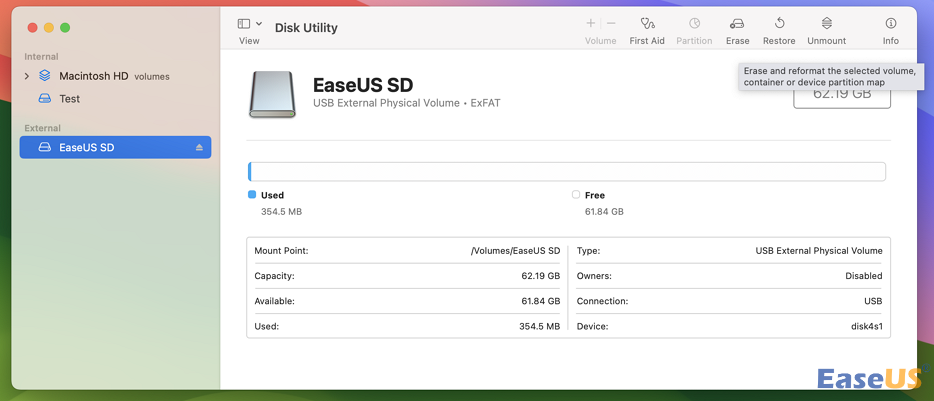
Step 3. Choose the new format (APFS vs. Mac OS Extended) and a new name for the WD hard drive. Click "Erase" again to confirm.

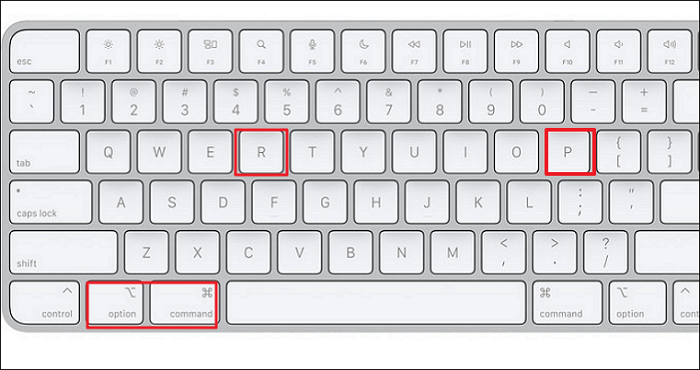
Fix 7. Reset NVRAM or PRAM on Your Mac
If you own an Intel-base Mac, here are the steps to reset NVRAM or PRAM on a Mac:
Note: Don't use a wireless keyboard to reset your NVRAM or PRAM, which may not work well.
Step 1. Shut down your Mac and press the power button to reboot it.
Step 2. Press and hold the "Command + Option + P + R" at the same time until you see the Apple Logo again.
Then, you can reset the NVRAM or PRAM after rebooting your Mac.
If you own an Apple Silicon-based Mac, you don't need to reset the NVRAM manually. Mac with M chips will test the NVRAM upon starting, and if any problems are found, they trigger an automatic reset.
Conclusion
This article introduces 7 effective ways to fix a WD hard drive not showing up on a Mac issue, including checking the USB cable with another device, checking the display settings in Finder, rebooting your Mac, and using Disk Utility to mount, repair, or format your WD hard drive, etc.
Before fixing the error, it's suggested that you install the powerful and trusted data recovery software EaseUS Data Recovery Wizard for Mac to recover your stored data. Also, this professional data recovery software provides an easy-to-use backup option that can create backups quickly!
Back Up Your Mac and Never Lose Data
Back up and restore your MacBook/iMac without Time Machine, iCloud, or external hard drives.
WD Hard Drive Not Showing Up on Mac FAQs
Here are questions people frequently ask when they search for how to fix the WD hard drive not showing up on a Mac error:
1. Why is my WD external hard drive not showing up on my Mac?
Many reasons can lead to a WD external hard drive not showing up on a Mac, such as wrong settings, which is the easiest problem to fix: go to "Finder > Preferences > General" to check the "External disks" option.
2. How do I get my WD hard drive to work on my Mac?
You can change the USB ports, edit the Finder Preferences, reboot your Mac, run First Aid on the WD hard drive, change the format on it, etc., to get your WD hard drive to work on your Mac.
Was This Page Helpful?
Dany is an editor of EaseUS who lives and works in Chengdu, China. She focuses on writing articles about data recovery on Mac devices and PCs. She is devoted to improving her writing skills and enriching her professional knowledge. Dany also enjoys reading detective novels in her spare time.
Brithny is a technology enthusiast, aiming to make readers' tech lives easy and enjoyable. She loves exploring new technologies and writing technical how-to tips. In her spare time, she loves sharing things about her game experience on Facebook or Twitter.
-
EaseUS Data Recovery Wizard is a powerful system recovery software, designed to enable you to recover files you’ve deleted accidentally, potentially lost to malware or an entire hard drive partition.
Read More -
EaseUS Data Recovery Wizard is the best we have seen. It's far from perfect, partly because today's advanced disk technology makes data-recovery more difficult than it was with the simpler technology of the past.
Read More -
EaseUS Data Recovery Wizard Pro has a reputation as one of the best data recovery software programs on the market. It comes with a selection of advanced features, including partition recovery, formatted drive restoration, and corrupted file repair.
Read More
Related Articles
-
Where Is Downloads Folder on Mac [with Pro Tips]
![author icon]() Finley/Jul 24, 2024
Finley/Jul 24, 2024 -
[5 Solutions for macOS] Recover Deleted Files After Updating to Catalina
![author icon]() Dany/Jul 24, 2024
Dany/Jul 24, 2024 -
Can't Save Excel File on Mac | Common Errors and Solutions (2024)
![author icon]() Jaden/Jul 24, 2024
Jaden/Jul 24, 2024 -
How to Recover Unsaved/Deleted Sketch Files on Mac [4 Tips for Sketch Users]
![author icon]() Dany/Jul 24, 2024
Dany/Jul 24, 2024