-
![]()
-
![]()
-
![]()
-
![]()
-
![]() Where Is Steam Screenshot Folder? How to Access and How to Restore
Where Is Steam Screenshot Folder? How to Access and How to Restore January 19,2026
 6 min read
 -
![]()
-
![]() How to Recover Deleted Tweets and Twitter Photos/Pictures/Images
How to Recover Deleted Tweets and Twitter Photos/Pictures/Images January 19,2026
 6 min read
 -
![]()
-
![]()
-
![]()
Page Table of Contents
Overview
Files automatically getting deleted on Windows 10, how to fix?
"I have a new laptop with Windows 10 and Office 2017 pre-installed. After two weeks of use, I find that some files disappeared completely. That is to say; my computer is automatically deleting files. I want to know how to fix this problem and how to recover the files deleted on Windows 10?"
It's no longer a new problem to Windows users that Windows 10 would automatically delete files by itself. Don't worry if your desktop files disappear automatically or you have lost important files or folders. Here below, you'll find reliable methods to recover files getting deleted automatically by Windows 10 effectively now.
You might also want to read: How to recover EXE files automatically deleted
Two Ways to Recover Files Getting Deleted Automatically in Windows 10
In this article, we provide you with two ways to recover automatically deleted files on Windows 10/8/7. To save your time and recover your data as quickly as possible, we highly recommend you try the first solution directly.
Method 1. Recover Deleted Files with Data Recovery Software
When you meet Windows 10 deleting files by itself issue, using EaseUS Data Recovery Wizard to help you recover the deleted files is the quickest and most effective way. This program allows you to recover lost data in Windows 10, 8, 7, etc. due to the system upgrade, system crash, careless deleting, or virus attacking within three simple steps.
- Recover lost or deleted files, documents, photos, audio, music, emails effectively
- Restore data after Windows 11 update, formatting, emptying recycle bin, virus attack, system crash, and more.
- Repair corrupted videos like MP4, MOV files from an SD card, USB flash drive, HDD, and other devices.
You can download this green software now, then follow the steps below to get Windows 10 automatically deleted files back with ease.
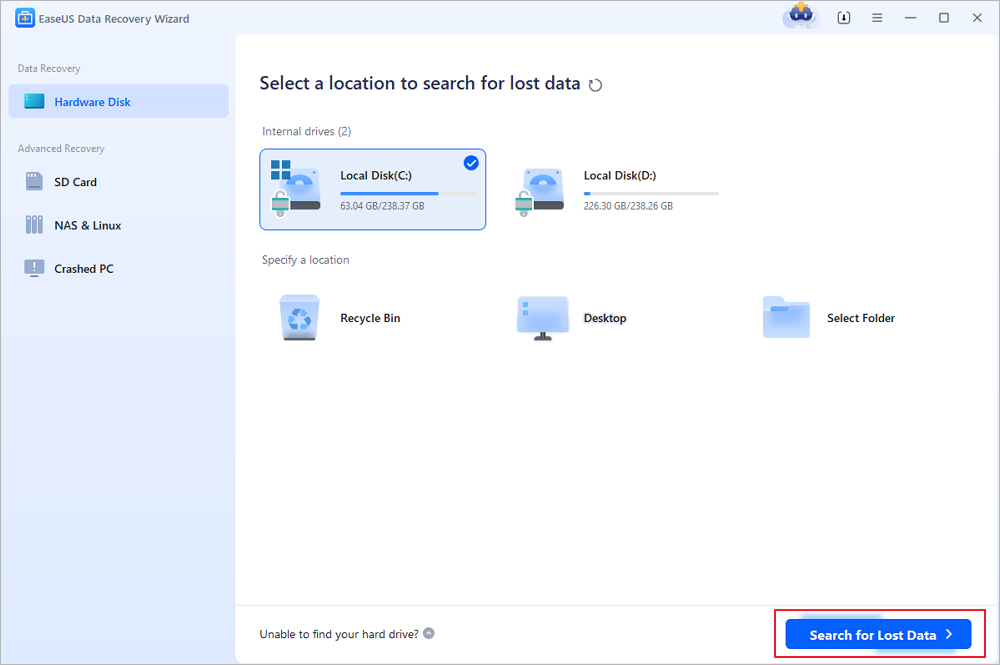
Step 1. Select a location and start scanning
Launch EaseUS Data Recovery Wizard, hover on the partition/drive where the deleted files were stored. Click "Search for Lost Data" to find lost files.
Step 2. Select the files you want to recover
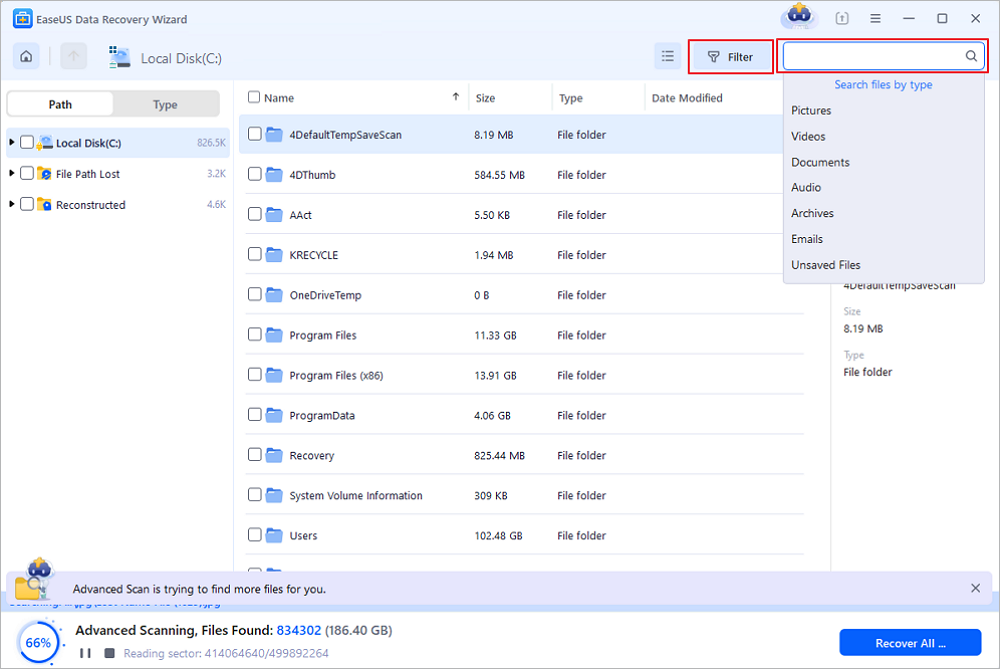
When the scanning has finished, select the deleted files you want to recover. You can click on the filter to display only the file types you want. If you remember the file name, you can also search in the search box, which is the fastest way to find the target file.
Step 3. Preview and recover deleted files
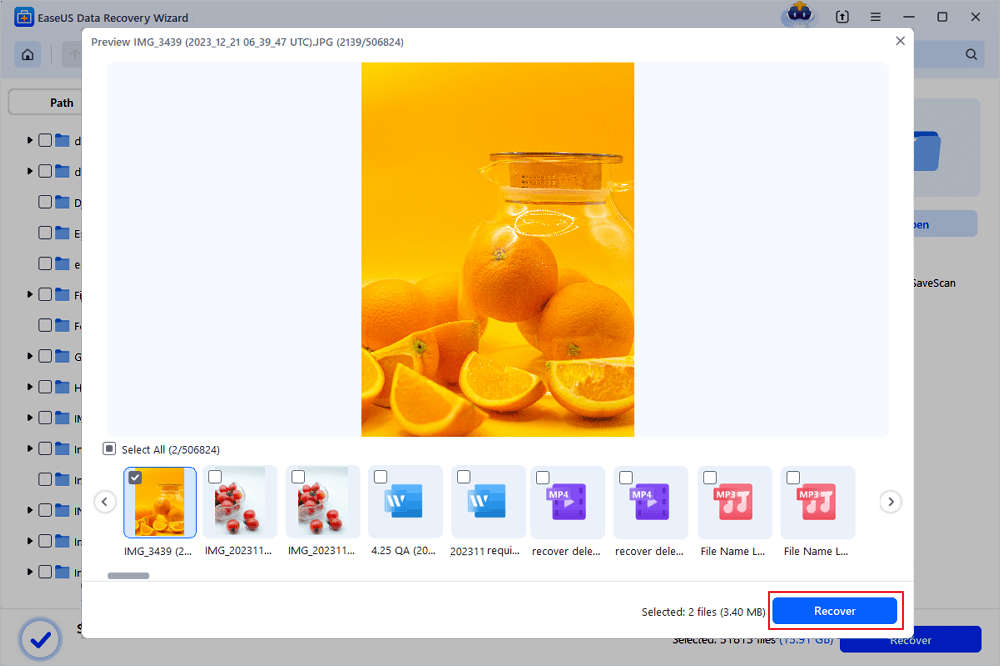
Preview the recoverable files. Then, select files you want to restore and click "Recover" to store the files at a new storage locations instead of the disk where the data was previously lost. You can choose a cloud storage, such as OneDrive, Google Drive, etc., and click "Save" to save your recovered files.
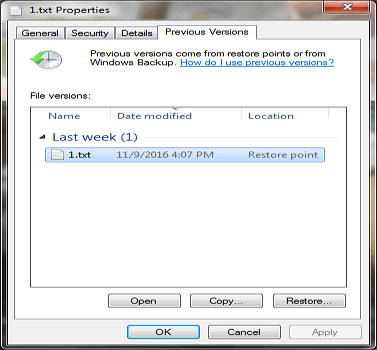
Method 2. Restore Deleted Files from the Previous Versions
- Notice:
- This method only works when you have created backups by using Windows Backup. If you don't turn on this feature, this tip may not work. If so, go back to Method 1 and use a reliable data recovery tool to make things done.
- Open This PC/Computer.
- Locate the folder where you used to save the deleted files.
- Right-click the folder and choose to "Restore previous versions".
- Select the versions that you need and click "Restore".
How to Prevent Windows 10 from Automatically Deleting Files
Storage Sense in Windows 10 is a fairly new feature. When turned on, it will automatically delete unused files and temporary files when your computer is low on disk space. It also can delete older files in the Downloads folder and the Recycle Bin to free up space. If you don't want Windows 10 delete files by itself, you can turn off Storage Sense in the ways below.
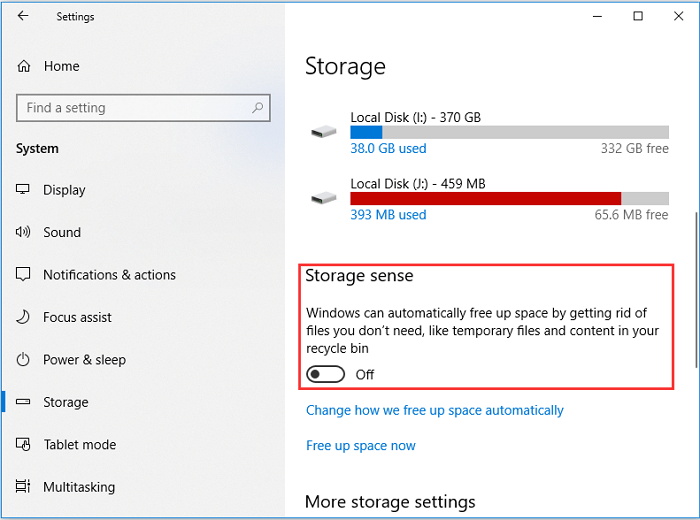
- Open the "Settings" app. Click the "System" category and then click "Storage".
- Move the "Storage Sense" switch to the off position to turn off the feature. When the feature is turned off, it will not automatically delete files to free up disk space.
Was this page helpful?
-
Jaden is one of the editors of EaseUS, who focuses on topics concerning PCs and Mac data recovery. Jaden is committed to enhancing professional IT knowledge and writing abilities. She is always keen on new and intelligent products.…
-
Brithny is a technology enthusiast, aiming to make readers' tech lives easy and enjoyable. She loves exploring new technologies and writing technical how-to tips. In her spare time, she loves sharing things about her game experience on Facebook or Twitter.…

20+
Years of experience

160+
Countries and regions

72 Million+
Downloads

4.9 +
Trustpilot Score


Free Data
Recovery Software
Recover data up to 2GB for free!
