Page Table of Contents
Reviews and Awards
How do I transfer my Skype to another computer
"I was going to work in another city, and I have a few Skype conference in the next few days. I have to transfer Skype with settings and chatting history to the new laptop.
Do you know how to transfer and move the Skype app with its settings, chat history to a new computer? If you know the solution, help me please."
As its advertisement, Skype makes it easy for you to keep in touch with all your friends, families, colleagues, and clients anytime and anywhere. With its popular feature, Skype is a top-ranked app and wildly used by world users.
So the need for transferring Skype with settings, chat history, etc., to a new PC also increases. On this page, we'll guide you to effectively transfer Skype with settings, chat history to a new computer with the help of automated PC transfer software.
Follow on, and learn how to move Skype to your new PC with ease.
Preparations
Here is a list of tools that you need to prepare for transferring Skype:
- 1. Two computers - the source and the new PCs.
- 2. An empty USB drive: over 30GB free space.
- 3. Download and install PC transfer software - EaseUS Todo PCTrans on both source and target PCs.
EaseUS Todo PCTrans enables users to easily transfer desired programs, software, files, and folders to another computer.
- Support: Windows 10/8.1/8/7/XP/Vista, Windows Server 2019/2016/2012/2008/2002.
- Support: Skype, Skype Live Chat, Office, Outlook, Adobe, etc.
With it, you can directly transfer programs and files to another computer via "PC to PC" or "Backup & Restore".
Here you can directly transfer Skype together with settings, and chat history files to the new PC at one time with the free "Backup & Restore" feature in EaseUS Todo PCTrans.
Note: Activation is necessary for a smooth transferring process.
You can click the button here to get the EaseUS Todo PCTrans for unlimited transferring capacity now:
Tutorial: Transfer Skype with Settings, Chat History to A New PC
Before transferring, you need to locate the location where does Skype stores its settings, chat history on your PC.
Here are some important tips that you should know for Skype transferring:
1. Browse the default location to find Skype settings and chat history: C:\Users\User Name\AppData\Local\Packages\Microsoft.SkypeApp
2. Back up Skype: Click Application to choose Skype app, and File to locate Skype settings, and chat history folder.
Now, you can follow through the process on your two PCs to accomplish the transferring process for free:
On the old PC:
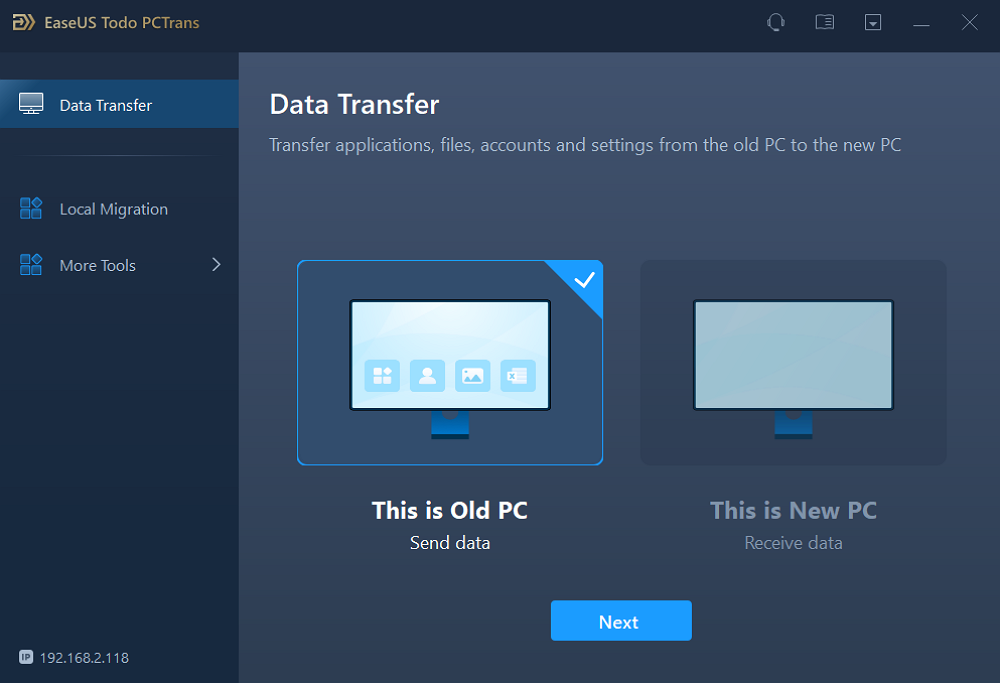
Step 1. Launch EaseUS Todo PCTrans and click "Data Transfer" on the main screen. Select "This is Old PC" and click the "Next."
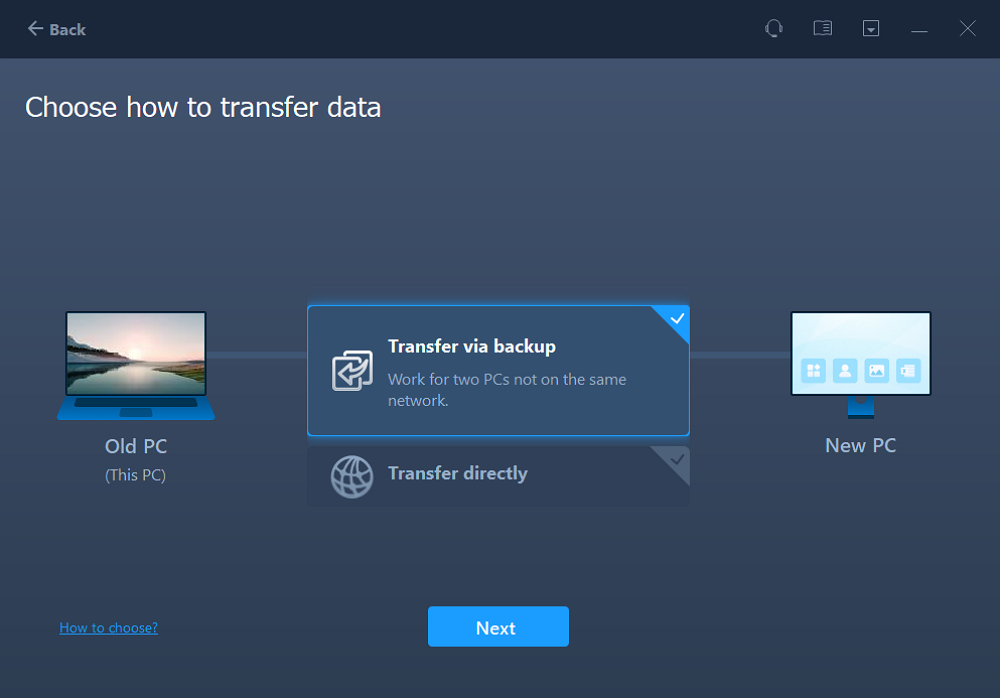
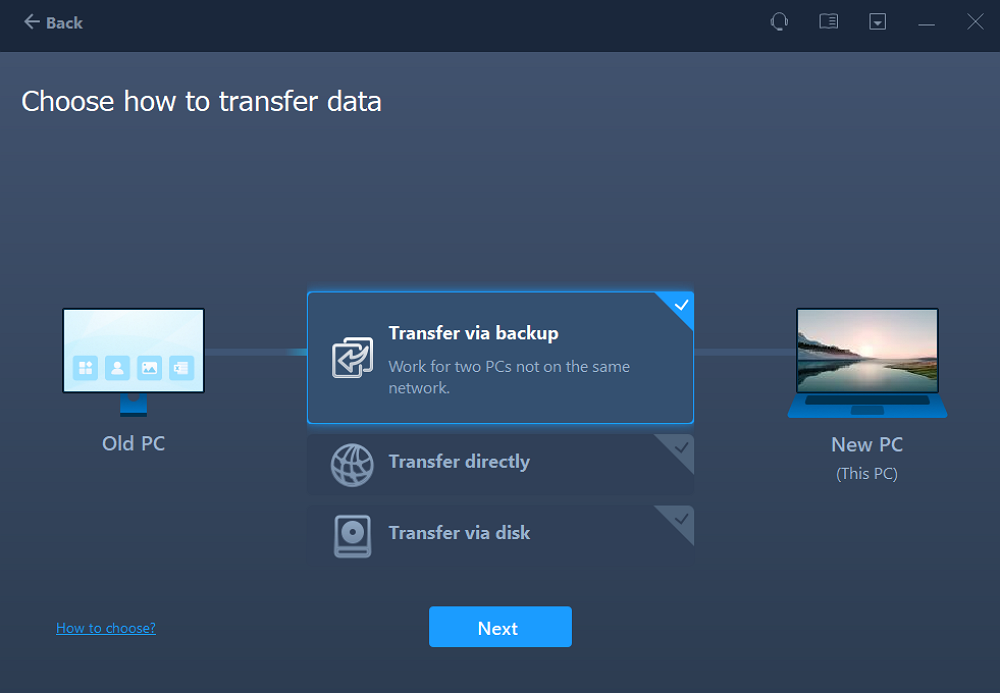
Step 2. Choose the "Transfer via backup" method and click the "Next."
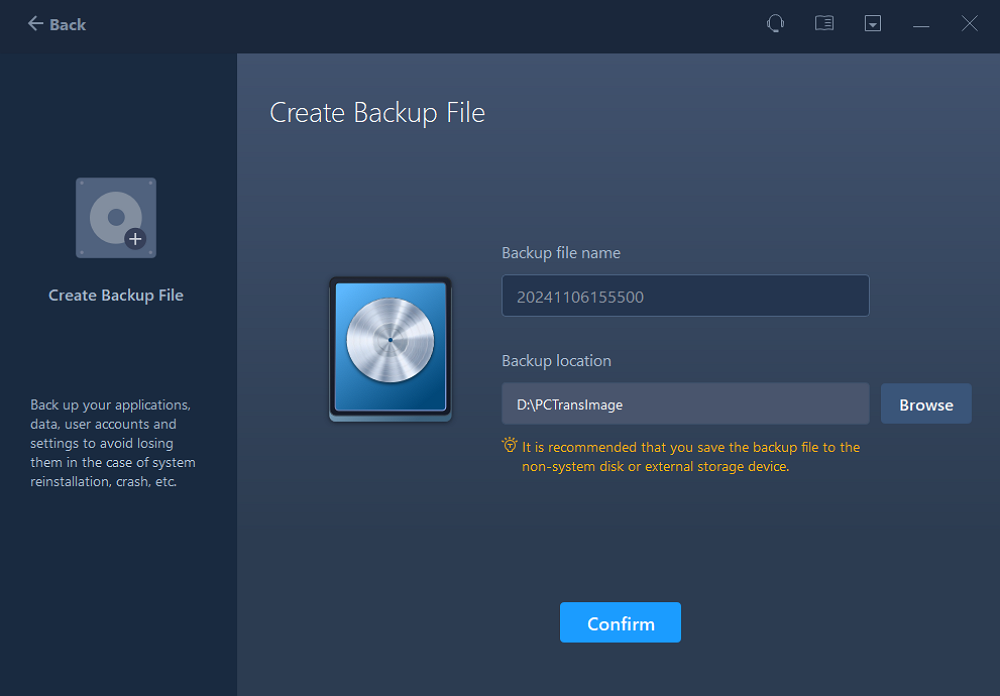
Step 3. Confirm the backup file name and backup location (Please save your files to a location where the new PC can access, like an external hard disk or shared network location.)
Step 4. Tick the Applications, Files, and Accounts that you wnat to backup. Click the "Backup" option to execute the process.

On the new PC:
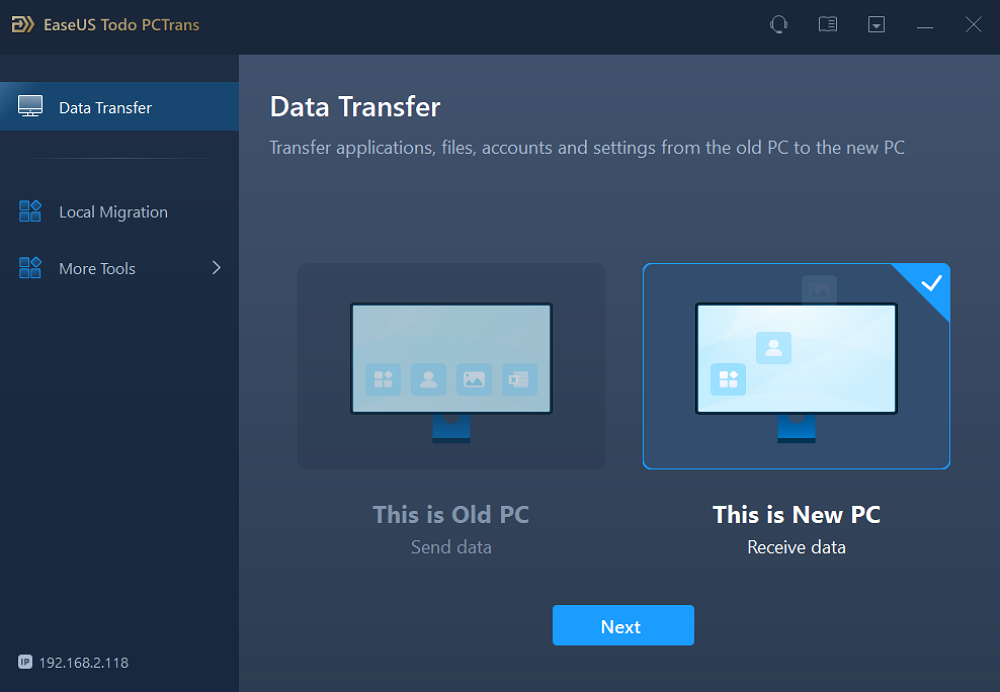
Step 1. Lauch EaseUS Todo PCTrans on your new PC, and choose "This is New PC" in the "Data Transfer" section.
Step 2. Selcet "Transfer via backup" and click "Next."
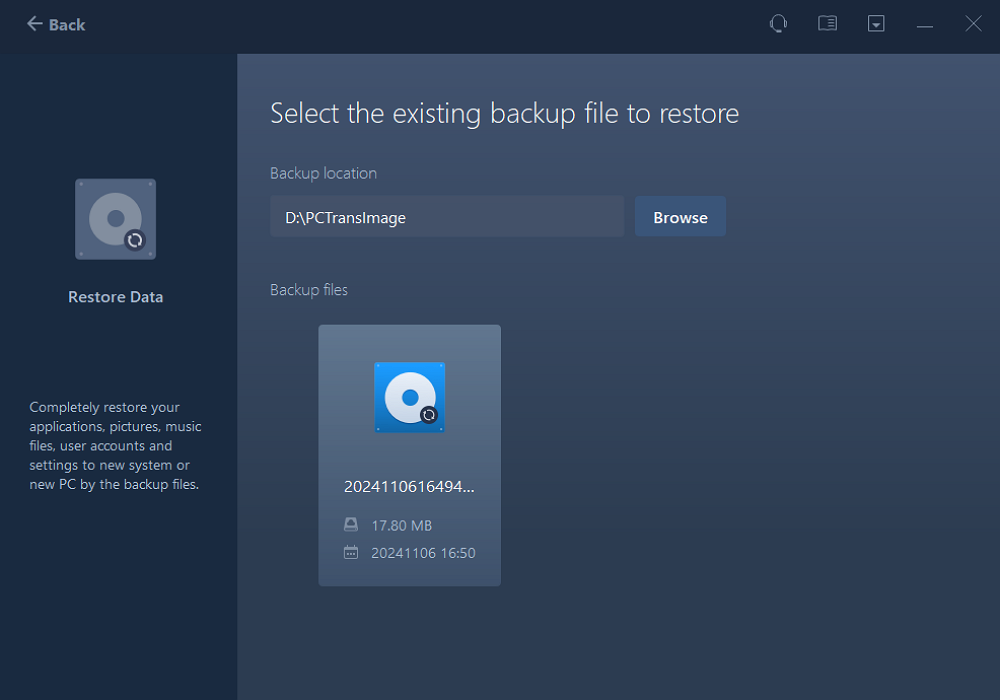
Step 3. Browse the "Backup location" of your existing backup files.
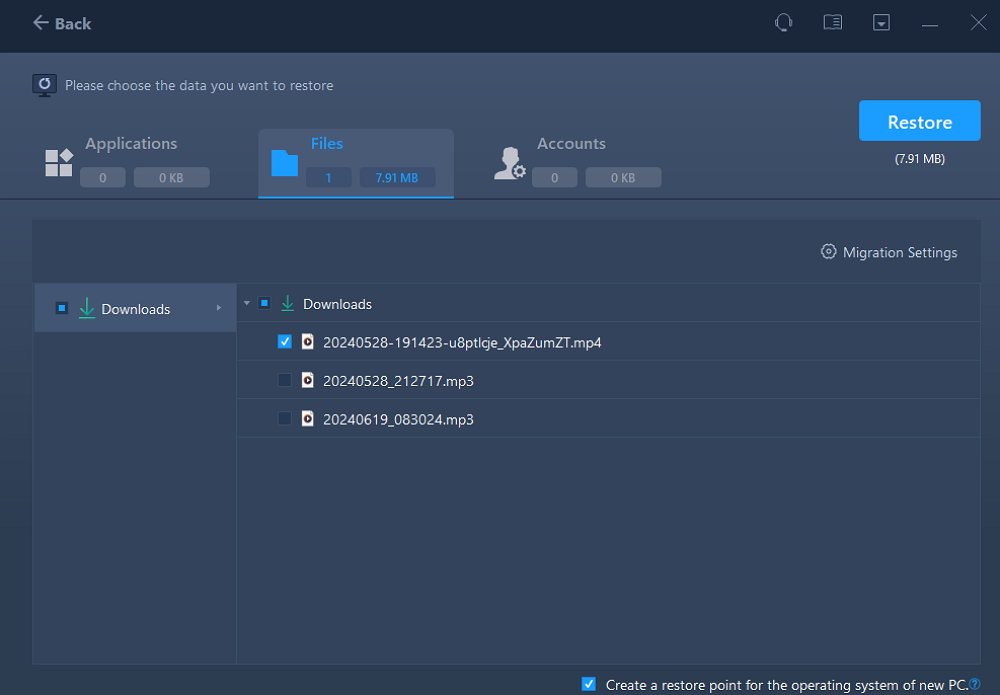
Step 4. Select the wanted Applications, Files , and Accounts to "Restore."
Follow-Up: Make Transferred Skype, Settings, Chat History to Work
When the transferring process finishes, go through the below tips to make transferred Skype with settings, chat history to work:
1. Save Skype settings, chat history folder to the right location
Check whether Skype settings, chat history folder have been saved to the default location: C:\Users\User Name\AppData\Local\Packages\
If the folder is empty, copy the Microsoft.SkypeApp folder and save it to this location.
2. Restart PC to keep all the changes.
3. Certify your Skype account.
If the transferred games and applications require certification, enter your Skype accounts with the password.
About the Author
Roxanne is one of the main contributors to EaseUS and has created over 200 posts that help users solve multiple issues and failures on digital devices like PCs, Mobile phones, tablets, and Macs. She loves to share ideas with people of the same interests.
Written by Tracy King
Tracy became a member of the EaseUS content team in 2013. Being a technical writer for over 10 years, she is enthusiastic about sharing tips to assist readers in resolving complex issues in disk management, file transfer, PC & Mac performance optimization, etc., like an expert.
Reviews and Awards
-
EaseUS Todo PCTrans Free is a useful and and reliable software solution created to serve in computer migration operations, be it from one machine to another or from an earlier version of your OS to a newer one.
Read More -
EaseUS Todo PCTrans is by the folks at EaseUS who make incredible tools that let you manage your backups and recover your dead hard disks. While it is not an official tool, EaseUS has a reputation for being very good with their software and code.
![]() Read More
Read More
-
It offers the ability to move your entire user account from your old computer, meaning everything is quickly migrated. You still get to keep your Windows installation (and the relevant drivers for your new PC), but you also get all your apps, settings, preferences, images, documents and other important data.
Read More
Related Articles
-
How to Move Game to M.2 SSD without Reinstalling
![author icon]() Sherly/2025/01/23
Sherly/2025/01/23 -
How to Copy/Transfer Microsoft Office to Another Computer With USB Flash Drive
![author icon]() Jean/2025/01/23
Jean/2025/01/23 -
Can I Transfer My Adobe Programs to a New Computer [Tutorial]
![author icon]() Sherly/2025/01/23
Sherly/2025/01/23 -
How to Move OneDrive from C to D - 2 Ways ✔️
![author icon]() Cici/2025/01/23
Cici/2025/01/23