
Content
Page Table of Contents
About the Author
Hot Topics
Updated on Jun 17, 2026
Key Takeaways
This article issues how to format NVMe SSD Windows 10/11 using EaseUS Partition Master (Lifewire-recommended), Disk Management, and Command Prompt.
Go to Solutions
To-Do List Before Formatting NVMe SSD
How to Format NVMe SSD Windows 10/11
After Formatting - Enter TRIM on SSD to Optimize Performance
Can You Format NVMe SSD?
Yes, you can. Let's issue the common reasons for formatting NVMe SSD.
There are two main reasons why people format NVMe SSDs. The first is for compatibility reasons. Many devices, such as smartphones and tablets, use different file systems than traditional hard drives. As a result, they may not be able to read data from an NVMe SSD that uses a different file system. By formatting the drive, you can ensure that your device can read the data on the drive.
The second reason why people format NVMe SSDs is for performance reasons. You're resetting a drive to its factory settings when you format it. This can help improve your computer's speed and efficiency by clearing out any unwanted files or programs that may be taking up space on your drive.
Further Reading: Format Hard Drive from BIOS Windows 10
To-Do List Before Formatting NVMe SSD
#1. Backup Important Data
Before formatting an NVMe SSD, it is essential to back up any critical data that is stored on the drive. This data can include personal files, applications, and operating system settings. One way to back up this data is to use free backup software that supports NVMe drives. Another way is to copy the data to a separate storage location, such as an external hard drive or cloud storage service. Once the backup is complete, the data can be safely cleared from the NVMe SSD without fear of losing any vital information.
#2. Select Quick Format & Full Format
While quick formatting a drive will delete the files and folders on it, full formatting will write over existing data with zeroes, making it much more difficult to recover lost files. As a result, quick formatting is generally sufficient for most users. However, if you are worried about sensitive data falling into the wrong hands, full formatting may be a better option. Keep in mind that quick formatting is a quick and easy way to refresh a drive, but it won't protect your data as well as full formatting will.
How to Format NVMe SSD Windows 10/11
Here are three methods you can choose to format your NVMe SSD. If you are unfamiliar with Disk Management or command lines, we recommend the first option, which finishes formatting in three steps.
#1. Format NVMe via EaseUS Partition Master
#2. Use Disk Management to Format NVMe for Windows 10
#3. How to Format NVMe SSD in BIOS
#1. Format NVMe via EaseUS Partition Master
EaseUS Partition Master is a reliable and free SSD format tool that can help you effectively format your SSD drive. It is straightforward and can format your SSD drive in just a few simple steps. This tool can also easily resize, move, split, merge, create, delete, and convert partitions on your SSD drive.
In addition, EaseUS Partition Master also provides other useful features such as disk/partition clone, dynamic disk manager, and more. EaseUS Partition Master Free is an excellent tool to help you better manage your SSD drive.
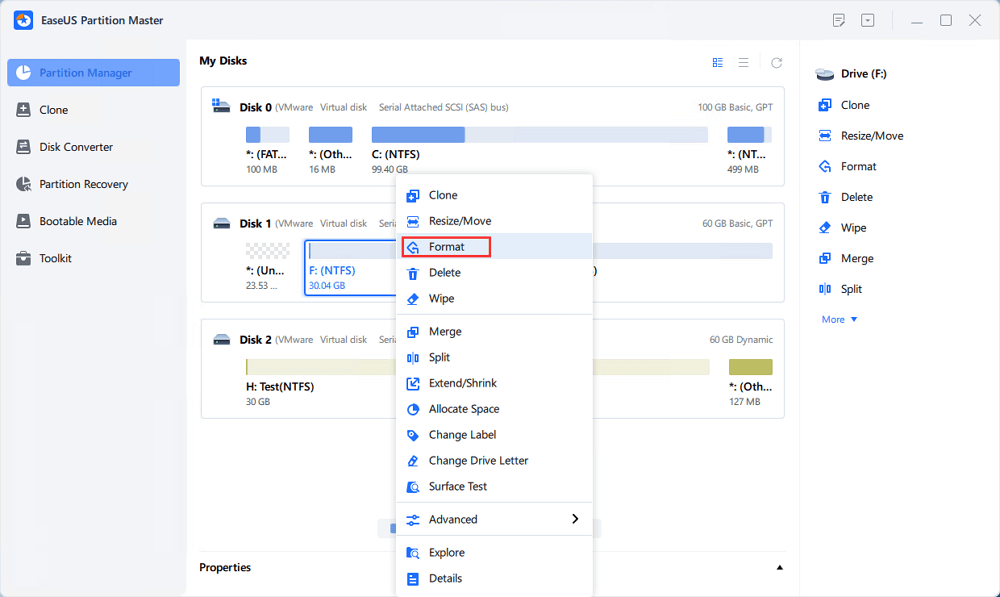
Step 1. Run EaseUS Partition Master, right-click the hard drive partition you intend to format and choose "Format".
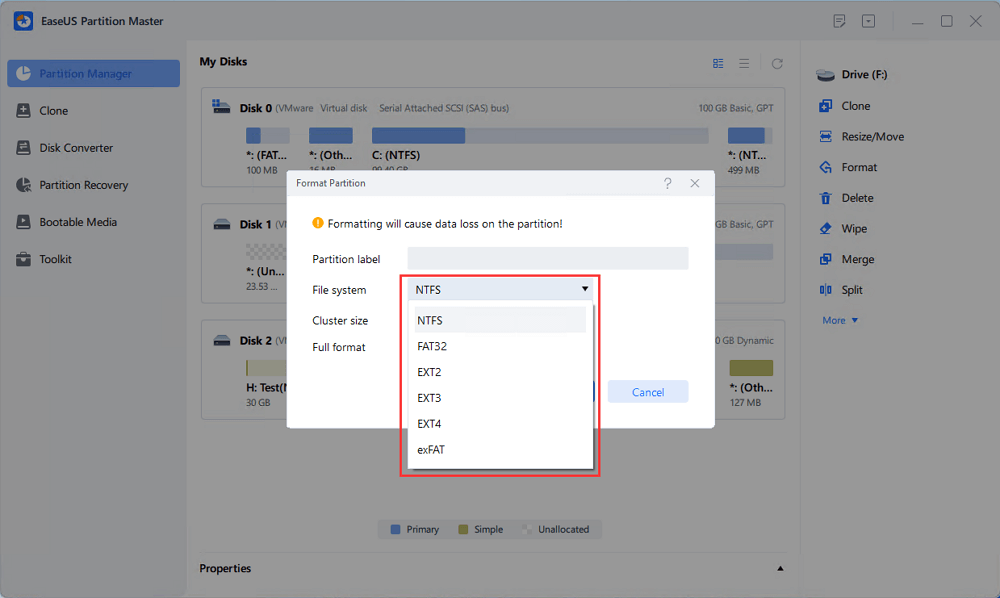
Step 2. In the new window, set the Partition label, File system (NTFS/FAT32/EXT2/EXT3/EXT4/exFAT), and Cluster size for the partition to be formatted, then click "OK".
Step 3. Then you will see a warning window, click "Yes" in it to continue.

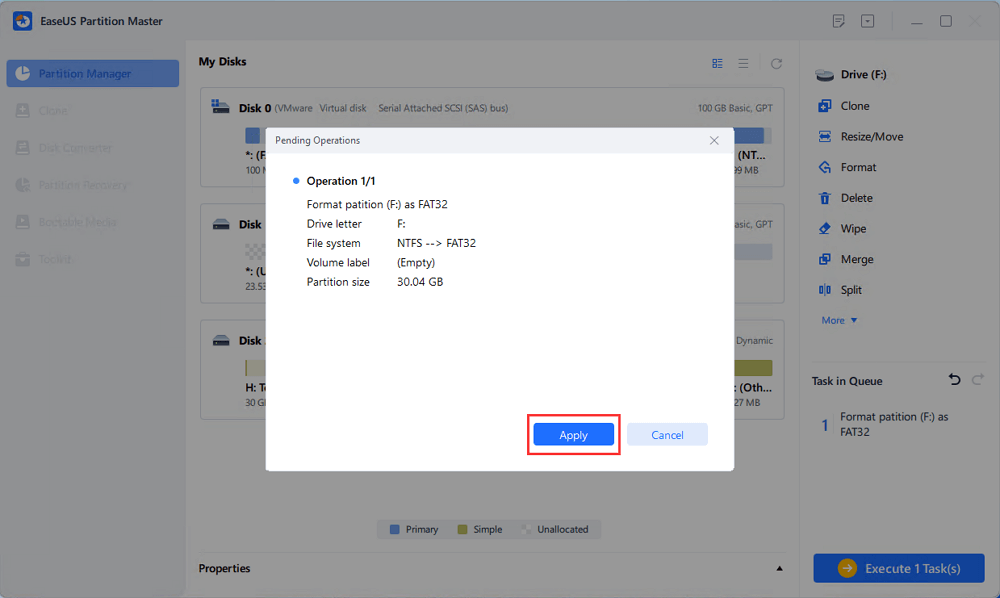
Step 4. Click the "Execute 1 Task(s)" button to review the changes, then click "Apply" to start formatting the partition on your hard drive.
#2. Use Disk Management to Format NVMe for Windows 10
To Format NVMe Drive:
1. Right-click the Start icon and select Disk Management.
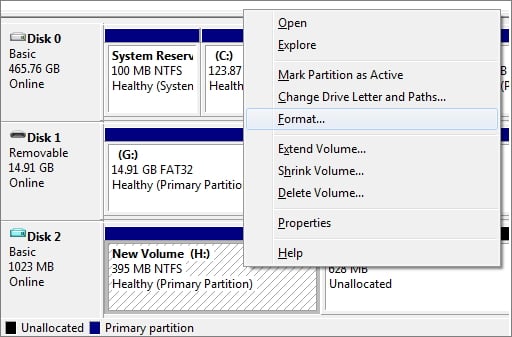
2. Choose the disk you want to format. Right-click it and select Format.
3. Select the compatible file system format.
4. Check Perform a quick format.
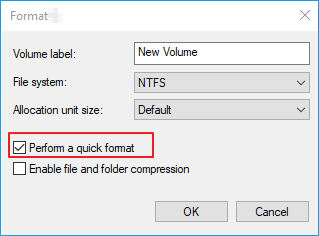
5. Click OK.
To Format NVMe for Windows 10 Install:
1. Open Disk Management and find your NVMe drive.
2. Right-click Drive and select Initialize Disk. (Initialize to MBR.)
3. Then right-click the partition and click Format.
4. In the pop-up window, select the file system and click OK.
#3. How to Format NVMe SSD in BIOS
1. Boot your PC with Windows installation media.
2. Click the "Repair your computer" on the Windows Setup window.
3. Go to "Troubleshoot" > "Command Prompt".
4. Type commands:
diskpart
list volume
select volume X (X = your partition number.)
format fs=ntfs quick or format fs=fat32 quick
assign
exit

Do you like the three ways to format NVMe SSD on Windows? If you have other friends who are searching for this, click the social buttons to share it with them.
After Formatting - Enter TRIM on SSD to Optimize Performance
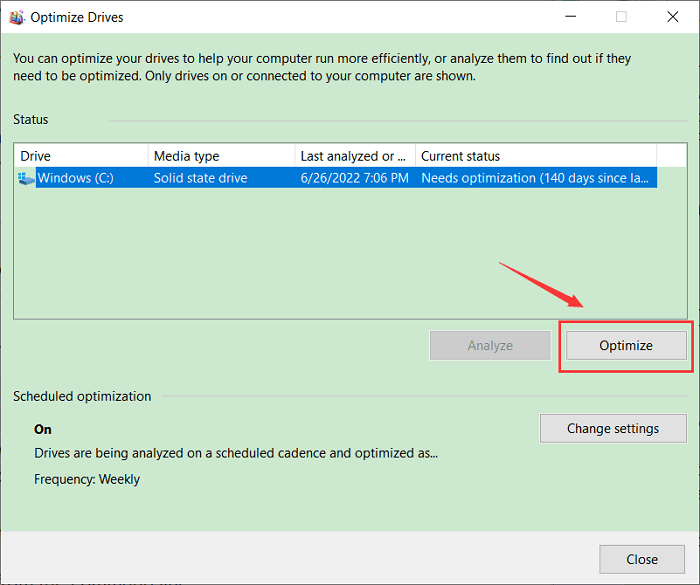
1. Open the Windows search menu and type "Defragment and Optimize Drives" on the box.
2. Once the "Optimize Drives" window shows, select the SSD and click Optimize button.
Format NVMe SSD Windows 10/11 FAQs
1. How do I format my NVMe SSD enclosure?
Step 1. Connect the NVMe SSD enclosure to your computer using a USB cable. Next, open the Disk Management utility by pressing the Windows key + R, then typing diskmgmt.msc into the Run dialog box. Step 2. Locate your NVMe SSD enclosure in the list of devices. Right-click on the device and select Format.
Step 3. In the format dialog box, choose the desired file system (NTFS or FAT32) and allocation unit size, then click Format.
2. How do I format my NVMe SSD to FAT32?
Step 1. Open This PC and select the drive you want to format.
Step 2. Right-click on the drive and select Format…
Step 3. In the File System dropdown, select FAT32.
Step 4. Click the Start button.
Step 5. Click OK to confirm.
Step 6. Click OK to format the drive.
3. How do I wipe data from NVMe?
While the process of wipe data from NVMe is not complicated, it is essential to take the time to ensure that all data is completely and irrevocably removed from the drive. The first step is using a disk wipe utility to write zeros over all of the information on the drive, effectively rendering the data unrecoverable. Once the disk wipe is complete, the drive should be reformatted to prevent any future attempts at recovery.
How Can We Help You
About the Author
Updated by Tracy King
Tracy became a member of the EaseUS content team in 2013. Being a technical writer for over 10 years, she is enthusiastic about sharing tips to assist readers in resolving complex issues in disk management, file transfer, PC & Mac performance optimization, etc., like an expert.
Product Reviews
-
I love that the changes you make with EaseUS Partition Master Free aren't immediately applied to the disks. It makes it way easier to play out what will happen after you've made all the changes. I also think the overall look and feel of EaseUS Partition Master Free makes whatever you're doing with your computer's partitions easy.
Read More -
Partition Master Free can Resize, Move, Merge, Migrate, and Copy disks or partitions; convert to local, change label, defragment, check and explore partition; and much more. A premium upgrade adds free tech support and the ability to resize dynamic volumes.
Read More -
It won't hot image your drives or align them, but since it's coupled with a partition manager, it allows you do perform many tasks at once, instead of just cloning drives. You can move partitions around, resize them, defragment, and more, along with the other tools you'd expect from a cloning tool.
Read More
Related Articles
-
Best Disk Benchmark Software for Mac | Free Download
![author icon]() Sherly/2026/06/17
Sherly/2026/06/17 -
How to Remove Write Protection from Pen Drive
![author icon]() Jean/2026/07/01
Jean/2026/07/01 -
How to Install Windows 11/10 on External Hard Drive [2 Ways]
![author icon]() Jean/2026/06/29
Jean/2026/06/29 -
How to Access Asus Laptop Boot Menu to Boot From USB
![author icon]() Jean/2026/06/17
Jean/2026/06/17


