Page Table of Contents
PAGE CONTENT:
Many computer users have complained that they encounter the hard drive showing the wrong size after cloning. So why does a cloned drive show the wrong size? And how to fix this problem?
This article offered by EaseUS will explain the common reasons that can cause the cloned hard drive shows wrong size or the cloned drive not showing full capacity error and how to fix it. Let's come to the details.
Why Is Cloned Hard Drive Showing Wrong Size
To figure out why the cloned hard drive shows the wrong size, one should know the cloning principle first. Cloning allows you to duplicate both the disk's original structure and its data. In other words, the old hard disk and the cloned hard disk are identical.
When you upgrade to a bigger hard disk, you may find the partition size on the target disk will remain unchanged. In other words, the cloned drive is not showing full capacity.
This is because when cloning a hard drive, you clone not only the data in the drive but also the partition size. Therefore, if the target disk is larger than the source disk, most cloning software will leave the extra space on the destination as unallocated space. In addition, it is also possible that the cloning process was not executed correctly. As a result, you will encounter the issue that a hard drive shows the wrong capacity.
However, you cannot access the stored data or add new data to the unallocated space since it is invisible in Windows File Explorer. That is why the cloned hard drive shows the wrong size in File Explorer instead of Disk Management.
How to Fix Cloned Hard Drive Shows Wrong Size
You need to shrink, extend, or transfer the current partition on the disk to the unallocated space for File Explorer to display the full capacity of the cloned hard drive. But how to resize or move the partition on your computer?
Fortunately, you can use Windows built-in programs, like Disk Management or Diskpart, to help you. Let us come to see how they can help you solve the 'cloned drive shows wrong size' error.
Solution 1. Use Disk Management
You can try shrinking the current partition using Disk Management to identify the "unshown" disk space and extending it to the entire size if the cloned hard drive shows the wrong size in File Explorer. Here's how to use Windows 10 or 11's Disk Management to resize or expand partitions.
How to Shrink Disk Partition
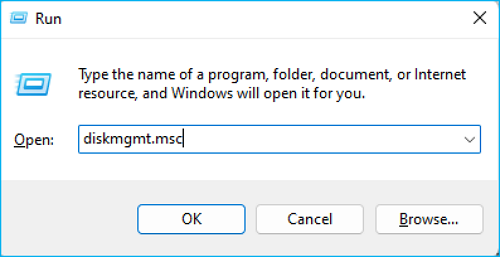
Step 1. Press Windows + R to launch the Run box. Then, type diskmgmt.msc and hit Enter.
Step 2. Right-click on the target partition and choose Shrink Volume.
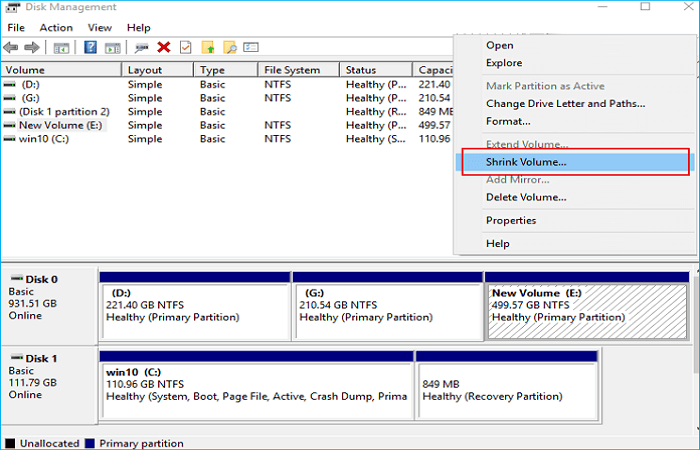
Step 3. Enter the amount of space, such as 200, in the pop-up window, and click Shrink.

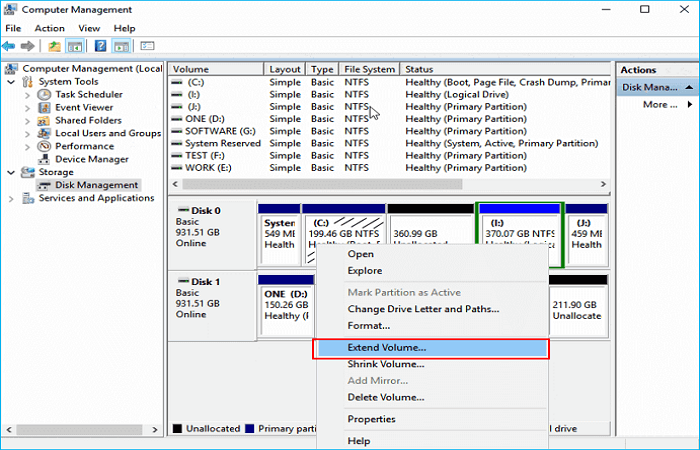
How to Extend Disk Partition
Step 1. Right-click on the partition and choose Extend Volume.
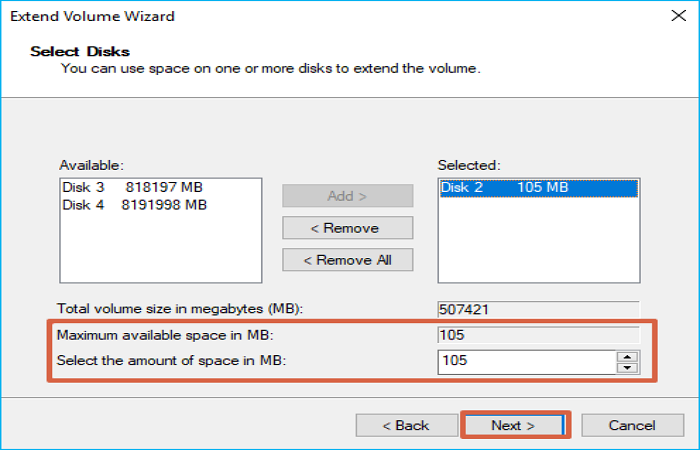
Step 2. Tap Next and choose the cloned disk.
Step 3. Adjust the space you want to extend the target volume. Click on Next > Finish.
However, some users argue they can't extend the partition volume because the extend volume option is greyed out. Under such circumstances, you can move to the following solution.
Solution 2. Use Diskpart
The Windows built-in utility Diskpart can also shrink/extend partitions. It is a command-line utility that lets you manage volumes, virtual hard disks, partitions, and disks. Here's how to use Diskpart to resolve the "hard disk shows the wrong size after cloning" problem.
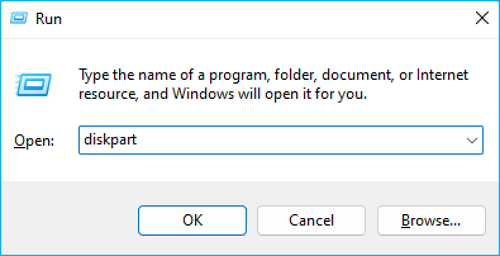
Step 1. Launch the Run dialog box again, then type diskpart and press Enter.
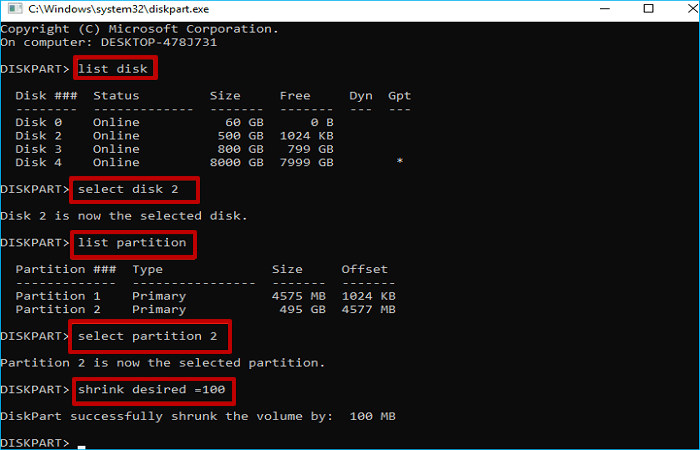
Step 2. Type the following command lines in the pop-up window and hit Enter each time.
- list disk
- select disk X ("x" refers to the target cloned hard drive, e.g., select disk 2.)
- select partition X (replace "x" with the disk number you want to shrink its volume, e.g., select partition 2)
- shrink desired=X (replace "x" with the amount of space you need to shrink in MB, e.g., shrink desired = 100)
Step 3. You can extend the partition after shrinking the partition. Type the following command:
- select partition 2
- extend size=X (Enter the maximum available space of the unallocated space in MB)
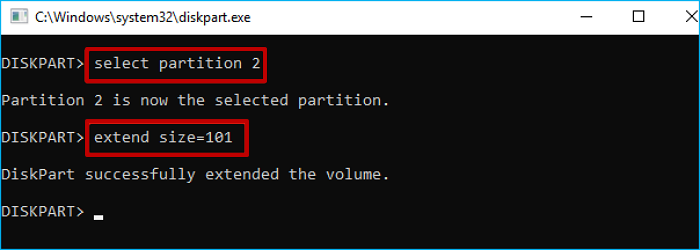
Step 4. Type exit to finish and close Diskpart.
Share this post on your social media to help more people.
How to Avoid Cloned Hard Drive Showing Wrong Size
As for how to avoid the cloned hard drive showing wrong size, you can use more effective and powerful cloning software to help you. EaseUS Disk Copy is exactly the one that can meet your needs. It can help clone a hard drive with different sizes without showing the wrong size.
Windows 11/10/8/7
EaseUS Disk Copy is a practical and versatile disk cloning software compatible with Windows 7/8/10/11. It can help you clone your system, disk, and partition. If you want to replace a laptop hard drive and reinstall operating systems, it can help you a lot.
It also lets you clone kinds of SD cards, such as a navigation SD card, and clone HDD to SSD. In addition, it lets you upgrade a hard drive without losing data and transfer the C drive to a new SSD.
What makes this cloning software so recommendable?
- Migrate OS from HDD to SSD or SSD to SSD
- Clone M.2 SSD with only one slot
- Clone a hard drive for backup and recovery
- Clone a hard drive with bad sectors
- Faster cloning speed and premium technical support
Here is how to clone a hard drive with EaseUS Disk Copy.
Before cloning:
- If your computer has only one slot, connect the target disk to your machine via a USB-to-SATA/NVMe adapter.
- If your computer has an extra slot, install the target disk into the empty slot properly, and make sure it is compatible.
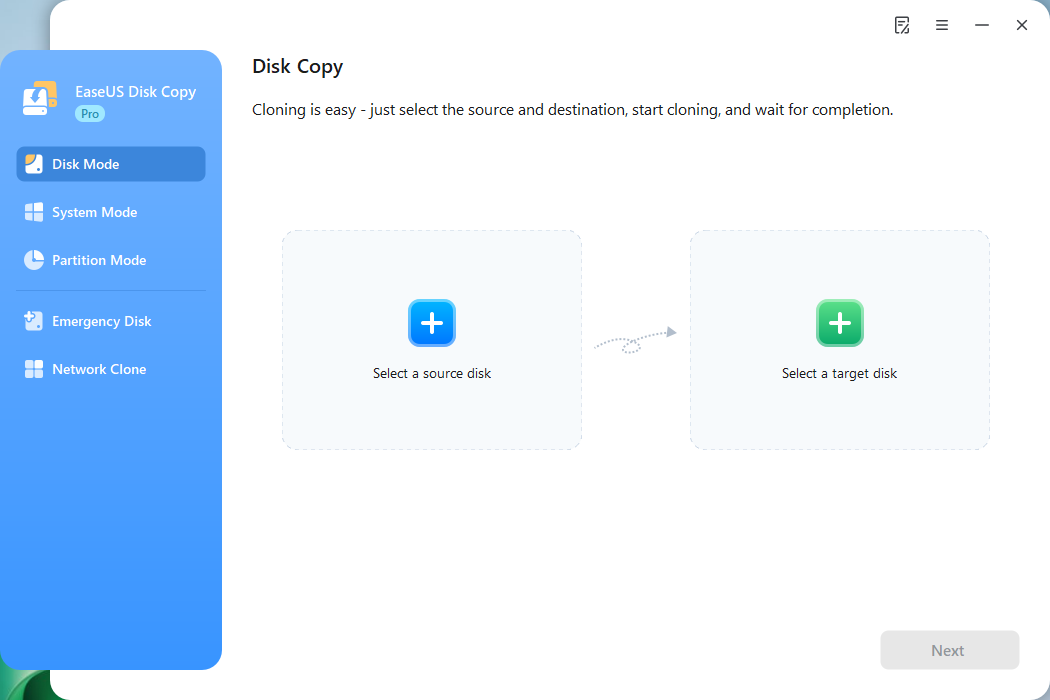
Step 1. Launch EaseUS Disk Copy and choose Disk Mode.
Install EaseUS Disk Copy cloning software on your Windows computer, then launch it and select Disk Mode from the left panel.
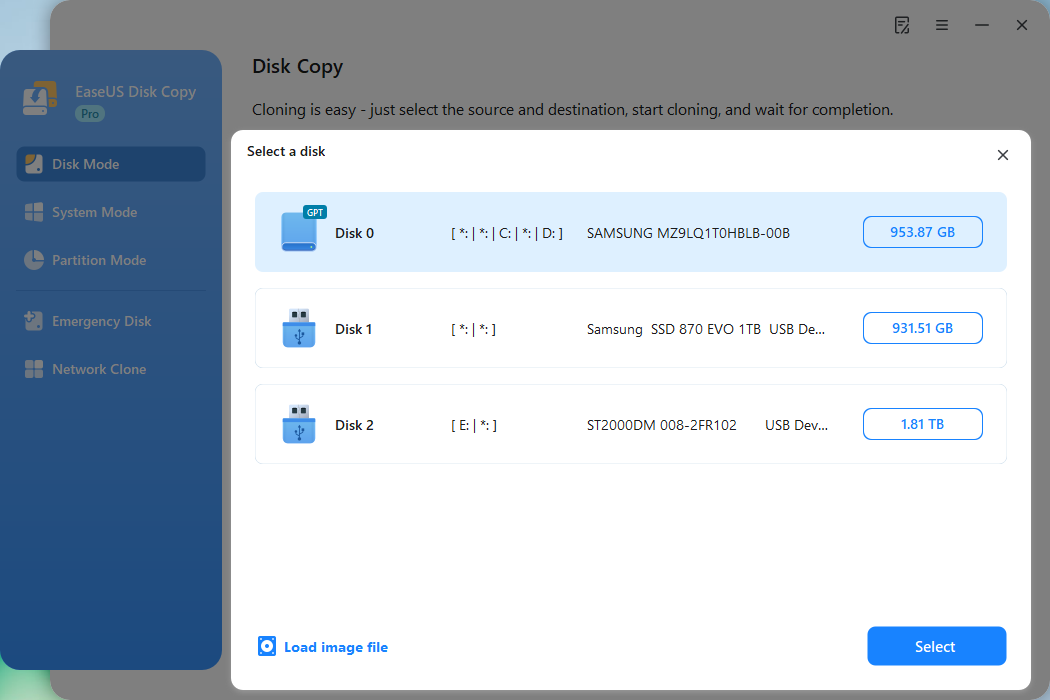
Step 2. Select the source drive.
Select the drive you want to copy, then click Select.
Step 3. Choose the target disk.
Choose the disk that you want to clone data to, and click Select. Note that the used space of the source disk should be less than the target disk capacity.
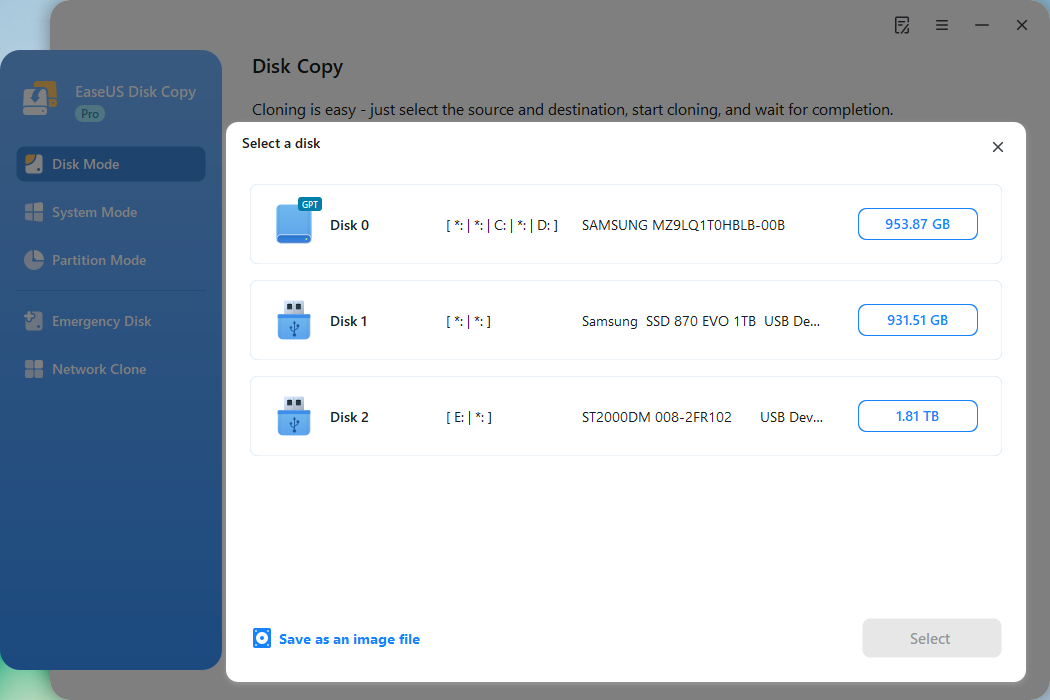
*At this step, you can also click the option "Save as an image file" to store your disk as a compressed image file, which can be restored without any data loss.
Step 4. Adjust disk layout.
Specify the target disk layout as your preference. You can choose among:
- Autofit the disk: makes some changes by default on the destination disk layout so that it can work at its best.
- Copy as the source: create a 1-to-1 copy of your source disk; the layout is the same as the source disk.
- Edit disk layout: allows you to manually resize/move the partition layout on this destination disk.
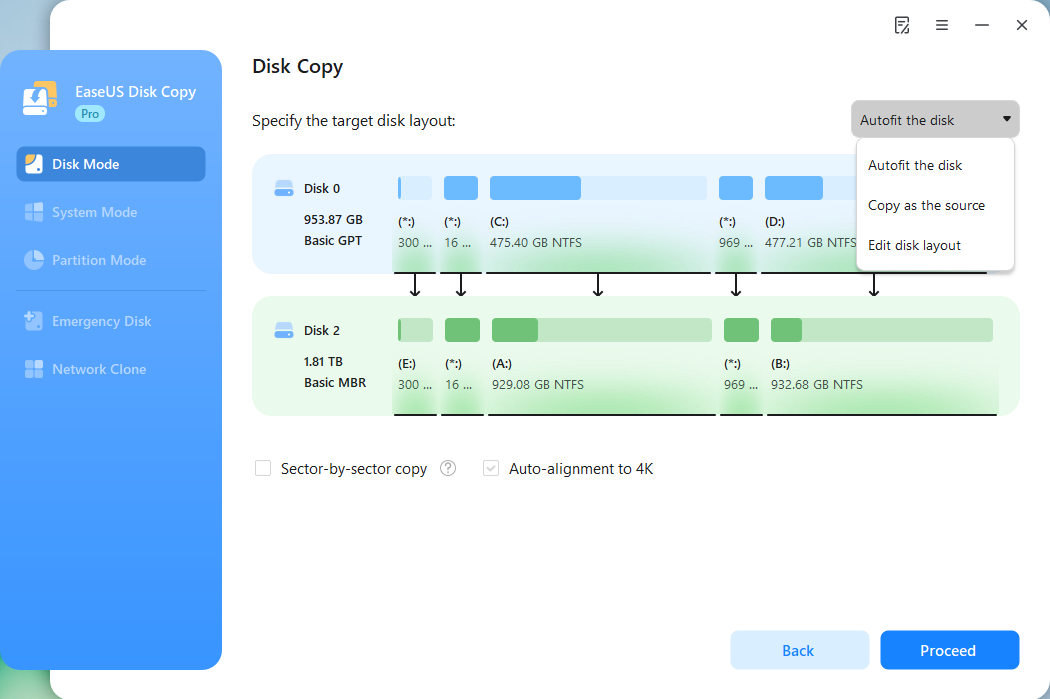
*If the target disk is an SSD, the option "Auto-alignment to 4K" will be checked automatically to optimize the performance of your SSD.
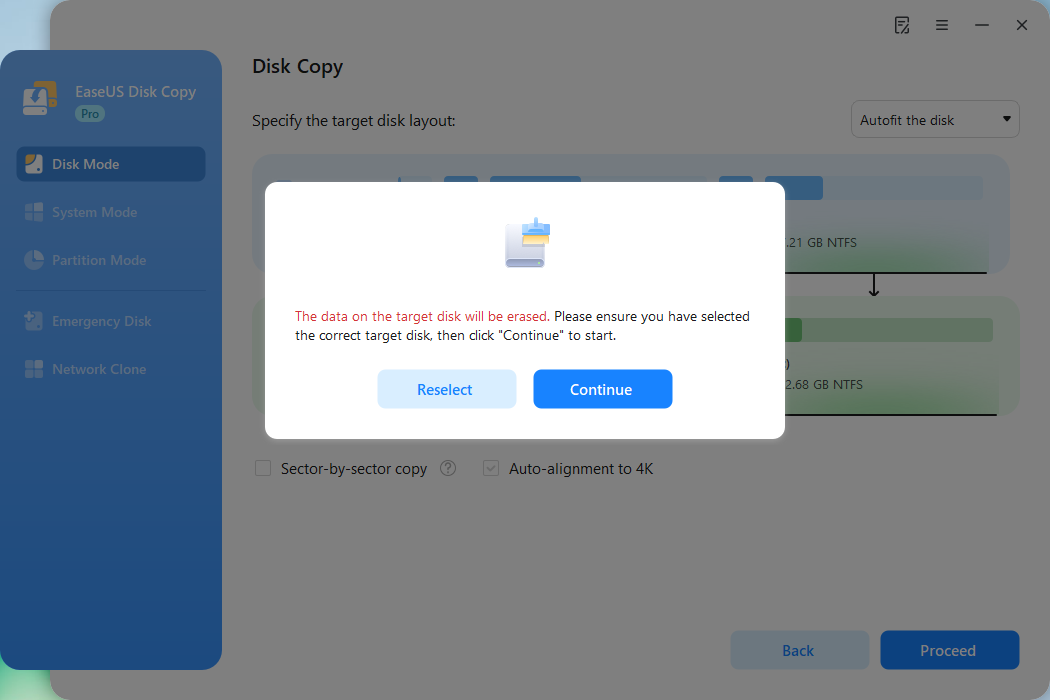
Step 5. Start cloning.
Click Proceed, and a message will appear, warning you that data will be lost. Confirm the message by clicking Continue.
Now, it will start executing the cloning task.
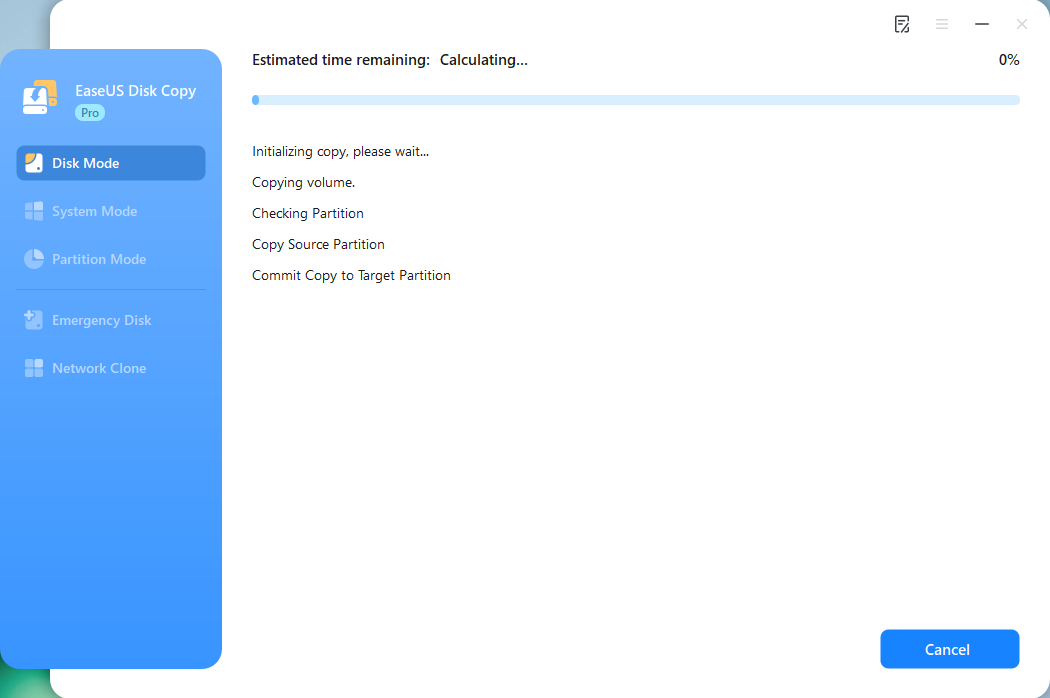
*The time it takes to clone a hard drive depends on how much data is on the source disk, and it will also be affected by the disk types, USB connection, etc.
To Wrap Things Up
How to fix the cloned hard drive shows wrong size? This is usually caused by the size of the partition on the destination disk remains unchanged by default error. You can find your answer to your cloned SSD showing wrong capacity error in this article. All in all, you can use the Windows built-in tool, including Disk Management and Diskpart, to help you shrink and extend partition volume.
However, sometimes, these two tools will not work as you expected. Therefore, you can use other cloning software, like EaseUS Disk Copy, to help you upgrade to a larger hard drive or clone a hard disk. This powerful and easy-to-use cloning tool can help you install Windows 7 on NVMe SSD and clone your C drive to an external drive. More practical features are waiting for you to explore and use.
Windows 11/10/8/7
FAQs on Cloned Hard Drive Shows Wrong Size
1. Why is my cloned drive smaller?
This is because when cloning a hard drive, you clone not only the data in the drive but also the partition size. Therefore, if the target disk is larger than the source disk, most cloning software will leave the extra space on the destination as unallocated space.
2. Does a cloned drive have to be the same size?
No, it does not have to be the same size. You can clone a hard drive to a smaller SSD/HDD. You must ensure that the target hard disk can accommodate all data on the source disk.
3. Why is my SSD not booting after cloning?
Cloned SSD not booting has many factors to consider. The following are some of them:
- Cloned SSD is not configured as the boot disk.
- SSD incompatibility with BIOS boot mode.
- The disk copying process was messed up or stopped.
- Missing boot partitions or boot components, incomplete clones.
-
Updated by
![]()
Jerry
"I hope my articles can help solve your technical problems. If you are interested in other articles, you can check the articles at the bottom of this page, and you can also check my Facebook to get additional help."…Read full bio