NVMe drives are becoming more and more popular, and for good reason. They offer much higher speeds than traditional SATA drives, and they're more power-efficient too. If you're looking to upgrade your computer's storage drive, you might be wondering if you can install Windows 11 on an NVMe SSD drive. The answer is yes! Here are two methods you can use to get Windows 11 up and running on your new NVMe SSD drive
***Are you interested in how to install Windows 11 on M.2 SSD?
Prepare for Windows 11 Installation on NVMe SSD
Here are the basic requirements for you to notice to be able to install Windows 11 operating system on an NVMe drive:
- To be able to install Windows 11 on an NVMe SSD drive, you need to have a computer that supports the NVMe standard and meets the minimum system requirements of Windows 11.
- You also need to format the drive using the NTFS file system, to make the drive recognizable once connected to your computer.
- If it's a new NVMe drive, try to initialize SSD to GPT instead.
It is no longer a thing to install Windows 11 on an NVMe SSD drive anymore as we have outlined two of the most helpful methods for you. You can use the SSD cloning software to easily migrate Windows 11 to a new NVMe SSD without installing it. Or, spend some time to clean install Windows 11 on NVMe drive with the help of a bootable installation media. Both methods require you to connect the new NVMe drive to your Windows device to get the job done, let's find out how to connect this type of SSD then.
***EaseUS Todo Backup is the NVMe SSD cloning software we'll use to directly move Windows OS installation to the new NVMe SSD drive. Download and enjoy it.
Secure Download
How to Connect NVMe SSD to Your PC and Laptop
- For desktop PC connection:
Here's a guideline for you to correctly connect an NVMe SSD to a desktop PC.
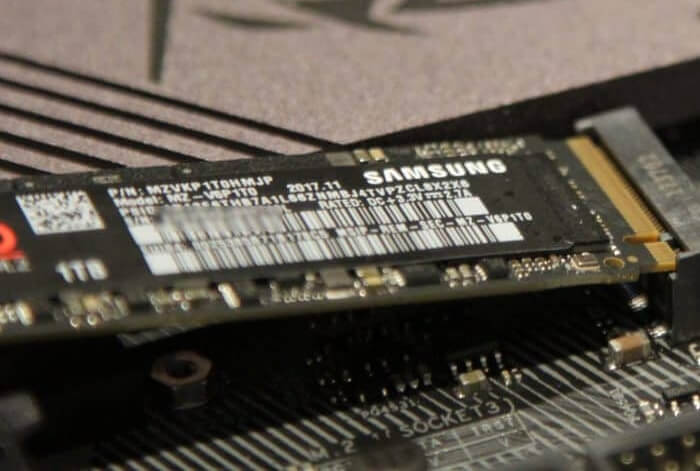
Connecting an NVME SSD to a desktop PC is a simple process. First, identify an available PCI Express slot on your motherboard. Next, insert the NVME SSD into the slot and secure it with screws. Finally, connect a SATA cable from the SSD to an available SATA port on your motherboard. That's it! Your NVME SSD is now ready to use.
- For laptop connection:
By comparison, it's more troublesome to connect a second hard drive to a laptop but we still get you there.
There are a few different ways to connect an NVMe SSD to your laptop. The most common is through a USB port, although some laptops also have Thunderbolt 3 ports that can be used. The Thunderbolt 3 connection will be faster, but the USB connection will work just fine.
1. If your laptop has a Thunderbolt 3 port, you can use an adapter like the StarTech Thunderbolt 3 to NVMe M.2 SSD Enclosure to connect your SSD. Simply insert your NVMe SSD into the enclosure, connect the Thunderbolt 3 cable, and then plug the other end of the cable into your laptop.
2. If your laptop only has a USB port, you can use a USB to NVMe SSD adapter like the Inateck FE3001. Again, simply insert your NVMe SSD into the adapter, connect the USB cable, and then plug the other end of the cable into your laptop.
Method 1. How to Clone Windows 11 to NVMe SSD Without Installing from Scratch
When you want to install Windows 11 on a new NVMe SSD, you may need to clone your current system to the SSD for better performance. For example,
- You want to upgrade your current SATA SSD to a faster NVMe SSD.
- You have an old HDD that is running out of space and want to upgrade to a larger SSD.
- You want to replace a boot drive without reinstalling Windows OS, or moving files & programs.
No matter what your reasons are, you can use the disk cloning method to install Windows 11 on NVMe SSD. But which tool should you use for the job? EaseUS Todo Backup is one of the most reliable HDD to SSD cloning software that can help you clone your current system to NVMe SSD without any data loss.
To be specific, EaseUS Todo Backup is a comprehensive backup and clone tool for both home users and businesses. It offers a wide range of features to make sure your data is safe, including full disk/partition backups, system image backups, file backups, cloud backups, and more. Whether you need to backup your entire system or just want a system migration or system transfer, EaseUS Todo Backup has you covered.
Secure Download
Step-by-step Guide: Migrate Windows 11/Windows 10 on NVMe SSD
Let's go through the whole process, which is incredibly easy to follow, to migrate Windows 11 operating system to the NVMe SSD drive without losing old configurations on your PC!
Step 1. Open EaseUS Todo Backup and click "Tools", and then you can choose any function presented to you.

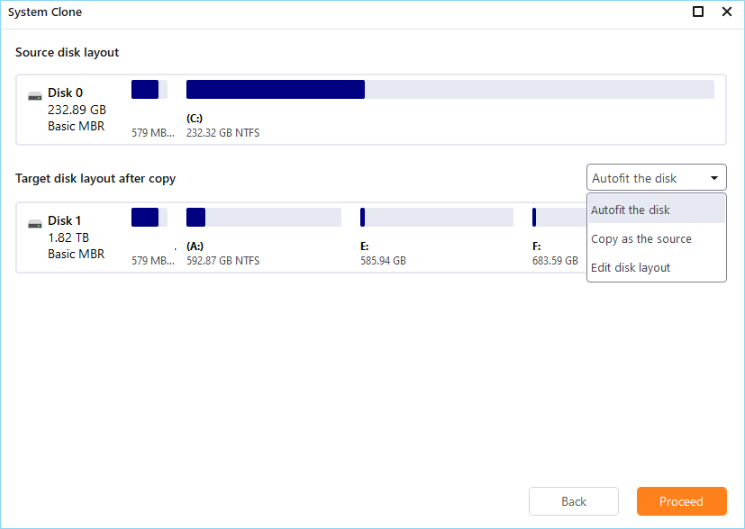
Step 2. EaseUS Todo Backup will automatically select the boot and system partition, what you need to do is choose the target disk and click "Next."
(Make sure that the partition style of the source disk and the target disk are the same.)
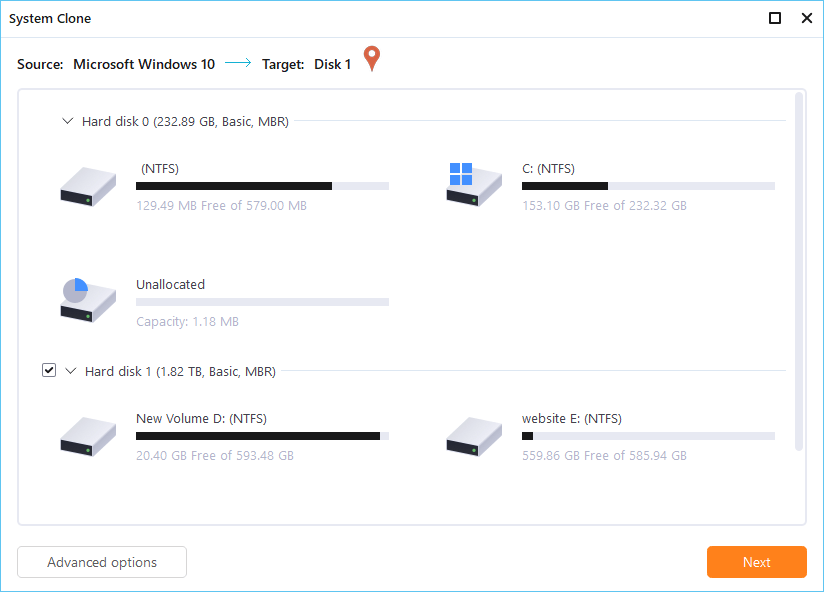
*System clone will wipe out all data, please make sure you backup your data in advance.

Step 3. If you want to clone your system to an SSD, you can choose "optimize for SSD" in the advanced options.
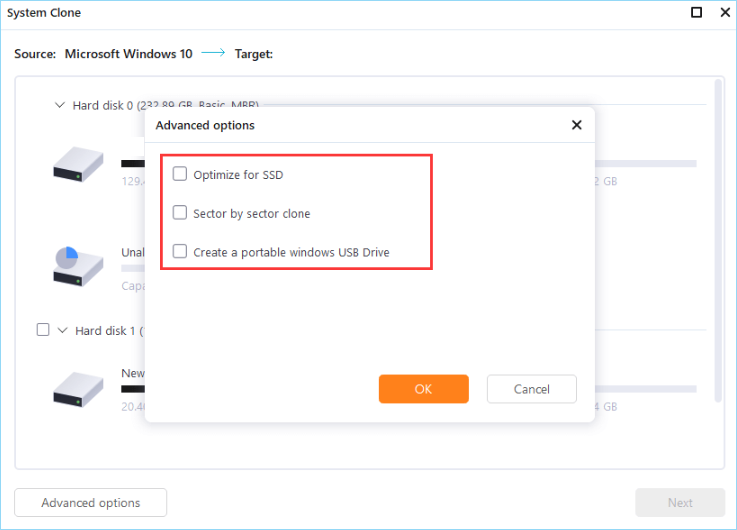
Step 4. Click "Proceed" to start cloning.
Method 2. How to Clean Install Windows 11 on NVMe SSD from USB
This is a guide on how to clean install Windows 11 on an NVMe SSD. If you don't need the old operating system configurations, or it's because your original operating system is not the new Windows 11, you'll need to get the new OS by a clean install, which is time-consuming and needs your careful operation at each step in the below guide.
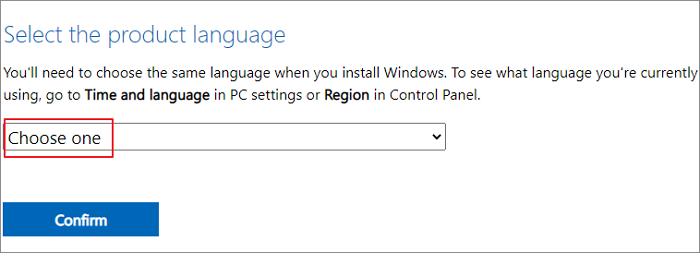
Step 1. Go to the Microsoft download page to create a Windows 11 installation media.

Step 2. Insert the Windows 11 installation media into your computer.
Step 3. Select the language, time and currency format, and keyboard or input method that you want to use during the installation.
Step 4. Click Install Now.
Step 5. If you're asked for a product key, you don't need one.
Step 6. Choose the installation option that you want:
- Upgrade: Keep personal files and apps
- Custom: Install Windows only (advanced)
Step 7. Select the drive on which you want to install Windows. If you have multiple drives, select the drive that you want to keep as your primary drive.
Step 8. Click Next, and then follow the instructions to complete the installation process.
Step 9. Once you've completed the installation process, your computer will restart and you'll be able to use Windows 11.
Should I Try Windows 11 Migration or Windows 11 Installation on NVMe?
After trying both methods, we found that cloning Windows 11 and cleaning install Windows 10/11 on NVMe SSD work differently to meet users' demands, so we cannot use one word to tell which one is a better option.
To sum up, the method that resolves your case shall be the most recommended. An automatic migration and cloning method provided by EaseUS Todo Backup is for users who want a hard drive upgrade or replacement on the same device. In this way, they don't necessarily need to reinstall Windows 11/10 on the new NVMe drive anymore. In fact, they just move everything on the old hard drive to the new drive without losing OS, programs and personal files and settings.
While for users who don't have any original copy of Windows 11 or Windows 10, they need to install the desired OS version on their new PC or new NVMe drive, the manual way of clean install from USB is necessary. Though a little painful to go through the whole procedure, with a little bit of care, you can install Windows 10/11 on NVMe SSD without any problem.
Just remember to back up your important files before you begin. Hence, no matter which way you took at the end, be aware of the backup importance on a PC (the free version of EaseUS Todo Backup is comprehensive enough for personal use), which will save you from the endless pain of paying an extra high price on data recovery software.
Secure Download
FAQ on How to Install Windows 10/11 on NVMe
Should I install Windows 11 on NVMe?
NVMe is a new protocol for accessing high-speed storage devices, and it is the successor to the AHCI protocol. Windows 11 includes native support for NVMe, and thus you do not need to install any special drivers to use an NVMe drive. However, there are a few things to keep in mind if you want to install Windows 11 on an NVMe drive.
First, keep in mind that NVMe is a very new technology, and thus there are not as many NVMe drives on the market as there are traditional hard drives or SSDs. This means that you may have to pay a premium for an NVMe drive. Secondly, while Windows 11 includes native support for NVMe, your motherboard's BIOS may not. This means that you may need to update your BIOS in order to use an NVMe drive. Finally, keep in mind that NVMe drives are designed for use in high-performance applications. If you are not using your computer for gaming or other demanding tasks, you may not see a significant difference in performance by using an NVMe drive.
Can I install Windows 11 on m2 SSD?
Yes, you can install Windows 11 on an m2 SSD. M2 is a type of solid-state drive (SSD) that is designed for use in high-performance applications. Windows 11 includes native support for m2 SSDs.
Was This Page Helpful?
Daisy is the Senior editor of the writing team for EaseUS. She has been working at EaseUS for over ten years, starting as a technical writer and moving on to being a team leader of the content group. As a professional author for over ten years, she writes a lot to help people overcome their tech troubles.
Jean is recognized as one of the most professional writers in EaseUS. She has kept improving her writing skills over the past 10 years and helped millions of her readers solve their tech problems on PC, Mac, and iOS devices.
Related Articles
-
[Steam Tutorial] How to Backup and Restore Steam Game Files
![author icon]() Dany/Jul 01, 2026
Dany/Jul 01, 2026 -
How to Install Windows 11 on Another Drive in Quick Steps
![author icon]() Jean/Jul 01, 2026
Jean/Jul 01, 2026 -
HP Recovery Disk Windows 10 Free Download (3 Ways & 1 Alternative)🔥
![author icon]() Jerry/Jul 01, 2026
Jerry/Jul 01, 2026 -
Can I Upgrade My Laptop Processor | Your Answer Is Here
![author icon]() Larissa/Jul 01, 2026
Larissa/Jul 01, 2026