
Batch computer program transfer, Windows account transfer, domain account transfer, virtual-physical machine transfer, local to cloud desktop transfer.
Technical Chat 24/7EaseUS Todo PCTrans
100% Secure
Free Inquiry
Page Table of Contents
Reviews and Awards
Transferring workloads from one server to another is one of the most common manifestations for many firms, critical folders, or files. No doubt, there are several methods and tools that can be used to transfer files from one server to another, but if you are searching for the best tool for this migration, then you are at the right place! Because here in this post, we will suggest to you the best Windows Server Migration tool and complete guidance of its working process and several outstanding features. So, let's start with more details.
When it comes to which tools are used to migrate Windows Server Data, we will recommend two widespread tools which are:
If you are looking for the best method to choose for the Migration of Windows Server Data then I will personally recommend Windows server beginners to turn to Server migration software.
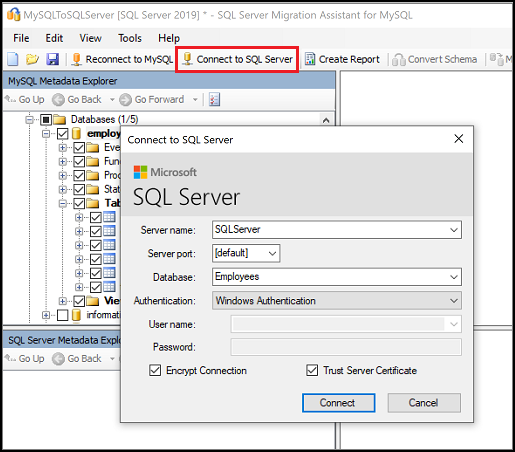
How to Migrate MySQL Database to SQL Server | Step-by-Step
This article will provide three ways to convert MySQL to SQL Server, including using EaseUS Server Migration Software and SQL Server Migration Assistant. Read on to learn more solutions to migrate MySQL database to SQL Server.
If you are looking for reliable and fast Free software for Windows Server Data Migration software, then EaseUS Todo PCTrans Technician is the best one for you. A highly recommended professional PC transfer solution helps several businesses move to new PCs with high effectiveness. It's completely free to download this software.
100% Secure
Free Inquiry
The simple interface and easy-to-use functionality of this tool make it stand out among other data migration tools. When it comes to advanced features
To know the proper process of Windows server data migration via the EaseUS Todo PCTrans Technician tool follow the exact steps given below in the tutorial.
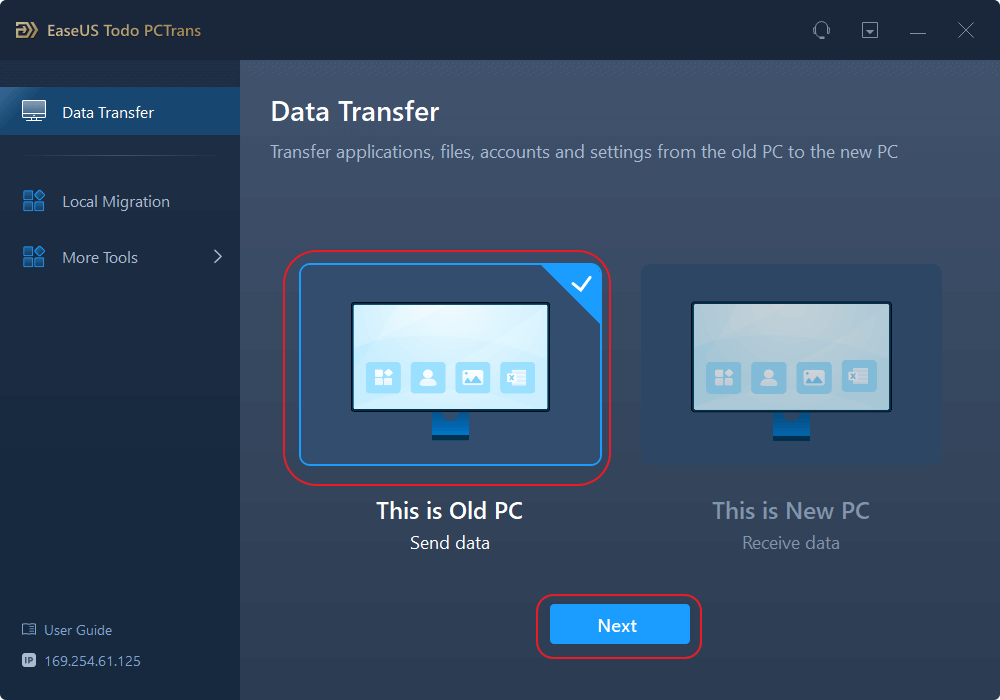
Step 1. Set Up the Old PC
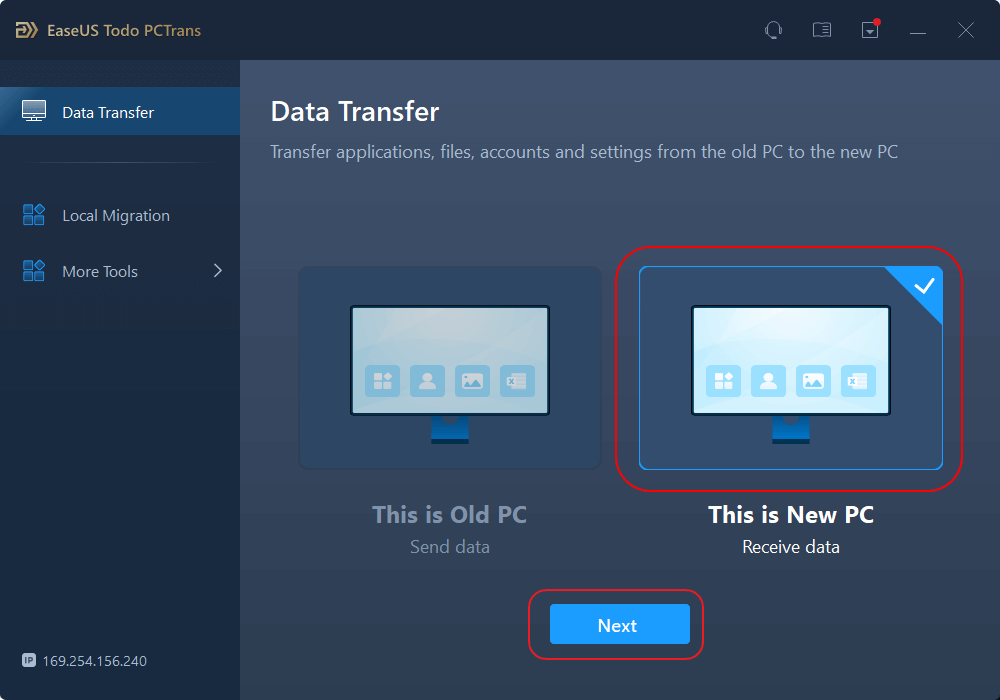
Step 2. Set Up the New PC
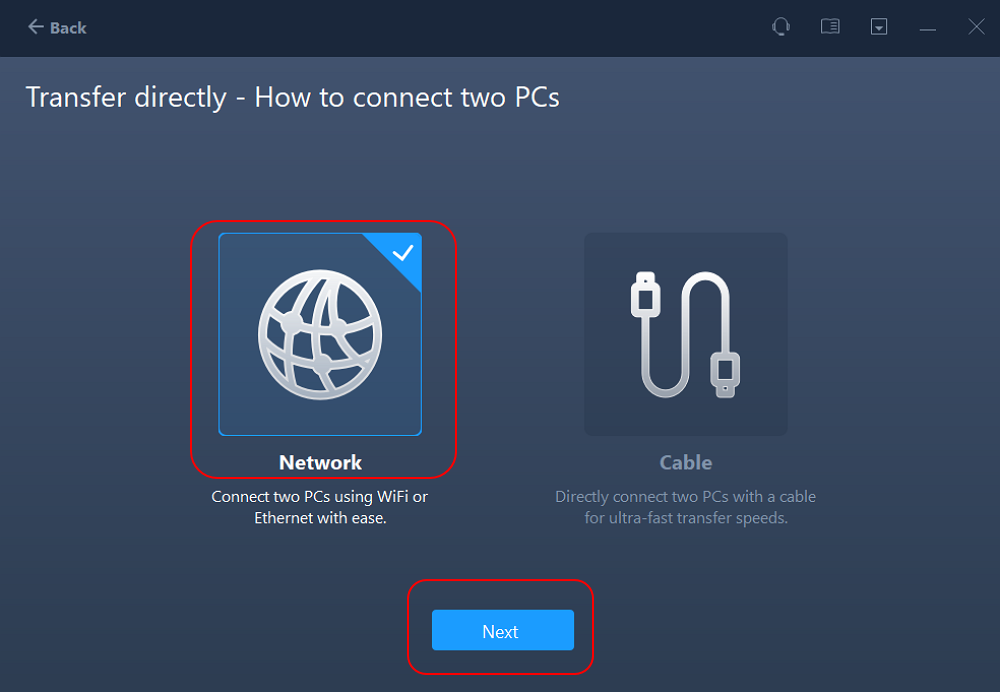
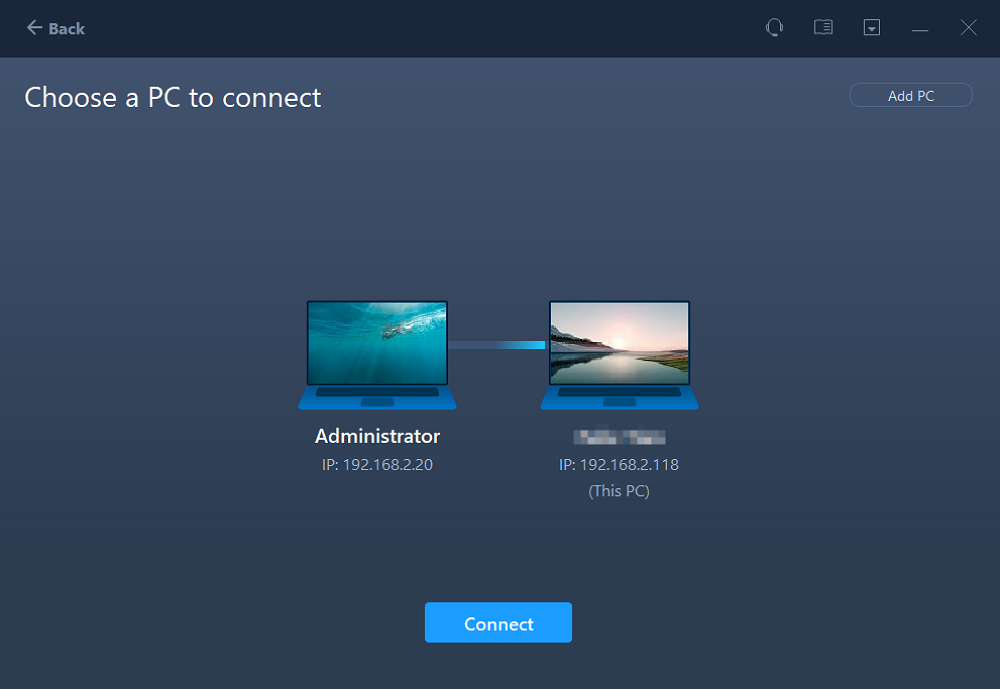
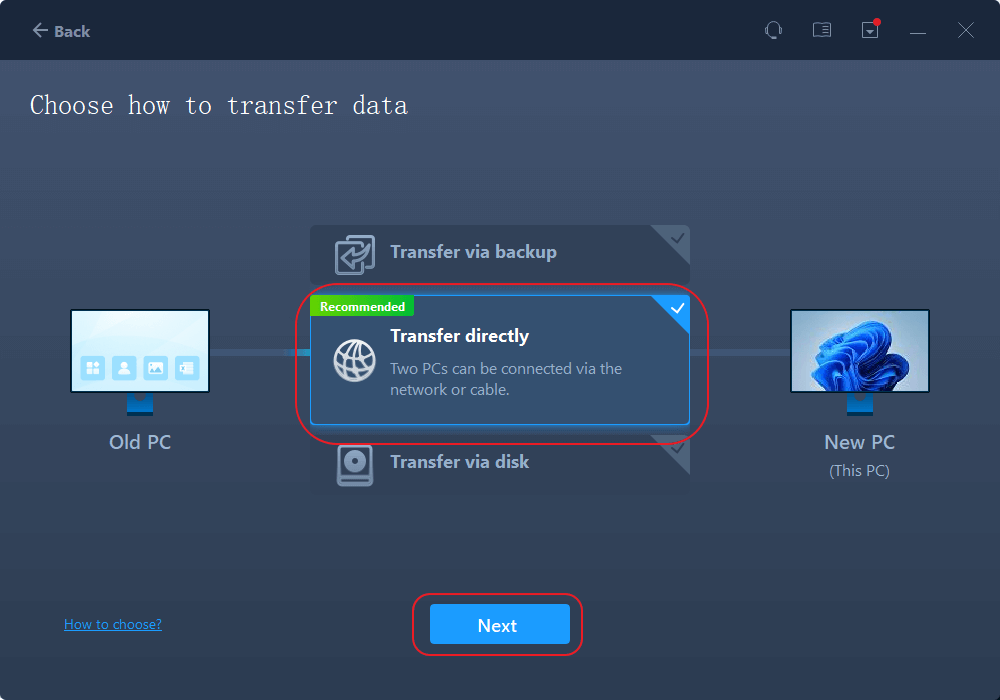
Step 3. Select the Data to Transfer

100% Secure
Free Inquiry
Usually for transferring workloads from one server to another many companies use Windows Server Migration Tools on Windows Server computers. When it comes to transferring files from server to server you can do it by several methods. One of the most common ones is Windows Server Migration Tools, which is usually a set of PowerShell cmdlets. For beginners, this method is a little bit complex as it undergoes several steps but you can do it if you follow the exact steps given below.
The operation of Windows Server Migration Tools is very complex, so we divided it into 4 parts for your better understanding and convenience.
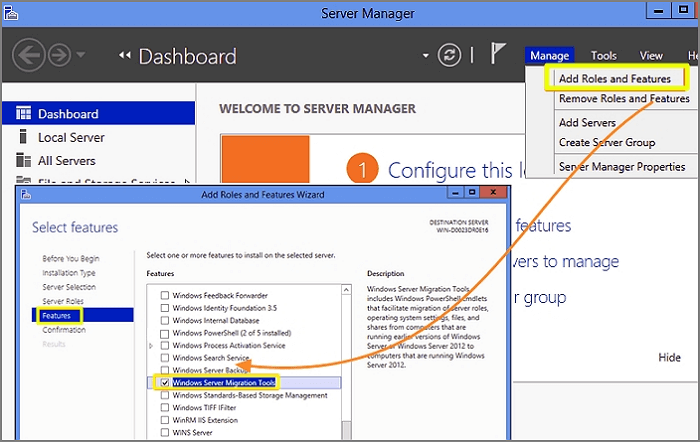
Step 1: Click the Start button in the lower-left corner of your windows system. Type Server Manager in the search box and open it.
Step 2: Click Add Roles and Features under the Manage tab; after that, press the Next button. Select the destination. Then press Next. Click Windows Server Migration Tools under the Features tab. Then press Next.
Step 3: Confirm the installation selections. Then click Install to install this tool on the targeted computer. Use the method already given above to install this utility on the source system.
Step 1: Press the Window +X key. Then choose the Command Prompt (Admin) or PowerShell or Windows Terminal. Any of them will work.
Step 2: At the command prompt, change to the directory in which the smigdeploy.exe tool is stored. Now type the given command and press Enter.
cd %Windir%\System32\ServerMigrationTools\
Step 3: Type the following command. The path represents the path of the deployment folder on the source system. Then press Enter.
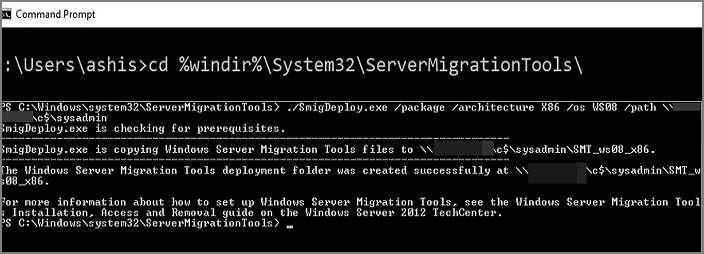
SmigDeploy.exe /package /architecture X64 /os WS08 /path
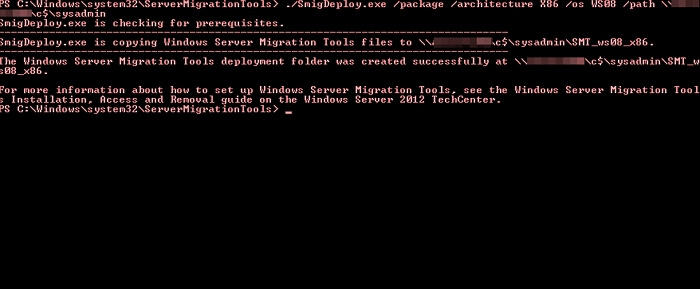
Step 1: Copy the deployment folder that was generated by the destination system to a local drive of the source system. Make sure that the operating system architecture of the arrangement folder matches that of the source computer.
Step 2: Press Windows logo Key+X. Now select Command Prompt to open a Command Prompt window on the source computer.
Step 3: In the command prompt section, change the directory to which you copied the deployment folder in Step 1.
Step 4: Type the below-given command to register Windows Server Migration Tools cmdlets. Then press Enter. .\Smigdeploy.exe
Now you have finished all the arrangements. Now let's learn how to use Server migration tools.
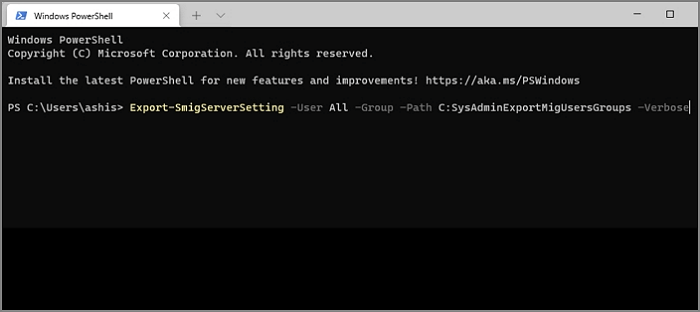
If you want to export the local users from the source server, then follow the given exact steps.
Step 1: Click Server Manager and Tools afterward on the source Server. Now click Windows Server Migration Tools to open it.
Step 2: Now run this command:
Export-SmigServerSetting -User All -Group –Path C:SysAdminExportMigUsersGroups –Verbose.
If you want to import the local users to the targeted server then you should follow these steps
Step 1: Open Windows Server Migration Tools from Server Manager>Tools>Windows Server>Migration Tools.
Step 2: Now type the following command and press Enter.
Import-SmigServerSetting–UserEnabled–Group-PathC:SysAdminExportMigUsersGroups -Verbose
No doubt, the whole process is complex for non-technical people, but you can follow the given steps to perform the procedure quickly. If you are unfamiliar with the operations, try EaseUS Todo PCTrans. And if you have any confusion, click the buttons to learn more functions and usage about it.
Batch computer program transfer, Windows account transfer, domain account transfer, virtual-physical machine transfer, local to cloud desktop transfer.
Technical Chat 24/7This post is everything about Windows Server Migration Tools, where we gave exact steps regarding the complete process of server data migration. No doubt it may be confusing and complex for non-technical people, and that's why we usually recommend Windows users choose the Windows Server data migration tool. When it comes to the most reliable Windows Server data migration tool, we recommend using the EaseUS Todo PCTrans Technician. This tool is easy to use and comes with several unique features along with a user-friendly interface.
100% Secure
Free Inquiry
Cici is the junior editor of the writing team of EaseUS. She accepted the systematic training on computers at EaseUS for over one year. Now, she wrote a lot of professional articles to help people resolve the issues of hard drive corruption, computer boot errors, and disk partition problems.
Written by Tracy King
Tracy became a member of the EaseUS content team in 2013. Being a technical writer for over 10 years, she is enthusiastic about sharing tips to assist readers in resolving complex issues in disk management, file transfer, PC & Mac performance optimization, etc., like an expert.
EaseUS Todo PCTrans Free is a useful and and reliable software solution created to serve in computer migration operations, be it from one machine to another or from an earlier version of your OS to a newer one.
Read MoreEaseUS Todo PCTrans is by the folks at EaseUS who make incredible tools that let you manage your backups and recover your dead hard disks. While it is not an official tool, EaseUS has a reputation for being very good with their software and code.
It offers the ability to move your entire user account from your old computer, meaning everything is quickly migrated. You still get to keep your Windows installation (and the relevant drivers for your new PC), but you also get all your apps, settings, preferences, images, documents and other important data.
Read MoreRelated Articles
7 Solutions to Fix Migration Assistant Not Finding PC
![]() Cici/2024/12/04
Cici/2024/12/04
How to Use Dell Migrate to Migrate Data Between PCs [Ultimate]
![]() Tracy King/2024/12/04
Tracy King/2024/12/04
How to Uninstall Fortnite on PC/Xbox/PlayStation/Switch
![]() Roxanne/2024/11/29
Roxanne/2024/11/29
How to Transfer Large Files Between Servers | 4 Ways
![]() Roxanne/2024/11/27
Roxanne/2024/11/27
Your Complete Guide: Windows Server Migration Tools Free Download and How-To Tips
Try smart Windows 11 data transfer tool to move all data in 1 click.
EaseUS Todo PCTrans
100% Secure
Free Inquiry
Copyright © EaseUS. All rights reserved.