Page Table of Contents
Reviews and Awards
Can Windows 7 files be transferred to Windows 11? Wondering whether you can transfer your files from Windows 7 to Windows 11? Then, the answer is a simple YES.
We store a massive amount of data on our systems. So, while upgrading the operating systems, the first thing that comes to mind is how to transfer files from one operating system to another smoothly and without any data loss. There are many ways through which you can shift all your files with ease. Through this guide, we will give you solutions to transfer Windows 7 files to Windows 11 successfully on your own.
| ⏱ Durations | 5-15 minutes (depending on the size of selected files) |
| ⚙ Necessities | Files for file sharing, two computers (with Windows 7 and Windows 10), USB/external hard drive, OneDrive |
| 💻 Target OS | Windows 7 and Windows 11 |
| 💵 Price | $0, Free |
| 🧰Hot File Transfer Tools |
3 Best Ways to Transfer Windows 7 Files to Windows 11
Upgrading to Windows 11 from Windows 7 is easy. There are several ways to move your files, but the best and fastest ways to transfer files from Windows 7 to Windows 11 are:
| Feature List | EaseUS Todo PCTrans | USB/External Disk | OneDrive |
|---|---|---|---|
|
✔️ | ✔️ | ✔️ |
|
✔️ | ✔️ | ✔️ |
|
✔️ | ✔️ |
✔️
|
|
✔️ | ✔️ |
❌Doesn't support Vista/XP |
|
✔️ | ❌ | ❌ |
|
✔️ | ✔️ | ❌Complex for beginners |
The next question that arises is which method amongst these is the best? Our top pick is EaseUS Todo PCTrans, as it's efficient and fast in file transferring and saves your time and effort.
Three File Transfer Modes You Can't-Miss in EaseUS Todo PCTrans
You can choose the most suitable transfer mode available to transfer and move to a new PC quickly.
- Transfer via Network Connection: By connecting computers on the same LAN, you can transfer files and programs with account settings through the network.
- Transfer Locally: You can also choose to migrate applications among local disks of the same computer.
- Transfer via Image File: Another way of transferring files is to create images of your files, programs, and accounts and move them from the source PC to the new PC.
Method 1. Using EaseUS Todo PCTrans Free
EaseUS Todo PCTrans Free is a full-featured tool that works best to transfer programs and files from one operating system to another while upgrading the OS. This software enables you to migrate everything from Windows 7 to Windows 11 smoothly and efficiently. It is a smart solution that lets you transfer data and programs without reinstalling. This PC-to-PC transfer software moves files, applications, programs, and accounts between computers.
In fact, EaseUS Todo PCTrans is one of the most convenient and fastest ways of transferring files. It also lets you recover programs and files from a dead computer.
Download the free data transfer software:
EaseUS Todo PCTrans is a very effective yet simple solution for moving your files and programs quickly and conveniently. Thus, we highly recommend this mode of transferring files.
How to Transfer File in "PC to PC" Mode
Step 1. Set Up the Old PC
- First, install and launch EaseUS Todo PCTrans and select Data Transfer on the left panel of the main interface.
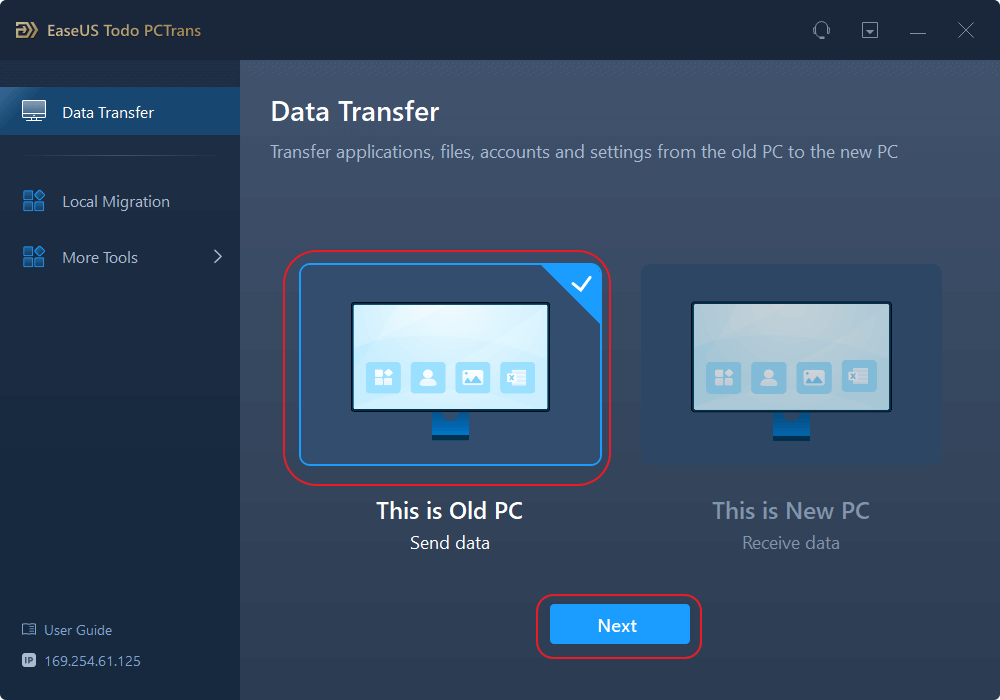
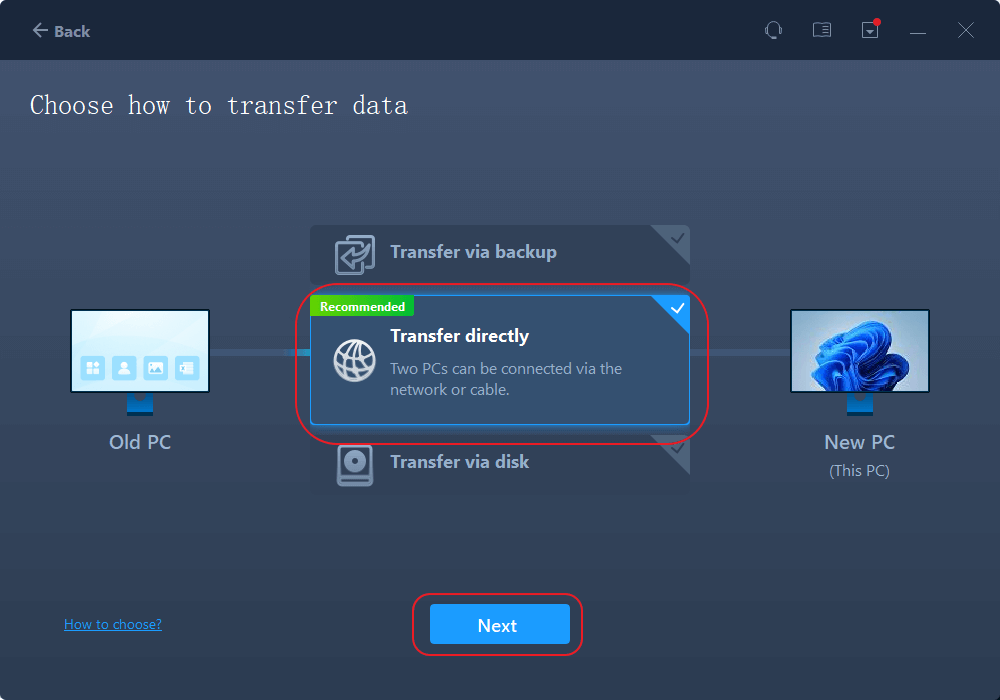
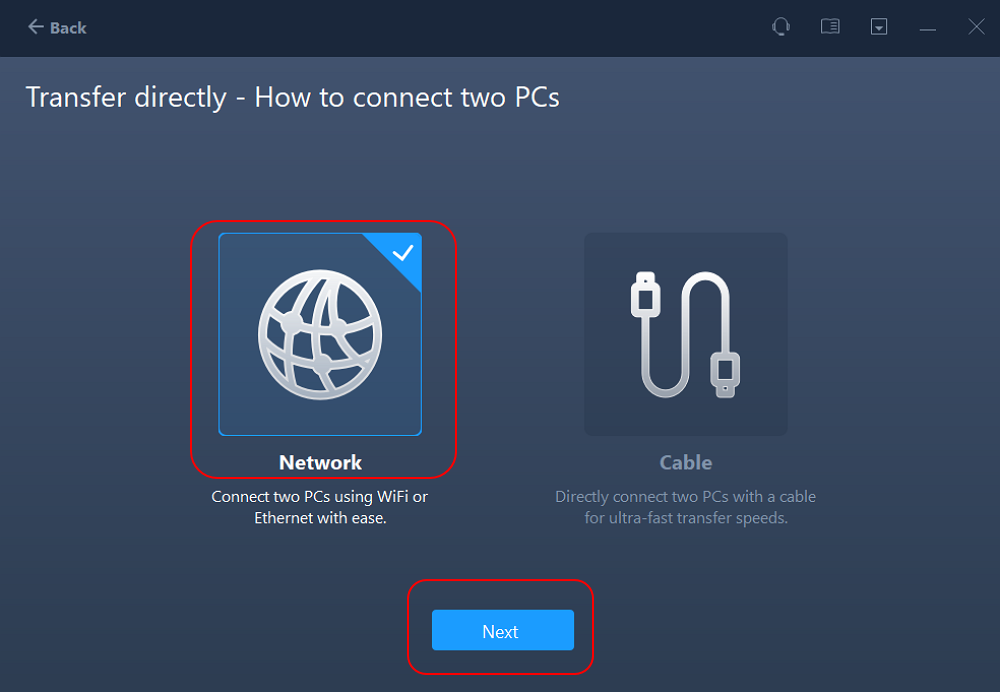
- Select "Transfer Directly" and click "Next" to continue.
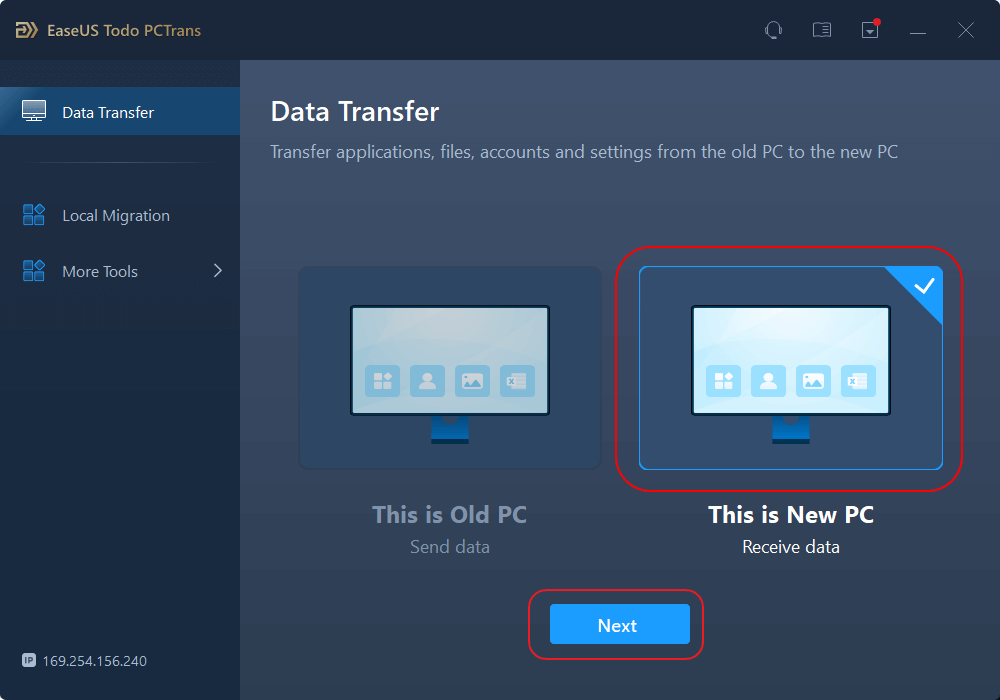
Step 2. Set Up the New PC
- Download and launch EaseUS Todo PCTrans on the new computer; select "This is New PC" and click "Next".
- Select "Transfer directly" and click "Next" to continue.
- Select "Network" and click Next to continue. This will automatically scan the old PC. (Make sure the two PCs are connected to the same LAN.)
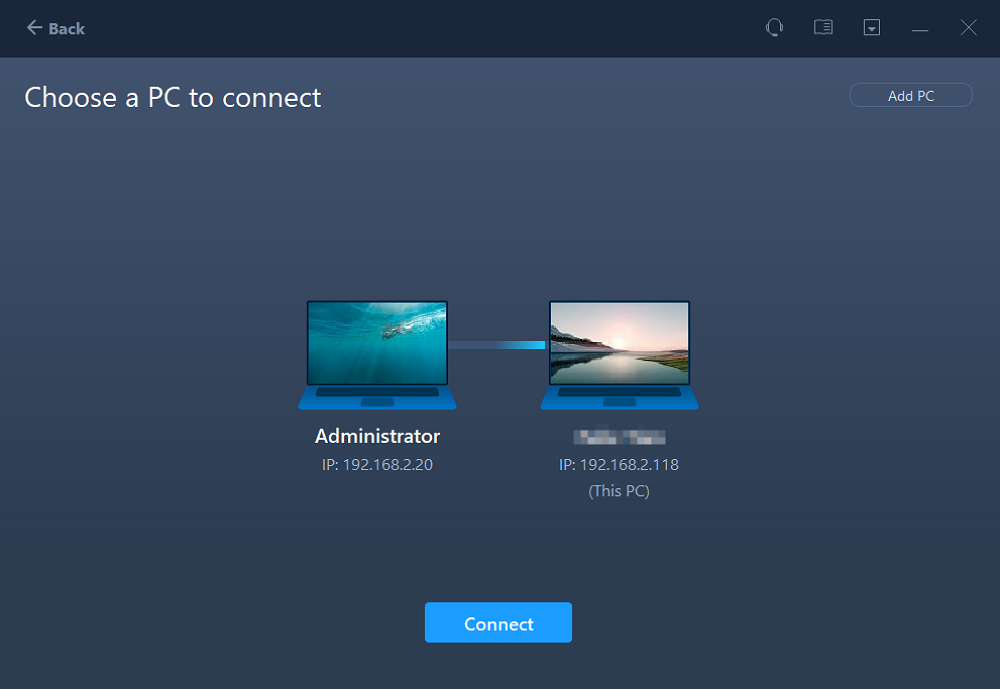
- Select the target PC and click Connect. Then, it will take some time to scan and analyze the data in old PC.
Step 3. Select the Files to Transfer
- Finally, on the new PC, select the Files tab, select the files you need to transfer. Then, click "Transfer" to start.

If your computers are not under the same network or not a laptop, you can refer to this guide to learn file transferring remotely or without a network. Here you go:
How to Share Files Between Two Laptops with or Without WiFi (Windows 11/10)
To make things easier, we provide 8 solutions for you to transfer files between two laptops in Windows 11/10/8/7.
To help more of your friends around you to flexibly transfer any type of files between their computers like an expert, feel free to share this great method online to help more people out there:
Method 2. Via USB/External Hard Drive
Another efficient way of moving files from a Windows 7 PC to a Windows 11 PC is by utilizing an external storage device. You can quickly transfer all your files and programs from Windows 7 to Windows 11 by using an external storage device like an external hard drive, USB drive, or SD card.
External hard drives are not only portable and convenient, but you can also encrypt them for security. Moreover, you do not require any additional software, service, or internet access. In addition, it is the fastest and most cost-effective solution to move large files that consume a lot of storage space.
Steps To Copy Your Files on Windows 7 PC To an External Storage Device
Here are the steps to copy files from a Windows 7 operating system to an external hard drive. You must note that simply copying files from one location to another will not remove them from their original location. The steps are:
- First, connect your external hard drive/USB drive to your Windows 7 PC.
- The next step is to Select the Start Button > Computer.
- Now locate the files or folders where your files are stored that you wish to copy.
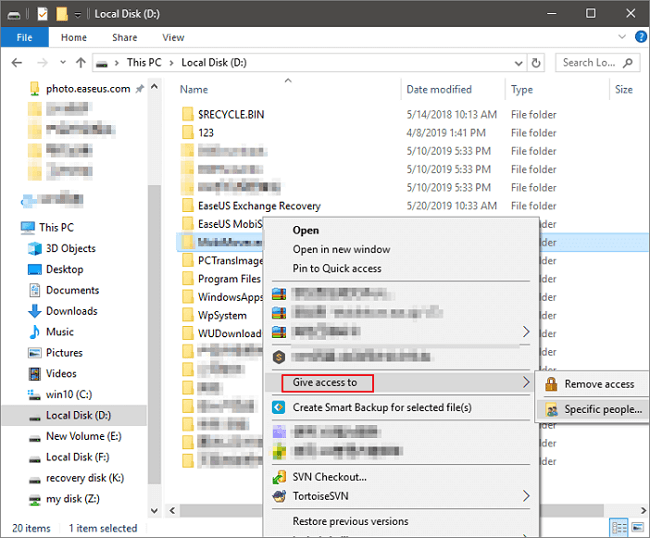
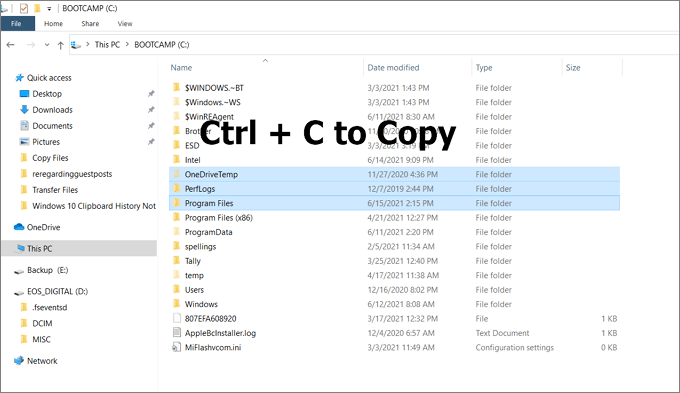
- Next, select the file you want to copy without opening the file. In case you want to copy multiple files, hold down the CTRL button while selecting additional files. When you choose folders, it will select all files within those folders.
- Once you select the files, you will see all the files you selected are now highlighted. For copying files to the memory, select Organize > Copy from the top of the window.
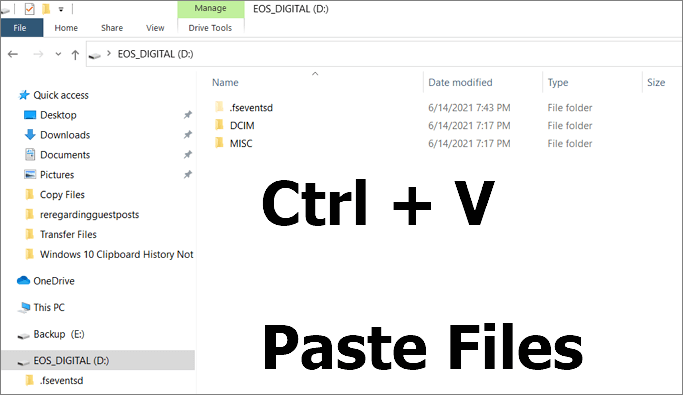
- Next, click on the corresponding letter of the drive to go to the external drive location.
- When the drive is highlighted, select Organize > Paste to copy the files you selected earlier to the drive.
Before Removing Files from the Storage Device to Windows 11, Verify Your Files Are Correct
- Once you have copied your files onto an external hard drive/USB storage device, verify they are in the right location by browsing the external hard drive/USB drive.
- The next step is to safely remove the external storage device to ensure no files are lost or corrupted. For removing an external storage device, Select Eject before removing the hard drive from your Windows 7 PC.
- Once you have copied your files onto the hard drive, you can easily transfer them onto your new Windows 11 PC.
Method 3. Using OneDrive
Transferring files from a Windows 7 PC to a Windows 11 computer can be easily done using OneDrive. When you move to a new PC, many files need to be transferred, and OneDrive enables you to set up your new computer quickly.
Here are the steps to transfer your files from Windows 7 to Windows 11 PC using OneDrive:
Step 1: Installing and Setting Up OneDrive on your Windows 7
To start, you need to install and set up OneDrive on your Windows 7 computer. Here is the process:
- Start with installing the Windows version of the OneDrive sync app. If you have Microsoft 365 or Microsoft 2016, you already have the OneDrive sync app installed on your PC. To check, click the Start button and search for OneDrive.

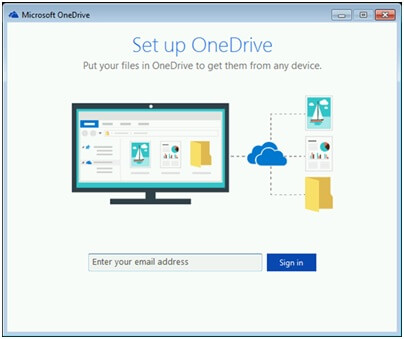
- Next, begin with OneDrive Setup.
- Sign up for a Microsoft account if you already don't have one. Signing up is free, and it gives you access to OneDrive, Microsoft Office for the web, Skype, and much more. You can sign in either by using your current email address or phone number or by creating a new Outlook.com email address.
- To finish the OneDrive setup, follow all the steps that appear on your screen.
- In the notification area, at the extreme right of the taskbar on the bottom, there is a OneDrive cloud icon (in case you can't find it, click on the Show Hidden Icons arrow next to the notification area in the taskbar to see the OneDrive cloud icon); right-click on it and then click Settings.
- Next, in the Back Up Your Folders dialog box, choose all folders containing files you want to transfer to your new PC.
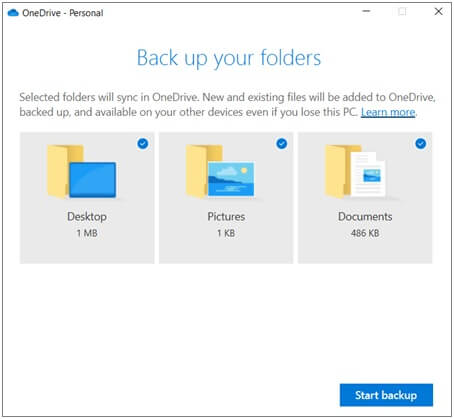
- Now select Start Backup (if you have an older version of OneDrive, select Start Protection).
- If the files you want to transfer are outside of your Documents, Pictures, and Desktop folders, then use Windows Explorer; for this, press Windows key + E to open Windows Explorer and search the folders you want to transfer and drag them to OneDrive in the left pane.
- You can check the status of the files uploading to OneDrive by hovering your mouse on the OneDrive cloud icon at the extreme right of the taskbar.
Step 2: Setup Your New Computer
To complete the Windows setup on your new PC, follow the steps that appear on the screens. Ensure your computer has access to the Internet throughout the process. When asked to sign in, sign in using the same Microsoft account you used for setting up OneDrive on your Windows 7 computer.
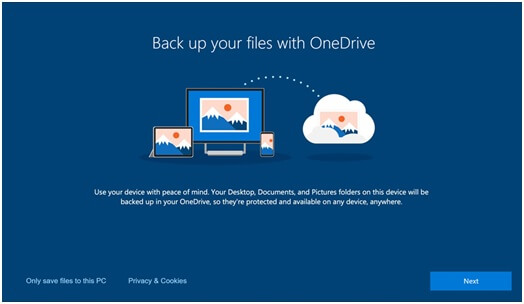
- Continue to click "Next" throughout the Windows setup, even on the "Back up your files with OneDrive" screen.
- And after the setup is finished, you will be able to browse your files in File Explorer.
The entire files in your Desktop, Documents, and Pictures folders on your Windows 7 PC will automatically appear in the exact locations on your Windows 11 PC.
Further Tip: Turn on PC folder Backup When Synced Files Faile to Show Up
You need to follow this step only if you cannot see your files in File Explorer on your Windows 11 PC. For this, you might need to "Turn On PC Folder Backup".
Here are the steps to ensure OneDrive is running and syncing your files.
- Start by selecting the OneDrive cloud icon in the taskbar.
- Select Help & Settings > Settings.
![]()
- In the settings, choose Backup > Manage backup.
- When the Back Up Your Folders dialog box appears, ensure all folders that you want to back up are selected.
- Click Start Backup.
- While your files sync to OneDrive, you can close the dialogue box. You can also see your files sync by selecting View Upload Progress.
The following page can be your menu for more choices on a file mover.

Top 4 - File Mover Windows 10 Review (Pros and Cons)
This article covers four of the best file transfer tools. If you happen to be struggling, come here and take a look. Read more >>
Transferring Windows 7 Files to Windows 11 Is Easy
By using useful and reliable software, you can successfully transfer Windows 7 files to Windows 11 on your own. The key lies in choosing the right tools. One of the best ways to do this is by using the EaseUS Todo PCTrans, as it is a smart tool that lets you migrate files smoothly and efficiently. Other ways, such as using an external hard drive or OneDrive, are also effective ways to send files to Windows 11 from Windows 7 PC.
The essential features of EaseUS Todo PCTrans are as follows:
- Move everything securely- It enables you to transfer apps, files, programs, settings, and even user profiles from a Windows 7 computer to another Windows 11 laptop or PC.
- Fast and automatic- It offers you the simplest ways to load your new computer, so when you start using your new Windows 11PC, all the programs and applications are installed and ready to use.
- Auto Transfer- With EaseUS Todo PCTrans, you can automatically transfer programs, files, and settings to another PC.
- No Need to Reinstall Programs- It allows you to directly transfer data without installing apps, improving efficiency.
- Recover Data and Accounts from A Dead Computer- Even in the case of hardware and software failure, you can still recover your data with EaseUS Todo PCTrans.
- Important
- Microsoft has confirmed that Windows 10 support will officially end on October 14, 2025. After this date, the system will no longer receive security updates, bug fixes, or technical support. To understand what this means for users, check our Windows 10 End of Support guide.
FAQs Aout File Transfer between Windows 7 and Windows 11
Here are some hot topics that are related to file transferring on Windows 7 and Windows 11. If you are interested, follow and find answers here:
1. Can I use Windows Easy Transfer to transfer files on Windows 11?
No, not really. Windows Easy Transfer is a file transfer program between computers for older Windows operating systems like Windows 8.1/8/7. It also requires you to connect two computers via a connection cable for file transferring.
However, Windows Easy Transfer is no longer available on Windows 10 or newer systems like Windows 11. So, you can only turn to reliable file transfer software or other manual methods like using USB for moving and transferring files from an old PC to Windows 11.
2. How do I execute PC to PC file transfer?
If the file size of the data that you tend to transfer from PC to PC is small, you can simply use the Copy and Paste method to copy files to a removable USB and then copy them to the target computer.
However, if the file size is big, you can directly turn to reliable PC to PC file transfer software for help. EaseUS Todo PCTrans provides you with 3 modes for sharing and moving files, and you can fully trust and rely on this utility.
3. How do I transfer everything from my old computer to a new computer?
Here is the procedure that you can follow to transfer everything from an old PC to a new computer by using EaseUS Todo PCTrans:
- Download and install EaseUS Todo PCTrans on both PCs.
- Select the modes you wish to transfer everything between two computers: PC to PC (via network) or Backup and Restore (via image).
- Select the files, programs, and even Windows settings, anything you want to transfer.
- Confirm to transfer files.
If you need a more detailed guide, follow this page for help: Transfer Everything from My Old Computer to My New Computer.
About the Author
Updated by Joey Albert
Joey is an enthusiast of science and technology. With a passion for uncovering the latest tech innovations, she creates clear, engaging how-to guides that make technology accessible and enjoyable for all.
Written by Tracy King
Tracy became a member of the EaseUS content team in 2013. Being a technical writer for over 10 years, she is enthusiastic about sharing tips to assist readers in resolving complex issues in disk management, file transfer, PC & Mac performance optimization, etc., like an expert.
Reviews and Awards
-
EaseUS Todo PCTrans Free is a useful and and reliable software solution created to serve in computer migration operations, be it from one machine to another or from an earlier version of your OS to a newer one.
Read More -
EaseUS Todo PCTrans is by the folks at EaseUS who make incredible tools that let you manage your backups and recover your dead hard disks. While it is not an official tool, EaseUS has a reputation for being very good with their software and code.
![]() Read More
Read More
-
It offers the ability to move your entire user account from your old computer, meaning everything is quickly migrated. You still get to keep your Windows installation (and the relevant drivers for your new PC), but you also get all your apps, settings, preferences, images, documents and other important data.
Read More
Related Articles
-
5 Best LAN File Sharing Software Recommend in 2026
![author icon]() Tracy King/2026/06/21
Tracy King/2026/06/21 -
How to Transfer Files from PC to PC With/Without USB Cable
![author icon]() Jean/2026/01/29
Jean/2026/01/29 -
2 Safe ways to Transfer Office 2016 to New Computer🔥
![author icon]() Tracy King/2026/01/29
Tracy King/2026/01/29 -
How to Transfer Files from iCloud to OneDrive [Full Guide]
![author icon]() Tracy King/2026/01/29
Tracy King/2026/01/29