
Content
Page Table of Contents
About the Author
Hot Topics
If you receive We couldn't complete the Updates/Undoing changes error on Windows PC, then here is how to resolve the problem using various methods. The error occurs because of a corrupt system file or low storage space on the System drive. You can fix all this using various tools including EaseUS Partition Master to increase the storage space.
| Workable Solutions | Step-by-step Troubleshooting |
|---|---|
| 1. Apply system restore | Boot your PC using Windows installation media or a bootable USB Drive...Full steps |
| 2. Fix Problem by Startup Repair | Open the Settings app (Win + I), go to the System section...Full steps |
| 3. Run System File Checker | Use Win + X to open the Power menu. Then select Windows Terminal...Full steps |
The Culprit of "We couldn't complete the updates undoing changes"
If you are facing a "We couldn't complete the updates undoing changes" error on your Windows 11 or Windows 10 PC, then you are at the right place. Today here, you will get seven working methods that can resolve your issues immediately. Now the question is why Windows users face this issue? The answer is pretty simple this issue usually occurs because of failing to install Windows updates or after the first restart post-installation.
This error can occur because of several causes like lack of enough free disk space, the update interrupted during the installation process, and corrupted files. This issue may be very annoying for you, and most users have no idea how to resolve this issue. Here you will get some best methods, so apply the given techniques to fix your "We couldn't complete the updates undoing changes" issue immediately.
1. Apply system restore
System restore is an in-built feature of Windows that can help you restore your Windows system to an earlier date without harming your data and files. If you had a system restore point before this issue occurred, then you can easily follow the given steps to restore your system.
Note: If you cannot boot into your PC, then use the Advanced Recovery method, but in case you can, then search for System Restore in the Start menu and launch the wizard.
Cannot log in to your Account
Step 1: Boot your PC using Windows installation media or a bootable USB Drive. Once the Windows recovery section appears, click on Troubleshooting> Advanced options.
Step 2: In the Advanced options menu, click System Restore. You will receive a message asking you to enter the recovery key, click Skip the drive or enter your account’s password. In the pop-up window, click Next.
Step 3: If there is a list of restore points (along with the automatic restore point and the restore point you created yourself), select the Restore point you want to recover and click Next.
Step 4. Select a restore point, and confirm by clicking the Finish button. After this, your PC will be restored to an earlier date where everything was working.
Can log in to your account
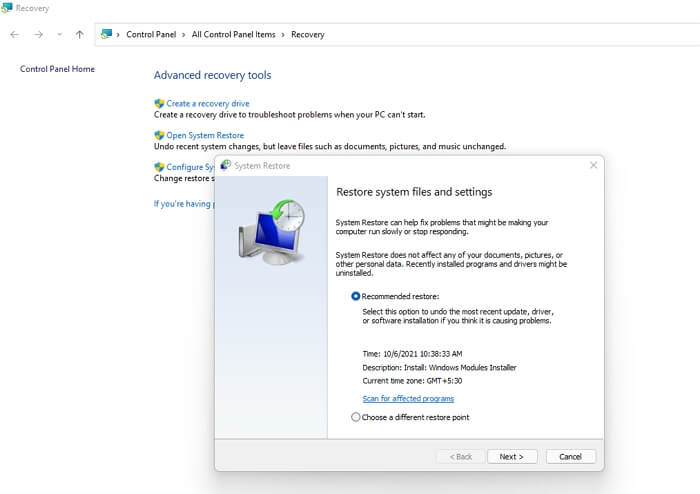
Step 1: Press the Start menu and type System Restore. Once it appears in the list, click on Recovery.
Step 2: Click on Open System Restore link. It will then prompt if you would like to use a recommended restore point or choose a different one.
Step 3: Choose appropriately, and then restore the PC to a working state.
2. Fix Problem by Startup Repair
The Startup Repair is another useful Windows diagnosis troubleshooting tool that can assist you in repairing Windows operating system when you cannot log into the system. Most of the time, you can use this method to resolve the issue with corrupted or missing system files.
Corrupted system files may cause the error "We couldn't complete the updates undoing changes". To resolve this issue, you can follow the given steps to run a Startup Repair.
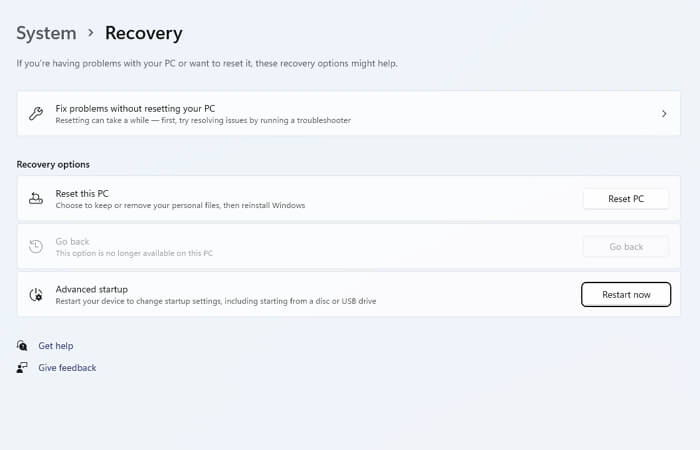
Step 1: Open the Settings app (Win + I), go to the System section, select the Recovery tab. Click Restart Now under Advanced Startup.
Step 2: You will have two options here. Troubleshoot and Restart. Select Troubleshooting > Advanced options. It will reveal more options that can help you fix most of the problems with Windows.
Step 3: Inside the Advanced options window, select Startup Repair. It will then check and fix your PC automatically. It is a long process as it will need to scan through a lot of files. So let it complete and do not try to restart the PC in between this process.
Post restart, check if the PC still has issues.
3. Run System File Checker
SFC or the System File Checker scan is another working method for many users to scan and restore corrupted system files. This tool can be helpful when you are dealing with Windows update errors. Follow the exact given steps to perform this method.
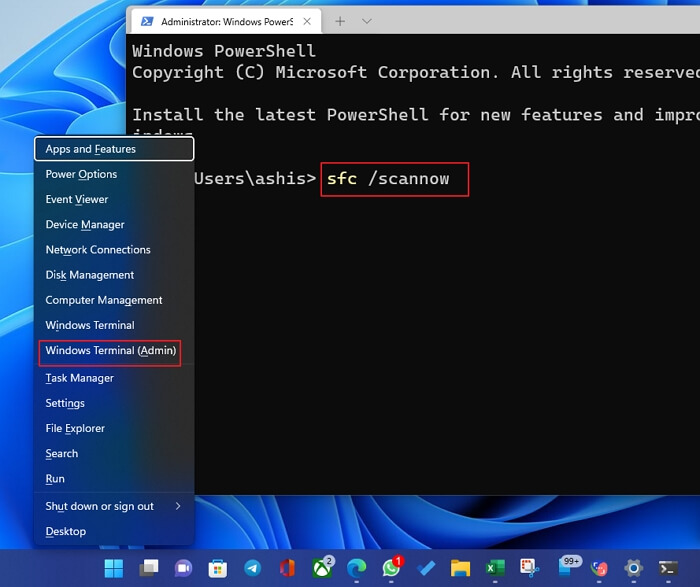
Step 1: Use Win + X to open the Power menu. Then select Windows Terminal (Admin) or Windows Powershell (Admin).
Step 2: In the window, type sfc/scanow command and press the Enter button.
Step 3: The tool will then scan the PC and look for corrupt files. When it finds such files, they are replaced with a new one from the Windows repository.
This process may take some time to complete. After the SFC scan completes, you can check if you can update Windows.
4. Extend C Drive with EaseUS Partition Master
One of the primary reasons behind this error is the storage space on the system drive. While you can easily extend the other partitions on the computer, extending or increasing storage space to the C Drive is tough. That's where you need the help of the EaseUSParttition Master tool.
It is a highly recommended third-party tool that can help you perform partition management and easily manage your disk for better performance. This tool comes with a Resize/Move function which permits the user to adjust a partition to a larger one.
Option 1. Extend System C drive with unallocated space
- 1. Right-click on the System C: drive and select "Resize/Move".
- 2. Drag the system partition end into the unallocated space so to add it to the C: drive. And click "OK".
- 3. Click "Execute Task" and "Apply" to execute the operations and extend the C drive.
Option 2. Extend System C drive without unallocated space
- 1. Right-click a big partition with enough free space on the system disk, select "Allocate Space".
- 2. Select the system drive at the Allocate Space From (*) To section, and drag the end of System C drive into the unallocated space. Click "OK" to confirm.
- 3. Click "Execute Task", it will list the pending operations, and click "Apply" to save the changes and extend the C drive.
0:00-0:26 Extend System Drive with Unallocated Space; 0:27-0:58 Extend System Drive without Unallocated Space.
Overall this is a reliable tool for users that comes with many valuable features like Merge, clone, format, copy partitions; Migrate OS to SSD, Convert MBR to GPT, or vice versa; partition recovery; create WinPE bootable disk, and much more.
5. Disable Automatic Windows Updates
The following method you can try to fix the issue is to disable the automatic Windows Updates. If the Windows update is under your control, you can manage it in a better way.
Follow the exact steps given below.
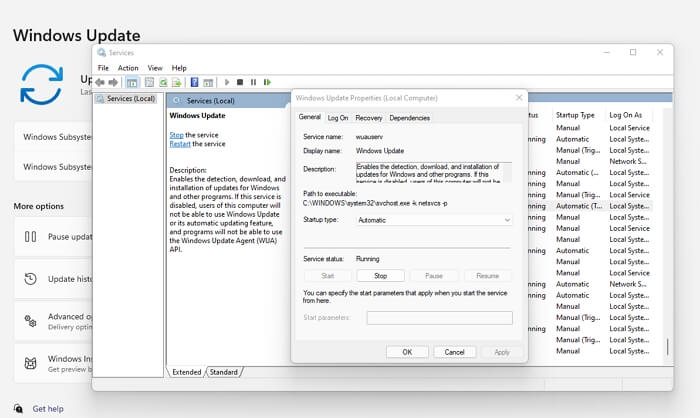
Step 1: Press Win+R keys to open the Run box. Type servces.msc and press the Enter key to open the Windows services snap-in. Locate Windows Update service from the list, and double click it to open the Properties.
Step 2: Set the Startup type to Disabled and click Stop if this service runs from the Service status section.
Step 3: Click App and OK to perform this change. Then restart your system to see if the error is resolved.
6. Enable App Readiness service
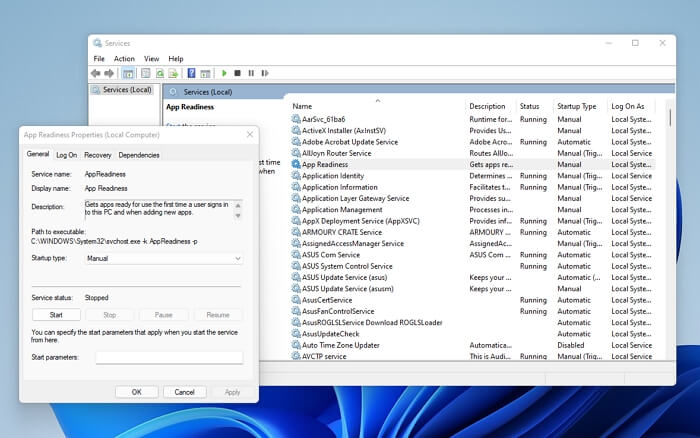
App Readiness service is essential to run a Windows update. Not only it comes in handy when setting up apps for the first time or when the user signs in for the first time, but it also comes in handy for getting the PC ready for the update.
Making sure that the feature is enabled has worked for many. So follow the given steps below to enable App Readiness service.
Step 1: Press Win+R keys to open the Run box, type services.msc in it, and press the Enter key.
Step 2: Go to the App Readiness service and double-click it to open the Properties.
Step 3: Then, set the Startup type to Automatic and click Start to enable this service.
Step 4. Click on the OK button to execute this change. Then restart your system to check if the problem persists.
7. Reset this PC
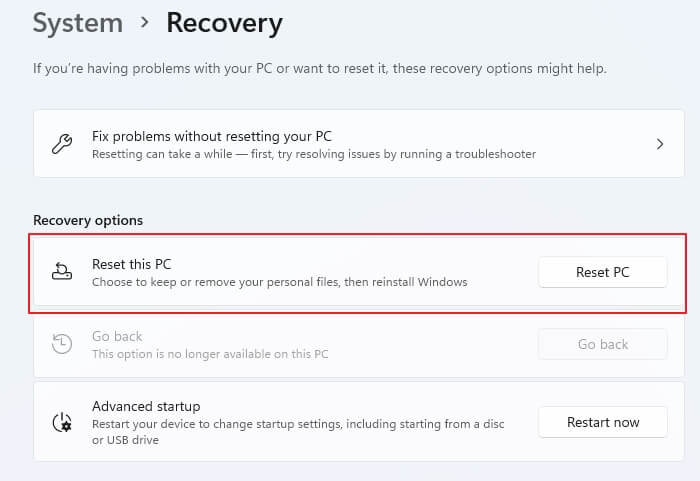
If all of the above-given solutions fail to work for you, then try this last method. Reset this PC can assist you in troubleshooting some of the serious operating system issues. To do so, you have to access the Advanced Startup screen and follow the below-given steps properly.
Step 1: Select Troubleshoot> Reset this PC option in order
Step 2: There, you will get two options. Just choose the Keep my file option to remove apps and settings but keep your all personal files if you choose to Remove everything. It will remove all of your files and apps.
Step 3: You will need to set up Windows again, and then download and apply the update.
Conclusion
Right now, hopefully, you have a clear idea of the top seven solutions to fix the error—we couldn’t complete the updates/Undoing changes. Now follow the exact steps we are given and resolve your issue. If you have any questions, feel free to ask us under the comment section.
How Can We Help You
About the Author
Oliver is an EaseUS professional writer who dares explore new areas. With a passion for solving tech issues with straightforward guides for common users, Oliver keeps honing his writing craft by developing in-depth solutions for disk and partition management, computer boot-up issues, file transfer, etc.
Written by Tracy King
Tracy became a member of the EaseUS content team in 2013. Being a technical writer for over 10 years, she is enthusiastic about sharing tips to assist readers in resolving complex issues in disk management, file transfer, PC & Mac performance optimization, etc., like an expert.
Product Reviews
-
I love that the changes you make with EaseUS Partition Master Free aren't immediately applied to the disks. It makes it way easier to play out what will happen after you've made all the changes. I also think the overall look and feel of EaseUS Partition Master Free makes whatever you're doing with your computer's partitions easy.
Read More -
Partition Master Free can Resize, Move, Merge, Migrate, and Copy disks or partitions; convert to local, change label, defragment, check and explore partition; and much more. A premium upgrade adds free tech support and the ability to resize dynamic volumes.
Read More -
It won't hot image your drives or align them, but since it's coupled with a partition manager, it allows you do perform many tasks at once, instead of just cloning drives. You can move partitions around, resize them, defragment, and more, along with the other tools you'd expect from a cloning tool.
Read More
Related Articles
-
Solved: 6 Fixes for Samsung 990 Pro Slow Write Speed - 2024 New
![author icon]() Sherly/2024/04/19
Sherly/2024/04/19 -
How to Install Windows 11 in Virtual Machine (Step-by-step Guide)
![author icon]() Tracy King/2024/04/19
Tracy King/2024/04/19 -
10 Ways | How to Speed Up Windows 11 and Make It Faster🔥
![author icon]() Tracy King/2024/04/19
Tracy King/2024/04/19 -
Optimize SSD Performance with 4K Alignment Software and Speed Up PC
![author icon]() Tracy King/2024/04/19
Tracy King/2024/04/19
Hot Topics in 2024


EaseUS Partition Master

Manage partitions and optimize disks efficiently