
Content
Page Table of Contents
About the Author
Hot Topics
Updated on Jun 17, 2026
External hard drives play a crucial role in expanding storage capacity and data safety in digital storage. However, encountering an issue where Steam, the prominent gaming platform, fails to recognize an external hard drive can be very frustrating. An example of such a challenge is the recurring issue in Steam forums where the platform fails to recognize an external hard drive. A frustrated user may articulate the problem: "Steam does not detect my external hard drive, preventing game installations and access to existing game libraries".
This technical issue affects the seamless installation and management of games and disrupts the gaming experience. Resolving this error requires a systematic approach. It begins with investigating related factors.
This article will walk you through the process of analyzing and fixing the problem, from simply reconnecting or reattaching an external hard drive to the PC to more complex tasks like partitioning or reformatting the external hard drive for Steam compatibility. Users can regain control over their external hard drives by efficiently addressing this issue, providing optimal performance and an uninterrupted gaming experience on the Steam platform.
Fix 1: Reattach or Reconnect External Hard Drive
Is your external hard drive playing hard to get with Steam? Let's start with a simple fix – reattaching or reconnecting the external hard drive.
Follow the below-mentioned steps to get started:
Step 1. Shut down both your computer and the external hard drive connected to it.
Step 2. Carefully disconnect the external hard drive from its USB port.
Step 3. Re-attach the external hard drive back into the same USB port.
Step 4. Power on the external hard drive and initiate the boot-up sequence for your computer.
Step 5. Launch the Steam application and verify if the external hard drive is successfully recognized within the system.
It's a basic step but often effective in resolving connectivity issues. If Steam still refuses to recognize your external hard drive, let's explore other potential fixes.
Fix 2: Partition or Reformat External Hard Drive
Let's examine this issue more deeply by examining the intricacies of partitioning and reformatting. But first, ensure that your external hard drive meets all the required specifications. Check to see if it's correctly partitioned and formatted. If not, don't worry; we'll provide you a logical and straightforward solution.
But first, make sure that it has the same language as Steam by adjusting its file system. For this task, consider using EaseUS Partition Master Professional, a user-friendly tool designed to make partitioning and formatting seamless. Its intuitive interface allows you to manage your external hard drive effortlessly, ensuring it aligns perfectly with Steam's requirements.
This tool simplifies the technicalities and allows you to focus on returning to uninterrupted gaming sessions. Follow the detailed guide below if you want to ensure that the Steam recognizes your external hard drive.
#1. Partition External Hard Drive for Steam
If your external hard drive is not partitioned yet, the computer, including Steam won't be able to recognize it. Here is how to do so:
Jump to step 3 if the entire external disk is unallocated.
Step 1. Launch EaseUS Partition Master to check for free space at the Partition Manager section.
- If your hard drive has unallocated space, jump to Step 3 to create partition.
- If the hard drive has no unallocated space, continue with Step 2.
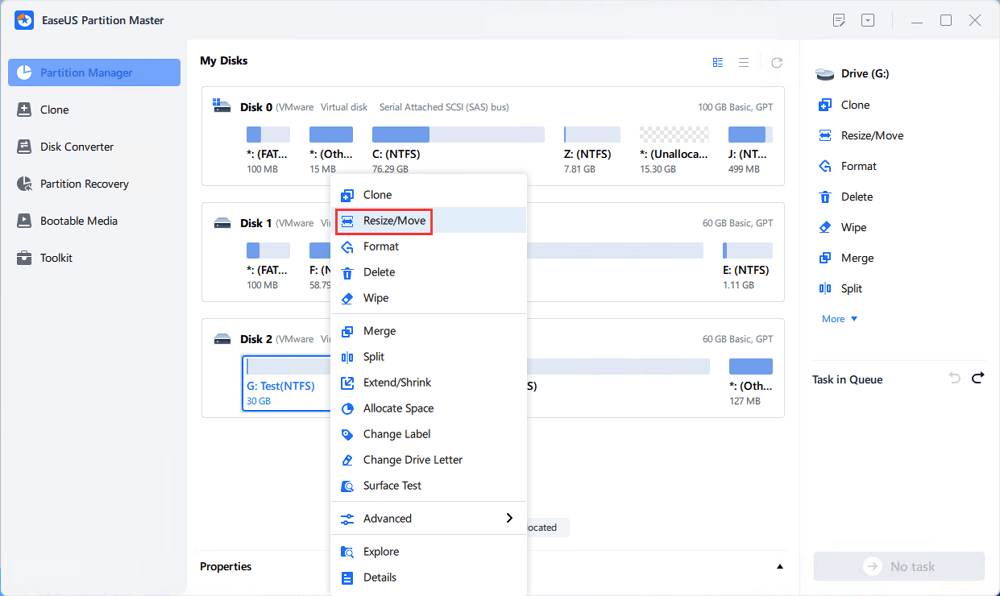
Step 2. Shrink a disk partition to create unallocated space.
Right-click on the target drive partition with a lot free space and select "Resize/Move".
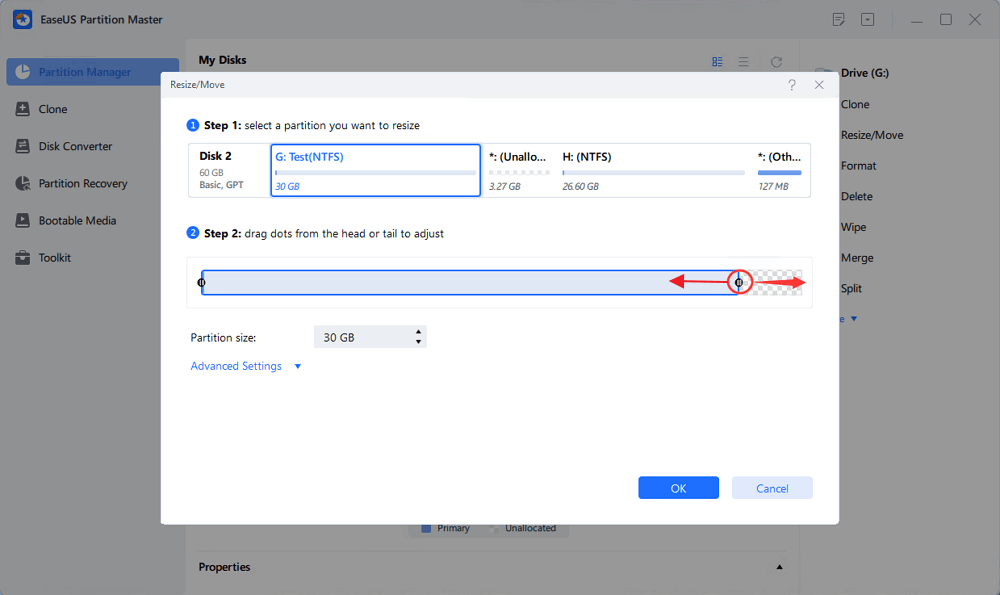
Drag either end of the partition rightwards or leftwards to shrink the partition size so as to get ample unallocated space. You can visually know how much space you've decreased in the "Size of partition" area. Click "OK".
Click "Execute xx Task" and then "Apply" to save all the changes.

Go back to Partition Manager, there should be unallocated space appearing on the same disk and you can continue with the next step to create new partition on your hard drive.
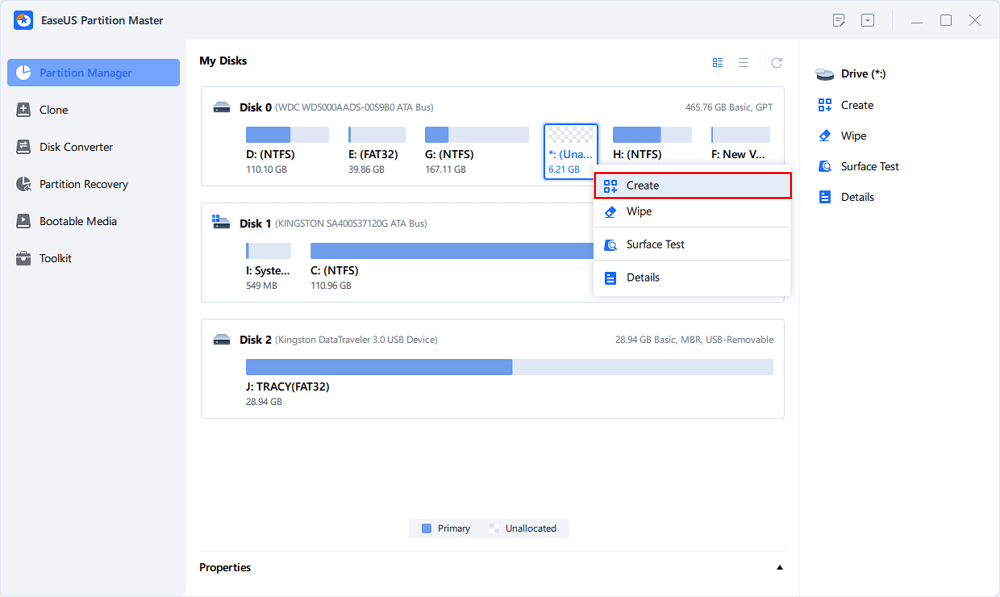
Step 3. Create a new partition with unallocated space on the target hard drive.
Right-click on the unallocated space and choose "Create".
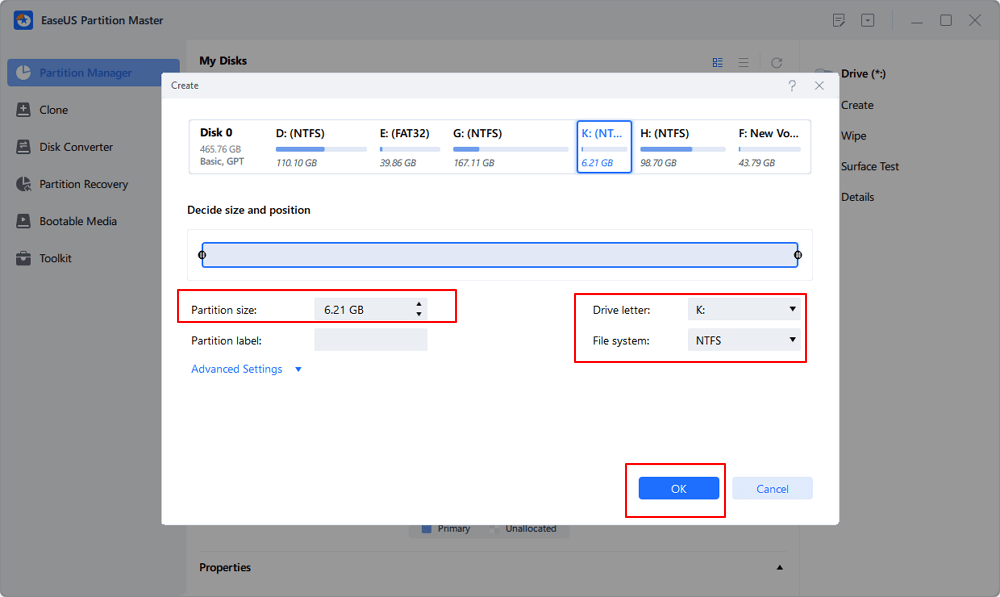
Customize the partition size, partition drive letter, partition label, file system (NTFS, FAT32, EXT2/3/4, exFAT) and more in the Advanced Settings. Click "OK".
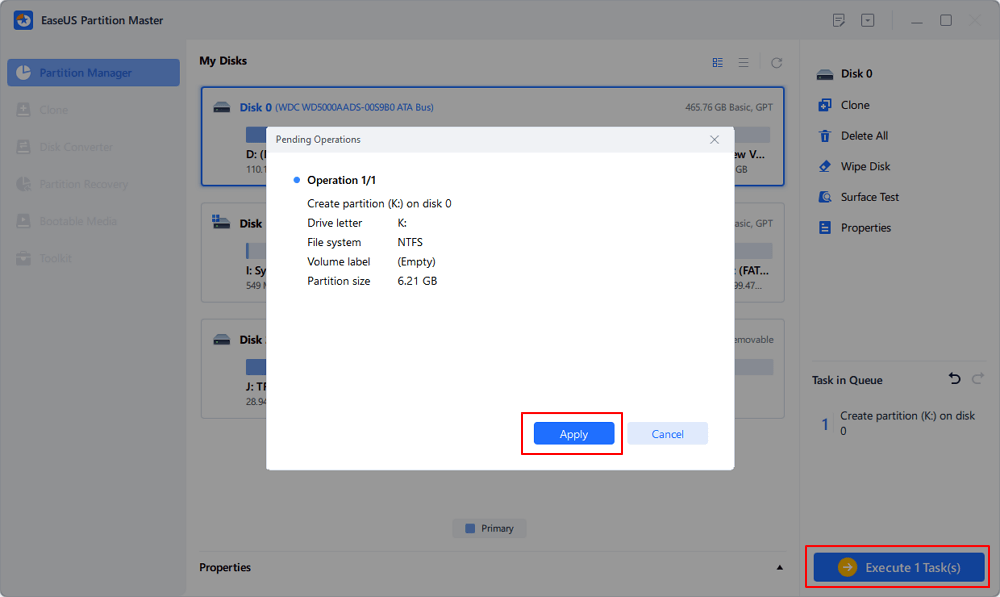
Finally, click "Execute * Task" and "Apply" to complete creating partition with the unallocated space on your disk. Repeat the steps to partition a hard drive and get many more partitions.
This tool can also resolve the Steam not launching issue:
#2. Reformat the External Hard Drive for Steam
Note that if you play Steam games on a computer, it would require you to set the external disk with the NTFS file system. When your current disk is not formatted to NTFS, reformat it with the following steps:
- Right-click the external drive or USB you intend to format and choose "Format".
- Set the Partition label, File system (NTFS/FAT32/EXT2/EXT3/EXT4/exFAT), and Cluster size if you intend to change. Then click "OK".
- Click "Yes" to continue.
- Click the "Execute 1 Task(s)" button and click "Apply" to format your selected external hard drive or USB stick.
If this method resolved your issue, making the external hard drive recognized by Steam on your PC, don't forget to share this guide online to help more of Steam players:
Fix 3. Re-add External Hard Drive with Steam Library Folder
Now, let's learn how to reconnect your external hard drive to your Steam Library seamlessly.
Here's how to add your external hard disk as a second or third game drive in Steam:
Step 1. Launch Steam and select "Settings" from the upper menu.
Step 2. Select "Downloads" from the left-hand navigation under the Settings menu.
Step 3. Add a Steam Library Folder to the external hard drive:
- Identify and select the "Steam Library Folders" section, click on "Steam Library Folder" and navigate to the specific location on your external hard drive designated for storing your games. Establish a new folder on your external hard drive explicitly dedicated to housing Steam games.
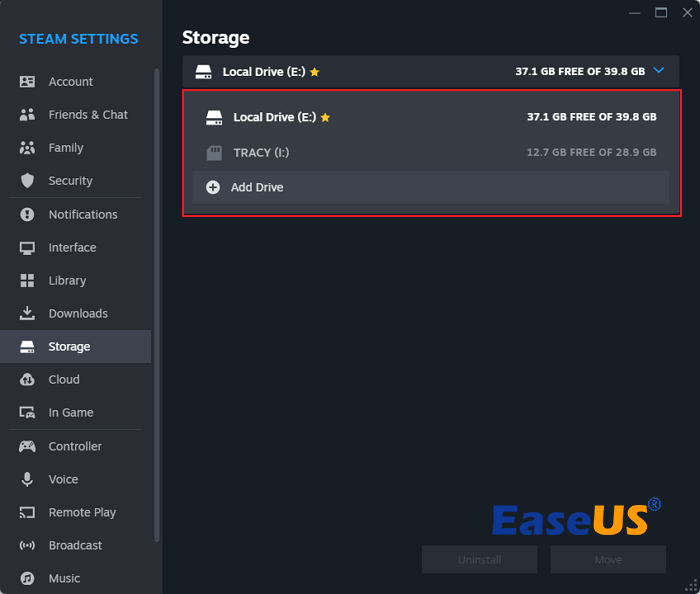
Or, go to the Storage section, click the storage drive with the Add button, and browse to select the external hard drive.

Confirm your selection, allowing Steam to recognize the new library folder on your external hard drive.
Before you embark on this journey, remember to follow each step carefully to add a new Steam Library folder to your external hard drive. This ensures a seamless integration, allowing your external hard drive to host your favorite games effortlessly. Let's proceed with these steps and bring your Steam Library back to order!
Conclusion
Resolving the issue of Steam failing to recognize an external hard drive involves a strategic and systematic approach that addresses various potential causes. This technical challenge, often expressed by frustrated users in Steam forums, significantly impacts the seamless installation and management of games, disrupting the overall gaming experience. Employing a methodical troubleshooting process is essential, starting with the basic step of reattaching or reconnecting the external hard drive to the PC.
For users encountering persistent recognition issues, delving into the intricacies of partitioning and reformatting becomes crucial. A thorough check of the external hard drive's specifications and ensuring compatibility with Steam's requirements is important. Utilizing tools such as EaseUS Partition Master simplifies this process, offering a user-friendly interface to manage external hard drive configurations effectively.
By following these comprehensive steps, users can navigate through technical intricacies, ensuring optimal performance and an uninterrupted gaming experience on the Steam platform. And don't forget to share this guide to help more of your Steam friends online:
FAQs of Steam Not Recognizing External Hard Drive
Here are some hot questions that most Steam fans asked online and if you are interested, follow to find answers here:
How do I get my Steam to recognize a new SSD?
- Ensure proper connection using a compatible cable.
- Open Disk Management (Windows) or Disk Utility (Mac).
- Initialize and format the SSD, assigning a drive letter.
- Reboot to apply changes.
- In Steam Settings, go to "Downloads."
- Add a new library folder on the SSD.
- Right-click on a game in Steam Library.
- Choose "Move Install Folder" and select the SSD.
By following these steps, Steam will recognize and utilize your new SSD for enhanced gaming performance.
Can I install Steam games to an external hard drive?
Yes, you can install Steam games to an external hard drive. Follow these steps:
- Access Steam "Settings" and choose "Downloads."
- Select "Steam Library Folders" and click "Add Library Folder."
- Choose the location on your external hard drive.
- Confirm your selection, and Steam will recognize the external hard drive as a game installation destination.
Which is better for Steam gaming, HDD or SSD?
The choice between HDD and SSD for Steam gaming depends on your priorities. SSDs offer faster load times and smoother performance but can be more expensive. HDDs provide ample storage at a lower cost but may have slightly slower load times. Consider your budget and preferences when deciding which storage type suits your gaming needs.
How Can We Help You
About the Author
Updated by Tracy King
Tracy became a member of the EaseUS content team in 2013. Being a technical writer for over 10 years, she is enthusiastic about sharing tips to assist readers in resolving complex issues in disk management, file transfer, PC & Mac performance optimization, etc., like an expert.
Product Reviews
-
I love that the changes you make with EaseUS Partition Master Free aren't immediately applied to the disks. It makes it way easier to play out what will happen after you've made all the changes. I also think the overall look and feel of EaseUS Partition Master Free makes whatever you're doing with your computer's partitions easy.
Read More -
Partition Master Free can Resize, Move, Merge, Migrate, and Copy disks or partitions; convert to local, change label, defragment, check and explore partition; and much more. A premium upgrade adds free tech support and the ability to resize dynamic volumes.
Read More -
It won't hot image your drives or align them, but since it's coupled with a partition manager, it allows you do perform many tasks at once, instead of just cloning drives. You can move partitions around, resize them, defragment, and more, along with the other tools you'd expect from a cloning tool.
Read More
Related Articles
-
How to Use SSD and HDD Together at the Same Time
![author icon]() Cedric/2026/06/30
Cedric/2026/06/30 -
How to Fix Windows 11 Error 0xc0000005? Answer Is Here!
![author icon]() Tracy King/2026/06/17
Tracy King/2026/06/17 -
FREE MBR Repair Tool: How to Fix MBR on Internal and External Hard Disk
![author icon]() Jean/2026/06/30
Jean/2026/06/30 -
Windows 10 File Transfer Stuck at 99%? Fixes Are Here!
![author icon]() Jean/2026/06/17
Jean/2026/06/17


