If you own a MacBook Pro or Air, chances are you've used the front-facing camera a lot for facetiming. As we all know, MacBook has a high-quality front camera allowing you to attend meetings and shoot clear videos and photographs, but what if you get the dark screen every time you turn it on.
The dark screen will have a "No connected camera" error message. But worry not, we understand how aggravating it can be when the camera malfunctions right in the middle of your zoom meeting, and we're here to solve this issue. Let's delve into further details of the 10 SOLUTIONS→
*Got no idea to make Mac Digital Camera Photo Video Recovery? Follow the guide to get 2GB free recovery method.
Camera Photo Recovery: Restore Lost Photos from Any Camera or SD Card
In this page, you will learn about digital camera photo recovery and how to recover lost digital photos, pictures, images, and videos from a memory card.

Why Is Camera Not Working on Mac?
The good news is that the message 'no connected camera' typically indicates a software issue instead of a hardware one, which is generally relatively simple to resolve. As a result, the camera might be used by an application previously running on macOS, or it might simply not have the requisite permissions.
Using the camera can be impossible because of Screen Time. In the event of a hardware failure, the green light on the camera might flash. Apple should be contacted if this occurs.

How to Fix 'No Connected Camera' Error in 10 Steps
Here are the first five ways of fixing your camera not connected issue on Mac which will not cost too much time and effort.
- Step 1. Restart Mac
- Step 2. Check The Camera Appearance
- Step 3. Check The Internet Connection
- Step 4. Check The App's Permission to Use a Camera or Not
- Step 5. Update The App to The Latest Version
- Step 6~Step 10
Step 1. Restart Mac
The first and the easiest way to go about it is restarting your MacBook. Here's how you can do that:
1: Take a look in the upper left corner, where you'll see an Apple icon.
2: Choose "Restart" from the drop-down list when the option displays.
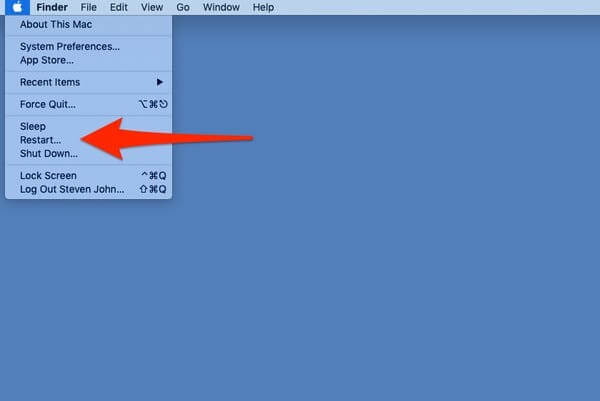
Step 3: A few minutes later, the MacBook will shut down and reactivate itself.
Step 2. Check The Camera Appearance
The second way you can test whether the camera is working correctly is by checking the appearance of the camera. Here's how:
1: Open the Finder.
2: Click on the Applications option on the left. The Finder is on the left-hand side of the menu bar.
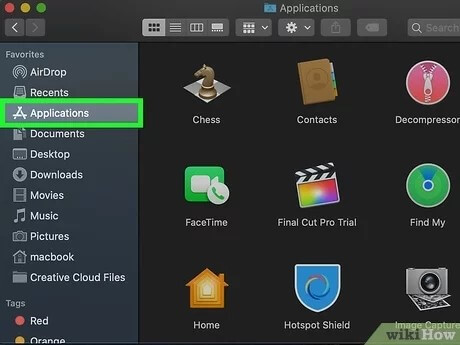
3: Simply double-click Photobooth. This will open your webcam by default. An internet camera that displays a picture indicates that it is operating correctly.
Step 3. Check The Internet Connection
Sometimes, it's better to check the internet connection before face-timing someone using your MacBook. So, how can you do that – is the real question. See here:
1: Select System Preferences from the Apple Menu.
2: Select Network from the drop-down menu.
3: Select the Network Adapter that you want to inspect.
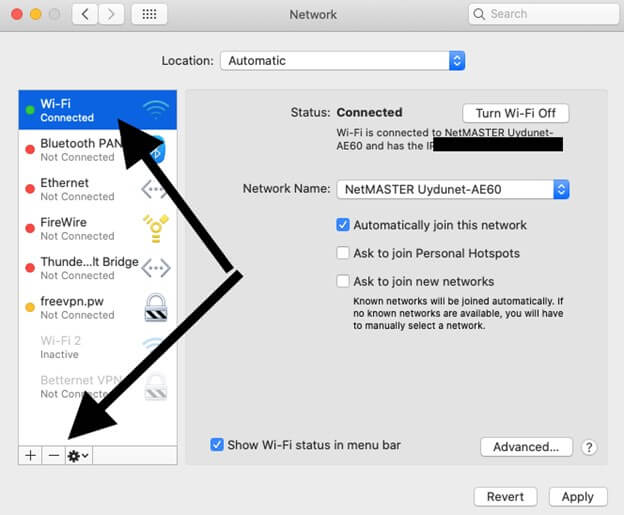
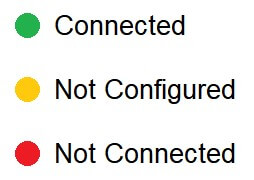
4: Your internet connection's current state may be seen right here.
Step 4. Check The App's Permission to Use a Camera or Not
Sometimes, it happens that your device hasn't granted permission to some functions. Name a few apps Like FaceTime, Zoom, Photo Booth...How to check them? Here's how:
1: Go to the Apple menu and choose System Preferences.
2: To learn more about security and privacy settings, go to the Security & Privacy menu option.
3: The Privacy tab may be found in the top-right of the screen.
4: Click the Privacy tab at the window's top-right in System Preferences > Security and Privacy.
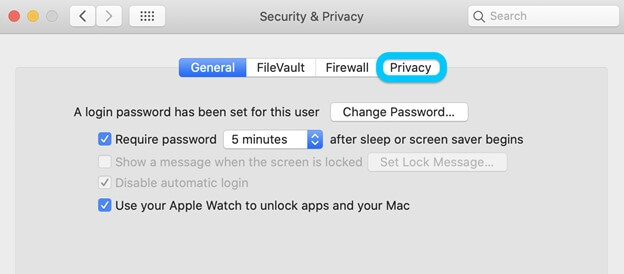
(Note: Locked-in Mac users may modify their system by clicking on the lock icon in the bottom left corner).
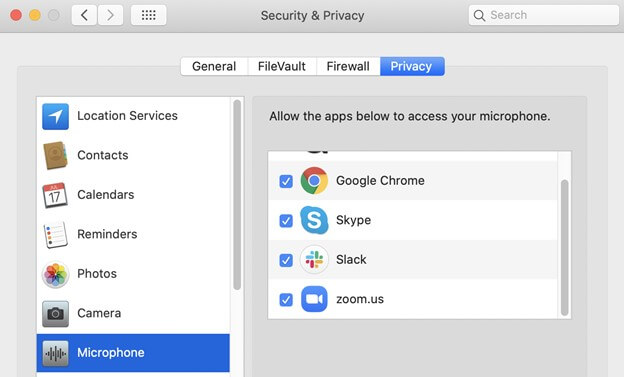
5: Now, you can view your applications' permissions by clicking on an item in the left sidebar.
Step 5. Update The App to The Latest Version
Maybe, your camera apps aren't updated at all. Perhaps, your system is running out of date. So, if not, after restarting the macOS, head over to the App Store and update all of your apps.
1: Open the Mac App Store by clicking on its Dock icon, searching for it in Spotlight, and navigating it in the Applications folder.
2: To discover any outstanding updates, click "Updates" on the sidebar.

3: Applications with pending updates will have an "Update" icon next to them; select it to initiate the update manually.
The rest five ways are kind of harder to follow, but they're all proved to be useful to solve the camera malfunctioning error.
- Step 6. Uninstall and Reinstall a New Version of the App
- Step 7. Disable Suspected Apps in Activity Monitor
- Step 8. Force Quit Camera Related Apps Using Terminal
- Step 9. Reset SMC
- Step 10. Reinstall macOS On MacBook or iMac
*Download EaseUS Data Recovery Wizard for Mac to recover any type of files * folders you care but somehow lost on your Macbook Pro, Air or iMac.
Step 6. Uninstall and Reinstall a New Version of the App
In any Finder window, you may access your Applications folder by choosing Applications in the sidebar:
1: Pressing and holding the Command () button when double-clicking the program in Spotlight to open it in a new window should be your next step.
2: Drag the application to the Trash or choose the program and pick File > Move to Trash from the context menu.
3: Select Finder > Empty Trash to get rid of the software.

(Note: For reinstalling an app, head over to the App Store and download what you deleted earlier).
Step 7. Disable Suspected Apps in Activity Monitor
If you think an application on your MacBook is damaging files and not allowing the device to function correctly, it's time you disable it.
1: Click "Go" on top of your screen in the status bar. Select "Utilities" from the drop-down menu that displays.
2: Next, look for "Activity Monitor" and click on it.
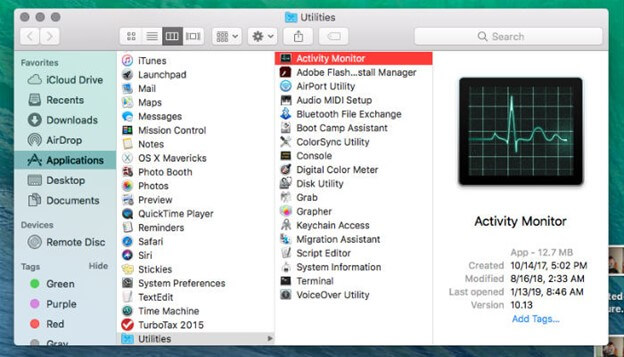
3: When the Activity Monitor window appears, look for and terminate the offending program.
4: In the Activity Monitor window, click on the "X" button in the upper-left corner.
Step 8. Force Quit Camera Related Apps Using Terminal
If you think your camera is lagging or glitching, force quitting the camera-related apps using the Terminal feature can help you big time.
1: Close any applications that have accessibility to your camera.
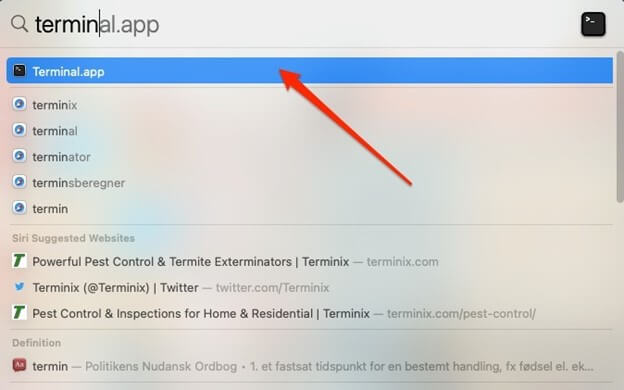
2: To open Terminal, select the Spotlight Search button, type "Terminal," and then hit Enter.
3: Enter the command sudo killall VDCAssistant. If asked, enter your password and hit the Enter key.

4: Enter the command sudo killall AppleCameraAssistant into the open command line window.
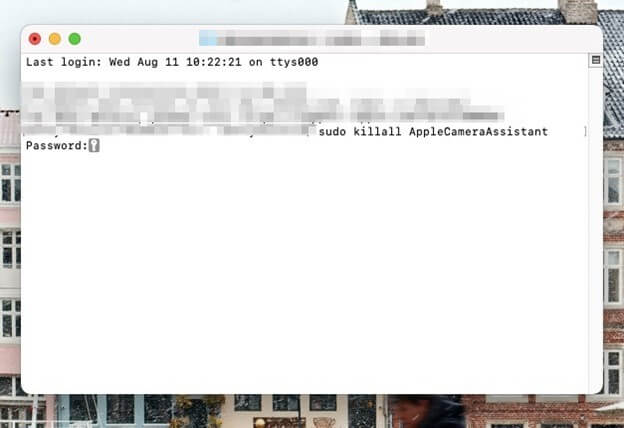
(Note: Afterwards, open an application that utilizes the built-in webcam and check whether the issue with the camera is fixed).
Step 9. Reset SMC
Resetting the SMC on a Mac to address the issue of "no camera attached" is a great option. Follow the system's step-by-step instructions to fix a MacBook camera that isn't functioning or isn't showing up.
1: Shut down your Mac.
2: After pressing and holding the Control+Alt+Shift for 7 seconds, press and hold the Power button for another 7 seconds.
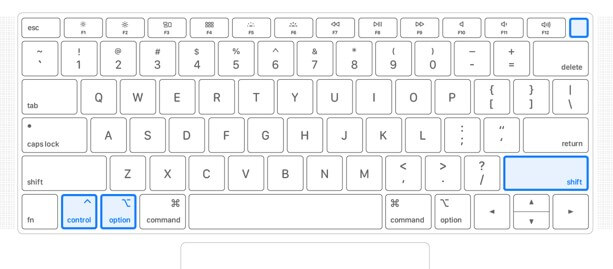
3: You may now turn it on by pressing the Power button.
Step 10. Reinstall MacOS On MacBook or iMac
Last but not least, you can reinstall macOS on iMac or MacBook to see if things improve or not. Here's how you can do it:
Step 1: Choose Reinstall macOS from the tools panel in macOS Recovery.
Step 2: Now select Continue and apply the on-screen directions to start the installation process.
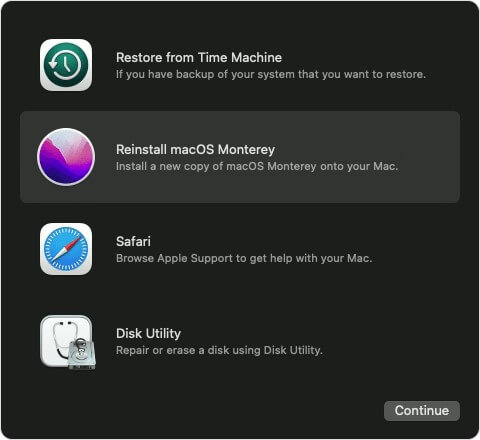
Important Note: reinstalling macOS is highly dangerous if you haven't backup your important files and contents. So, if you go ahead with it, we have the perfect solution for you to recover your files.
EaseUS Data Recovery Wizard for Mac: Your Data Recovery Companion
In the case of reinstalling macOS, you can recover your lost files. Surprised? It's high time you turn your head towards the best software in town that will help you regain, or shall we say, "recover" all of your files after you are done reinstalling your macOS.
Disappointingly, even the most excellent data-recovery tools might fail to retrieve files that have already been destroyed or lost permanently. However, we've found that EaseUS Data Recovery Wizard for Mac is the most excellent macOS data recovery program we've used so far.
A long cry from a perfect solution, the world's most potent & dependable tool for restoring deleted files on Mac is EaseUS Data Recovery Wizard for Mac, and it does it in just three simple steps.
Additionally, it searches deeper into storage devices than any other Mac data recovery program, ensuring the most outstanding results. There is no harm to the original data, and your personal information is safe. It's the first and only program that works with the T2 chip encryption problem.
Plus, you would be surprised to know that with EaseUS Mac SD card file recovery feature, you can now retrieve all of your lost videos and photos easily with the software.
Some prominent features include:
- Recovery of Deleted Files – With their original names, recover digital camera deleted files [photos and videos] even from the Trash Bin.
- Mac Hard Disk Recovery – Backup and restore data from a corrupted or formatted external hard drive.
- SD Card Photo Recovery – You can get back photographs and information that have been erased or lost from your memory cards.
- Different Data Loss Scenarios – A system crash or upgrade, a virus, or an unplanned power outage are all examples of this.
Here is the step-by-step tutorial of data recovery of lost macOS files using the EaseUS Wizard Recovery:
Step 1. Search for lost files
Select the disk location to search for lost files (it can be an internal HDD/SSD or a removable storage device) on macOS Sierra, High Sierra, Mojave, Catalina, Big Sur, Monterey, Ventura, and the latest Sonoma. Click the "Search for lost files" button.

Step 2. Go through the scanning results
EaseUS Data Recovery Wizard for Mac will immediately scan your selected disk volume and display the scanning results.

Step 3. Select the file(s) and recover
In the scan results, select the file(s) to preview and click the "Recover" button to have them back.

Was This Page Helpful?
Jaden is one of the editors of EaseUS, who focuses on topics concerning PCs and Mac data recovery. Jaden is committed to enhancing professional IT knowledge and writing abilities. She is always keen on new and intelligent products.
Jean is recognized as one of the most professional writers in EaseUS. She has kept improving her writing skills over the past 10 years and helped millions of her readers solve their tech problems on PC, Mac, and iOS devices.
-
EaseUS Data Recovery Wizard is a powerful system recovery software, designed to enable you to recover files you’ve deleted accidentally, potentially lost to malware or an entire hard drive partition.
Read More -
EaseUS Data Recovery Wizard is the best we have seen. It's far from perfect, partly because today's advanced disk technology makes data-recovery more difficult than it was with the simpler technology of the past.
Read More -
EaseUS Data Recovery Wizard Pro has a reputation as one of the best data recovery software programs on the market. It comes with a selection of advanced features, including partition recovery, formatted drive restoration, and corrupted file repair.
Read More
Related Articles
-
Downloads Folder on Mac Dock Disappeared? How to Add
![author icon]() Dany/Jun 30, 2026
Dany/Jun 30, 2026 -
How to Fix Mac Won't Boot After Time Machine Restore
![author icon]() Dany/Jun 17, 2026
Dany/Jun 17, 2026 -
How to Access Time Machine Backups on a Mac and Restore Your Data
![author icon]() Brithny/Jun 30, 2026
Brithny/Jun 30, 2026 -
Missing Photos After macOS Ventura Update, Restore Pictures Now!
![author icon]() Brithny/Jun 30, 2026
Brithny/Jun 30, 2026