| Workable Solutions | Step-by-step Troubleshooting |
|---|---|
| 1. Run Data Recovery Software | Select the location where your valuable photos were lost and click Scan...Full steps |
| 2. Check Your Photos Application | Use Touch ID or your login password to unlock the Recently Deleted album...Full steps |
| 3. Turn to iCloud on Mac | Go to "Photos > Settings". Click the "iCloud" tab. Select iCloud...Full steps |
| 4. Use Time Machine | Open Time Machine on macOS Ventura. Browse through the backups...Full steps |
| 5. Get Back Photos from Trash | Open the Trash Bin icon on your desktop.. Find the missing photos..Full steps |
Photos Disappeared After Update to macOS Ventura
"After my Mac update 13, my photos are gone. I've looked everywhere, but I can't find them anywhere. Where did they go? Can I find the missing photos and recover lost photos after macOS update? Does anyone know how to fix it? Help!"

Many users have reported that their photos have disappeared after updating to Ventura. This problem seems to affect a wide range of users, across different devices and operating systems. There are a few possible explanations for this issue.
- There is a glitch in the update process, which caused photos to be accidentally deleted.
- The photos, stored in a different location after the update, are moved to the new app.
If you're experiencing this problem, you can try a few things. First, check to see if the photos are stored in a different location on your device. If not, try the solutions below to get back missing photos from macOS Ventura.
Tip 1. Run Data Recovery Software to Scan and Find Missing Photos
The macOS Ventura update can delete or misplace photos stored on your computer. If you've recently updated your Mac and can't find your photos, don't panic. EaseUS Data Recovery Wizard for Mac can do you a favor. It is a powerful data recovery software that can scan and recover lost photos after the macOS Ventura update.
- The best macOS Ventura recovery software for everyone
- Recover deleted files on macOS Ventura
- Recover missing/lost files after macOS Ventura update
- Be compatible with all major file types
Follow the steps below to recover missing photos after the macOS Ventura update.
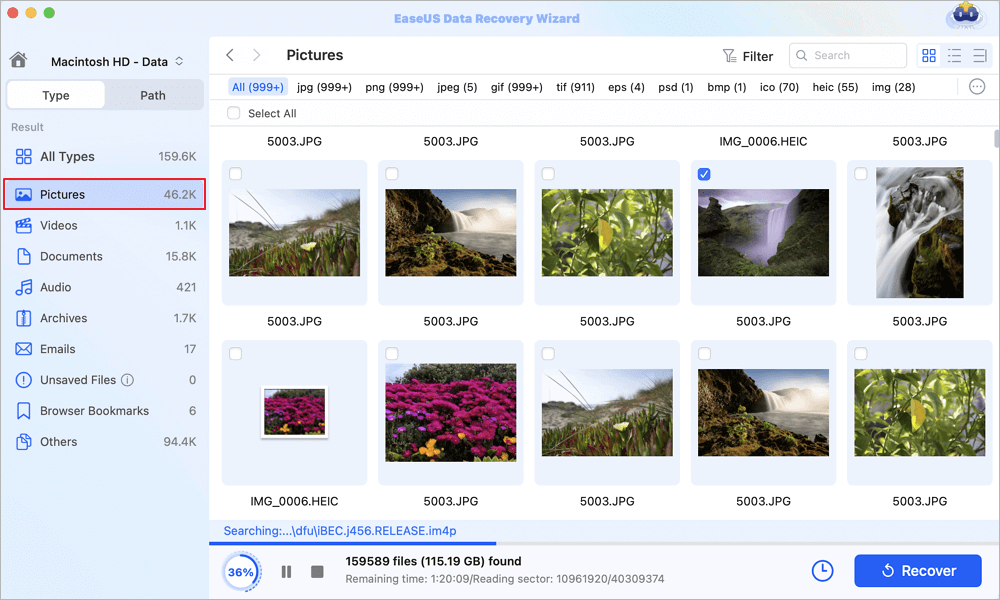
Step 1. Scan for lost photos
Select the location where your valuable photos were lost and click the "Search for lost files" button.

Step 2. Select wanted photos
EaseUS Data Recovery Wizard for Mac will immediately start a scan on your selected disk volume. Meanwhile, the scanning results will be presented in the left pane. By Path and Type, you can quickly filter the photos you've lost earlier.
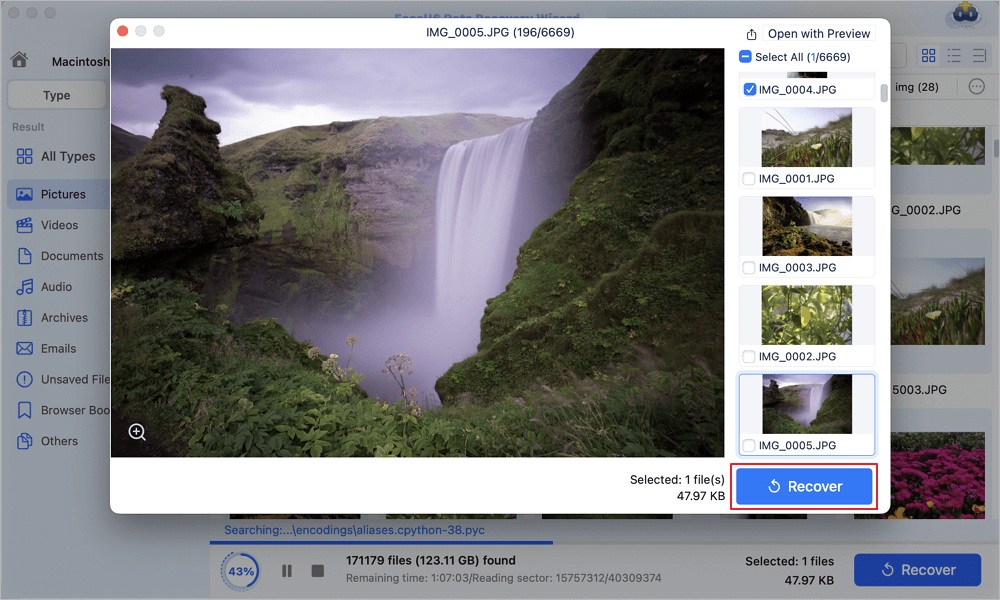
Step 3. Recover lost photos
Select the target photos and click the "Recover" button to get them back at once.
Tip 2. Check Your Photos App on Mac to Restore Disappeared Photos
macOS Photos is a free app that comes installed on every Mac. You can easily organize, edit, and share your photos with macOS Photos. Besides, you can find the disappeared pictures in the Photos app. Follow the steps below to recover missing photos after the macOS Ventura update.
Step 1. Use Touch ID or your login password to unlock the Recently Deleted album.
Step 2. Select the photos or videos that you want.
Step 3. Click the "Recover" button.

The Recently Deleted album stores files for 30 days. After 30 days, they're permanently deleted and you can't recover permanently deleted files on Mac.
Tip 3. Recover Missing Photos After Ventura Update with iCloud
iCloud is a cloud-based service that allows users to store data and access it across all of their devices. It offers 5 GB of free storage, and users can purchase additional storage if needed. If you have turned on iCloud, you can find a missing photo in iCloud Photos.
Step 1. Go to "Photos > Settings".
Step 2. Click the "iCloud" tab.
Step 3. Select iCloud Photos.

Then, connect to Wi-Fi and wait a few minutes. You can recheck your photos.
Tip 4. Fix Photos Disappeared After Update with Time Machine
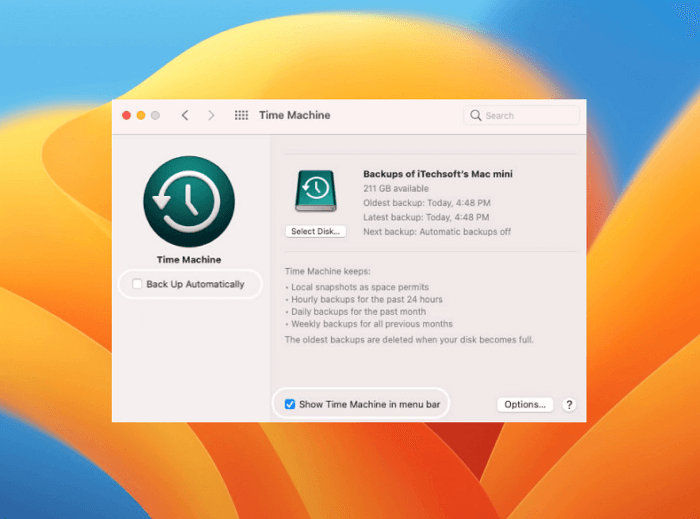
As anyone who has accidentally lost a file knows, it can be a frustrating experience. Fortunately, if you're using Time Machine, it's easy to recover missing photos. Time Machine automatically backs up your files regularly, so all you need to do is find the backup file that contains the image you want to recover.
Step 1. Open Time Machine on macOS Ventura.
Step 2. Browse through the backups to find the photos.
Step 3. Select the photo and restore it to its original location.
Tip 5. Restore Missing Photos After macOS Update from Trash
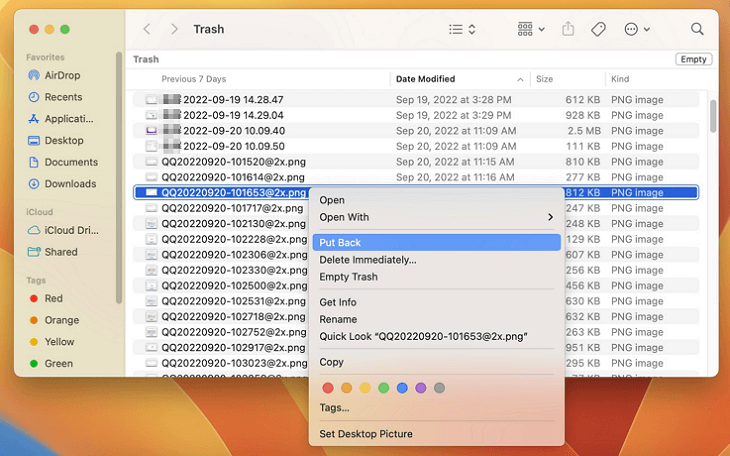
The last and easiest way to find missing photos after updating is to check the Trash. When you delete a file on Mac, it is not immediately removed from your computer. Instead, it is stored in the Trash Can, where it will remain until you choose to empty the Trash Can. Thus, you can recover disappeared photos from the Trash. Follow the steps below to start the Mac Trash recovery process.
Step 1. Open the Trash Bin icon on your desktop.
Step 2. Find the missing photos, right-click them, and select the "put back" option.
Conclusion
One of the worst things is losing precious photos. Photos are irreplaceable, whether they're of family, friends, pets, vacations, or anything else, and their loss can be devastating. While preventing all accidents is impossible, some steps can be taken to minimize the risk of losing photos. For example, it's important to regularly back up files to an external hard drive or cloud storage service. The images will still be safe if a laptop is lost or stolen.
Additionally, if you lose them forever, it's a good idea to use iCloud or Mac data recovery software to restore disappeared, missing, and deleted photos, videos, and files.
Missing Photos After macOS Ventura Update
What if you still have macOS Ventura-related problem? Read the frequently asked questions to get additional help.
1. How to Install the macOS 13 Ventura?
To upgrade to macOS 13 Ventura:
- Find System Preferences from the Apple menu.
- Click Software Update.
- Available macOS will show up, and wait until macOS Ventura appears.
- Click Upgrade Now to start upgrading.
2. Why did my Pictures disappear from my Mac?
Here are the reasons:
- Mac crashes when updating to the latest macOS.
- macOS conflicts with apps on your Mac and causes data loss.
- Not enough space for macOS updates and data is overwritten.
3. Where did my Photos go?
Where do permanently deleted photos go? The Recycle Bin. Deleting a file or photo goes to the Recycle Bin, Trash, or something similar, depending on your operating system.
Was This Page Helpful?
Cedric Grantham is a senior editor and data recovery specialist of EaseUS. He mainly writes articles and how-to tips about data recovery on PC and Mac. He has handled 10,000+ data recovery cases and is good at data recovery of NTFS, FAT (FAT32 and ExFAT) file systems, and RAID structure reorganization.
Brithny is a technology enthusiast, aiming to make readers' tech lives easy and enjoyable. She loves exploring new technologies and writing technical how-to tips. In her spare time, she loves sharing things about her game experience on Facebook or Twitter.
Related Articles
-
How to Restore Notes from Backup on a Mac [with 4 Tested Methods]
![author icon]() Brithny/Jun 30, 2026
Brithny/Jun 30, 2026 -
How to Recover a Deleted Word Document on Mac
![author icon]() Brithny/May 03, 2026
Brithny/May 03, 2026 -
Recover Unsaved Word/Excel Files in Crashed Office 2016 on Mac
![author icon]() Jean/Jun 30, 2026
Jean/Jun 30, 2026 -
Where Are Screenshots Saved on Mac | Find Screenshots on macOS
![author icon]() Dany/Jun 21, 2026
Dany/Jun 21, 2026