***Join the hot discussion for fixing Windows 11 cumulative update failed to download and install
In the process of providing solutions to help Windows users resolve Windows 11 update issues, the error of 'Windows 11 installation has failed' seems happening frequently on Windows computers.
To help you get rid of this error, follow through with this guide and you'll be able to install Windows 11 on your computer successfully on your own.
| Workable Solutions | Step-by-step Troubleshooting |
|---|---|
| Fix 1. Configure PC | Check and configure PC to be compatible with Windows 11...Full steps |
| Fix 2. Remove 0xC1900101 | Unplug the external device, remove GUP driver, configure startup...Full steps |
| Fix 3. Upgrade System Disk | Extend system drive volume, or upgrade Windows to new HDD/SSD...Full steps |
| Fix 4. Redownload Windows 11 | Download Windows 11 ISO and create installation media...Full steps |
Error: Windows 11 Installation Has Failed
The "Windows 11 installation has failed" error often happens when you run Windows Setup to configure a hard disk drive for installing a new Windows operating system like Windows 11.
Some unknown issues caused or stops the installation process of Windows 11, then the computer prompts this error message, notifying Windows users that the installation of Windows OS has failed.
So how do you fix this error? Let's figure out the reasons why has the installation of Windows 11 failed on your computer and fix this issue immediately.
Why Has Windows 11 Installation Failed
Multiple possible reasons could prevent you from installing Windows 11 successfully on the computer.
Here is a list that you can follow to see if your Windows 11 installation task was blocked for the same reasons.
Causes of 'Windows 11 installation has failed' Error:
- External hard drives connected to PC.
- Driver conflict or drivers are outdated.
- PC is not compatible with Windows 11 or PC doesn't meet Windows 11 requirements.
- Windows 11 installation failed in the safe_OS phase error
- Error code 0xC1900101
- This PC can't run Windows 11 due to secure boot, UEFI, or MBR disk issues.
- Downloaded faulty Windows 11 ISO files or problematic insider preview build.
- More...
So how to get rid of this error and make Windows 11 installed on your computer successfully? Follow the guide on the next part, you'll get this issue resolved on your own. Let's move forward and see the details.
💡Read More: How to Fix Total Identified Windows Installations 0
How Do I Fix Windows 11 Installation Has Failed Error? Fix It Now
To get rid of the 'Windows 11 installation has failed' error, we have some quick check tips and a complete fix plan here. Please follow the tips and solutions one by one so to get rid of this error, complete Windows 11 installation on your PC.
Quick Tips to Fix 'Windows 11 Installation Has Failed' Error:
- Remove connected external hard drives, USB drives, or SD cards from PC.
- Update disk drivers or uninstall/reinstall disk drivers.
- Check if Windows 11 download is complete or genuine.
- Clean up malware or virus from PC.
After this, please restart your computer and retry to install Windows 11 on your computer again. If the installation completes, you can stop here. If not, relax and you can now move forward to get rid of the 'Windows 11 installation has failed' error from your computer successfully.
Solutions below can be applied to fix this error on Windows 10/8.1/8/7/XP/Vista.
Fix 1. Check and Configure PC to Be Compatible with Windows 11
Many Windows users who can't install Windows 11 on their computers are because their computer doesn't meet the Windows 11 system requirements.
So how to check if your computer meets the spec and Windows 11 requirements? Here, a reliable PC health checker - EaseUS Windows 11 Checker app can help.
This software will automatically check and inform you if your computer device is fully compatible with Windows 11. Let's see:
Step 1. Launch EaseUS Partition Master and click "Built-in Toolkits".
Step 2. Click "Win11 Checker" to open this feature. Then click the Check Now button to start.
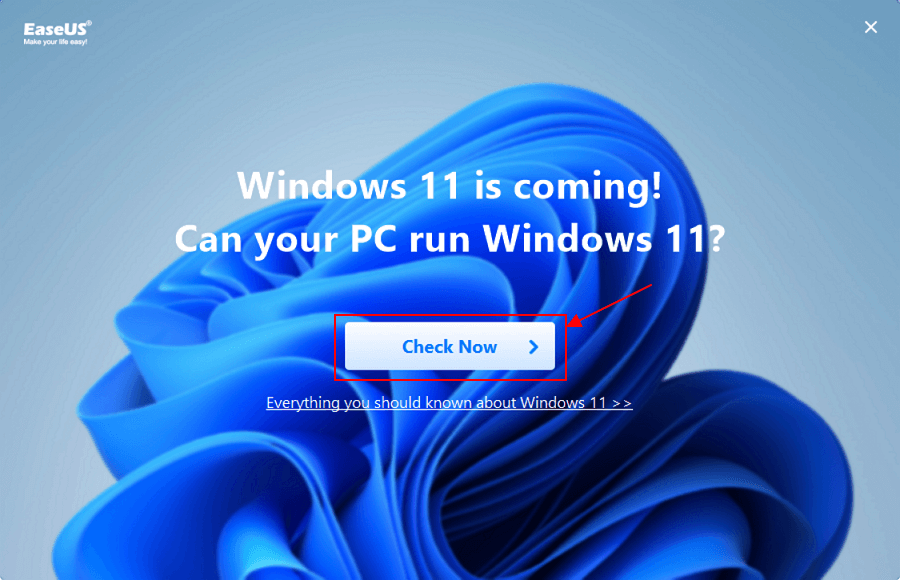
Step 3. The Windows 11 compatibility result window will soon appear. All the incompatible and compatible configuration items will be listed.
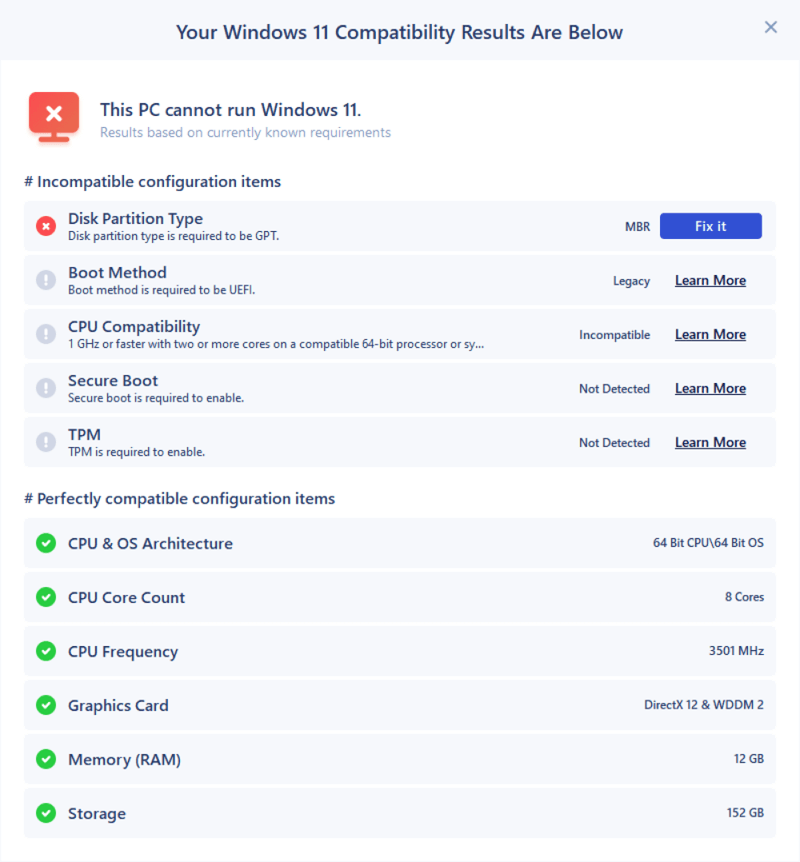
If the Windows 11 Checker found some issues on your computer, don't panic. You can try the tips here for help:
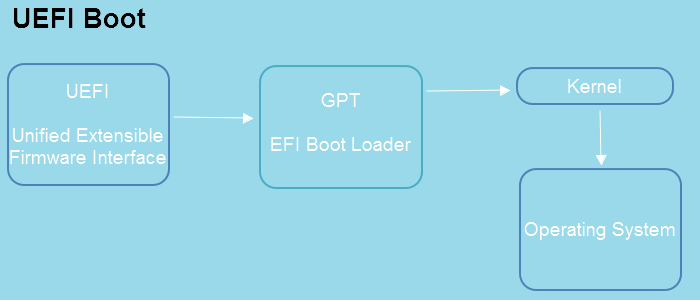
#1. Boot Method - The boot method is required to be UEFI.
This notice means that your computer is not configured as UEFI boot mode. To install Windows 11 successfully, you should set the computer to UEFI boot mode first.
If you're having trouble enable or configure Windows UEFI boot mode, here's how you can disable or enable it within Windows.
#2. Disk Partition Type - Disk partition type is required to be GPT.
This notice means that your current target disk to be installed Windows 11 is with MBR disk type. However, Windows 11 requires GPT disk type to update or install. This is another common reason that so many people fail to install the latest Windows OS on their PCs.
To do so, you'll need to apply the disk conversion feature in EaseUS Partition Master for help.
Video Guide: Convert MBR to GPT for Windows 11 Installation
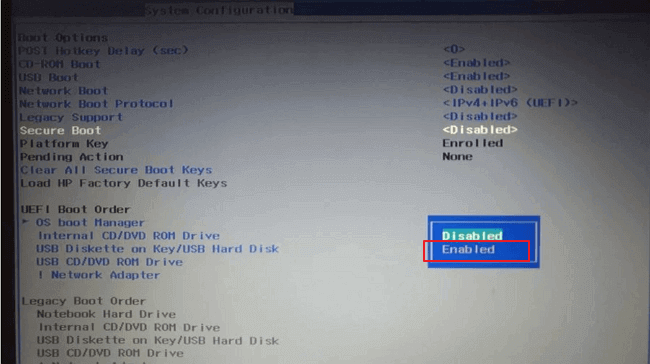
#3. Secure Boot - Secure boot is required to enable.
Besides UEFI boot mode, Windows 11 installation also requires that your computer is configured to a secure boot mode. To do so, you can follow this tutorial for help:
Enable Secure Boot
In this article, we will focus on secure boot, telling you how to enable secure boot for the Windows 11 installation.
#4. TPM - TPM is required to enable.
Windows 11 installation also requires a TPM 2.0 chip to be enabled. Follow to see how to check and enable TPM 2.0 on your PC.
It doesn't matter if your computer currently doesn't have or doesn't support the TPM 2.0 chip. You can follow this guide to bypass this setting:
Windows 11 Download without TPM 2.0
If you're interested in downloading the latest version of Windows 11 on a TPM 2.0 unsupported computer from a bootable USB, try this method here.
When you complete the computer configuration, you should be able to download and install Windows 11 then.
Fix 2. Fix Windows 11 Installation Has Failed in Safe_OS Phase: 0xc1900101
When you get a message saying 'The installation failed in the SAFE_OS phase with an error during BOOT operation' while installing Windows 11, it could be faulty peripherals, corrupted drivers, buggy registry entries, even wrong system settings, or malfunctioning hardware, even not enough disk space that caused this issue.
Try the while guide steps here one by one until you get rid of this issue from your PC:
Step 1. Unplug all external devices connected to the computer.
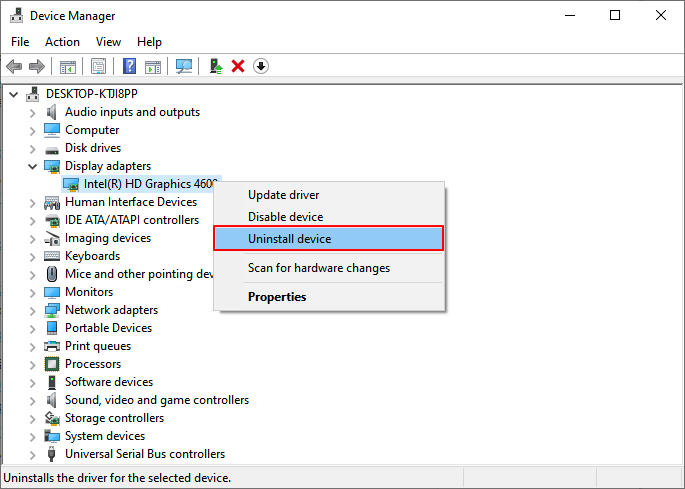
Step 2. Remove GPU driver:
Open Device Manager > Extend Display adapters > Right-click Intel(R) UHD Graphics and select "Uninstall device".
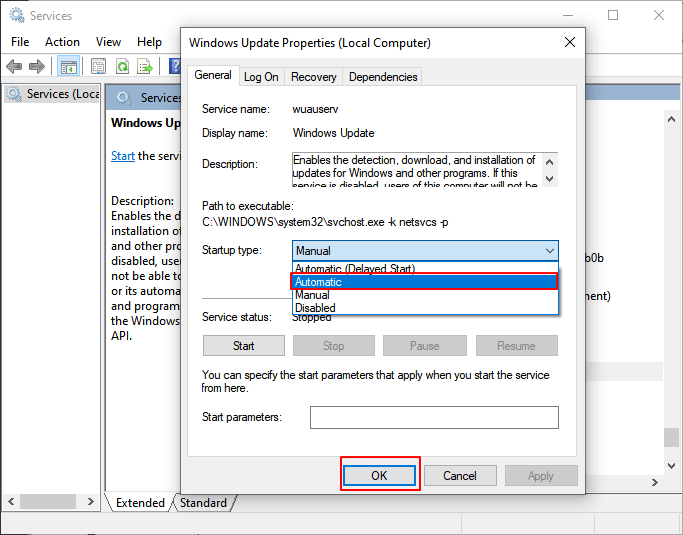
Step 3. Improve startup settings:
Type services.msc in Run dialog > Right-click BITS, Windows Update Services, Cryptographic Service to enter their Properties settings > Set Startup to "Automatic" and click "OK".
Step 4. Upgrade or add RAM if necessary.
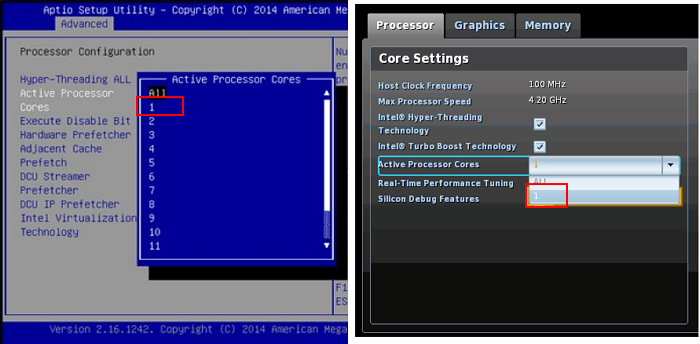
Step 5. Set BIOS active core settings to 1:
Enter BIOS > Locate Active Core Settings > Change the number of active processor cores to 1 > Save and exit BIOS.
After this, restart your PC and try if you can complete installing Windows 11 on your computer.
Fix 3. Upgrade System Disk to Complete Windows 11 Installation
Low system disk space, too old or malfunctioning mechanical hard disk drive could be the barrier that blocks Windows 11 from installing successfully on your computer.
To fix this issue, you can upgrade your target system disk to complete Windows 11 installation with the help of EaseUS Partition Master.
#1. Extend System Drive to Fix Low Disk Space Error for Windows 11
Step 1. Launch EaseUS Partition Master and click "Built-in Toolkits".
Step 2. Click "Win11 Checker" to open this feature. Then click the Check Now button to start.
Step 3. The Windows 11 compatibility result window will soon appear. All the incompatible and compatible configuration items will be listed.
#2. Upgrade/Migrate OS to New SSD
Fix 4. Download and Clean Install Genuine Windows 11 ISO
Faulty or buggy Windows 11 insider ISO files not only can't ensure that your PC obtain the latest OS update but also could cause program or software malfunction issues.
To fix the 'Windows 11 installation has failed' error caused due to faulty ISO file, we suggest that you download and complete Windows 11 installation with a genuine build. EaseUS Win11 Builder can help here.
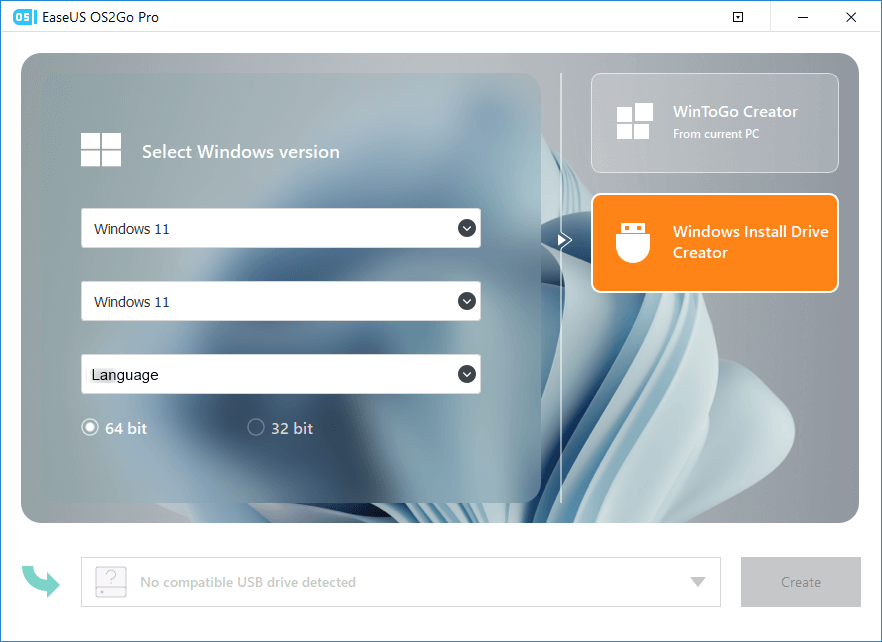
#1. Create Windows 11 Installation USB
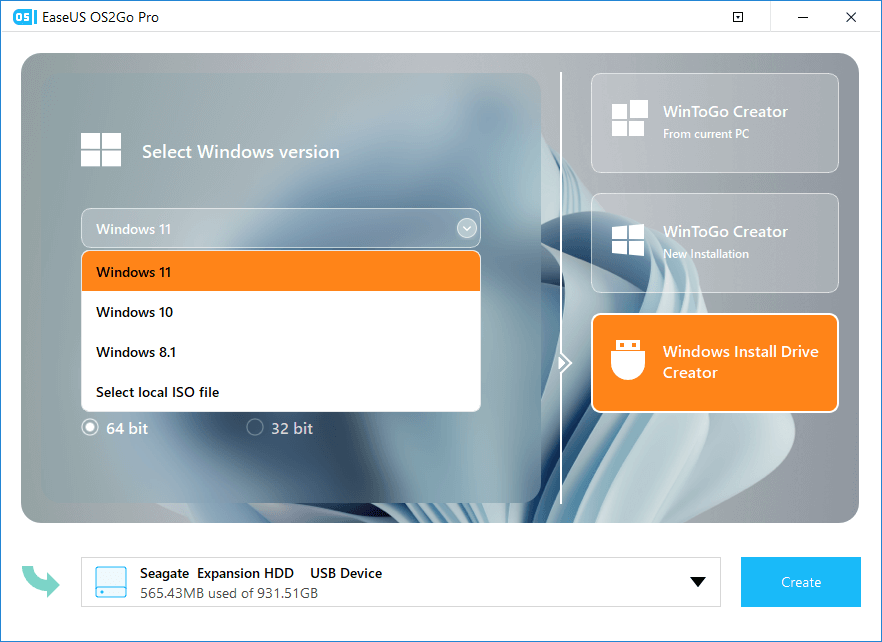
Step 1. Launch OS2Go after installation, and click Windows Install Drive Creator. The obtained system information is available on the home screen, and it keeps updating all the time. Apart from Windows 11, Win11 builder also supports you to download Windows 10/8.1.
Step 2. Connect your USB flash drive to the computer. Win11 builder will automatically detect your USB device, so all you need to do is click the Create button.
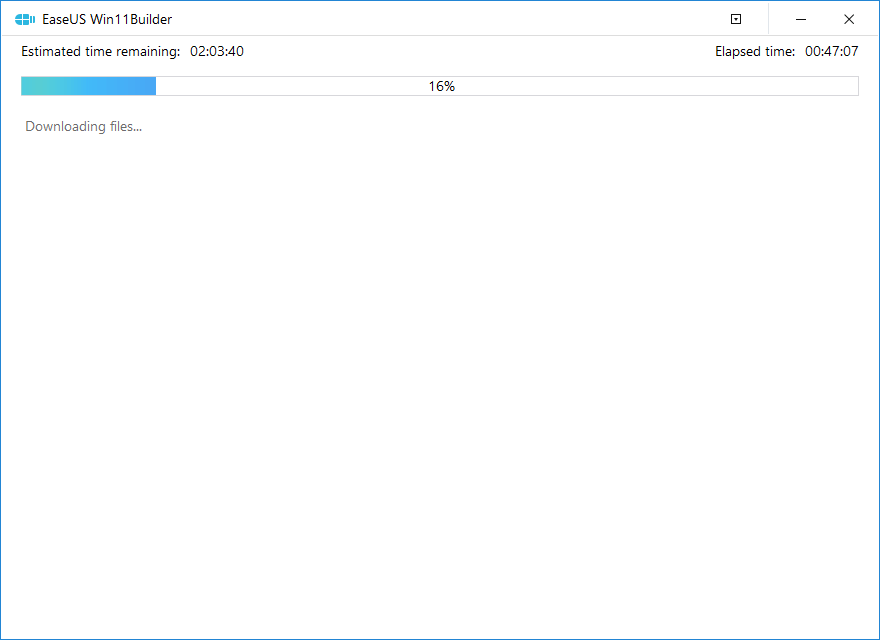
Step 3. The software will empty your USB drive data if it's a used one. Once the downloading process begins, wait there until it finished or leave for a while to do you own job.
Step 4. After successfully downloading the Windows 11 iso image file on the USB drive, start to install Windows 11 from the bootable USB drive on your computer by following the installation wizard step by step.
#2. Clean Install Windows 11 from Installation USB
Step 1. Reboot PC and enter BIOS, setting the USB drive as the boot drive.
Step 2. Once the computer boots on the USB disk, follow the onscreen instructions to install the new OS.
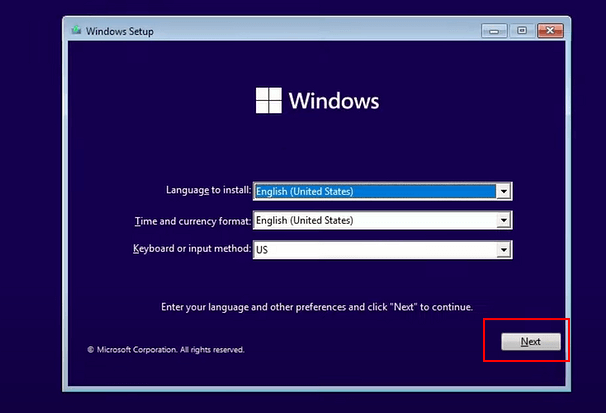
Step 3. Set Language, Time and currency format, Keyboard or input method, and click "Next".
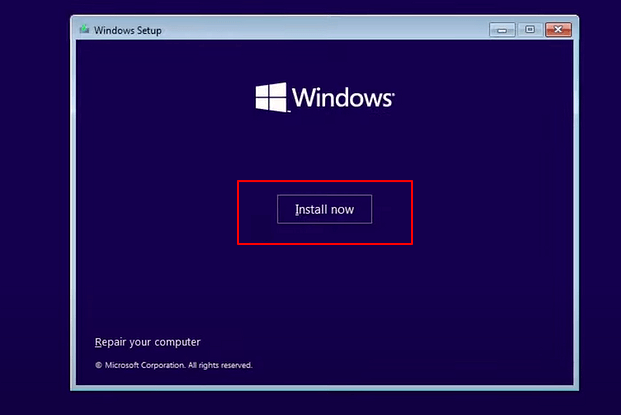
Step 4. Click Install Now to enter the next step.
Step 5. Click I don't have a product key to continue.
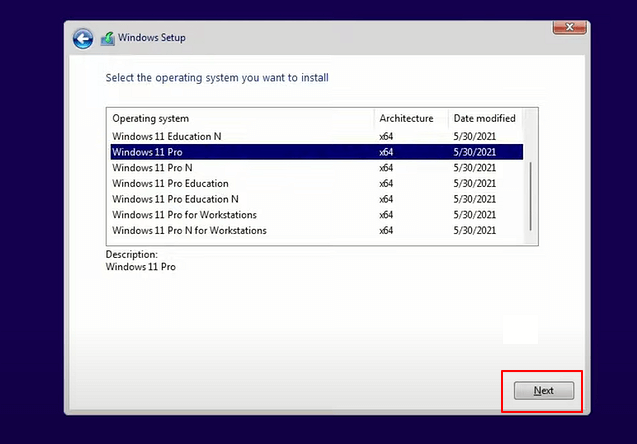
Step 6. Select Windows 11 edition that you want to install and click Next to continue.
Step 7. Click to accept the Microsoft License Term and click Next.
Step 8. Click Custome: Install Windows only on the new disk.

Step 9. Select the OS disk and click Next to continue.
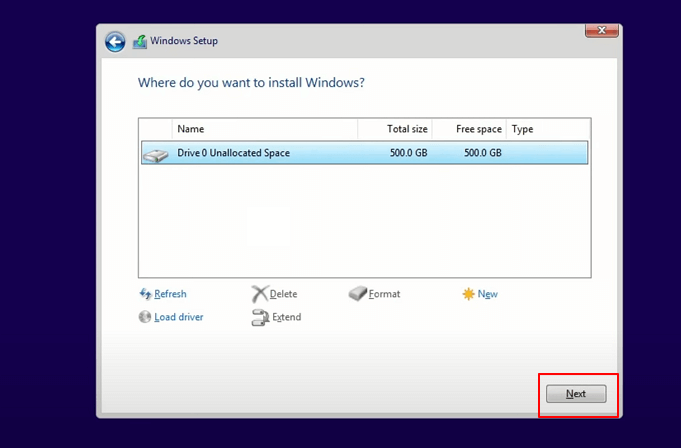
Step 10. Wait for the installing process to complete, the computer will restart automatically.
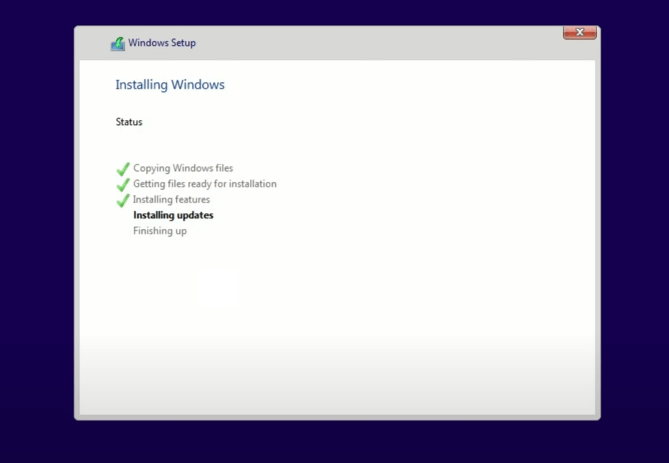
Then follow the on-screen guide to set up the computer. If your computer doesn't boot on the new drive, follow the next guide to enable it and set it to boot from the target disk.
Windows 11 Installation FAQs
It doesn't matter if you know the causes of the 'Windows 11 installation has failed' error. You can simply follow through with solutions on this page to make Windows 11 installed on your computer successfully.
Aside from this issue, we also collected other types of issues while installing Windows 11. If you have the same issue, follow to see the solutions here:
1. How to Fix Windows 11 Installation Stuck at 35%, 85%, 100%?
When you are trying to upgrade to Windows 11 but the installation process gets stuck, don't worry. You can find effective solutions to fix Windows 11 installation stuck at 35%, 85%, 100%.
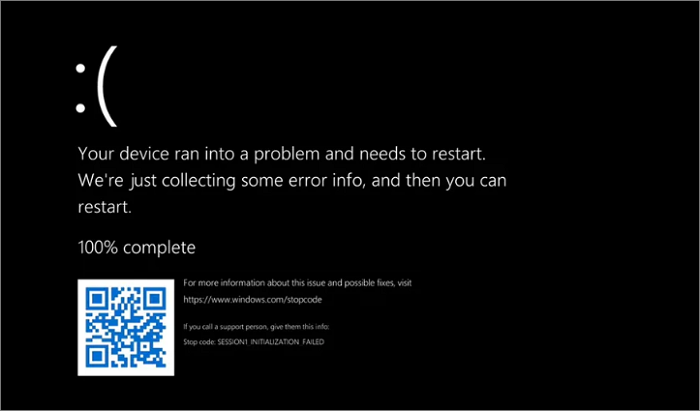
2. How to Fix Windows 11 Black Screen of Death?
Windows 11 BSOD, black screen of death, comes with 'Your PC ran into a problem and needs to restart' error message, displaying a certain error code, such as CRITICAL_PROCESS_DIED, VIDEO_TDR_TIMEOUT_DETECTED, etc. You can fix it by rebooting the PC into safe mode, uninstall bad drivers, fix BDC, and remove viruses.
See how to fix it:
The black screen of death on Windows 11 is caused by many reasons. Follow to figure out the causes and fixes for Windows 11 BIOS error on your own.
3. Windows 11 Update Not Enough Space, How to Fix?
When old computers retain very small free space on the system disk, Windows update not enough space error will occur. To fix this issue, you can delete old Windows files, clean up system junk files, add more space to the system c drive and even merge a big partition to the C drive.
Among these fixes, extending the C drive will work immediately and you can do this by applying EaseUS Partition Master for help.
Was This Page Helpful?
Updated by Tracy King
Tracy became a member of the EaseUS content team in 2013. Being a technical writer for over 10 years, she is enthusiastic about sharing tips to assist readers in resolving complex issues in disk management, file transfer, PC & Mac performance optimization, etc., like an expert.
Related Articles
-
WD Elements vs. My Passport, Everything You Should Know
 Cici/2026-06-29
 -
What Is MSI Boot Menu [Detailed Info]🔥🔥
 Jerry/2025-06-30
 -
What Is macOS Base System [Everything You Need to Know]
 Cedric/2026-05-21
 -
How to Kill All the Processes in Windows 10/11
 Daisy/2025-06-30