Windows 11 now has some mandatory limitations on computer configurations for users who want to upgrade from Windows 10 to the new version. Including the UEFI boot method, GPT disk style, TPM 2.0, and secure boot.
In this article, we will focus on the last one, secure boot, telling you how to enable secure boot for the Windows 11 installation.
What is Microsoft Secure Boot?
Secure Boot is a feature associated with UEFI-based computers. The main purpose of Secure Boot is to provide security measures that were not possible before by ensuring that only trusted software components signed by Microsoft or computer manufacturers (OEMs) are used during the startup process.
So you can see that since Windows 11 requires the UEFI boot mode, and the Secure Boot feature is associated with UEFI-based computers. It's a necessary option for users to enable Secure Boot. Keep reading, in the next part, we will tell you how to enable it.
How to Enable Secure Boot for Windows 11
Don't be afraid if you are not a computer expert, follow the step-by-step guide, you can do it on your own. But one thing to remember, before turning on the secure boot feature, you need to make sure you have changed the boot mode into UEFI. If you don't know how or you don't know how to check your computer's boot mode, you can refer to this page. How to Check Your Computer Boot Mode?
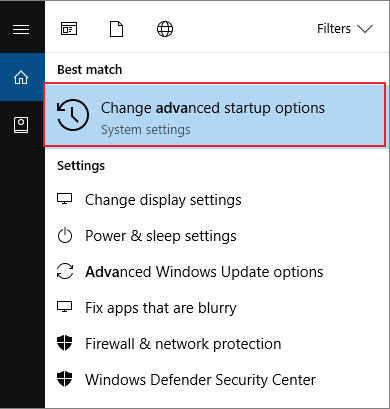
Step 1. Search Advanced startup in Windows search bar. Then select Change advanced startup options.
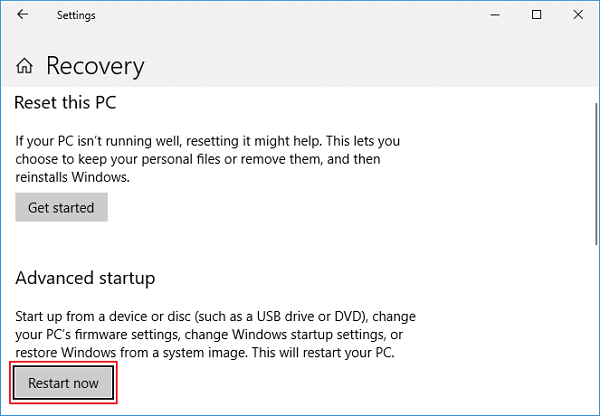
Step 2. Under Recovery > Advanced startup, click the Restart now button.
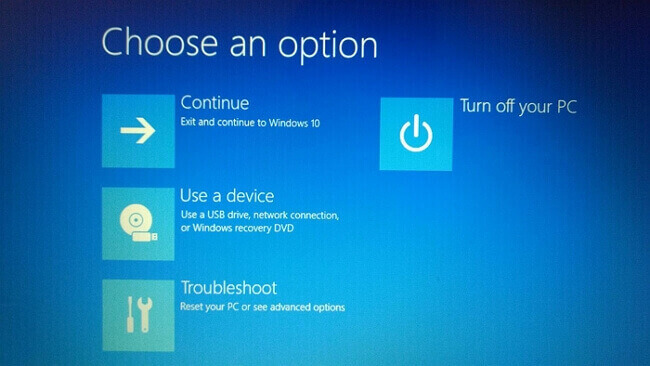
Step 3. Your computer will restart, and showing the Choose an option screen. Select Troubleshoot.
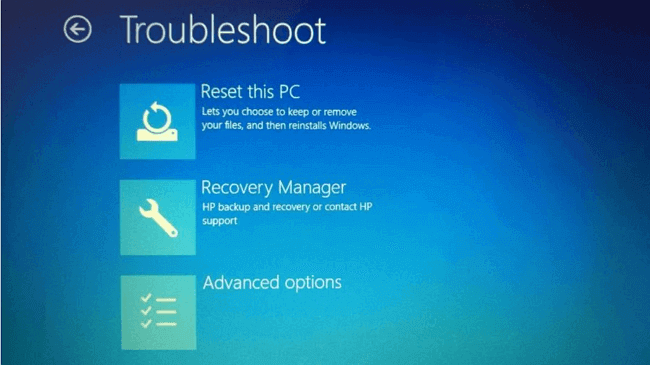
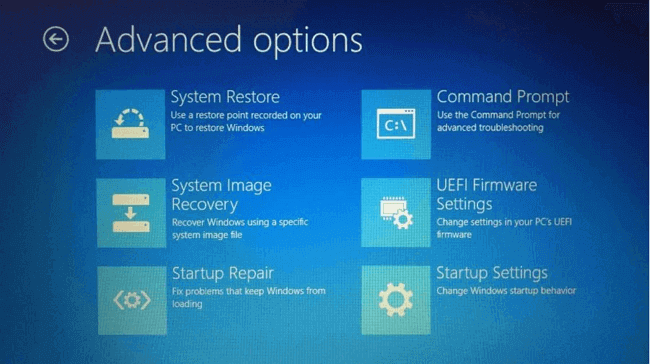
Step 4. Choose Advanced options.
Step 5. Choose UEFI Firmware Settings.
Step 6. Now your computer will restart again, and it will start in BIOS.
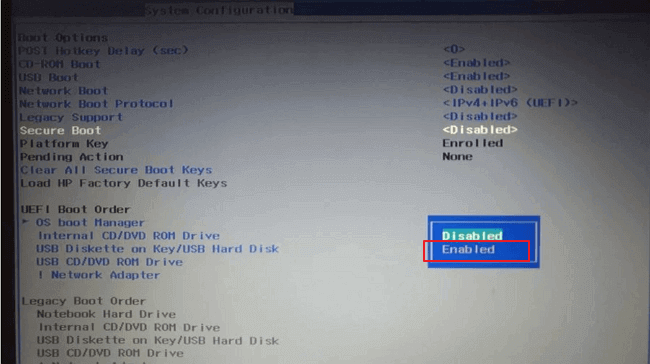
Step 7. Under the BIOS settings, you need to click the Security tab.
Step 8. Find the Secure Boot option, use the Up and Down arrow to choose this option, then change the status into Enabled.
Download and Install Windows 11
You have now enabled the secure boot of your computer. If you want to check the status, you can apply this tool to check if your PC meets the system requirements of Windows 11. On this same page, you will also find Windows 11 DOWNLOAD AND INSTALL solutions. EaseUS has developed a toolkit to help you install Windows 11 with ease.
Windows 11 Requirements Free Checker
Conclusion
Upgrading to Windows 11 is quite different from other Windows 10 updates. You need to do more to meet the requirements of Windows 11. But with our Windows 11 guides, you don't need to worry if you have no idea how to upgrade by yourself. What's more, even if you find Windows 11 is not so advanced, you still have a chance to roll back from Windows 11 to Windows 10. Good luck, and hope you can enjoy the journey of the new Windows OS.
Was This Page Helpful?
Daisy is the Senior editor of the writing team for EaseUS. She has been working at EaseUS for over ten years, starting as a technical writer and moving on to being a team leader of the content group. As a professional author for over ten years, she writes a lot to help people overcome their tech troubles.
Written by Tracy King
Tracy became a member of the EaseUS content team in 2013. Being a technical writer for over 10 years, she is enthusiastic about sharing tips to assist readers in resolving complex issues in disk management, file transfer, PC & Mac performance optimization, etc., like an expert.
Related Articles
-
What Is Minimum Processor State? Everything You Need to Know
 Daisy/2024-01-11
 -
Hyper-V vs. VMware: Which Is the Better Choice for You?
 Brithny/2024-01-11
 -
M2 Pro vs M2 Max | Price, Battery Life, CPU, and GPU
Brithny/2024-07-01 -
What Is Incremental Backup? Definition, Pros, and Cons
 Dany/2024-07-01
