Windows 11 was officially announced on June 24th and Microsoft provides PC Health Check for Windows 10 users to check if their computer is compatible with the new operating system. The PC Health Check will show two different results:
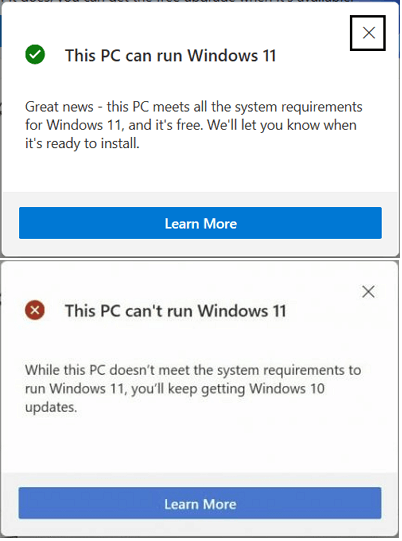
1. This PC can run Windows 11. Great news - this PC meets all the system requirements for Windows 11.
2. This PC can't run Windows 11. While This PC doesn't meet system requirements on Windows 11.
If you received the first message, congratulation. You can directly update to Windows 11 and it will run smoothly without any issue on your computer. However, if you get the second error message, it means that your current computer is not compatible with Windows 11 and you can't directly install it on your computer. Follow this guide, we'll show you how to fix your PC can't run Windows 11 error.
- How to Fix "This PC can't run Windows 11. The PC must support Secure Boot" Error
- How to Fix "This PC can't run Windows 11. The system disk needs to be 64GB or larger." Error
- How to Fix "This PC can't run Windows 11. The processor isn't supported for Windows 11." Error
- How to Fix "This PC can't run Windows 11. TPM 2.0 is a requirement for running Windows 11." Error
Error: This PC can't run Windows 11
What is the "This PC can't run Windows 11" error? It's an error message popped up by the PC Health Check application which is a tool for checking Windows 11 compatibility. When your computer doesn't reach the Windows 11 minimum system requirement as shown below, you'll receive the error message telling "This PC can't run Windows 11":
| Processor: 1 gigahertz (GHz) or faster with 2 or more cores on a compatible 64-bit processor or System on a Chip (SoC) | Internet connection: Microsoft account and internet connectivity required for setup for Windows 11 Home |
| TPM: Trusted Platform Module (TPM) version 2.0 | Graphics card: DirectX 12 compatible graphics / WDDM 2.x |
| Storage: 64 GB or larger storage device | Display: >9” with HD Resolution (720p) |
| System firmware: UEFI, Secure Boot capable | Memory: 4 GB RAM |
As the different support for Windows 11 in computer hardware, the descriptions of the "This PC can't run Windows 11" error may be different. Here is a list of all error messages that popped up by PC Health Check, and if you are one of them, follow the respective solution to fix it on your computer now:
- This PC can't run Windows 11. The PC must support Secure Boot.
- This PC can't run Windows 11. The system disk needs to be 64GB or larger.
- This PC can't run Windows 11. The processor isn't supported for Windows 11.
- This PC can't run Windows 11. TPM 2.0 is a requirement for running Windows 11.
- Other more...
So how to fix these issues and it works for your computer to get Windows 11 update? Follow the respective fix for each issue and make it possible to update or install Windows 11 on your computer now.
Guide 1: How to Fix "This PC can't run Windows 11. The PC must support Secure Boot" Error
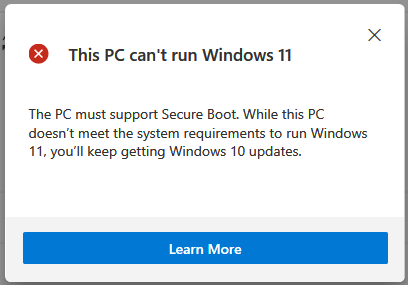
Detailed Error Message: "This PC can't run Windows 11. The PC must support secure boot. While this PC doesn't meet the system requirements to run Windows 11, you'll keep getting Windows 10 updates."
Most modern PCs in Windows 10/8 are shipped with the Secure Boot mode. It keeps your computer safe. And it requires the Secure Boot mode to be enabled for updating or installing Windows 11.
How to Fix Guide:
1. Check if your system supports Secure Boot
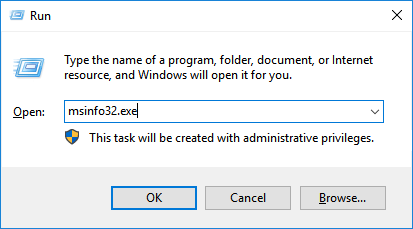
Step 1. Press Windows + R keys, type msinfo32.exe, and hit Enter.
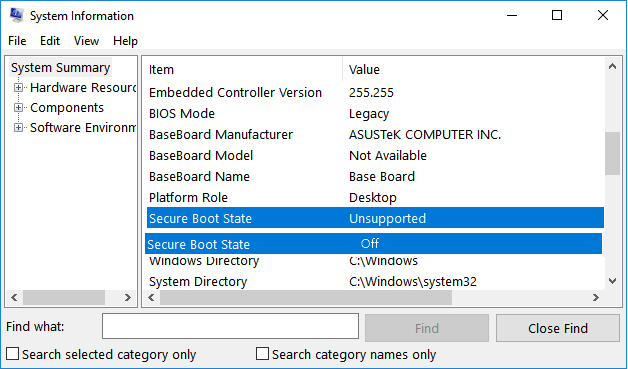
Step 2. On the System Information window, select System Summary.
Step 3. Scroll down to see if you find a section named Secure Boot State (as shown below).
If the Secure Boot State shows as "Off", it means that your computer support Secure Boot and you can jump to the third part to enable it.
If the Secure Boot State shows as "Unsupported", it indicates that your computer hardware doesn't support secure boot. To fix it, move to the next part to check if your computer supports UEFI mode first.
2. Check if your computer supports UEFI mode
Step 1. Restart PC and press F2/F10/Del to enter BIOS.
Step 2. Go to the Boot Menu, find the boot mode section, click to see if your computer supports UEFI mode.
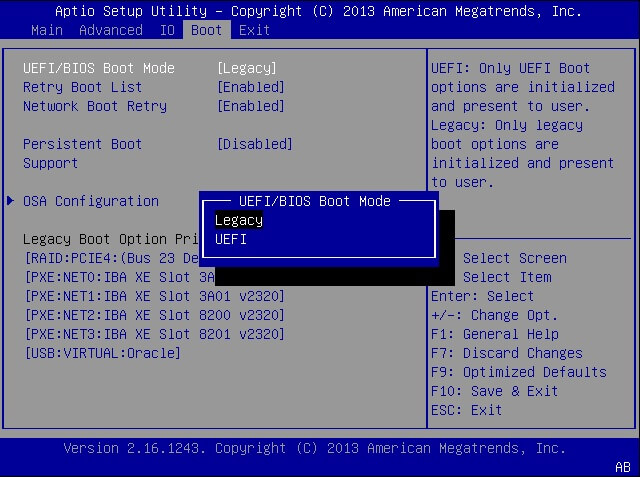
If you see a UEFI mode, it means your computer supports this boot mode. And if it's currently disabled, move to the next guide to enable UEFI and Secure Mode.
Note that, if your computer doesn't support UEFI mode, you can't enable Secure Boot and upgrade to Windows 11.
3. Enable UEFI Mode and Secure Boot
Enable UEFI Mode:
Step 1. Open Disk Management and check if the system disk is with GPT type.
If not, convert the OS disk to GPT disk first as UEFI and Secure Boot requires GPT disk type.
Here we suggest you applying EaseUS Partition Master with its disk conversion feature for help. It converts the disk to MBR or GPT without removing any data or partitions.
Step 2. After disk conversion, restart PC and enter BIOS, go to the Boot Menu, click Boot Mode and select "UEFI".
Step 3. Save the changes and restart the PC.

Enable Secure Boot:
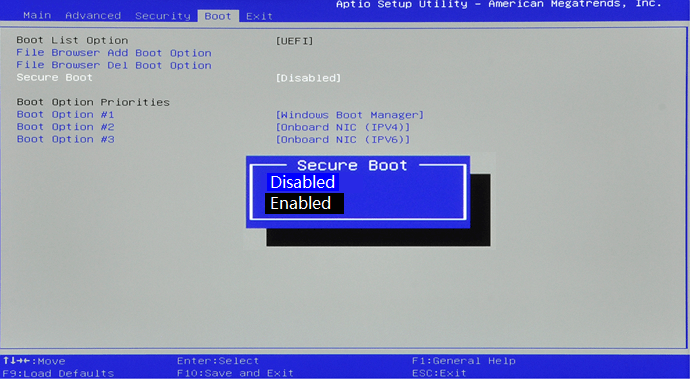
Step 1. Restart PC and re-enter BIOS settings.
Step 2. Go to the Boot Menu, select the Secure Boot settings and set it to "Enabled".
When you complete the process, you can continue installing the Windows 11 update on your computer now.
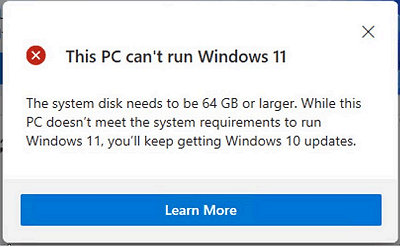
Guide 2. How to Fix "This PC can't run Windows 11. The system disk needs to be 64GB or larger." Error
Detailed Error Message: "This PC can't run Windows 11. The System disk needs to be 64GB or larger. While this PC doesn't meet the system requirements to run Windows 11, you'll keep getting Windows 10 updates.
This error message indicates that your system disk space is too small, which mostly happens on old computers. Here are two tips for you:
1. If your computer is too old, bought before the year of 2015, we suggest that you stay with Windows 10.
2. If your computer is new but the OS disk is too small, you can upgrade your system disk to fix this issue.
How to Fix Guide: (Upgrade OS disk to a larger one)
1. Purchase and Prepare a New Disk - SSD (Preferred)
- New disk capacity must be bigger than 64GB.
- SSD is more recommended for replacing OS disk.
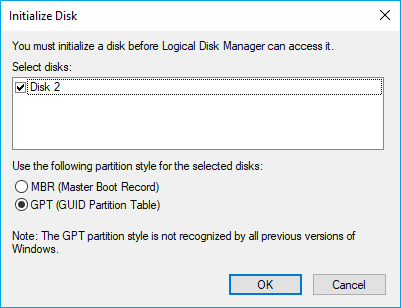
- Initialize disk in Disk Management: Right-click SSD > Initialize > Select "GPT".
2. Transfer OS to New Disk
It's recommended that you transfer OS to the new disk and keep data on the old drive, which is the best way of optimizing the computer performance.
EaseUS Partition Master with its Migrate OS to HDD/SSD feature enables you to fully transfer OS and installed applications to the new disk in a few simple clicks.
Note: The operation of migrating OS to SSD or HDD will delete and remove existing partitions and data on your target disk when there is not enough unallocated space on the target disk. If you saved important data there, back up them to an external hard drive in advance.
Step 1. Select "Clone" from the left menu. Select the "Migrate OS" and click "Next" to continue..
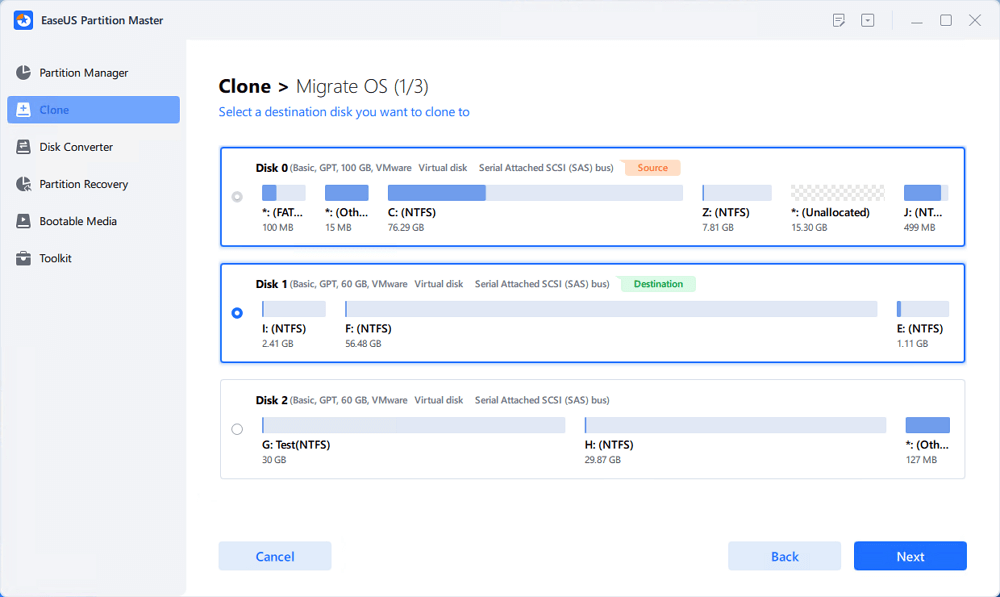
Step 2. Select the target disk you want to clone. Click "Next".
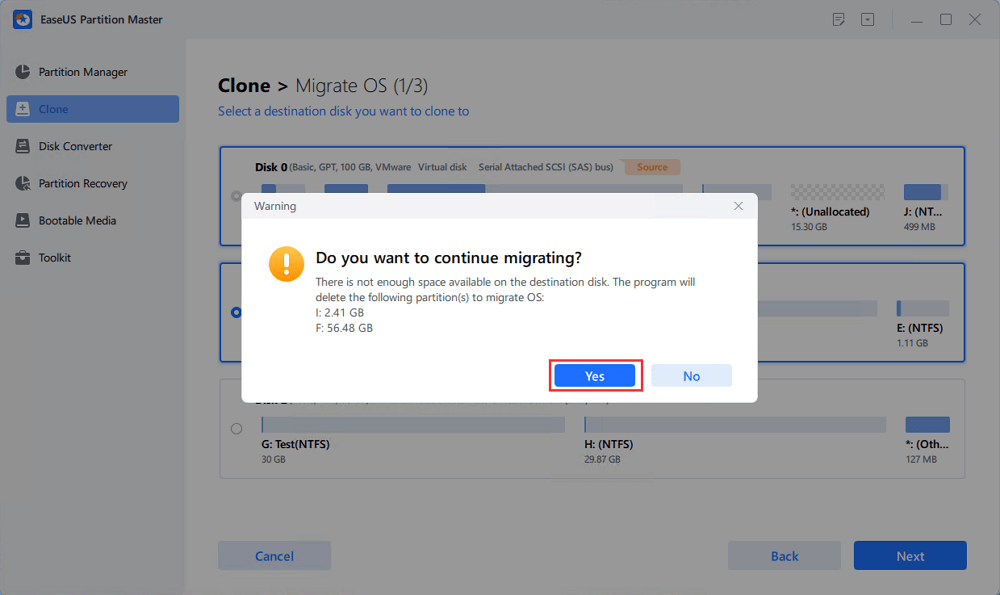
Step 3. Click "Yes" after checking the warning message. The data and partitions on the target disk will be deleted. Make sure that you've backed up important data in advance. If not, do it now.
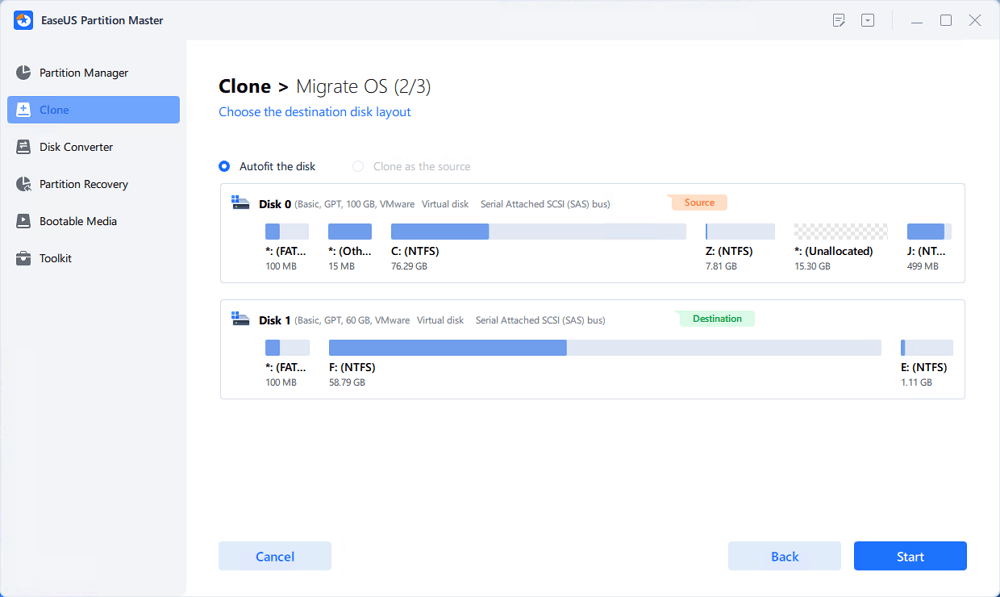
Step 4. Preview the layout of your target disk. You can also click the disk layout options to customize the layout of your target disk as you want. Then click "Start" to start migrating your OS to a new disk
Step 5. When you see a confirming message, asking "If you want to start up computer from the clone target disk", tick "Adjust the order to boot from the clone target disk" and click the respective button through your demands.
- Reboot Now: it means to reboot the PC and boot OS from the new disk immediately.
- Done: it means to make the changes later.

When you are done with this, restart the computer as requested. If necessary, go and enter BIOS to set the new SSD as boot drive:
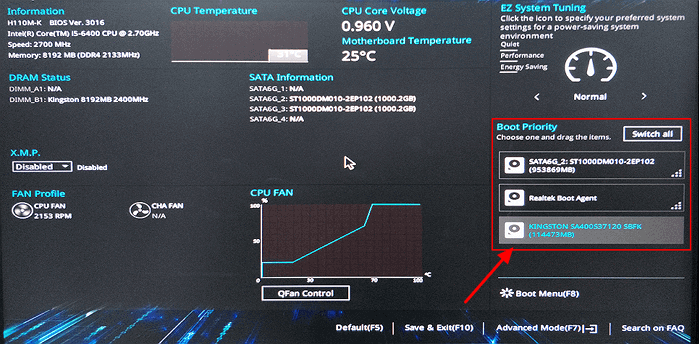
When the computer boots up, you can continue with the Windows 11 update process now.
Guide 3: How to Fix "This PC can't run Windows 11. The processor isn't supported for Windows 11." Error
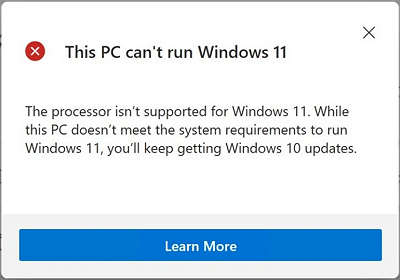 Detailed Error Message: This PC can't run Windows 11. The processor isn't supported for Windows 11. While this PC doesn't meet the system requirements to run Windows 11, you'll keep getting Windows 10 updates.
This error message means that your computer processor is not included in the supported processor list.
How to Fix:
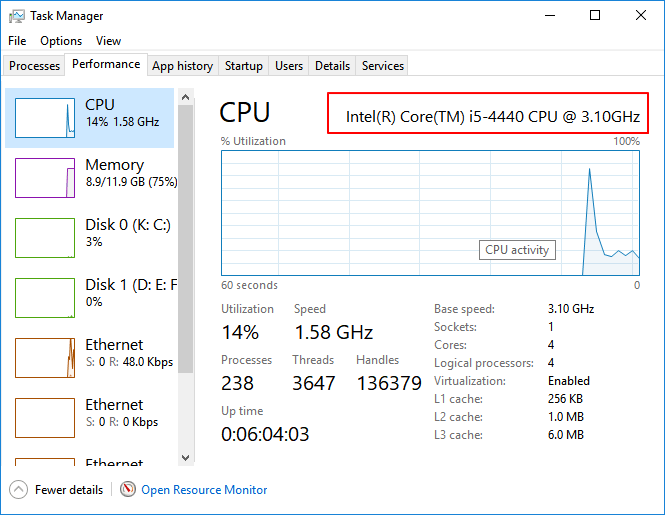
1. Check your processor
- Press Ctrl+Alt+Del to bring up Task Manager, select to open it.
- Go to the performance section and check the CPU generation. (CPU is sometimes called as the processor.)
2. Check if your processor is supported for Windows 11
Go to Windows 11 Supported Intel Processors page and find if your processor is on the list.
3. 3 options to fix unsupported processor
- Option 1. Stay with Windows 10
- Option 2. Replace processor in a local computer repair center.
- Option 3. Change processor on your own. (Risky) See how to upgrade CPU processor.
Editor's Suggestion: To keep your computer safe, it's a wise choice of staying with your current operating system.
Guide 4: How to Fix "This PC can't run Windows 11. TPM 2.0 is a requirement for running Windows 11." Error
Detailed Error Message: This PC can't run Windows 11. TPM 2.0 is a requirement for running Windows 11. We recommend that you check if TMP 2.0 is enabled.
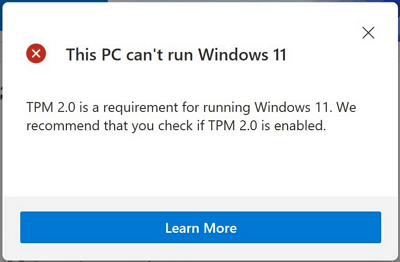
The error message contains two meanings: 1. Your computer contains a TPM chip but its not enabled; 2. Your computer doesn't contain a TPM 2.0 chip and you can't update the computer to Windows 11. So how to fix this issue? Check the fixes below.
How to Fix:
1. Check if your computer supports Trusted Platform Module
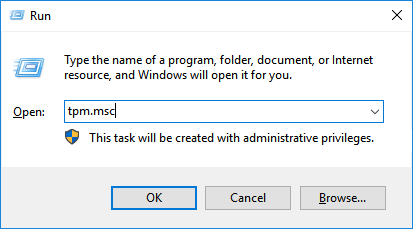
Step 1. Press Windows + R keys, type tpm.msc in the Run dialog, and hit Enter.
Step 2. When the Trusted Platform Module (TPM) utility pops up, check if the TPM is in use.
If yes, you'll see it under the Status section, marked as The TPM is ready for use.
Step 3. Under the TPM Manufacturer Information section, you'll be able to check the TPM version.
If it's TPM 2.0, your computer is good to install and run Windows 11. Move to the next guide to enable it.

But if it's not TPM 2.0, or its version is lower, it means that you can't update to Windows 11.
Editors Suggestions: When your computer warns "Compatible TPM cannot be found" or the TPM module version is lower than 2.0, staying with your current computer operating system will be a wise decision.
2. Enable TPM 2.0 chip for Windows 11
Step 1. Restart PC and press F2/F10/Del key to enter BIOS.
Step 2. Use the left key and go to the Security section.

Step 3. Check the TPM State and if it's Disabled, change it to Enabled.
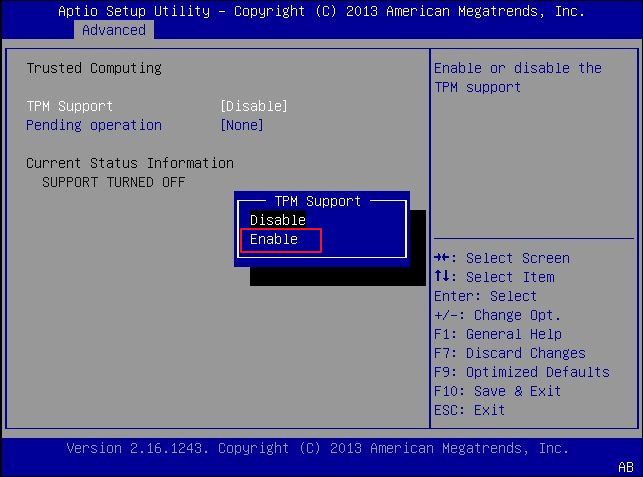
Step 4. Save the changes and exit BIOS.
Now you can restart the computer and get Windows 11 update on your computer successfully.
This PC can't run Windows 11 Is Not The End of The Day, Fix It and Get Windows 11 on Your PC Now
On this page, we explained that This PC can't run Windows 11 error mainly occurs when you use Microsoft PC Health Check to check if your computer is compatible with Windows 11.
And when the PC has a compatibility issue, you'll get this error. Fortunately, you can do something to fix the error and make yourself ready for this new OS update. We collected 4 major error messages with respective solutions for you.
If you are with one of the errors, go and follow to fix it, then make your computer ready for Windows 11 update now.
FAQs About This PC can't run Windows 11
We listed 4 major errors related to This PC can't run Windows 11 that happened to Windows 11 users while using PC Health Check. According to some Windows users, it seemed that when they install Windows 11 via the Insider program, they also came across some similar issues.
If you are encountering one of them, follow the quick guide to fix it:
1. How to fix "This pc can't run Windows 11. The PC must support TPM 2.0. The PC must support Secure Boot."?
To fix this issue, you'll need to revert to Guide 1 and Guide 2 for help. Or, do the listed work here:
- First, confirm if your computer supports Secure Boot and TPM 2.0.
- If not, stay with Windows 10 or your current operating system.
- If yes, go to BIOS to enable UEFI mode and turn on Secure Boot. And enable TPM mode.
2. How to fix "This PC can't run Windows 11. There must be at least 4GB of system memory."?
This issue happens when the system memory storage is too low. If your processor matches with Windows 11, you can fix this issue by adding a new memory stick to your computer.
- Mostly, the new memory stick should be the same brand as your current one.
- Also, if your current computer doesn't have an extra memory stick slot, replace the old memory stick with a bigger one.
3. What caused the "PC can't run Windows 11" issue?
First, let's make it clear that the "This PC can't run Windows 11" error is not caused by the Windows 11 compatibility check tool, either it's PC Health Check or WhyNotWindows11, etc., tools.
The basic reason why PC not compatible with Windows 11 is that Windows 11 has some basic system requirements on your computer.
And when the hardware or software on your computer doesn't match with the new OS requests, the compatibility issue comes up. Again, let's see all the basic requirements of Windows 11:
- UEFI and Secure Boot must be enabled.
- TPM 2.0 chip must be enabled.
- OS disk storage must be 64GB or bigger.
- Processor must be Intel Core processor produced from 2017 or AMD Zen 2 processors from 2019.
- Memory at least needs to be 4GB or even bigger.
- Graphics card must be DirectX12 or later with a WDDM 2.0 driver.
- Display must be at least 720P or higher.
Was This Page Helpful?
Daisy is the Senior editor of the writing team for EaseUS. She has been working at EaseUS for over ten years, starting as a technical writer and moving on to being a team leader of the content group. As a professional author for over ten years, she writes a lot to help people overcome their tech troubles.
Written by Tracy King
Tracy became a member of the EaseUS content team in 2013. Being a technical writer for over 10 years, she is enthusiastic about sharing tips to assist readers in resolving complex issues in disk management, file transfer, PC & Mac performance optimization, etc., like an expert.
Related Articles
-
How to Kill All the Processes in Windows 10/11
 Daisy/2025-06-30
 -
[Solved] What Happens If I Interrupt System Restore Windows 10?
 Brithny/2025-06-30
 -
What Is Mac Recovery Key? [Everything You Get]
 Tracy King/2025-06-30
 -
How to Fix and Remove Windows Defender Security Warning Scam
Daisy/2025-06-30