Page Table of Contents
System imaging helps with many issues on the Windows OS. When updating or installing significant software on your PC, you need images to roll back if something odd happens.
Rescuezilla is open-source software with a GUI that creates disk images on Windows. With Rescuezilla, you can take a snapshot of your system and restore it when the hard drive or system fails. Read this EaseUS blog and check out the RescueZilla review in the post; also, find an excellent Rescuezilla alternative, EaseUS Disk Copy, to image a disk more easily.
📚PAGE CONTENT:
Rescuezilla Review: Features, Pros, Cons
Rescuezilla offers many functions for users, including creating system images, restoring them, cloning them, and verifying them. Most of these come into play while creating a system image.
Rescuezilla was developed primarily to address the complexity of using Clonezilla. Clonezialla used to be an industry-standard system imaging solution, but making a disk image requires expertise.
With Rescuezilla, you have a GUI (graphical user interface) to make disk images. You can include your PC's current state, including the documents, settings, and apps. After creating an image, you can backup, restore, and recover the actions, even when the system is not booting up. Additionally, if you have any images made with VMWare, Qemu, VirtualBox, or any open-source imaging platform, Rescuezilla helps you recover from them.
👍Pros:
- Rescuezilla comes with a seamless GUI, making navigating the operations more straightforward.
- With Rescuezilla, you can restore images from various tools regardless of the software (only open-source software).
- Capable of working with Windows, Mac, and Linux.
- Users can mount any supported images and copy out the data.
👎Cons:
- If you restore the partitions to a larger or smaller drive, the partitions do not automatically resize to fit the new drive.
- You cannot encrypt the system images or partitions with Rescuezilla.
How to Use Rescuezilla to Image a System
Let us see the steps to use Rescuezilla to image a system.
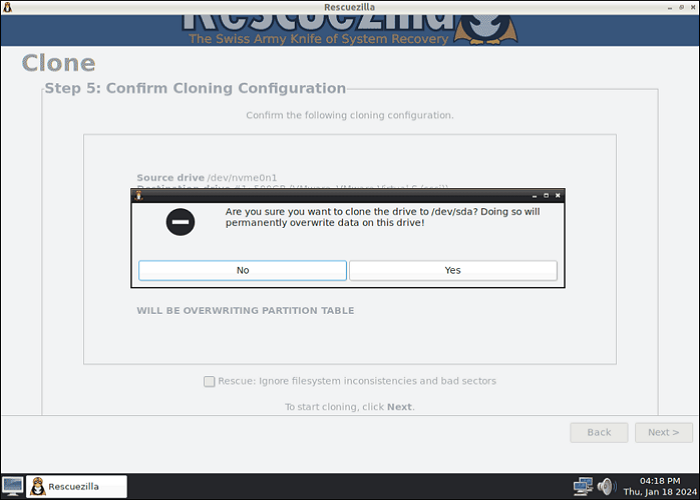
Note: If you want to clone a disk to a smaller one using Rescuezilla, manually shrink the final partition size to clone to a smaller drive.
Step 1. Open the Rescuezilla official page and get the latest version of the software.
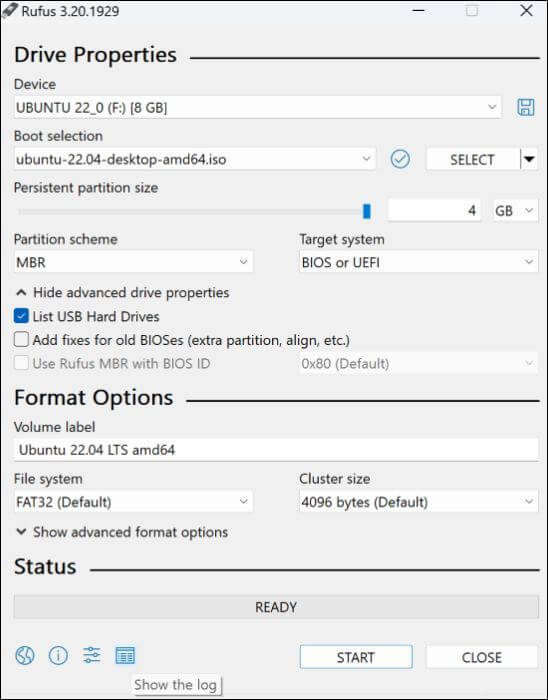
Step 2. Download Rufus and burn the Rescuezilla download file onto a USB drive.
Step 3. Restart your PC and enter the BIOS environment. Change the boot priority to the USB drive and save the changes,
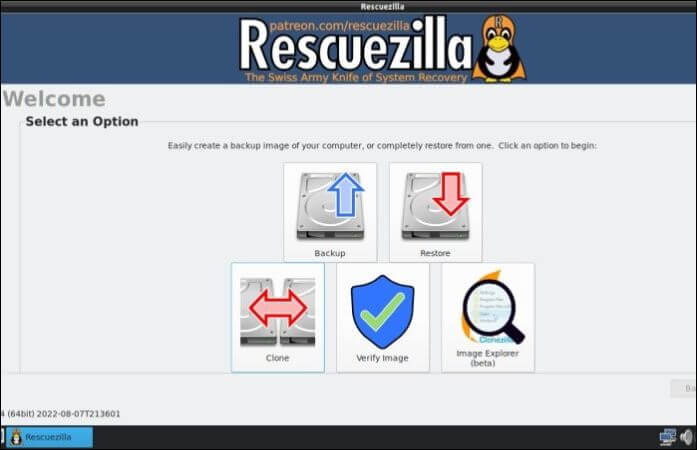
Step 4. Rescuezilla will open automatically as soon as the PC restarts. Select your languages and click Clone.
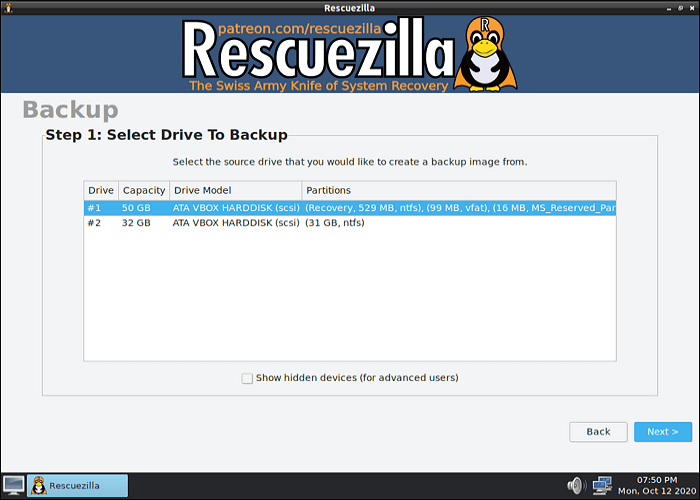
Step 5. You have to select the Drive to backup/clone. Select the partitions or drives you want to make an image of.
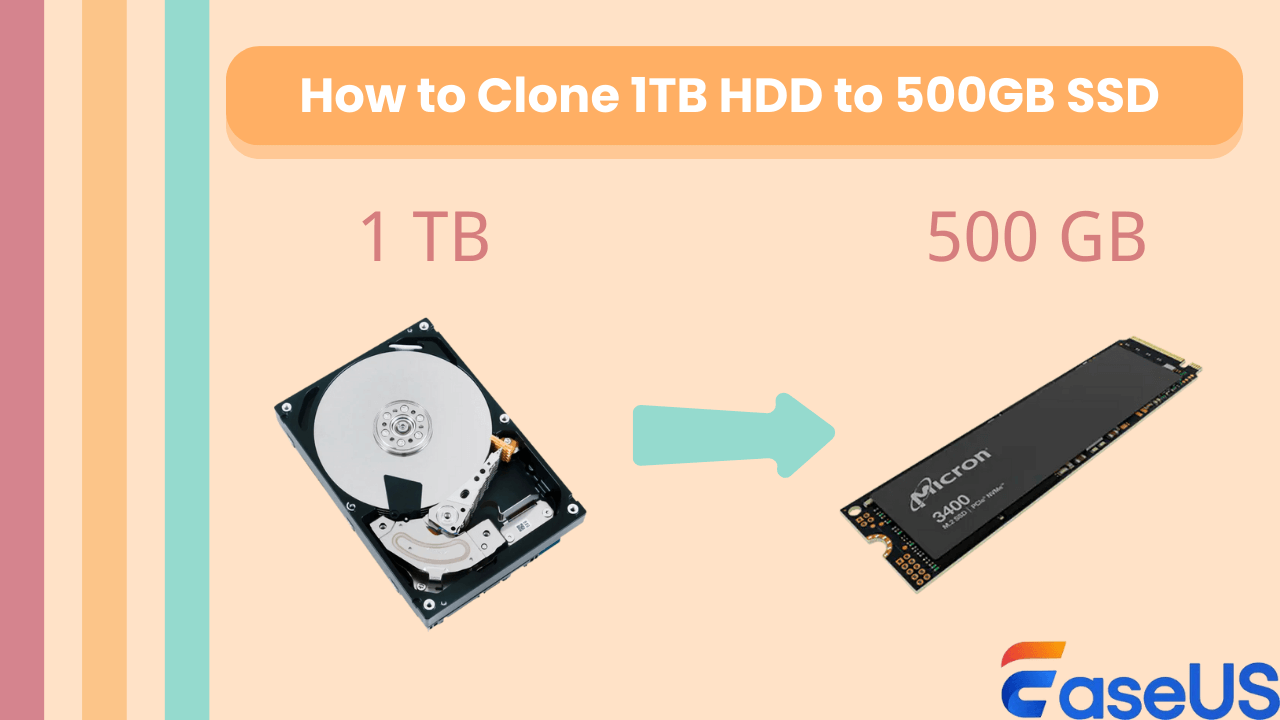
🎁You may be interested: Rescuezilla Clone to Smaller Disk
Step 6. Select your destination drive and folder (click Browse) to store the image file. You can make a new folder or select an existing one. Do not forget to name the image file.
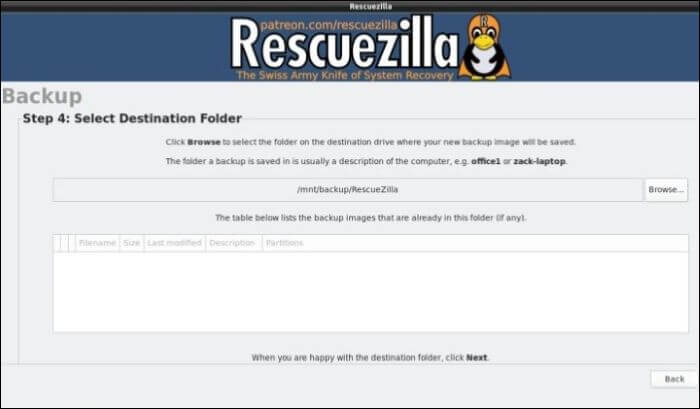
Note: The data on the destination drive will be permanently erased.
Step 6. Rescuezilla allows compression of the image to save space. You have to choose a level of compression before you start to clone.
Share the post on social media to help others know more about Rescuezilla.
Use Rescuezilla Alternative to Backup & Clone Disk Easily
Although Rescuezilla has a GUI for creating system images, it still requires a USB drive and file-burning software to create backups and clones. Additionally, cloning to a larger drive requires manually partitioning the drive, and cloning to a small drive is impossible. So, is there a simple Rescuezilla alternative?
EaseUS Disk Copy requires just three steps to create a clone or backup of your system. Select the source and destination, and your image or backup will be ready in minutes. The powerful software excels at cloning drives, partitions, and systems with advanced algorithms. In addition to cloning, you can upgrade SSDs and transfer OS to new drive over PCs and networks. Download it for free, and you will know how simple it is to make system images or backups with Disk Copy.
Windows 11/10/8/7
Follow this step-by-step guide to clone or backup disks with EaseUS Disk Copy:
Before cloning:
- If your computer has only one slot, connect the target disk to your machine via a USB-to-SATA/NVMe adapter.
- If your computer has an extra slot, install the target disk into the empty slot properly, and make sure it is compatible.
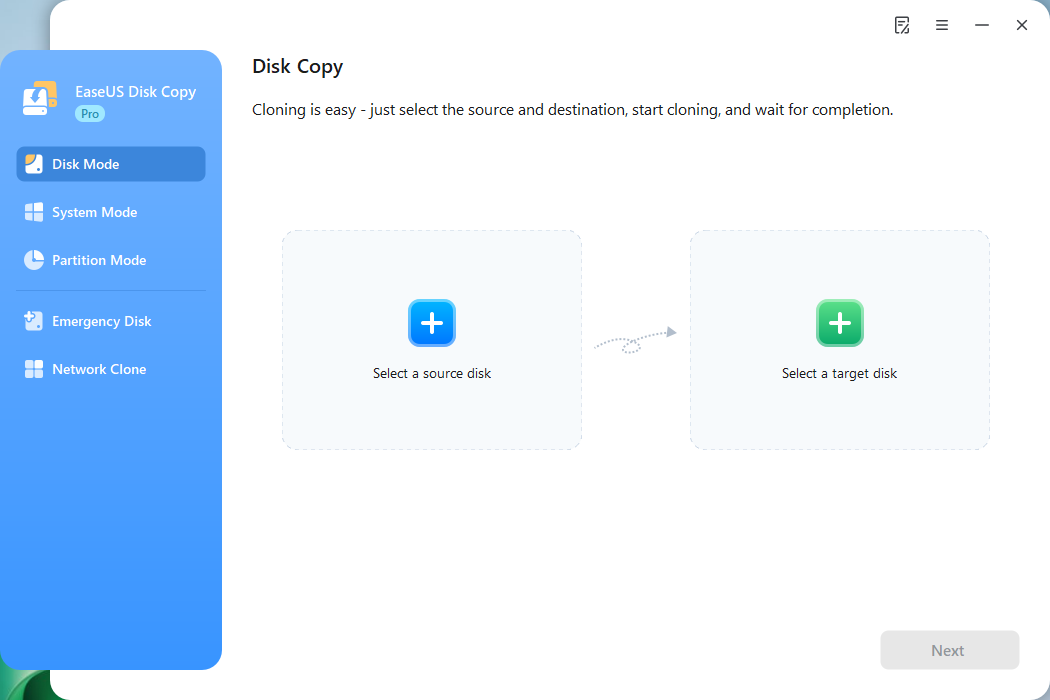
Step 1. Launch EaseUS Disk Copy and choose Disk Mode.
Install EaseUS Disk Copy cloning software on your Windows computer, then launch it and select Disk Mode from the left panel.
Step 2. Select the source drive.
Select the drive you want to copy, then click Select.
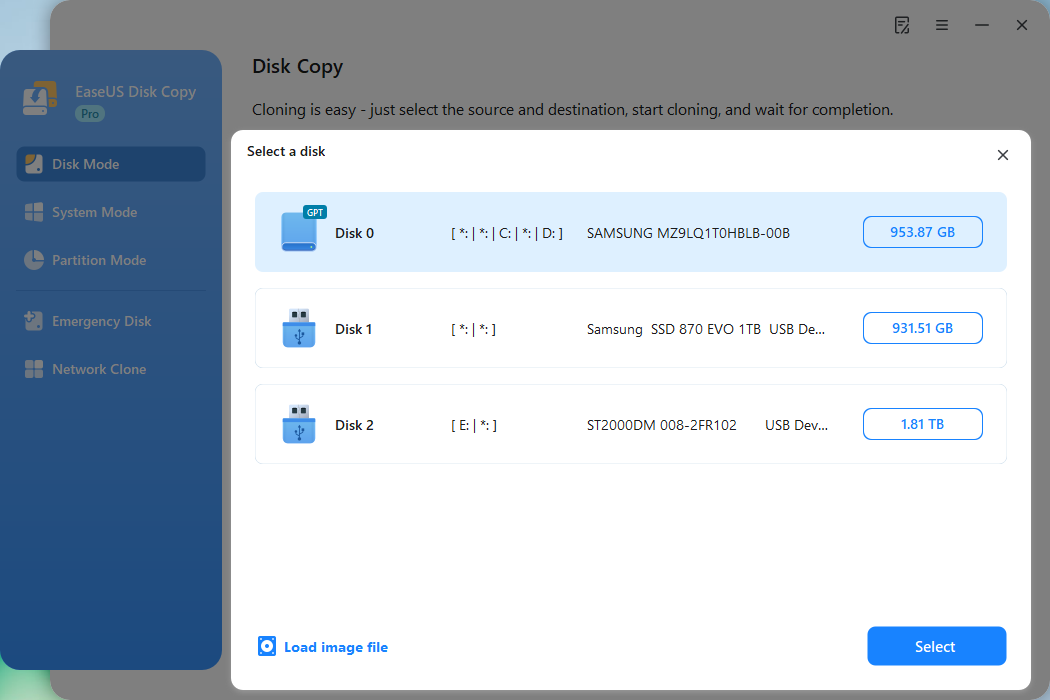
Step 3. Choose the target disk.
Choose the disk that you want to clone data to, and click Select. Note that the used space of the source disk should be less than the target disk capacity.
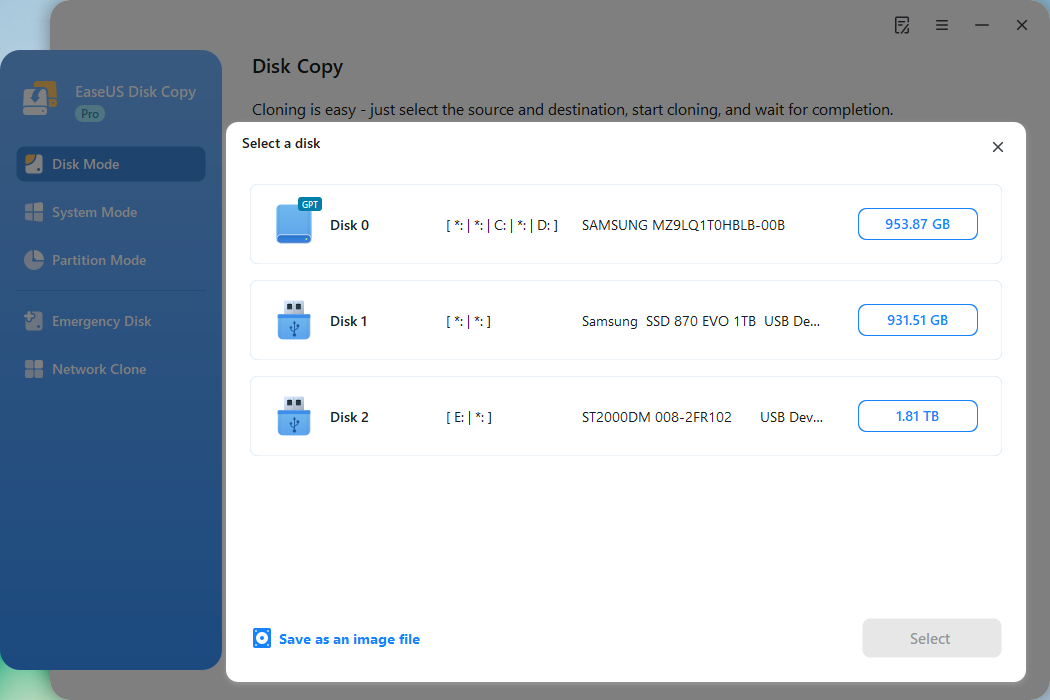
*At this step, you can also click the option "Save as an image file" to store your disk as a compressed image file, which can be restored without any data loss.
Step 4. Adjust disk layout.
Specify the target disk layout as your preference. You can choose among:
- Autofit the disk: makes some changes by default on the destination disk layout so that it can work at its best.
- Copy as the source: create a 1-to-1 copy of your source disk; the layout is the same as the source disk.
- Edit disk layout: allows you to manually resize/move the partition layout on this destination disk.
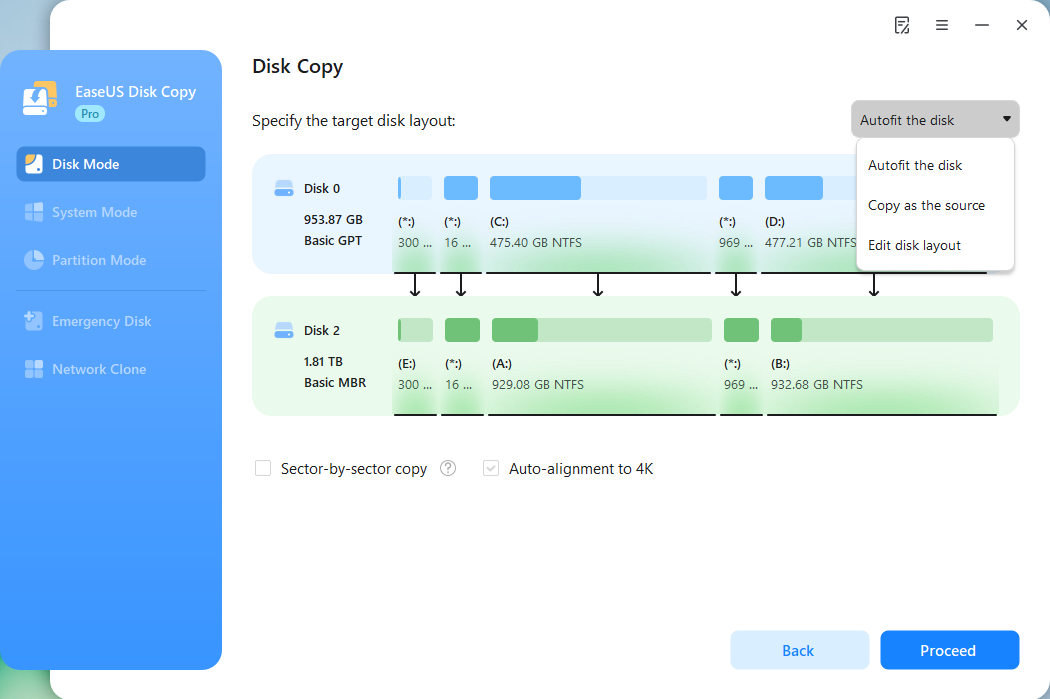
*If the target disk is an SSD, the option "Auto-alignment to 4K" will be checked automatically to optimize the performance of your SSD.
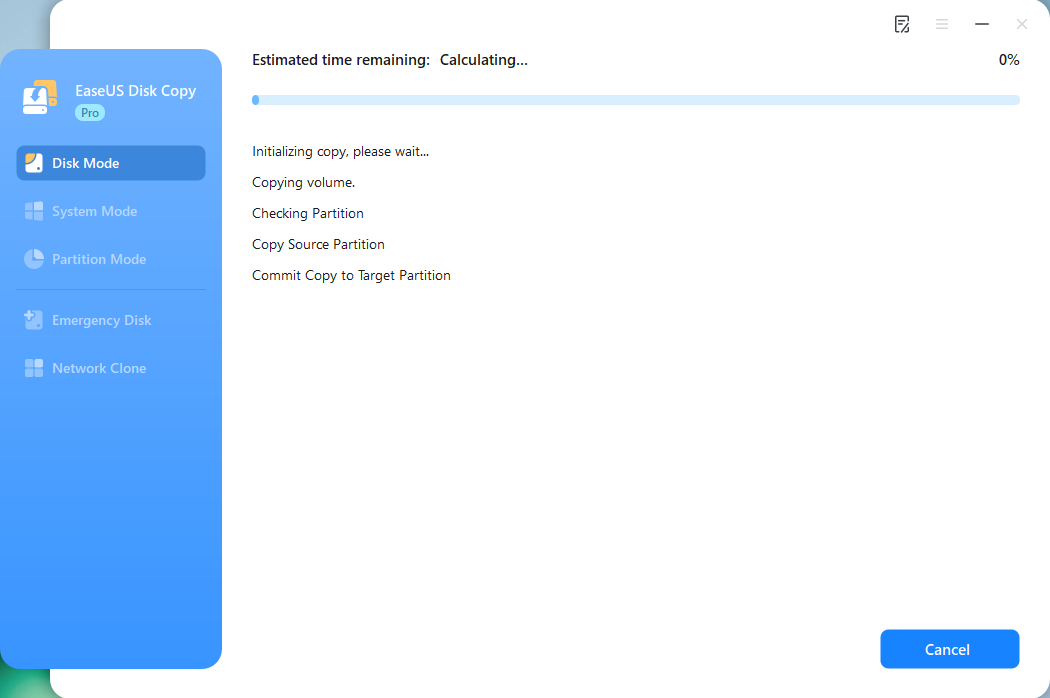
Step 5. Start cloning.
Click Proceed, and a message will appear, warning you that data will be lost. Confirm the message by clicking Continue.
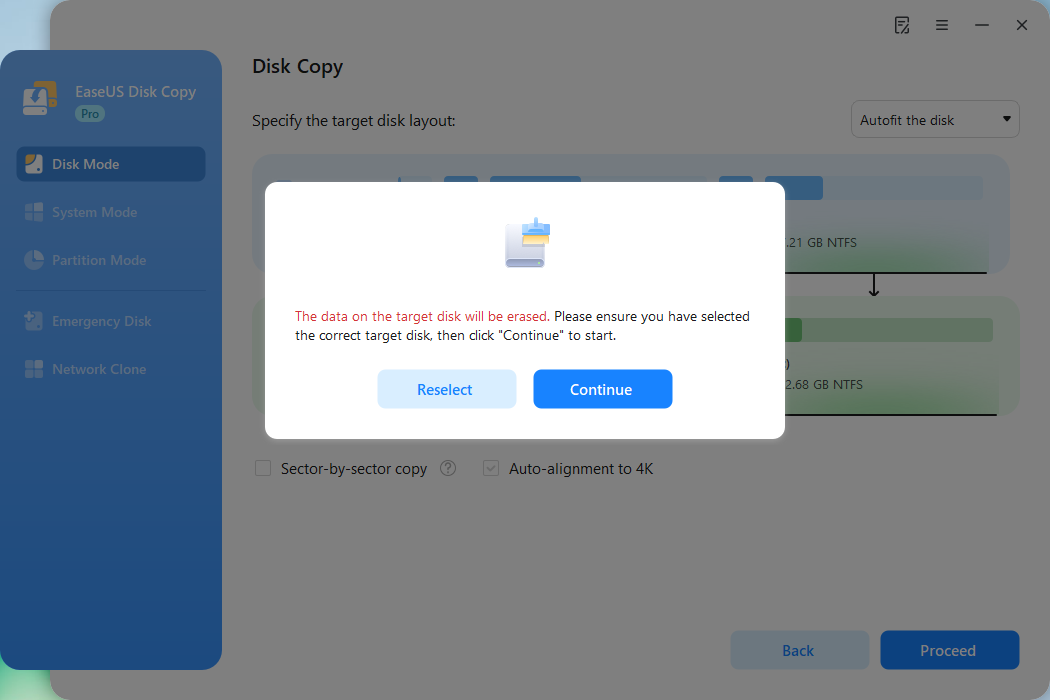
Now, it will start executing the cloning task.
*The time it takes to clone a hard drive depends on how much data is on the source disk, and it will also be affected by the disk types, USB connection, etc.
Share the post on social media to help others know more about Rescuezilla.
Rescuzilla vs. Clonezilla: What's the Difference?
Rescuezill and Clonezilla are compatible. An image you make with one can be used to restore with another. In fact, both should be burnt on a bootable device and then boot up Windows, Linux, or macOS. The operations offered by both are also the same, so what sets both of them apart?
Clonezilla is a traditional text-based interface, whereas Rescuezilla is a GUI (graphical user interface). Although Rescuezilla is built based on Clonezilla, the GUI makes it more appealing to the audience. In the text-based interface, you will have to remember a lot of commands; on the other hand, simple clicks do the job on Rescuezilla. Be it creating backups, clones or restoring them, move your cursor, click on the screen, and the job's done.
Wrap Up
That's all about the Rescuezilla review. Similarly, you can restore your system image whenever you face issues. Just like Rescuezilla went miles ahead with GUI, EaseUS Disk Copy's cloning and backup also make you feel the same. Download and open EaseUS Disk Copy, select source and destination, and your job is done. EaseUS Disk Copy is the best Rescuezilla alternative for Windows users.
Windows 11/10/8/7
FAQs about Rescuezilla
1. Is Rescuezilla reliable?
Yes, Rescuezilla is a powerful system imaging tool. The software follows the footsteps of Clonezilla, the industry standard of system imaging.
2. How do I recover files from Rescuezilla?
Burn the Rescuezilla download file on a USB and use it to boot the PC. Now, you can click on restore on the GUI and select the image file to recover files.
3. Can Rescuezilla resize partitions?
No, after restoring the data, Rescuezilla does not automatically resize the partitions. For years, this has been its biggest downside. You will have to resize them or use the partition software manually.
-
Updated by
![]()
Larissa
Larissa has rich experience in writing technical articles and is now a professional editor at EaseUS. She is good at writing articles about data recovery, disk cloning, disk partitioning, data backup, and other related knowledge. Her detailed and ultimate guides help users find effective solutions to their problems. She is fond of traveling, reading, and riding in her spare time.…Read full bio